Table of Contents
Advertisement
Advertisement
Table of Contents

Related Manuals for Bissell POWERFORCE HELIX TURBO REWIND 1797 Series


Summary of Contents for Bissell POWERFORCE HELIX TURBO REWIND 1797 Series
- Page 1 POWERFORCE ® HELIX TURBO ™ REWIND Vacuum ___________ USER GUIDE 1797 SERIES...
-
Page 2: Safety Instructions
This plug will fit in a polarized outlet only one way. If the plug does not fit fully in the outlet, reverse the plug. If it still does not fit, contact a qualified electrician to install a proper outlet. Do not change the plug in any way. www.BISSELL.com... -
Page 3: Table Of Contents
“Carton Contents” list located on the carton top flap. NOTE: Replacement Febreze Pre-Motor Filters for the Powerforce Helix Turbo Rewind are available for purchase on BISSELL.com and at various retailers. Model 12141. Safety Instructions... 2 Troubleshooting . -
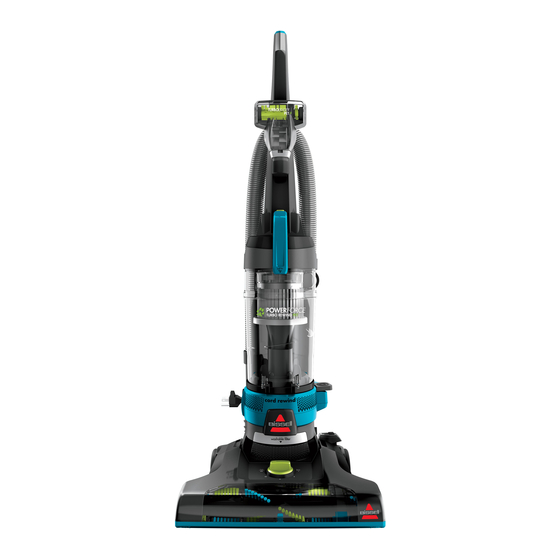
Page 4: Product View
Wand Base Dirt Tank Power Cord Dirt Tank Empty Button Hose Wand Washable Post-Motor Filter Power Switch Pedal Automatic Cord Rewind Button Handle Recline Pedal 10 Cord Hook 20 Foot Hose Hose Clip Product Rating Label & Serial Number www.BISSELL.com... -
Page 5: Assembly
NOTE: The Crevice Tool can be found inside the Extension Wand. You can remove it to use it and put it back to store it neatly out of your way when you’re finished. Certain trademarks used under license from The Procter & Gamble Company or its affiliates. www.BISSELL.com... -
Page 6: Operations
Never place your fingers under the vacuum when it is running. Never place the powerfoot on furniture or uneven surfaces. Do not place vacuum close enough to objects to pull them into rotating brush. www.BISSELL.com... -
Page 7: Maintenance & Care
If paddle wheel gets The faceplate will not appears then separate dislodged, align the two close properly if all faceplate. Carefully clips on each side and parts are not aligned remove brush, replace pop into place. correctly. belt and brush if needed. www.BISSELL.com... - Page 8 To reduce the risk of electrical shock, turn power OFF and disconnect polarized plug from electrical outlet before performing maintenance or troubleshooting checks. WARNING Do not operate the vacuum with damp or wet filters, without filters in place or with the Dirt Tank missing. Allow components to dry before reassembling the Dirt Tank. www.BISSELL.com...
- Page 9 Brush Roll. Line up the end caps and pull the brush forward into place. Once the Brush Roll is installed, This will stretch the belt. place the bottom cover back on and replace the screws. End Cap www.BISSELL.com...
-
Page 10: Troubleshooting
Floor brush bristles worn. Replace floor brush. Floor brush jammed. Remove floor brush and clean debris from brush and ends. Check drive belt for any damage. Cord won’t Power Cord is knotted or Follow instructions on page 6. retract twisted. www.BISSELL.com... -
Page 11: Warranty
Care by E-mail or telephone as described it was sold. below. BISSELL is not liable for incidental or It may be necessary to obtain some of your consequential damages of any nature personal information, such as a mailing associated with the use of this product. -
Page 12: Contact Information
NOTE: Please keep your original sales receipt. It provides proof of purchase date in the event of a warranty claim. See Warranty page for details. Parts & Supplies For Parts and Supplies, go to www.BISSELL.com and enter your model number in the search field. Love your product? BISSELL®...