Siemens SINUMERIK 840D sl Manual
Hide thumbs
Also See for SINUMERIK 840D sl:
- Function manual (2184 pages) ,
- Programming manual (1334 pages) ,
- Commissioning manual (1102 pages)
Table of Contents
Advertisement
Quick Links
SINUMERIK, SINAMICS SINUMERIK 840D sl, SINAMICS S120 Guide for the SINUMERIK 840D sl machine configuring
SINUMERIK, SINAMICS
SINUMERIK 840D sl, SINAMICS
S120
Guide for the SINUMERIK 840D sl
machine configuring
Manual
Valid for
controller
SINUMERIK 840D sl / 840DE sl
drive
SINAMICS S120
software
NCU system software for 840D sl/840DE sl version 1.3
07/2006 Edition
6FC5397-6CP10-0BA0
Preface
______________
System overview
______________
Structure of the drive group
NCU/NX Terminal
______________
Assignment
______________
Safety Integrated
Connection of the
______________
Components
______________
Signal Interconnection
______________
Typical circuit diagrams
______________
Additional Information
Activate/Deactivate Drive
______________
System
______________
ESD Notes
______________
Abbreviations
1
2
3
4
5
6
7
8
9
A
B
Advertisement
Table of Contents

Related Manuals for Siemens SINUMERIK 840D sl


Summary of Contents for Siemens SINUMERIK 840D sl
- Page 1 Preface SINUMERIK, SINAMICS SINUMERIK 840D sl, SINAMICS S120 Guide for the SINUMERIK 840D sl machine configuring ______________ System overview ______________ Structure of the drive group SINUMERIK, SINAMICS NCU/NX Terminal ______________ Assignment SINUMERIK 840D sl, SINAMICS S120 ______________ Safety Integrated Guide for the SINUMERIK 840D sl...
- Page 2 Trademarks All names identified by ® are registered trademarks of the Siemens AG. The remaining trademarks in this publication may be trademarks whose use by third parties for their own purposes could violate the rights of the owner.
- Page 3 ● User documentation ● Manufacturer/service documentation You can obtain further information for publications about SINUMERIK 840D sl and for publications that concern all SINUMERIK controllers from your SIEMENS regional office. An overview of publications, which is updated monthly and also provides information about the language versions available, can be found on the Internet at: http://www.siemens.com/motioncontrol...
- Page 4 Preface Standard version The accompanying documentation also mentions components that have not been released for use with SINUMERIK 840D sl. The NC61 catalog is binding for the permitted combinations. Technical Support If you have any questions, please contact our hotline:...
-
Page 5: Table Of Contents
Application..........................1-1 System configuration ......................... 1-2 Variants ............................1-3 SINAMICS S120 components....................1-4 SINAMICS S120 / SINUMERIK 840D sl Component Overview ..........1-6 Power Sections .......................... 1-8 HMI User Interface Software...................... 1-9 Structure of the drive group ........................2-1 Structure............................. 2-1 2.1.1... - Page 6 Overview ..........................5-30 5.4.2 Connection Examples ......................5-31 5.4.3 Motor/brake connection......................5-32 5.4.4 X21/X22 EP Terminals / Motor Module Temperature Sensor Connection ......5-34 5.4.5 X200-X203 DRIVE-CLiQ interface................... 5-36 Guide for the SINUMERIK 840D sl machine configuring Manual, 07/2006 Edition, 6FC5397-6CP10-0BA0...
- Page 7 Voltage Protection Module (VPM).................... 5-82 5.13.1 Voltage Protection Module (VPM).................... 5-82 Signal Interconnection ..........................6-1 Application 1..........................6-2 Application 2..........................6-4 Application 3..........................6-6 Application 4..........................6-9 Application 5..........................6-12 Guide for the SINUMERIK 840D sl machine configuring Manual, 07/2006 Edition, 6FC5397-6CP10-0BA0...
- Page 8 Cold Plate........................... 8-5 Activate/Deactivate Drive System ......................9-1 Overview of the Status Signals ....................9-1 Drive Group with Several Axes ....................9-2 ESD Notes..............................A-1 Abbreviations............................B-1 Abbreviations ..........................B-1 Index..............................Index-1 Guide for the SINUMERIK 840D sl machine configuring viii Manual, 07/2006 Edition, 6FC5397-6CP10-0BA0...
-
Page 9: System Overview
Fields of application The SINUMERIK 840D sl can be used worldwide in tool and mold making, for high-speed cutting applications, for wood and glass processing, for handling operations, in transfer lines and rotary indexing machines, for mass production and JobShop production. -
Page 10: System Configuration
System overview 1.2 System configuration System configuration The heart of the SINUMERIK 840D sl is the Numerical Control Unit (NCU). It combines NCK, HMI, PLC, closed-loop control and communication tasks. Components With the TCU (Thin Client Unit), the operator panel can be installed as much as 100 meters away. -
Page 11: Variants
The scalability of the hardware and software – both in the controller and control area – provides the prerequisites for use of the SINUMERIK 840D sl in many sectors. The possibilities range from simple positioning tasks up to complex multi-axis systems. -
Page 12: Sinamics S120 Components
Converter modules for the conversion of traditional encoder signals to DRIVE-CLiQ are available for non-Siemens motors or retrofit applications. Guide for the SINUMERIK 840D sl machine configuring Manual, 07/2006 Edition, 6FC5397-6CP10-0BA0... - Page 13 Because these values can be fetched electronically both on-site and by remote diagnosis, a unique identification of all components used in a machine is always possible with the consequent simplification of the servicing. Guide for the SINUMERIK 840D sl machine configuring Manual, 07/2006 Edition, 6FC5397-6CP10-0BA0...
-
Page 14: Sinamics S120 / Sinumerik 840D Sl Component Overview
System overview 1.5 SINAMICS S120 / SINUMERIK 840D sl Component Overview SINAMICS S120 / SINUMERIK 840D sl Component Overview The following overview contains the SINAMICS S120 and SINUMERIK components that should be used in preference for multi-axis drive tasks. Figure 1-2... - Page 15 System overview 1.5 SINAMICS S120 / SINUMERIK 840D sl Component Overview The following power components are offered: ● Line-side power components, such as fuses, contactors, chokes and filters for switching the energy supply and for observing the EMC regulations ● Line modules that perform the function of the central energy supply in the DC link ●...
-
Page 16: Power Sections
The active line modules generate a stabilized DC link voltage and are capable of regenerative feedback. Motor modules ● Convert energy from the DC link for the connected motors with variable voltage and variable frequency. Guide for the SINUMERIK 840D sl machine configuring Manual, 07/2006 Edition, 6FC5397-6CP10-0BA0... -
Page 17: Hmi User Interface Software
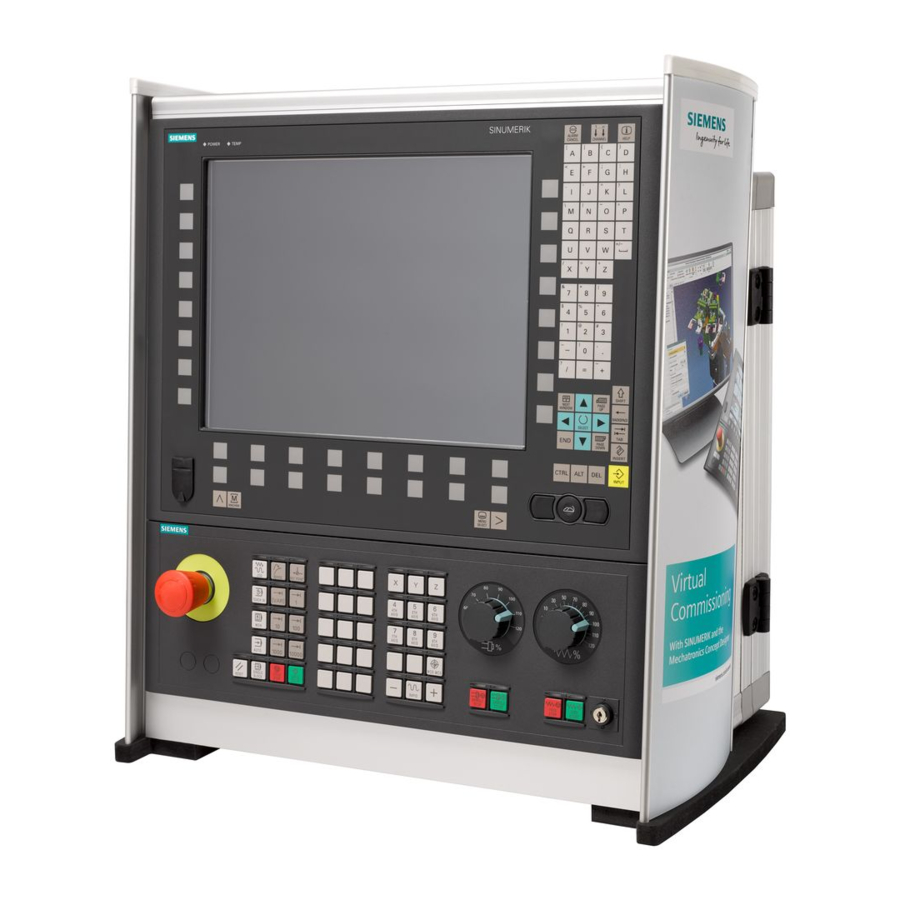
For the embedded HMI, the HMI software is used on the NCU 7x0. A thin client (TCU) performs the NCU - operator panel communication. Figure 1-3 Connection of embedded HMI Guide for the SINUMERIK 840D sl machine configuring Manual, 07/2006 Edition, 6FC5397-6CP10-0BA0... - Page 18 1.7 HMI User Interface Software HMI-Advanced connection HMI Advanced runs on the PCU 50.3. Figure 1-4 HMI-Advanced connection in the example; PCU 50.3 behind the operator panel Guide for the SINUMERIK 840D sl machine configuring 1-10 Manual, 07/2006 Edition, 6FC5397-6CP10-0BA0...
- Page 19 Note Detailed information about the operator panels, TCU and PCU 50.3 is contained in the "sl Operator Components Device Manual" and in "CNC Commissioning, Part 2 (HMI)". Guide for the SINUMERIK 840D sl machine configuring 1-11 Manual, 07/2006 Edition, 6FC5397-6CP10-0BA0...
-
Page 21: Structure Of The Drive Group
Also refer to the "Current Carrying Capacity of the DC Link Busbar“ section Note The appropriate measures must be adopted to satisfy the EMC requirement (see below). Guide for the SINUMERIK 840D sl machine configuring Manual, 07/2006 Edition, 6FC5397-6CP10-0BA0... - Page 22 The DC link bridges must be removed by loosening the M4 screws. Danger The DC link bridge must not be removed for power units and DC link components (e.g. Capacitor Module) that are wider than 50 mm. Guide for the SINUMERIK 840D sl machine configuring Manual, 07/2006 Edition, 6FC5397-6CP10-0BA0...
-
Page 23: Single Row Layout
● DC link components, such as Braking Module, Control Supply Module, Capacitor Module Figure 2-2 Single row layout Note For the layout of the NCU 7x0 or NX1x, see "Layout of the Components" Guide for the SINUMERIK 840D sl machine configuring Manual, 07/2006 Edition, 6FC5397-6CP10-0BA0... -
Page 24: Two-Row / Multi-Row Construction
Observe the installation and ventilation clearances; refer to the "Note for Connection Cable Installation Clearance" section Figure 2-3 Two-row construction Note For the layout of the NCU 7x0 or NX1x, see "Layout of the Components" Guide for the SINUMERIK 840D sl machine configuring Manual, 07/2006 Edition, 6FC5397-6CP10-0BA0... - Page 25 300 mm. For components with a width of 150 to 300 mm, the separation between the top and bottom row must be at least 500 mm. Guide for the SINUMERIK 840D sl machine configuring Manual, 07/2006 Edition, 6FC5397-6CP10-0BA0...
-
Page 26: Center Infeed (Single Row Construction) For 55/80/120 Kw Line Module
The installation guidelines are the same as the previous guidelines. Figure 2-5 Center infeed construction Note For the layout of the NCU 7x0 or NX1x, see "Layout of the Components" Guide for the SINUMERIK 840D sl machine configuring Manual, 07/2006 Edition, 6FC5397-6CP10-0BA0... -
Page 27: Direct Installation Of A Cu-/Ncu-/Nx Module On The Line Module
● for a center infeed using Line Modules 55 / 80 / 120 kW Use suitable tools to lift the latching device Remove the holder. After the removing the holder and push up the holder. Guide for the SINUMERIK 840D sl machine configuring Manual, 07/2006 Edition, 6FC5397-6CP10-0BA0... -
Page 28: Layout Of The Components
NCU 720/730 NCU 720/730 +NXs A (direct to the Line Module) possible possible – B (with fastening clip) – possible – C (with spacer) possible possible possible Guide for the SINUMERIK 840D sl machine configuring Manual, 07/2006 Edition, 6FC5397-6CP10-0BA0... -
Page 29: Layout Of The Nx For Single Row Construction Integrated In The Power Unit Group
If NX components are present, they should be added between the power unit and the NCU. This ensures the best-possible reachability and access to the connection plugs for digital signals / bus connections. Figure 2-7 NX between NCU and Line Module Guide for the SINUMERIK 840D sl machine configuring Manual, 07/2006 Edition, 6FC5397-6CP10-0BA0... -
Page 30: Ncu/Nx Layout As Offset Solution
NX modules. The layout of the NCU / NX directly in the drive group is thus not mandatory. The installation in these cases in made using fastening clips or spacers. Figure 2-8 NCU/NX as offset solution Guide for the SINUMERIK 840D sl machine configuring 2-10 Manual, 07/2006 Edition, 6FC5397-6CP10-0BA0... -
Page 31: Current Carrying Capacity Of The Dc Link Busbar
Connection of several Motor Modules with different current carrying capacity of the DC link busbar to a Line Module. Figure 2-9 Regular construction; DC link busbars not overloaded Guide for the SINUMERIK 840D sl machine configuring 2-11 Manual, 07/2006 Edition, 6FC5397-6CP10-0BA0... - Page 32 The single side infeed would produce an overloading for a 60 A Motor Module. This construction variant is not permitted. Figure 2-11 Overloading of the DC link busbar for a 60 A Motor Module Guide for the SINUMERIK 840D sl machine configuring 2-12 Manual, 07/2006 Edition, 6FC5397-6CP10-0BA0...
-
Page 33: Shield Connection
Recommended shield contacts: from Weidmüller, Order No. KLBÜ CO4 Weidmüller: http://www.weidmueller.com For Motor Modules 50 mm and 100 mm wide, the motor cable shield is connected through the motor connector housing. Guide for the SINUMERIK 840D sl machine configuring 2-13 Manual, 07/2006 Edition, 6FC5397-6CP10-0BA0... - Page 34 Motor Module) with internal air cooling Note A shield connecting plate can be ordered as option. Recommended shield contacts: from Weidmüller, Order No. KLBÜ CO1 and KLBÜ CO4 Weidmüller: http://www.weidmueller.com Guide for the SINUMERIK 840D sl machine configuring 2-14 Manual, 07/2006 Edition, 6FC5397-6CP10-0BA0...
- Page 35 Motor Module) with internal air cooling Note The shield terminal plate can be ordered as option. Recommended shield contacts: from Weidmüller, Order No. KLBÜ CO1 Weidmüller: http://www.weidmueller.com Guide for the SINUMERIK 840D sl machine configuring 2-15 Manual, 07/2006 Edition, 6FC5397-6CP10-0BA0...
- Page 36 Motor Module) with internal air cooling Note A shield connecting plate can be ordered as option. Recommended shield contacts: from Weidmüller, Order No. KLBÜ CO1 Weidmüller: http://www.weidmueller.com Guide for the SINUMERIK 840D sl machine configuring 2-16 Manual, 07/2006 Edition, 6FC5397-6CP10-0BA0...
-
Page 37: Sinamics Components Dimension Drawings (External Air Cooling)
The shield connecting plate is part of the scope of supply of a 100 mm Line Module. Recommended shield contacts: from Weidmüller, Order No. KLBÜ CO4 Weidmüller: http://www.weidmueller.com Guide for the SINUMERIK 840D sl machine configuring 2-17 Manual, 07/2006 Edition, 6FC5397-6CP10-0BA0... - Page 38 Motor Module) with external air cooling Note A shield connecting plate is available as option. Recommended shield contacts: from Weidmüller, Order No. KLBÜ CO1 and KLBÜ CO4 Weidmüller: http://www.weidmueller.com Guide for the SINUMERIK 840D sl machine configuring 2-18 Manual, 07/2006 Edition, 6FC5397-6CP10-0BA0...
- Page 39 Dimension drawing of shield terminal plate on a 200 mm component (Line Module or Motor Module) with external air cooling Note A shield connecting plate is available as option. Recommended shield contacts: from Weidmüller, Order No. KLBÜ CO1 Weidmüller: http://www.weidmueller.com Guide for the SINUMERIK 840D sl machine configuring 2-19 Manual, 07/2006 Edition, 6FC5397-6CP10-0BA0...
- Page 40 Dimension drawing of shield terminal plate on a 300 mm component (Line Module or Motor Module) with external air cooling Note A shield connecting plate is available as option. Recommended shield contacts: from Weidmüller, Order No. KLBÜ CO1 Weidmüller: http://www.weidmueller.com Guide for the SINUMERIK 840D sl machine configuring 2-20 Manual, 07/2006 Edition, 6FC5397-6CP10-0BA0...
-
Page 41: Shield Connection For Internal Heat Dissipation
The two examples for preassembled cables on power components of different width follow: Preassembled cable on a 100 mm Preassembled cable on a 200 mm component component Guide for the SINUMERIK 840D sl machine configuring 2-21 Manual, 07/2006 Edition, 6FC5397-6CP10-0BA0... -
Page 42: Note For The Installation Clearance For The Connection Cables
Clearance of the Power Components The installation clearance is defined by ● Ventilation clearance ● Cable clearance Figure 2-20 Clearance in the vicinity of the power components Guide for the SINUMERIK 840D sl machine configuring 2-22 Manual, 07/2006 Edition, 6FC5397-6CP10-0BA0... -
Page 43: Heat Dissipation Of The Control Cabinet
You must take into account the following specifications when installing a SINAMICS drive line-up: ● Ventilation clearance ● Cable routing ● Air guidance, air-conditioner Guide for the SINUMERIK 840D sl machine configuring 2-23 Manual, 07/2006 Edition, 6FC5397-6CP10-0BA0... - Page 44 80 (additional 50 in front of fan) Braking Module 6SL3100-1AE31-0AAx Control Supply Module 6SL3100-1DE22-0AAx Capacitor Module 6SL3100-1CE14-0AAx The specifications regarding ventilation clearances for two-tier configurations are provided in Drive Line-Up. Guide for the SINUMERIK 840D sl machine configuring 2-24 Manual, 07/2006 Edition, 6FC5397-6CP10-0BA0...
- Page 45 Structure of the drive group 2.6 Heat Dissipation of the Control Cabinet Figure 2-21 Clearances for booksize drive line-up with internal air cooling Guide for the SINUMERIK 840D sl machine configuring 2-25 Manual, 07/2006 Edition, 6FC5397-6CP10-0BA0...
- Page 46 Structure of the drive group 2.6 Heat Dissipation of the Control Cabinet Figure 2-22 Clearances for booksize drive line-up with external air cooling Guide for the SINUMERIK 840D sl machine configuring 2-26 Manual, 07/2006 Edition, 6FC5397-6CP10-0BA0...
- Page 47 Structure of the drive group 2.6 Heat Dissipation of the Control Cabinet Figure 2-23 Spray protection for external cooling Figure 2-24 Cooling clearances for 300 mm components with mounted equipment fan Guide for the SINUMERIK 840D sl machine configuring 2-27 Manual, 07/2006 Edition, 6FC5397-6CP10-0BA0...
- Page 48 Structure of the drive group 2.6 Heat Dissipation of the Control Cabinet Figure 2-25 Cooling clearances, rail-mounted modules (e.g. VSM, SMC, TM, DMC) Guide for the SINUMERIK 840D sl machine configuring 2-28 Manual, 07/2006 Edition, 6FC5397-6CP10-0BA0...
-
Page 49: Ventilation
If the components are installed in a sealed cabinet, an internal air cooling system must be installed to circulate the air and prevent hot spots. It is best to install the fan above the components to optimize the air flow (suction). Guide for the SINUMERIK 840D sl machine configuring 2-29 Manual, 07/2006 Edition, 6FC5397-6CP10-0BA0... - Page 50 Overview). Using air baffle plates, for example, you must ensure that the cold air expelled from the air conditioner mixes with warm air in the cabinet before it enters the equipment. This reduces the relative air humidity to uncritical values. Guide for the SINUMERIK 840D sl machine configuring 2-30 Manual, 07/2006 Edition, 6FC5397-6CP10-0BA0...
-
Page 51: Power Loss Of The Sinumerik Components
Wideband Line Filter for Active Line Modules 16 kW 36 kW 55 kW 80 kW 120 kW Wideband Line Filter for Smart Line Modules 5 kW 10 kW 16 kW 36 kW Guide for the SINUMERIK 840D sl machine configuring 2-31 Manual, 07/2006 Edition, 6FC5397-6CP10-0BA0... - Page 52 The sum of the losses of the various power components (Active Line Module, Smart Line Module, Motor Module) is calculated from the power losses (following table) and electronic losses (next table but one). Guide for the SINUMERIK 840D sl machine configuring 2-32 Manual, 07/2006 Edition, 6FC5397-6CP10-0BA0...
- Page 53 16 kW 36 kW Single Motor Modules 18 A 30 A 45 A 60 A 85 A 132 A 1250 200 A 2050 Double Motor Modules 18 A Guide for the SINUMERIK 840D sl machine configuring 2-33 Manual, 07/2006 Edition, 6FC5397-6CP10-0BA0...
- Page 54 10 kW Single Motor Modules 18 A 30 A 45 A 60 A 85 A 132 A 1000 1250 200 A 1615 2050 Double Motor Modules 18 A Guide for the SINUMERIK 840D sl machine configuring 2-34 Manual, 07/2006 Edition, 6FC5397-6CP10-0BA0...
- Page 55 Active Line Modules 16 kW 26,4 36 kW 36,0 55kW 45,6 80kW 36,0 120kW 60,0 Smart Line Module 24,0 10kW 31,2 16 kW 26,4 36 kW 36,0 Guide for the SINUMERIK 840D sl machine configuring 2-35 Manual, 07/2006 Edition, 6FC5397-6CP10-0BA0...
-
Page 56: Dimensioning Climate Control Equipment
Temperature difference between the room and cabinet interior ∆T = 10 K q = (2415 [W] / 10 [Κ]) - 5.5 [W / (m * K)] * 5 [m ] = 214 [W/K] Guide for the SINUMERIK 840D sl machine configuring 2-36 Manual, 07/2006 Edition, 6FC5397-6CP10-0BA0... -
Page 57: Ncu/Nx Terminal Assignment
● The "1" and "5" configuration macros parameterize the central measuring of the first probe of the SINUMERIK 840D sl. The second probe must be parameterized by the user. ● For the default settings of BEROs, only the corresponding input or output on the NCU is configured via the macro. -
Page 58: Macros For Commissioning
● Macro for infeed (Line Module) with DRIVE-CLiQ -> "1" ● Macro for infeed (Line Module) without DRIVE-CLiQ -> "5" ● Macros 100116 for preassigning the data sets and message-frame types Guide for the SINUMERIK 840D sl machine configuring Manual, 07/2006 Edition, 6FC5397-6CP10-0BA0... - Page 59 The following parameters are set on all 6 drives: Set up two encoder data sets p140=2 • Eight drive data sets p180=8 • Profibus protocol p922 = 116 • 150399 pm150399.acx Update of all drive components Guide for the SINUMERIK 840D sl machine configuring Manual, 07/2006 Edition, 6FC5397-6CP10-0BA0...
-
Page 60: Procedure For Calling Acx Macros
For an initial commissioning or component replacement, an update of the drive components to the current software version can be required. The 150399 macro can be used to update all components. Guide for the SINUMERIK 840D sl machine configuring Manual, 07/2006 Edition, 6FC5397-6CP10-0BA0... - Page 61 NCU/NX Terminal Assignment 3.4 Procedure for calling ACX macros Figure 3-1 Process macro call for update (left) and for configuration (right) Guide for the SINUMERIK 840D sl machine configuring Manual, 07/2006 Edition, 6FC5397-6CP10-0BA0...
-
Page 62: X122 And X132 Interface Overview
X122 and X132 Interface Overview X122 and X132 interfaces for NCU 7x0 X122 X132 Figure 3-2 X122 and X132 interfaces for NCU 7x0 Note The NX1x component has only the X122 interface. Guide for the SINUMERIK 840D sl machine configuring Manual, 07/2006 Edition, 6FC5397-6CP10-0BA0... - Page 63 NCU/NX Terminal Assignment 3.5 X122 and X132 Interface Overview X122 and X132 block diagram for NCU 7x0 Figure 3-3 X122 and X132 block diagram for NCU 7x0 Guide for the SINUMERIK 840D sl machine configuring Manual, 07/2006 Edition, 6FC5397-6CP10-0BA0...
- Page 64 NCU/NX Terminal Assignment 3.5 X122 and X132 Interface Overview X122 block diagram for NX1x Figure 3-4 NX1x block diagram Guide for the SINUMERIK 840D sl machine configuring Manual, 07/2006 Edition, 6FC5397-6CP10-0BA0...
-
Page 65: Ncu 7X0 And Nx1X Terminal Assignment
1 The macro does SINAMICS Safety Integrated not perform any BICO from CU BICO after the interconnection; first drive in the the use of the group Guide for the SINUMERIK 840D sl machine configuring Manual, 07/2006 Edition, 6FC5397-6CP10-0BA0... - Page 66 BICO source/sink Macro number Input Digital input $A_IN[1] CU: r0722.4 CU: p2082[0] Input Digital input $A_IN[2] CU: r0722.5 CU: p2082[1] Input Digital input $A_IN[3] CU: r0722.6 CU: p2082[2] Guide for the SINUMERIK 840D sl machine configuring 3-10 Manual, 07/2006 Edition, 6FC5397-6CP10-0BA0...
- Page 67 CU: p0680[1] = 0 Each drive use of the function (control MD13210 = 1) p489 [1,2,3]=6 requires parameterization by the user. Ground for pins 7, 8, 10, 11 Guide for the SINUMERIK 840D sl machine configuring 3-11 Manual, 07/2006 Edition, 6FC5397-6CP10-0BA0...
- Page 68 2. OFF 2 NX: r0722.11 Drive: p0845 use of the function requires parameterization by the user. Ground for pins 7, 8, 10, 11 Low – high edge required! Guide for the SINUMERIK 840D sl machine configuring 3-12 Manual, 07/2006 Edition, 6FC5397-6CP10-0BA0...
-
Page 69: Safety Integrated
NX modules have DI 0 to DI 3 digital input. ● Motor Module The input terminal for "safe standstill (SH)" is terminal "EP" ("enable pulses"). Both terminals must be simultaneously energized, otherwise a fault will be issued. Guide for the SINUMERIK 840D sl machine configuring Manual, 07/2006 Edition, 6FC5397-6CP10-0BA0... - Page 70 (3TK28...) or SIMATIC S7 F control (e.g. ET200S F-DO- P/M-switching) in accordance with EN954-1 or prEN 13849-1 must be provided. Figure 4-1 Terminals for "safe standstill" Guide for the SINUMERIK 840D sl machine configuring Manual, 07/2006 Edition, 6FC5397-6CP10-0BA0...
- Page 71 Safety Integrated 4.1 SINAMICS Safety Integrated Figure 4-2 Safe standstill terminals; control, e.g. with the fail safe output of the ET200S Guide for the SINUMERIK 840D sl machine configuring Manual, 07/2006 Edition, 6FC5397-6CP10-0BA0...
- Page 72 1 (drive 1 and 2) and group 2 (drive 3 and 4). The same grouping for the safe standstill must be performed for both the Control Unit and for the Motor Modules. Guide for the SINUMERIK 840D sl machine configuring Manual, 07/2006 Edition, 6FC5397-6CP10-0BA0...
- Page 73 Safety Integrated 4.1 SINAMICS Safety Integrated Figure 4-3 Terminal grouping for "safe standstill" Guide for the SINUMERIK 840D sl machine configuring Manual, 07/2006 Edition, 6FC5397-6CP10-0BA0...
- Page 74 Safety Integrated 4.1 SINAMICS Safety Integrated Figure 4-4 Safe standstill terminals grouping; control, e.g. with the fail safe output of the ET200S Guide for the SINUMERIK 840D sl machine configuring Manual, 07/2006 Edition, 6FC5397-6CP10-0BA0...
- Page 75 CO/BO: Safety Integrated Status (Control Unit) r9872 CO/BO: Safety Integrated Status (Motor Module) r9773 CO/BO: Safety Integrated Status (Control Unit + Motor Module) r9774 CO/BO: Safety Integrated Status (Safe Standstill Group) Guide for the SINUMERIK 840D sl machine configuring Manual, 07/2006 Edition, 6FC5397-6CP10-0BA0...
-
Page 76: Safe Brake Control (Sbc)
The monitoring and the forced checking procedure of the brake outlet is possible only when the brake is connected directly and not using a coupling relay to the connection terminals! Guide for the SINUMERIK 840D sl machine configuring Manual, 07/2006 Edition, 6FC5397-6CP10-0BA0... -
Page 77: Sinumerik Safety Integrated
PROFIBUS with PROFIsafe profile and PROFIsafe-conform peripheral modules (e.g. ET200S, ET200eco or ET200pro). Overview of the ET200S peripheral connection to the NCU Figure 4-5 Overview of the ET200S peripheral connection to the NCU Guide for the SINUMERIK 840D sl machine configuring Manual, 07/2006 Edition, 6FC5397-6CP10-0BA0... - Page 78 Signal state channel 0 = "1" and channel 4 = "1": Emergency stop activator not pressed. Signal state channel 0 = "0" and channel 4 = "0": Emergency stop activator pressed. Guide for the SINUMERIK 840D sl machine configuring 4-10 Manual, 07/2006 Edition, 6FC5397-6CP10-0BA0...
- Page 79 OR sensor agreement button is an exception. For this sensor variant, in conjunction with the short-circuit test, the VS1 sensor supply must be used for both contacts. Guide for the SINUMERIK 840D sl machine configuring 4-11 Manual, 07/2006 Edition, 6FC5397-6CP10-0BA0...
- Page 80 Two valve units are connected in the configuration example. These are used to control the motion of the supplementary pneumatic axis. Figure 4-7 Signal assignment electronics module, 4F-DO, 24 VDC_2 A, PROFIsafe Guide for the SINUMERIK 840D sl machine configuring 4-12 Manual, 07/2006 Edition, 6FC5397-6CP10-0BA0...
- Page 81 DO modules following the PM-E F module is possible. Figure 4-8 Signal assignment, power module PM-E F PROFIsafe 24 V DC Guide for the SINUMERIK 840D sl machine configuring 4-13 Manual, 07/2006 Edition, 6FC5397-6CP10-0BA0...
- Page 82 U 1 is not shutdown. Through the six available shutdown groups (SG1...SG6), the power module is, among other things, suitable for supplying fail-safe motor starters such as F-DS1e-x and F-RS1e-x. Guide for the SINUMERIK 840D sl machine configuring 4-14 Manual, 07/2006 Edition, 6FC5397-6CP10-0BA0...
- Page 83 PM-D F PROFIsafe module, if the shutdown group has been enabled, the motor starter can be enabled and disabled using its PLC output interface. Guide for the SINUMERIK 840D sl machine configuring 4-15 Manual, 07/2006 Edition, 6FC5397-6CP10-0BA0...
-
Page 85: Connection Of The Components
● Direct operation of the line connection components on the supply ● Operating line connection components via an autotransformer ● Operating line connection components via an isolating transformer Figure 5-1 Overview of line connection versions Guide for the SINUMERIK 840D sl machine configuring Manual, 07/2006 Edition, 6FC5397-6CP10-0BA0... -
Page 86: Operation Of The Line Connection Components On The Supply Network
3-ph. 380 V to 3-ph. 480 V AC. Note Operation with a line filter is only permitted for a TN line supply. Figure 5-2 Direct operation on the line supply Guide for the SINUMERIK 840D sl machine configuring Manual, 07/2006 Edition, 6FC5397-6CP10-0BA0... -
Page 87: Operating Line Connection Components Via An Autotransformer
● The motor insulation must be protected from excessive voltages. ● The active line module must provide a stabilized DC link voltage. It can be in the range 380 V to 415 V. Figure 5-3 Autotransformer Guide for the SINUMERIK 840D sl machine configuring Manual, 07/2006 Edition, 6FC5397-6CP10-0BA0... -
Page 88: Operating Line Connection Components Via An Isolating Transformer
If the supply voltage is greater than 480 V +10 %, it is not permissible to use an autotransformer. An isolating transformer must be used to ensure protective separation. Guide for the SINUMERIK 840D sl machine configuring Manual, 07/2006 Edition, 6FC5397-6CP10-0BA0... -
Page 89: Line Connection Via A Ground-Fault Circuit Interrupter
In addition to protective measures against direct and indirect contact, selectively tripping AC/DC-sensitive residual-current circuit-breakers (Type B) can be used. Danger Residual-current circuit-breakers alone are not permissible to provide protection against direct and indirect contact. Guide for the SINUMERIK 840D sl machine configuring Manual, 07/2006 Edition, 6FC5397-6CP10-0BA0... - Page 90 (83 Ω max. for residual-current circuit-breakers with 0.3 A rated differential current). ● Parts of the electrical equipment and machine that can be touched are integrated in a protective grounding system. Guide for the SINUMERIK 840D sl machine configuring Manual, 07/2006 Edition, 6FC5397-6CP10-0BA0...
- Page 91 (1 break contact / 1 make contact) for 63 A rated current, 0.3 A rated residual current (see "BETA Installation Built-in Devices - ET B1" catalog). Notice AC or pulse-sensitive RCCBs are not suitable. Guide for the SINUMERIK 840D sl machine configuring Manual, 07/2006 Edition, 6FC5397-6CP10-0BA0...
-
Page 92: Line Contactor Control
When the ready message leaves the SLM, if required, the line contactor may only be deactivated after a delay time (t ≥ 10 ms). The current is removed during the delay time. Figure 5-6 Line contactor control signal chart Guide for the SINUMERIK 840D sl machine configuring Manual, 07/2006 Edition, 6FC5397-6CP10-0BA0... - Page 93 This is required so that the line contactor is switched in accordance with the required safety categories; also refer to the "Safety Integrated" section. Guide for the SINUMERIK 840D sl machine configuring Manual, 07/2006 Edition, 6FC5397-6CP10-0BA0...
-
Page 94: Line Contactor Control For Line Modules With Drive-Cliq Interface
● Line contactor switching time less than 100 ms Note Based on the macro preassignment, the parameterization of the pins 4 and 10 on the X132 interface must be changed. Guide for the SINUMERIK 840D sl machine configuring 5-10 Manual, 07/2006 Edition, 6FC5397-6CP10-0BA0... - Page 95 4. Connect the feedback contact of the line contactor to DI 7. 5. Interconnect (BI: p0860 = r0723.7) p0860 with the inverted input signal (p0723.7). 6. Enter the monitoring time of the line contactor (p0861 = 100 ms). Guide for the SINUMERIK 840D sl machine configuring 5-11 Manual, 07/2006 Edition, 6FC5397-6CP10-0BA0...
- Page 96 ● 8934 missing enables, line contactor control Parameter overview (see SINAMICS S Parameter Manual) ● r0863.1 CO/BO: Drive coupling status/control word ● p0860 BI: Line contactor feedback Guide for the SINUMERIK 840D sl machine configuring 5-12 Manual, 07/2006 Edition, 6FC5397-6CP10-0BA0...
-
Page 97: Line Modules Interfaces Description
Digital inputs/outputs are used exclusively to control and monitor the 5/10 kW types of the Smart Line Module. No connection to the Control Unit using DRIVE-CLiQ exists. Guide for the SINUMERIK 840D sl machine configuring 5-13 Manual, 07/2006 Edition, 6FC5397-6CP10-0BA0... - Page 98 The setpoint for the DC link voltage (p3510) can be changed. The insulation voltage of the motors must be observed (see the NC61 catalog or the motors configuring guide)! Guide for the SINUMERIK 840D sl machine configuring 5-14 Manual, 07/2006 Edition, 6FC5397-6CP10-0BA0...
- Page 99 U = 400 V). Supply Note The Active Line Module (16 kW, 36 kW) and the Smart Line Module (16 kW, 36 kW) interfaces are identical. Guide for the SINUMERIK 840D sl machine configuring 5-15 Manual, 07/2006 Edition, 6FC5397-6CP10-0BA0...
-
Page 100: Active Line Modules With Internal Air Cooling
5.3 Line Modules Interfaces Description 5.3.2 Active Line Modules with Internal Air Cooling 5.3.2.1 Overview Figure 5-9 Active Line Module with internal air cooling (example: 16 kW) Guide for the SINUMERIK 840D sl machine configuring 5-16 Manual, 07/2006 Edition, 6FC5397-6CP10-0BA0... -
Page 101: Connection Example
Connection of the Components 5.3 Line Modules Interfaces Description 5.3.2.2 Connection example Figure 5-10 Example connection of Active Line Module Guide for the SINUMERIK 840D sl machine configuring 5-17 Manual, 07/2006 Edition, 6FC5397-6CP10-0BA0... -
Page 102: X1 Line Connection
Threaded hole M6/6 Nm 55 kW: Threaded hole M6/6 Nm 80 kW to 120 kW: Threaded hole M8/13 Nm 1 for ring cable lugs to DIN 46234 Guide for the SINUMERIK 840D sl machine configuring 5-18 Manual, 07/2006 Edition, 6FC5397-6CP10-0BA0... -
Page 103: Active Line Module X21 Ep Terminals
On/Off control function will be performed. EP M (Enable Pulses) Reference potential for the -X21:3 terminal Max. connectable cross-section: 1.5 mm Type: Screw terminal 1 Guide for the SINUMERIK 840D sl machine configuring 5-19 Manual, 07/2006 Edition, 6FC5397-6CP10-0BA0... -
Page 104: Active Line Module X24 24 V Terminal Adapter
Used for the central infeed of the 24 VDC power supply of the drive group The 24 V terminal adapter is supplied as standard Max. connectable cross-section: 6 mm Type: Screw terminal 5 Guide for the SINUMERIK 840D sl machine configuring 5-20 Manual, 07/2006 Edition, 6FC5397-6CP10-0BA0... -
Page 105: X200-X202 Drive-Cliq Interfaces
Motor Modules. This ensures that the Motor Modules can be started only when the DC link is operating correctly. The Motor Modules will be disabled immediately in case of faults, etc. Guide for the SINUMERIK 840D sl machine configuring 5-21 Manual, 07/2006 Edition, 6FC5397-6CP10-0BA0... -
Page 106: Meaning Of The Leds On The Active Line Module
The warning information on the components must be carefully observed! Cause and rectification of faults The following reference contains information about the cause and rectification of faults: Reference: /IH1/ SINAMICS S120, Commissioning Manual. Guide for the SINUMERIK 840D sl machine configuring 5-22 Manual, 07/2006 Edition, 6FC5397-6CP10-0BA0... -
Page 107: Smart Line Modules (5 Kw Und 10 Kw) With Internal Air Cooling
5.3.3 Smart Line Modules (5 kW und 10 kW) with internal air cooling 5.3.3.1 Overview Figure 5-11 Smart line module with internal air cooling (example 5 kW) Guide for the SINUMERIK 840D sl machine configuring 5-23 Manual, 07/2006 Edition, 6FC5397-6CP10-0BA0... -
Page 108: Connection Example
Connection of the Components 5.3 Line Modules Interfaces Description 5.3.3.2 Connection example Figure 5-12 Smart Line Module connection example Guide for the SINUMERIK 840D sl machine configuring 5-24 Manual, 07/2006 Edition, 6FC5397-6CP10-0BA0... -
Page 109: X1 Line Connection
(see above). This ensures that the Motor Modules can be started only when the DC link is operating correctly. The Motor Modules will be disabled immediately in case of faults, etc. Guide for the SINUMERIK 840D sl machine configuring 5-25 Manual, 07/2006 Edition, 6FC5397-6CP10-0BA0... - Page 110 DI: Enable pulses ground EP M Enable Pulses Reference potential for the –X21:3 terminal. Max. connectable cross-section: 1.5 mm Type: Screw terminal 1 Guide for the SINUMERIK 840D sl machine configuring 5-26 Manual, 07/2006 Edition, 6FC5397-6CP10-0BA0...
-
Page 111: X22 Terminals: Smart Line Module
(a negative edge resets the fault). If the fault is still present, no reset will be performed. The reset is also possible by canceling the external 24 VDC (-X24). Guide for the SINUMERIK 840D sl machine configuring 5-27 Manual, 07/2006 Edition, 6FC5397-6CP10-0BA0... -
Page 112: X24 24 V Terminal Adapter
24 VDC power supply busbar, plus Two connection straps on the distribution busbar pole can be used to pass the voltage potential to neighboring components. 24 VDC power supply busbar, ground pole Guide for the SINUMERIK 840D sl machine configuring 5-28 Manual, 07/2006 Edition, 6FC5397-6CP10-0BA0... -
Page 113: Smart Line Module Dc Link Busbar
The warning information on the components must be carefully observed! Cause and rectification of faults The following reference contains information about the cause and rectification of faults: Reference: /IH1/ SINAMICS S120 Commissioning Manual Guide for the SINUMERIK 840D sl machine configuring 5-29 Manual, 07/2006 Edition, 6FC5397-6CP10-0BA0... -
Page 114: Motor Modules Interface Description
Connection of the Components 5.4 Motor Modules Interface Description Motor Modules Interface Description 5.4.1 Overview Figure 5-13 Example: Double motor module with internal air cooling (2 x 3 A) Guide for the SINUMERIK 840D sl machine configuring 5-30 Manual, 07/2006 Edition, 6FC5397-6CP10-0BA0... -
Page 115: Connection Examples
5.4 Motor Modules Interface Description 5.4.2 Connection Examples Figure 5-14 Connection example of Motor Modules 3 A to 30 A and Double Motor Modules 3 A to 18 A Guide for the SINUMERIK 840D sl machine configuring 5-31 Manual, 07/2006 Edition, 6FC5397-6CP10-0BA0... -
Page 116: Motor/Brake Connection
U (U2) Motor connection V (V2) W (W2) + (BR+) Brake connection - (BR-) PE connection Threaded hole M5/3 Nm 1 for ring cable lugs to DIN 46234 Guide for the SINUMERIK 840D sl machine configuring 5-32 Manual, 07/2006 Edition, 6FC5397-6CP10-0BA0... - Page 117 Only protective extra-low voltages (PELVs) that comply with EN60204-1 must be connected to all connections and terminals between 0 and 48 V DC. The voltage tolerances of the motor holding brakes must be taken into account. Guide for the SINUMERIK 840D sl machine configuring 5-33 Manual, 07/2006 Edition, 6FC5397-6CP10-0BA0...
-
Page 118: X21/X22 Ep Terminals / Motor Module Temperature Sensor Connection
If the "Safe standstill" function is selected, for operation, ground must be placed at the - X21:3 24 VDC and the -X21:4 terminal. For cancelation, a pulse suppression will be activated. Guide for the SINUMERIK 840D sl machine configuring 5-34 Manual, 07/2006 Edition, 6FC5397-6CP10-0BA0... - Page 119 Note Protective measures must be adopted (e.g. for hanging axes) to prevent motions after disconnection of the energy supply from the motor ("coast to a standstill"). Guide for the SINUMERIK 840D sl machine configuring 5-35 Manual, 07/2006 Edition, 6FC5397-6CP10-0BA0...
-
Page 120: X200-X203 Drive-Cliq Interface
DC link voltage within permissible tolerance range (only when ready for operation) DC LINK Steady light DC link voltage outside permissible tolerance range (only when ready for operation) Guide for the SINUMERIK 840D sl machine configuring 5-36 Manual, 07/2006 Edition, 6FC5397-6CP10-0BA0... - Page 121 The warning information on the components must be carefully observed! Cause and rectification of faults The following reference contains information about the cause and rectification of faults: Reference: /IH1/ SINAMICS S120, Commissioning Manual. Guide for the SINUMERIK 840D sl machine configuring 5-37 Manual, 07/2006 Edition, 6FC5397-6CP10-0BA0...
-
Page 122: Drive-Cliq Topologies
● Up to one Line Module, 6 Motor Modules (a Double Motor Module counts as 2 nodes) and 3 direct measuring systems may be connected to one control unit. Guide for the SINUMERIK 840D sl machine configuring 5-38 Manual, 07/2006 Edition, 6FC5397-6CP10-0BA0... -
Page 123: Nx10/15 Wiring
NX10/15 can be operated per DRIVE-CLiQ port on a control unit. ● DRIVE-CLiQ ports not assigned to NX10/15 can be wired to other DRIVE-CLiQ components. Guide for the SINUMERIK 840D sl machine configuring 5-39 Manual, 07/2006 Edition, 6FC5397-6CP10-0BA0... - Page 124 Table 5-17 NX10/15 PROFIBUS addresses DRIVE-CLiQ port Drive PROFIBUS addresses X105 X104 X103 X102 X101 X100 The following figure shows a sample topology: Figure 5-17 NX10/15 topology Guide for the SINUMERIK 840D sl machine configuring 5-40 Manual, 07/2006 Edition, 6FC5397-6CP10-0BA0...
-
Page 125: Connectable Drive-Cliq Components
● You will find information about Line Modules and Motor Modules in the SINAMICS S120 Booksize Power Units Equipment Manual. ● You will find information about Sensor Modules in the SINAMICS S120 Control Units Equipment Manual. Guide for the SINUMERIK 840D sl machine configuring 5-41 Manual, 07/2006 Edition, 6FC5397-6CP10-0BA0... -
Page 126: Electronics Power Supply
● Use of Siemens three-phase motors ● Use of Siemens MOTION-CONNECT power cables ● Motor cable lengths maximum 100 m Guide for the SINUMERIK 840D sl machine configuring 5-42 Manual, 07/2006 Edition, 6FC5397-6CP10-0BA0... -
Page 127: Selection Of The Power Supply Devices
3AC 480 +10% 0AA0 See NC61 catalog. Warning When external power supplies are used, e.g. SITOP, the ground potential must be connected to the protective conductor terminal (PELV). Guide for the SINUMERIK 840D sl machine configuring 5-43 Manual, 07/2006 Edition, 6FC5397-6CP10-0BA0... -
Page 128: 24 V Current Consumption Of The Components
85 A (+ 1 x DRIVE-CLiQ; + 1 x brake) 132 A (+ 1 x DRIVE-CLiQ; + 1 x brake) 200 A (+ 1 x DRIVE-CLiQ; + 1 x brake) Guide for the SINUMERIK 840D sl machine configuring 5-44 Manual, 07/2006 Edition, 6FC5397-6CP10-0BA0... -
Page 129: Calculation Of The 24 Vdc Power Requirement Example
● The line connection of the power supply should be made directly and without additional switched feeders. ● The dimensioning of the output rated current of the power supply is determined by the load of the connected consumers. Guide for the SINUMERIK 840D sl machine configuring 5-45 Manual, 07/2006 Edition, 6FC5397-6CP10-0BA0... -
Page 130: Assignment Of The Power Supply To Other Components
The 24 V busbar is used to pass the 24 VDC power between the individual components. 24 V jumper plugs (supplied with the Line Modules) are used to jumper the 24 V busbar at the component transitions. Guide for the SINUMERIK 840D sl machine configuring 5-46 Manual, 07/2006 Edition, 6FC5397-6CP10-0BA0... - Page 131 The total current of all attached components, however, must not exceed 20 A. The supply voltage, for example, the digital inputs/outputs at Control Unit and Sensor Module, is made separately using appropriate terminals (max. 0.5 mm Guide for the SINUMERIK 840D sl machine configuring 5-47 Manual, 07/2006 Edition, 6FC5397-6CP10-0BA0...
-
Page 132: Overcurrent Protection
EN 60204-1 which in the case of overload/short-circuit, independently protects the SITOP power and the supplied 24 VDC circuits against overload. Guide for the SINUMERIK 840D sl machine configuring 5-48 Manual, 07/2006 Edition, 6FC5397-6CP10-0BA0... -
Page 133: Line Formation
The tripping characteristic of the circuit-breakers must be chosen appropriately for the consumers to be protected and the maximum current provided by the power supply device in a short-circuit situation. The MCBs can be selected according to Siemens catalog "BETA Modular Installation Devices - ET B1". 5.6.7... - Page 134 Active Line Module 1.5 mm Motor Module 1.5 mm ● Controller outputs at the Line, Motor and Braking Module, Control Unit and Sensor Module Cabinet are short-circuit resistant. Guide for the SINUMERIK 840D sl machine configuring 5-50 Manual, 07/2006 Edition, 6FC5397-6CP10-0BA0...
-
Page 135: Power Supply Connection Example
Connection of the Components 5.6 Electronics Power Supply 5.6.8 Power Supply Connection Example Figure 5-20 Power Supply Connection Example Guide for the SINUMERIK 840D sl machine configuring 5-51 Manual, 07/2006 Edition, 6FC5397-6CP10-0BA0... -
Page 136: Control Supply Module (Csm)
Note The supply voltage corresponds to PELV (protective extra-low voltage). The required connection of the ground potential to the protective conductor system is realized in the CSM. Guide for the SINUMERIK 840D sl machine configuring 5-52 Manual, 07/2006 Edition, 6FC5397-6CP10-0BA0... -
Page 137: Connection Example
Connection of the Components 5.7 Control Supply Module (CSM) 5.7.1 Connection example Figure 5-21 Example connection of Control Supply Module Guide for the SINUMERIK 840D sl machine configuring 5-53 Manual, 07/2006 Edition, 6FC5397-6CP10-0BA0... -
Page 138: Criteria For The Protection, Line Formation And Monitoring
In a fault situation, the CSM must be able to supply the required current until tripping. Guide for the SINUMERIK 840D sl machine configuring 5-54 Manual, 07/2006 Edition, 6FC5397-6CP10-0BA0... -
Page 139: Interconnection Of The Voltage Output For The Csm
CSM in the drive group. The CSM must not be installed between or in front of the 300 mm components! In preference, the CSM should be placed at the end of the drive group. Guide for the SINUMERIK 840D sl machine configuring 5-55 Manual, 07/2006 Edition, 6FC5397-6CP10-0BA0... - Page 140 This ensures that should one line fail, the power supply to all attached consumers does not fail. The fault-free consumer lines remain operational. Guide for the SINUMERIK 840D sl machine configuring 5-56 Manual, 07/2006 Edition, 6FC5397-6CP10-0BA0...
- Page 141 The danger note for the DC link discharge time must be placed on the component in the national language. A set of labels in 16 languages is provided with the component. Guide for the SINUMERIK 840D sl machine configuring 5-57 Manual, 07/2006 Edition, 6FC5397-6CP10-0BA0...
-
Page 142: Control Supply Module Power Supply - Connection Example
8. Observe the maximum current carrying capacity of the DC link busbar on the Control Supply Module (100 A) when the drive group is formed; also refer to the "Current Carrying Capacity of the DC Link Busbar" section. Guide for the SINUMERIK 840D sl machine configuring 5-58 Manual, 07/2006 Edition, 6FC5397-6CP10-0BA0... -
Page 143: Cable Lengths
The cable shields must be connected as close to the conductor terminal connections as possible to ensure a low-impedance connection with cabinet ground. For Siemens power cables in which the shield is connected to the connector shell (see relevant catalog), this is a sufficiently good shield contact. - Page 144 Weidmüller GmbH & Co. KG An der Talle 89 33102 Paderborn Tel. 05252/960-0 Fax 05252/960-116 http://www.weidmueller.com Caution The connected signal and power cables must not cover the ventilation slots. Guide for the SINUMERIK 840D sl machine configuring 5-60 Manual, 07/2006 Edition, 6FC5397-6CP10-0BA0...
- Page 145 1 To comply with EMC limit values, shielded cables (preferably Motion Connect cables) must be used. 2 For greater lengths, suitable circuitry must be connected by the user to provide overvoltage protection. Guide for the SINUMERIK 840D sl machine configuring 5-61...
-
Page 146: Equipotential Bonding
(control cabinet) in order to establish the protection connection. All protective conductors must be selected to conform with EN 60204-1 or EN 60439-1 and connected in accordance with the specifications of the associated device manuals. Guide for the SINUMERIK 840D sl machine configuring 5-62 Manual, 07/2006 Edition, 6FC5397-6CP10-0BA0... -
Page 147: Motor Connection
(without pin contacts) and additional required pin contacts. The pin contacts are available for cross-sections 1.5 mm , 2.5 mm , 4 mm , 6 mm and 10 mm Figure 5-26 Motor-side power connector Guide for the SINUMERIK 840D sl machine configuring 5-63 Manual, 07/2006 Edition, 6FC5397-6CP10-0BA0... - Page 148 Only the motor brake is connected using a brake connection plug supplied for preassembled cables. Figure 5-28 Motor Module - motor connection for Motor Modules > 30 A Guide for the SINUMERIK 840D sl machine configuring 5-64 Manual, 07/2006 Edition, 6FC5397-6CP10-0BA0...
-
Page 149: Connection Examples
5.9 Motor Connection 5.9.2 Connection Examples Figure 5-29 Connection example of Motor Modules 3 A to 30 A and Double Motor Modules 3 A to 18 A Guide for the SINUMERIK 840D sl machine configuring 5-65 Manual, 07/2006 Edition, 6FC5397-6CP10-0BA0... -
Page 150: Motor/Brake Connection
U (U2) Motor connection V (V2) W (W2) + (BR+) Brake connection - (BR-) PE connection Threaded hole M5/3 Nm 1 for ring cable lugs to DIN 46234 Guide for the SINUMERIK 840D sl machine configuring 5-66 Manual, 07/2006 Edition, 6FC5397-6CP10-0BA0... - Page 151 Only protective extra-low voltages (PELVs) that comply with EN60204-1 must be connected to all connections and terminals between 0 and 48 V DC. The voltage tolerances of the motor holding brakes must be taken into account. Guide for the SINUMERIK 840D sl machine configuring 5-67 Manual, 07/2006 Edition, 6FC5397-6CP10-0BA0...
-
Page 152: X21/X22 Ep Terminals / Temperature Sensor Connection Motor Module
If the "Safe standstill" function is selected, for operation, ground must be placed at the - X21:3 24 VDC and the -X21:4 terminal. For cancelation, a pulse suppression will be activated. Guide for the SINUMERIK 840D sl machine configuring 5-68 Manual, 07/2006 Edition, 6FC5397-6CP10-0BA0... -
Page 153: Sensor Systems Connection
DRIVE-CLiQ cable can be used for all types. Further information Motor sensors and temperature signals should preferably be connected to the associated Motor Module, while external sensors should be connected to the Control Unit. Guide for the SINUMERIK 840D sl machine configuring 5-69 Manual, 07/2006 Edition, 6FC5397-6CP10-0BA0... -
Page 154: Description
Note The SMC supplies the power to the sensor; the SMC, however, must be provided separately with 24 VDC power. Figure 5-31 Sensor Modules Cabinet-Mounted (SMC) Guide for the SINUMERIK 840D sl machine configuring 5-70 Manual, 07/2006 Edition, 6FC5397-6CP10-0BA0... - Page 155 / without reference signal Absolute encoder EnDat Incremental encoder TTL/HTL SSI absolute encoder Temperature evaluation (electricall (electricall y isolated) y isolated) As of Order No. 6SL3055-0AA00-5CA1 and Firmware 2.4 Guide for the SINUMERIK 840D sl machine configuring 5-71 Manual, 07/2006 Edition, 6FC5397-6CP10-0BA0...
-
Page 156: X200-X203 Drive-Cliq Interface
Power supply GND (0 V) Electronic ground Blanking plate for DRIVE-CLiQ interface: Molex, order number: 85999-3255 5.10.4 Sensor Connections Figure 5-33 Sensor connection using Sensor Module Cabinet (SMC) Guide for the SINUMERIK 840D sl machine configuring 5-72 Manual, 07/2006 Edition, 6FC5397-6CP10-0BA0... - Page 157 Connection of the Components 5.10 Sensor Systems Connection Figure 5-34 Sensor connection via a motor with a DRIVE-CLiQ interface Figure 5-35 Sensor connection using Sensor Module External (SME) Guide for the SINUMERIK 840D sl machine configuring 5-73 Manual, 07/2006 Edition, 6FC5397-6CP10-0BA0...
-
Page 158: Brake Connection
● Connection for device size 45 A to 200 A The connection is made to a separate -X11 brake connection terminal: BR+/BR- terminal, max. connectable cross-section 1.5 mm Guide for the SINUMERIK 840D sl machine configuring 5-74 Manual, 07/2006 Edition, 6FC5397-6CP10-0BA0... - Page 159 ● Wire breakage only when the brake is switched on Note The above-mentioned monitoring is possible only when the brake is directly attached to the Motor Module without interface contactor. Guide for the SINUMERIK 840D sl machine configuring 5-75 Manual, 07/2006 Edition, 6FC5397-6CP10-0BA0...
-
Page 160: Connection Of The Brake Using Interface Relay
This is performed, for example, with varistors for an AC supply power (also refer to the motors configuring guide). Guide for the SINUMERIK 840D sl machine configuring 5-76 Manual, 07/2006 Edition, 6FC5397-6CP10-0BA0... -
Page 161: Brake Control
For the selection/deselection of the brake, any pending pulse enable will not be further influenced. The unconditional opening of the holding brake, for example, can lead to dangerous motions for hanging axes. Additional safety measures may need to be adopted. Guide for the SINUMERIK 840D sl machine configuring 5-77 Manual, 07/2006 Edition, 6FC5397-6CP10-0BA0... - Page 162 TIMING 1 TIMING 2 Start with ON command Start with ON command Stop with OFF1 command Stop with OFF3 command (rapid stop) Guide for the SINUMERIK 840D sl machine configuring 5-78 Manual, 07/2006 Edition, 6FC5397-6CP10-0BA0...
- Page 163 Stop with OFF2 command (coast to standstill) The switch-off behavior in a fault situation will be assigned to the associated fault numbers and largely corresponds to a stop behavior OFF1/2/3. Guide for the SINUMERIK 840D sl machine configuring 5-79 Manual, 07/2006 Edition, 6FC5397-6CP10-0BA0...
- Page 164 When the "Safe standstill" function is selected, an internal OFF2 command will be issued and the holding brake closed immediately. Guide for the SINUMERIK 840D sl machine configuring 5-80 Manual, 07/2006 Edition, 6FC5397-6CP10-0BA0...
- Page 165 Connection of the Components 5.12 Brake Control p1215 & Figure 5-39 Operating modes of the safe brake control Guide for the SINUMERIK 840D sl machine configuring 5-81 Manual, 07/2006 Edition, 6FC5397-6CP10-0BA0...
-
Page 166: Voltage Protection Module (Vpm)
An operation with VPM is possible only in conjunction with SINAMICS, SIMODRIVE 611digital, SIMODRIVE 611 universal HR/HRS and 1FE1/2SP1 motors. Shielded 6FX8 motor supply cables must be used with the VPM. Guide for the SINUMERIK 840D sl machine configuring 5-82 Manual, 07/2006 Edition, 6FC5397-6CP10-0BA0... - Page 167 Depending on the speed of the motors, the motor terminal voltage of the 1FE1 motors can attain values as high as 2 kV. Connection example for VPM 120 Figure 5-40 Voltage Protection Module 120 connection Guide for the SINUMERIK 840D sl machine configuring 5-83 Manual, 07/2006 Edition, 6FC5397-6CP10-0BA0...
- Page 168 The X3 signal contact closes after t > 2 min or after resetting the temperature switch. Figure 5-41 Signal contact X3 of the Voltage Protection Module Warning Measures must be adopted to prevent the drive from starting by itself! Guide for the SINUMERIK 840D sl machine configuring 5-84 Manual, 07/2006 Edition, 6FC5397-6CP10-0BA0...
-
Page 169: Signal Interconnection
Safety realized with external safety controller (e.g. 3TK28 safety relay or SIMATIC S7 F control) using the SINAMICS SH/SBC function Safety realized with the system/drive-integrated safety function of the SINUMERIK 840D sl Line contactor provided, however, without safe control Line contactor provided, with safe control... -
Page 170: Application 1
Signal Interconnection 6.1 Application 1 Application 1 Figure 6-1 Infeed with DRIVE-CLiQ (SLM/ALM 16 kW to 120 kW) Guide for the SINUMERIK 840D sl machine configuring Manual, 07/2006 Edition, 6FC5397-6CP10-0BA0... - Page 171 ● After activating the infeed, given correct operation, the "Infeed operation" state will be attained and all axes (BI: p0864) will be enabled. This status must also be forwarded to the NX components (NCU terminal X132.7 and NX terminal: X122.1). Guide for the SINUMERIK 840D sl machine configuring Manual, 07/2006 Edition, 6FC5397-6CP10-0BA0...
-
Page 172: Application 3
Signal Interconnection 6.2 Application 2 Application 2 Figure 6-2 Infeed with DRIVE-CLiQ (SLM/ALM 16 kW to 120 kW) and line contactor without safe control Guide for the SINUMERIK 840D sl machine configuring Manual, 07/2006 Edition, 6FC5397-6CP10-0BA0... - Page 173 The described control is made with standard signals with regard to the safety engineering. If the appropriate safety categories must be satisfied, the control must be made in accordance with the required safety categories using a safety controller. Guide for the SINUMERIK 840D sl machine configuring Manual, 07/2006 Edition, 6FC5397-6CP10-0BA0...
-
Page 174: Application 5
Signal Interconnection 6.3 Application 3 Application 3 Figure 6-3 Infeed without DRIVE-CLiQ (SLM 5/10 kW); line contactor without safe control Guide for the SINUMERIK 840D sl machine configuring Manual, 07/2006 Edition, 6FC5397-6CP10-0BA0... - Page 175 ● "Line contactor control" Control the line contactor using the input/output condition Caution If the named conditions are not observed, the line contactor and the infeed can be damaged. Guide for the SINUMERIK 840D sl machine configuring Manual, 07/2006 Edition, 6FC5397-6CP10-0BA0...
- Page 176 ● "Infeed Ready" (SLM terminal X21.1) Infeed operational ● "Infeed PreWarning" (SLM terminal X21.2) Overtemperature prewarning Interconnection of the PLC output signals ● "Infeed Reset" (SLM terminal X22.3) Reset of a pending fault Guide for the SINUMERIK 840D sl machine configuring Manual, 07/2006 Edition, 6FC5397-6CP10-0BA0...
-
Page 177: Application 7
Application 4 Figure 6-4 Infeed with DRIVE-CLiQ (SLM/ALM 16 kW to 120 kW), use of a drive-integrated SH/SBC safety function by SINAMICS and line contactor with safe control Guide for the SINUMERIK 840D sl machine configuring Manual, 07/2006 Edition, 6FC5397-6CP10-0BA0... - Page 178 If required, appropriate groups (1/2) can be formed that must be controlled depending on the switching condition. The feedback of the SH/SBC function must be evaluated in the safety controller. Guide for the SINUMERIK 840D sl machine configuring 6-10 Manual, 07/2006 Edition, 6FC5397-6CP10-0BA0...
- Page 179 Notice The described control must be locked by the safety controller in accordance with the required safety category. Guide for the SINUMERIK 840D sl machine configuring 6-11 Manual, 07/2006 Edition, 6FC5397-6CP10-0BA0...
- Page 180 Application 5 Figure 6-5 Infeed without DRIVE-CLiQ (SLM 5 kW to 10 kW), use of a drive-integrated SH/SBC safety function by SINAMICS and line contactor with safe control Guide for the SINUMERIK 840D sl machine configuring 6-12 Manual, 07/2006 Edition, 6FC5397-6CP10-0BA0...
- Page 181 After activating the infeed, given correct operation, the "Infeed operation" state will be attained and all axes (BI: p0864) will be enabled. This status must also be forwarded to the NX components (NX terminal: X122.1). Guide for the SINUMERIK 840D sl machine configuring 6-13 Manual, 07/2006 Edition, 6FC5397-6CP10-0BA0...
- Page 182 If the named conditions are not observed, the line contactor and the infeed can be damaged. Notice The described control must be locked by the safety controller in accordance with the required safety category. Guide for the SINUMERIK 840D sl machine configuring 6-14 Manual, 07/2006 Edition, 6FC5397-6CP10-0BA0...
- Page 183 Infeed operational ● "Infeed PreWarning" (SLM terminal X21.2) Overtemperature prewarning Interconnection of the PLC output signals ● "Infeed Reset" (SLM terminal X22.3) Reset of a pending fault Guide for the SINUMERIK 840D sl machine configuring 6-15 Manual, 07/2006 Edition, 6FC5397-6CP10-0BA0...
- Page 184 Signal Interconnection 6.6 Application 6 Application 6 Figure 6-6 Infeed with DRIVE-CLiQ (SLM/ALM 16 kW to 120 kW); use of the system/drive-integrated safety function of the SINUMERIK Guide for the SINUMERIK 840D sl machine configuring 6-16 Manual, 07/2006 Edition, 6FC5397-6CP10-0BA0...
- Page 185 The need for a line contactor for the safe separation of the energy supply to the motor is no longer assured. Notice When servicing work is performed, power must be removed and possibly the main power switch turned off. Guide for the SINUMERIK 840D sl machine configuring 6-17 Manual, 07/2006 Edition, 6FC5397-6CP10-0BA0...
- Page 186 Signal Interconnection 6.7 Application 7 Application 7 Figure 6-7 Infeed without DRIVE-CLiQ (SLM 5/10 kW); use of the system/drive-integrated safety function of the SINUMERIK Guide for the SINUMERIK 840D sl machine configuring 6-18 Manual, 07/2006 Edition, 6FC5397-6CP10-0BA0...
- Page 187 The need for a line contactor for the safe separation of the energy supply to the motor is no longer assured. When servicing work is performed, power must be removed and possibly the main power switch turned off. Guide for the SINUMERIK 840D sl machine configuring 6-19 Manual, 07/2006 Edition, 6FC5397-6CP10-0BA0...
-
Page 189: Typical Circuit Diagrams
The selection of the surge suppression affects the switch-off delay of the devices. This influence must also be taken into account for the configuring. For the selection and the technical data, see the LV10 (Low-voltage Switchgear) catalog. Guide for the SINUMERIK 840D sl machine configuring Manual, 07/2006 Edition, 6FC5397-6CP10-0BA0... -
Page 190: Functional Description Of The Typical Circuit Diagrams
Drives or drive group on/off; stop in an emergency (emergency stop); safety using drive- integrated safety function of the SINUMERIK 840D sl; ET 200S distributed peripherals. The following section does not further discuss the setpoint and actual value interface and the user's machine control. - Page 191 4. Note All subsequent typical circuit diagrams do not contain any safety-relevant or other possible machine-specific essential interlocks with the user-provided machine control. Guide for the SINUMERIK 840D sl machine configuring Manual, 07/2006 Edition, 6FC5397-6CP10-0BA0...
-
Page 192: Circuit Manual Group =1
See the Equipment Manual for Booksize Power Units; for selection, see =1.-V27 NC61 catalog =1.-R23 Line reactor =1.-R24 See the Equipment Manual for Booksize Power Units; for selection, see =1.-R26 NC61 catalog =1.-R27 Guide for the SINUMERIK 840D sl machine configuring Manual, 07/2006 Edition, 6FC5397-6CP10-0BA0... - Page 193 See the Equipment Manual for Booksize Power Units See KT10.1 catalog Line infeed and power supply of the automation system is made as shown in the following typical circuit diagrams. Guide for the SINUMERIK 840D sl machine configuring Manual, 07/2006 Edition, 6FC5397-6CP10-0BA0...
- Page 194 Typical circuit diagrams 7.3 Circuit Manual Group =1 Circuit manual group =1 examples Figure 7-1 Circuit manual group =1, page 1 Guide for the SINUMERIK 840D sl machine configuring Manual, 07/2006 Edition, 6FC5397-6CP10-0BA0...
- Page 195 Typical circuit diagrams 7.3 Circuit Manual Group =1 Figure 7-2 Circuit manual group =1, page 2 Guide for the SINUMERIK 840D sl machine configuring Manual, 07/2006 Edition, 6FC5397-6CP10-0BA0...
- Page 196 Typical circuit diagrams 7.3 Circuit Manual Group =1 Figure 7-3 Circuit manual group =1, page 3 Guide for the SINUMERIK 840D sl machine configuring Manual, 07/2006 Edition, 6FC5397-6CP10-0BA0...
- Page 197 Typical circuit diagrams 7.3 Circuit Manual Group =1 Figure 7-4 Circuit manual group =1, page 4 Guide for the SINUMERIK 840D sl machine configuring Manual, 07/2006 Edition, 6FC5397-6CP10-0BA0...
- Page 198 Typical circuit diagrams 7.3 Circuit Manual Group =1 Figure 7-5 Circuit manual group =1, page 5 Guide for the SINUMERIK 840D sl machine configuring 7-10 Manual, 07/2006 Edition, 6FC5397-6CP10-0BA0...
- Page 199 Typical circuit diagrams 7.3 Circuit Manual Group =1 Figure 7-6 Circuit manual group =1, page 6 Guide for the SINUMERIK 840D sl machine configuring 7-11 Manual, 07/2006 Edition, 6FC5397-6CP10-0BA0...
-
Page 200: Circuit Manual Group =2
Enable Pulses input on the Active Line Module must be disabled, for example, using a leading (<=10 ms) auxiliary switch on the main power switch. Guide for the SINUMERIK 840D sl machine configuring 7-12 Manual, 07/2006 Edition, 6FC5397-6CP10-0BA0... - Page 201 The "Infeed Ready" signal from the Line Module must be switched parallel on all connected Motor Modules to enable the Motor Modules. The interconnection is made within the drive objects in the Control Unit. Guide for the SINUMERIK 840D sl machine configuring 7-13 Manual, 07/2006 Edition, 6FC5397-6CP10-0BA0...
- Page 202 Typical circuit diagrams 7.4 Circuit Manual Group =2 Circuit manual group =2 examples Figure 7-7 Circuit manual group =2, page 1 Guide for the SINUMERIK 840D sl machine configuring 7-14 Manual, 07/2006 Edition, 6FC5397-6CP10-0BA0...
- Page 203 Typical circuit diagrams 7.4 Circuit Manual Group =2 Figure 7-8 Circuit manual group =2, page 2 Guide for the SINUMERIK 840D sl machine configuring 7-15 Manual, 07/2006 Edition, 6FC5397-6CP10-0BA0...
- Page 204 Typical circuit diagrams 7.4 Circuit Manual Group =2 Figure 7-9 Circuit manual group =2, page 3 Guide for the SINUMERIK 840D sl machine configuring 7-16 Manual, 07/2006 Edition, 6FC5397-6CP10-0BA0...
- Page 205 Typical circuit diagrams 7.4 Circuit Manual Group =2 Figure 7-10 Circuit manual group =2, page 4 Guide for the SINUMERIK 840D sl machine configuring 7-17 Manual, 07/2006 Edition, 6FC5397-6CP10-0BA0...
- Page 206 Typical circuit diagrams 7.4 Circuit Manual Group =2 Figure 7-11 Circuit manual group =2, page 5 Guide for the SINUMERIK 840D sl machine configuring 7-18 Manual, 07/2006 Edition, 6FC5397-6CP10-0BA0...
- Page 207 Typical circuit diagrams 7.4 Circuit Manual Group =2 Figure 7-12 Circuit manual group =2, page 6 Guide for the SINUMERIK 840D sl machine configuring 7-19 Manual, 07/2006 Edition, 6FC5397-6CP10-0BA0...
- Page 208 Typical circuit diagrams 7.4 Circuit Manual Group =2 Figure 7-13 Circuit manual group =2, page 7 Guide for the SINUMERIK 840D sl machine configuring 7-20 Manual, 07/2006 Edition, 6FC5397-6CP10-0BA0...
-
Page 209: Circuit Manual Group =3
(<=10 ms) auxiliary switch on the main power switch. The "Infeed Ready" signal is activated only when the Smart Line Module is operating correctly and the DC link has started properly. Guide for the SINUMERIK 840D sl machine configuring 7-21 Manual, 07/2006 Edition, 6FC5397-6CP10-0BA0... - Page 210 Because the 1FE motor does not have any internal sensor, an SMC20 module must be used to connect a separate external sensor (e.g. SIMAG H2) to the Motor Module. Guide for the SINUMERIK 840D sl machine configuring 7-22 Manual, 07/2006 Edition, 6FC5397-6CP10-0BA0...
- Page 211 Typical circuit diagrams 7.5 Circuit Manual Group =3 Circuit manual group =3 examples Figure 7-14 Circuit manual group =3, page 1 Guide for the SINUMERIK 840D sl machine configuring 7-23 Manual, 07/2006 Edition, 6FC5397-6CP10-0BA0...
- Page 212 Typical circuit diagrams 7.5 Circuit Manual Group =3 Figure 7-15 Circuit manual group =3, page 2 Guide for the SINUMERIK 840D sl machine configuring 7-24 Manual, 07/2006 Edition, 6FC5397-6CP10-0BA0...
- Page 213 Typical circuit diagrams 7.5 Circuit Manual Group =3 Figure 7-16 Circuit manual group =3, page 3 Guide for the SINUMERIK 840D sl machine configuring 7-25 Manual, 07/2006 Edition, 6FC5397-6CP10-0BA0...
- Page 214 Typical circuit diagrams 7.5 Circuit Manual Group =3 Figure 7-17 Circuit manual group =3, page 4 Guide for the SINUMERIK 840D sl machine configuring 7-26 Manual, 07/2006 Edition, 6FC5397-6CP10-0BA0...
- Page 215 Typical circuit diagrams 7.5 Circuit Manual Group =3 Figure 7-18 Circuit manual group =3, page 5 Guide for the SINUMERIK 840D sl machine configuring 7-27 Manual, 07/2006 Edition, 6FC5397-6CP10-0BA0...
- Page 216 Typical circuit diagrams 7.5 Circuit Manual Group =3 Figure 7-19 Circuit manual group =3, page 6 Guide for the SINUMERIK 840D sl machine configuring 7-28 Manual, 07/2006 Edition, 6FC5397-6CP10-0BA0...
- Page 217 Typical circuit diagrams 7.5 Circuit Manual Group =3 Figure 7-20 Circuit manual group =3, page 7 Guide for the SINUMERIK 840D sl machine configuring 7-29 Manual, 07/2006 Edition, 6FC5397-6CP10-0BA0...
-
Page 218: Circuit Manual Group =4
● Drive group (=4.-S74) On pushbutton, the safety switching device (=4.-K71) is activated and latches. The drive group is activated. Once the DC link has been charged, and the Guide for the SINUMERIK 840D sl machine configuring 7-30 Manual, 07/2006 Edition, 6FC5397-6CP10-0BA0... - Page 219 Standstill" is selected, the brake is closed immediately. Consequently, the "Safe Standstill" function should be selected only when the drives have been brought to a standstill. Otherwise the holding brake can be damaged. Guide for the SINUMERIK 840D sl machine configuring 7-31 Manual, 07/2006 Edition, 6FC5397-6CP10-0BA0...
- Page 220 Typical circuit diagrams 7.6 Circuit Manual Group =4 Circuit manual group =4 examples Figure 7-21 Circuit manual group =4, page 1 Guide for the SINUMERIK 840D sl machine configuring 7-32 Manual, 07/2006 Edition, 6FC5397-6CP10-0BA0...
- Page 221 Typical circuit diagrams 7.6 Circuit Manual Group =4 Figure 7-22 Circuit manual group =4, page 2 Guide for the SINUMERIK 840D sl machine configuring 7-33 Manual, 07/2006 Edition, 6FC5397-6CP10-0BA0...
- Page 222 Typical circuit diagrams 7.6 Circuit Manual Group =4 Figure 7-23 Circuit manual group =4, page 3 Guide for the SINUMERIK 840D sl machine configuring 7-34 Manual, 07/2006 Edition, 6FC5397-6CP10-0BA0...
- Page 223 Typical circuit diagrams 7.6 Circuit Manual Group =4 Figure 7-24 Circuit manual group =4, page 4 Guide for the SINUMERIK 840D sl machine configuring 7-35 Manual, 07/2006 Edition, 6FC5397-6CP10-0BA0...
- Page 224 Typical circuit diagrams 7.6 Circuit Manual Group =4 Figure 7-25 Circuit manual group =4, page 5 Guide for the SINUMERIK 840D sl machine configuring 7-36 Manual, 07/2006 Edition, 6FC5397-6CP10-0BA0...
- Page 225 Typical circuit diagrams 7.6 Circuit Manual Group =4 Figure 7-26 Circuit manual group =4, page 6 Guide for the SINUMERIK 840D sl machine configuring 7-37 Manual, 07/2006 Edition, 6FC5397-6CP10-0BA0...
- Page 226 Typical circuit diagrams 7.6 Circuit Manual Group =4 Figure 7-27 Circuit manual group =4, page 7 Guide for the SINUMERIK 840D sl machine configuring 7-38 Manual, 07/2006 Edition, 6FC5397-6CP10-0BA0...
-
Page 227: Circuit Manual Group =5
Control Unit (=4. -K11-X122:4, DI3) and the Motor Module (=5.-Q11-X21:3, EP) on two channels. "Safe Standstill" function feedback The "Safe Standstill" function is monitored in the Control Unit and in the Motor Module. Guide for the SINUMERIK 840D sl machine configuring 7-39 Manual, 07/2006 Edition, 6FC5397-6CP10-0BA0... - Page 228 (=5.-K24) to also safely shutdown the brake using hardware. This means a fault in the PLC cannot cause an incorrect control of the brake when the drive is stationary. Guide for the SINUMERIK 840D sl machine configuring 7-40 Manual, 07/2006 Edition, 6FC5397-6CP10-0BA0...
- Page 229 Typical circuit diagrams 7.7 Circuit Manual Group =5 Circuit manual group =5 examples Figure 7-28 Circuit manual group =5, page 1 Guide for the SINUMERIK 840D sl machine configuring 7-41 Manual, 07/2006 Edition, 6FC5397-6CP10-0BA0...
- Page 230 Typical circuit diagrams 7.7 Circuit Manual Group =5 Figure 7-29 Circuit manual group =5, page 2 Guide for the SINUMERIK 840D sl machine configuring 7-42 Manual, 07/2006 Edition, 6FC5397-6CP10-0BA0...
-
Page 231: Circuit Manual Group =6
7.8 Circuit Manual Group =6 Circuit Manual Group =6 A drive group without main contactor, however, with the system/drive-integrated safety function of the SINUMERIK 840D sl; connection of the safety sensor technology / actuators using ET200S. ● Power supply of the NCU 710 (=6.-K11) ●... - Page 232 Typical circuit diagrams 7.8 Circuit Manual Group =6 Circuit manual group =6 examples Figure 7-30 Circuit manual group =, page 1 Guide for the SINUMERIK 840D sl machine configuring 7-44 Manual, 07/2006 Edition, 6FC5397-6CP10-0BA0...
- Page 233 Typical circuit diagrams 7.8 Circuit Manual Group =6 Figure 7-31 Circuit manual group =6, page 2 Guide for the SINUMERIK 840D sl machine configuring 7-45 Manual, 07/2006 Edition, 6FC5397-6CP10-0BA0...
- Page 234 Typical circuit diagrams 7.8 Circuit Manual Group =6 Figure 7-32 Circuit manual group =6, page 3 Guide for the SINUMERIK 840D sl machine configuring 7-46 Manual, 07/2006 Edition, 6FC5397-6CP10-0BA0...
- Page 235 Typical circuit diagrams 7.8 Circuit Manual Group =6 Figure 7-33 Circuit manual group =6, page 4 Guide for the SINUMERIK 840D sl machine configuring 7-47 Manual, 07/2006 Edition, 6FC5397-6CP10-0BA0...
- Page 236 Typical circuit diagrams 7.8 Circuit Manual Group =6 Figure 7-34 Circuit manual group =6, page 5 Guide for the SINUMERIK 840D sl machine configuring 7-48 Manual, 07/2006 Edition, 6FC5397-6CP10-0BA0...
- Page 237 Typical circuit diagrams 7.8 Circuit Manual Group =6 Figure 7-35 Circuit manual group =6, page 6 Guide for the SINUMERIK 840D sl machine configuring 7-49 Manual, 07/2006 Edition, 6FC5397-6CP10-0BA0...
- Page 238 Typical circuit diagrams 7.8 Circuit Manual Group =6 Figure 7-36 Circuit manual group =6, page 7 Guide for the SINUMERIK 840D sl machine configuring 7-50 Manual, 07/2006 Edition, 6FC5397-6CP10-0BA0...
- Page 239 Typical circuit diagrams 7.8 Circuit Manual Group =6 Figure 7-37 Circuit manual group =6, page 8 Guide for the SINUMERIK 840D sl machine configuring 7-51 Manual, 07/2006 Edition, 6FC5397-6CP10-0BA0...
- Page 240 Typical circuit diagrams 7.8 Circuit Manual Group =6 Figure 7-38 Circuit manual group =6, page 9 Guide for the SINUMERIK 840D sl machine configuring 7-52 Manual, 07/2006 Edition, 6FC5397-6CP10-0BA0...
- Page 241 Typical circuit diagrams 7.8 Circuit Manual Group =6 Figure 7-39 Circuit manual group =6, page 10 Guide for the SINUMERIK 840D sl machine configuring 7-53 Manual, 07/2006 Edition, 6FC5397-6CP10-0BA0...
- Page 242 Typical circuit diagrams 7.8 Circuit Manual Group =6 Figure 7-40 Circuit manual group =6, page 11 Guide for the SINUMERIK 840D sl machine configuring 7-54 Manual, 07/2006 Edition, 6FC5397-6CP10-0BA0...
- Page 243 Typical circuit diagrams 7.8 Circuit Manual Group =6 Figure 7-41 Circuit manual group =6, page 12 Guide for the SINUMERIK 840D sl machine configuring 7-55 Manual, 07/2006 Edition, 6FC5397-6CP10-0BA0...
- Page 244 Typical circuit diagrams 7.8 Circuit Manual Group =6 Figure 7-42 Circuit manual group =6, page 13 Guide for the SINUMERIK 840D sl machine configuring 7-56 Manual, 07/2006 Edition, 6FC5397-6CP10-0BA0...
-
Page 245: Additional Information
DC link rectifier adapter with connection possibilities from 0.5 mm² to 10 mm², max. 36 A. Component width 150 ... 300 mm DC link rectifier adapter with connection possibilities from 35 mm² to 95 mm², max. 240 A. Guide for the SINUMERIK 840D sl machine configuring Manual, 07/2006 Edition, 6FC5397-6CP10-0BA0... - Page 246 The internal DC link busbar may not be used if the DC link rectifier adapter is connected to a power unit. The provided DC link strap must be removed. Each power unit requires a DC link rectifier adapter! Guide for the SINUMERIK 840D sl machine configuring Manual, 07/2006 Edition, 6FC5397-6CP10-0BA0...
-
Page 247: Cooling Systems
The heat sink with its cooling fins and fan (contained in scope of delivery) extends at the back out of the control cabinet and the heat dissipation is made externally from the control cabinet or in a separate air duct. Guide for the SINUMERIK 840D sl machine configuring Manual, 07/2006 Edition, 6FC5397-6CP10-0BA0... - Page 248 Additional Information 8.2 Cooling Systems Figure 8-2 Installation of a booksize power unit with external air cooling Guide for the SINUMERIK 840D sl machine configuring Manual, 07/2006 Edition, 6FC5397-6CP10-0BA0...
-
Page 249: Cold Plate
● Cold plate with internal liquid heat sink This is considered to be a liquid cooling using a connection adapter. The liquid passes through the integrated channels in the cold plate. Guide for the SINUMERIK 840D sl machine configuring Manual, 07/2006 Edition, 6FC5397-6CP10-0BA0... - Page 250 The associated notes contained in the device manuals must be observed for the configuring and the layout of the corresponding component. This ensures that devices in the control cabinet are not damaged as a result of leaks, etc. Guide for the SINUMERIK 840D sl machine configuring Manual, 07/2006 Edition, 6FC5397-6CP10-0BA0...
-
Page 251: Activate/Deactivate Drive System
Activate/Deactivate Drive System Overview of the Status Signals Figure 9-1 Overview of the Status Signals Guide for the SINUMERIK 840D sl machine configuring Manual, 07/2006 Edition, 6FC5397-6CP10-0BA0... -
Page 252: Drive Group With Several Axes
SINAMICS S Parameter Manual. To enable the Motor Module, the "infeed ready" signal must be connected from the Line Module. The following function diagrams show how the individual signals interact. Guide for the SINUMERIK 840D sl machine configuring Manual, 07/2006 Edition, 6FC5397-6CP10-0BA0... - Page 253 Activate/Deactivate Drive System 9.2 Drive Group with Several Axes Activating the infeed Figure 9-2 Activating the infeed Guide for the SINUMERIK 840D sl machine configuring Manual, 07/2006 Edition, 6FC5397-6CP10-0BA0...
- Page 254 Activate/Deactivate Drive System 9.2 Drive Group with Several Axes Activating the drive Figure 9-3 Activating the drive Guide for the SINUMERIK 840D sl machine configuring Manual, 07/2006 Edition, 6FC5397-6CP10-0BA0...
- Page 255 The standstill is detected when the speed actual value of the speed threshold (p1226) is undershot or when the monitoring time (p1227) started when speed setpoint ≤ speed threshold (p1226) has expired. – Power-on inhibit is activated. Guide for the SINUMERIK 840D sl machine configuring Manual, 07/2006 Edition, 6FC5397-6CP10-0BA0...
- Page 256 ● 2610 execution control - processor ● 2634 missing enables, line contactor control ● 8732 basic infeed - processor ● 8832 smart infeed - processor ● 8932 active infeed - processor Guide for the SINUMERIK 840D sl machine configuring Manual, 07/2006 Edition, 6FC5397-6CP10-0BA0...
-
Page 257: Esd Notes
(e.g. with a protective conductor) or prior to measuring with a potential-free measuring unit, the measuring head is briefly discharged (e.g. by touching a bare metal housing). Guide for the SINUMERIK 840D sl machine configuring Manual, 07/2006 Edition, 6FC5397-6CP10-0BA0... -
Page 259: Abbreviations
Protective Earth Speicherprogrammierbare Steuerung (SPS) Programmable Logic Controller Safe Brake Control Safe Brake Control Sicherer Halt Safe standstill Sicherheitsintegritätsgrad Safety Integrity Level Smart Line Module Smart Line Module Guide for the SINUMERIK 840D sl machine configuring Manual, 07/2006 Edition, 6FC5397-6CP10-0BA0... -
Page 260: Abbreviations
Grounded three-phase supply network Drehstromversorgungsnetz geerdet Grounded three-phase supply network Voltage Protection Module Voltage Protection Module Spannungsversorgung Voltage Supply Voltage Sensing Module Voltage Sensing Module Zustandswort Status word Guide for the SINUMERIK 840D sl machine configuring Manual, 07/2006 Edition, 6FC5397-6CP10-0BA0... -
Page 261: Index
Emergency return movement, 5-52 Power Loss Calculation, 2-36 Equipotential Bonding, 5-62 Power Units, 1-8 ET200S PROFIsafe, 4-9 PROFIsafe, 4-9 Holding brake integrated in the motor, 5-74 References, iii Guide for the SINUMERIK 840D sl machine configuring Index-1 Manual, 07/2006 Edition, 6FC5397-6CP10-0BA0... - Page 262 SIZER, 1-4 STARTER, 1-4 Sensor Module, 5-41 Sensor Modules, 5-71 Sensor systems, 5-71 Shielding, 5-62 SIMATIC S7 F control, 4-2 Ventilation, 2-29 SITOP select, 5-54 SITOP-Modular, 5-42 Guide for the SINUMERIK 840D sl machine configuring Index-2 Manual, 07/2006 Edition, 6FC5397-6CP10-0BA0...
- Page 263 P.O. Box 3180 SINUMERIK 840D sl, SINAMICS S120 D-91050 Erlangen Guide for the SINUMERIK 840D sl Federal Republic of Germany machine configuring Tel.: +49 (0) 180 / 5050 – 222 [Hotline] Fax: +49 (0) 9131 / 98 – 63315 [Documentation] E-Mail motioncontrol.docu@siemens.com...
- Page 265 Overview of SINUMERIK 840D sl/840Di sl Documentation (03/2006) General Documentation SINAMICS SINUMERIK SINUMERIK S120 840D sl 840Di sl Brochure Catalog NC 61 *) Catalog D21.2 Servo Control *) User Documentation SINUMERIK SINUMERIK SINUMERIK SINUMERIK SINUMERIK 840D sl 840D sl 840D sl...