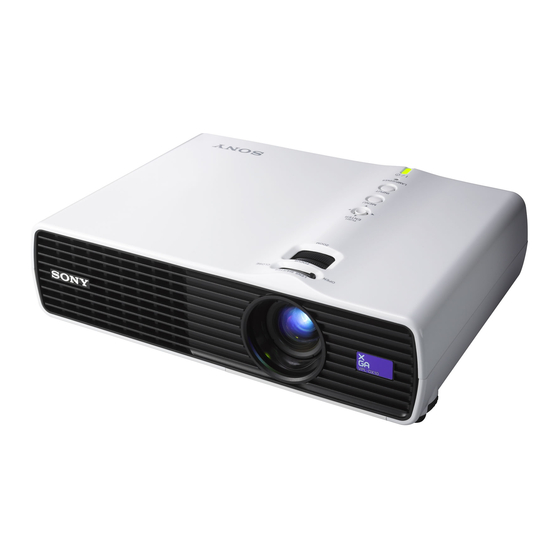
Sony VPL-DX10 Operating Instructions Manual
Sony projector user manual
Hide thumbs
Also See for VPL-DX10:
- Quick reference manual (120 pages) ,
- Brochure & specs (4 pages) ,
- Quick reference manual (116 pages)
Table of Contents
Advertisement
Quick Links
Data
Projector
Operating Instructions
Before operating the unit, please read this manual thoroughly
and retain it for future reference.
VPL-DX10/DX11/DX15
Not all models are available in all countries and area. Please check
with your local Sony Authorized Dealer.
© 2009 Sony Corporation
4-128-127-12 (2)
Advertisement
Table of Contents

Related Manuals for Sony VPL-DX10


Summary of Contents for Sony VPL-DX10
-
Page 1: Operating Instructions
Before operating the unit, please read this manual thoroughly and retain it for future reference. VPL-DX10/DX11/DX15 Not all models are available in all countries and area. Please check with your local Sony Authorized Dealer. © 2009 Sony Corporation 4-128-127-12 (2) - Page 2 WARNING To reduce the risk of fire or electric shock, do not expose this apparatus to rain or moisture. To avoid electrical shock, do not open the cabinet. Refer servicing to qualified personnel only. WARNING THIS APPARATUS MUST BE EARTHED. WARNING When installing the unit, incorporate a readily accessible disconnect device in the...
- Page 3 For the customers in Canada This Class B digital apparatus complies with Canadian ICES-003. For the customers in Europe The manufacturer of this product is Sony Corporation, 1-7-1 Konan, Minato-ku, Tokyo, Japan. The Authorized Representative for EMC and product safety is Sony Deutschland GmbH, Hedelfinger Strasse 61, 70327 Stuttgart, Germany.
- Page 4 Danish direktiv 1999/5/EF. For yderligere information gå ind på følgende hjemmeside: http://www.compliance.sony.de/ Hierbij verklaart Sony Corporation dat het toestel VPL-DX15/Data Projector in overeenstemming is met de essentiële eisen en de andere relevante bepalingen Dutch van richtlijn 1999/5/EG. Nadere informatie kunt u vinden op: http:// www.compliance.sony.de/...
- Page 5 Dyrektywy 1999/5/WE. Szczególowe informacje znaleźć mozna pod następującym adresem URL: http:// www.compliance.sony.de/ Sony Corporation declara que este VPL-DX15/Data Projector está conforme os requisitos essenciais e outras disposições da Directiva 1999/5/CE. Para mais Portuguese informacoes, por favor consulte a seguinte URL: http://www.compliance.sony.de/...
- Page 6 Smernice Slovak 1999/5/ES. Podrobnosti získate na nasledovnej webovej adrese: http://www.compliance.sony.de/ Sony Corporation izjavlja, da je ta VPL-DX15/Data Projector v skladu z bistvenimi zahtevami in ostalimi relevantnimi določili direktive 1999/5/ES. Slovenian Za podrobnosti vas naprošamo, če pogledate na URL: http://www.compliance.sony.de/...
- Page 7 For the customers in Norway Use of this radio equipment is not allowed in the geographical area within a radius of 20 km from the centre of Ny-Ålesund, Svalbard. For kundene i Norge Det er ikke tillatt å bruke dette radioutstyret innen en radius på...
-
Page 8: Table Of Contents
Table of Contents Precautions ... 10 Notes on Installation and Usage ... 11 Unsuitable Installation ... 11 Usage in High Altitude ... 12 Unsuitable Conditions ... 13 Overview About the Supplied Manuals ... 14 Included Attachments ... 15 Location and Function of Controls (Main Unit) ... - Page 9 Using the Network Function (VPL-DX15 only) ...41 Projecting the File in the USB Memory Directly (VPL-DX15 only) ...42 Adjustments and Settings Using a Menu Using a MENU ...43 The Picture Menu ...45 The Screen Menu ...47 About the Preset Memory No..49 The Setup Menu ...50 The Function Menu ...52 The Installation Menu ...54...
-
Page 10: Precautions
• Check that the operating voltage of your unit is identical with the voltage of your local power supply. If voltage adaptation is required, consult with qualified Sony personnel. • Should any liquid or solid object fall into the cabinet, unplug the unit and have it checked by qualified Sony personnel before operating it further. -
Page 11: Notes On Installation And Usage
• If you rub on the cabinet with a stained cloth, the cabinet may be scratched. • If the cabinet is in contact with a rubber or vinyl resin product for a long period of time, the finish of the cabinet may deteriorate or the coating may come off. -
Page 12: Usage In High Altitude
Subject to direct cool or warm air from an air-conditioner Installing in such a location may cause malfunction of the unit due to moisture condensation or rise in temperature. Near a heat or smoke sensor Malfunction of the sensor may be caused. Very dusty, extremely smoky Avoid installing the unit in a very dusty or extremely smoky environment. -
Page 13: Unsuitable Conditions
Unsuitable Conditions Do not use the unit under the following conditions. Do not topple the unit Avoid using as the unit topples over on its side. It may cause malfunction. Do not tilt right/left Avoid using as the unit tilts right or left more than 20 degrees. -
Page 14: About The Supplied Manuals
Instructions stored on the CD-ROM. About the Supplied Manuals This manual contains explanations for the VPL-DX10, VPL-DX11 and VPL-DX15 together. Be aware that the VPL-DX15 is mainly used for explanation of the display, and there may be an item that is not... -
Page 15: Included Attachments
Main unit (projector) and the following attachments. Check them before use. Main unit (projector) (1) RM-PJ6 Remote Commander (1) HD D-sub 15 pin cable (2 m) (1) (1-791- 992-51/Sony) Carrying case (1) CR2025 Lithium battery (1) (installed in the Remote Commander) AC power cord (1) -
Page 16: Location And Function Of Controls (Main Unit)
Location and Function of Controls (Main Unit) Top/Front/Side Rear/Side/Bottom a Zoom ring Adjusts the picture size. Location and Function of Controls (Main Unit) b Focus ring Adjusts the picture focus. -
Page 17: Control Panel
c Lens shutter lever If you operate the Lens shutter lever manually, the image is interrupted. In this case, the video signal is not projected to the screen. d Adjusters (front pad) Use the adjusters for minor tilt adjustment of the projected picture. For details, see “Using the adjuster”... -
Page 18: Control Panel
Control Panel PUSH ENTER MENU INPUT LAMP/COVER Top of projector a PUSH ENTER/v/V/b/B (Arrow) keys Used to enter the settings of items in the menu system, select a menu, or make various adjustments. b MENU key Displays the on-screen menu. Press again to clear the menu. -
Page 19: Connector Panel
Connector Panel Rear (network) connector (RJ-45) (VPL-DX15 only) Connects to the LAN cable when the network function is in use. CAUTION For safety, do not connect the connector for peripheral device wiring that might have excessive voltage to this port. (USB) connector (type A) (VPL-DX15 only) Uses to view files saved on media with... -
Page 20: Remote Commander
Remote Commander The keys that have the same names as those on the control panel function identically. INPUT NETWORK USB MENU ENTER RESET KEYSTONE AUTO FOCUS LENS /TILT D ZOOM VOLUME FREEZE a NETWORK key One press of this key starts the network function. - Page 21 For details, see “To Freeze the Image Projected (Freeze)” on page 37. Before using the Remote Commander Pull out the clear film from the lithium battery holder. To replace a battery Pull out the battery cover by a thin stick inserting to a hole, as shown the illustration.
-
Page 22: Projecting The Picture
B Projecting the Picture Installing the Projector This unit can be operated on a floor or desktop (floor installation), but also can be suspended from a ceiling with a dedicated mounting device (ceiling installation). For details, see “Installing the Projector and Installation Diagram”... -
Page 23: Connecting A Computer
Connecting a Computer This section describes how to connect the projector to a computer. For more information, refer to the computer’s instruction manual. To connect a computer Rear to AUDIO to INPUT A connector connector to audio to monitor output output Computer A Stereo audio connecting cable (not supplied) -
Page 24: Connecting A Vcr
Connecting a VCR This section describes how to connect the projector to a VCR. For more information, refer to the instruction manuals of the equipment you are connecting. To connect to a video output connector Rear to VIDEO connector S VIDEO connector to S video... -
Page 25: Connecting To A Network (Vpl-Dx15 Only)
Connecting to a Network (VPL-DX15 only) To see how to connect to a network, refer to “Operating Instructions for Network/USB File Viewer” included on the supplied CD- ROM. Connecting a USB memory (VPL-DX15 only) To see how to connect a USB memory, refer to “Operating Instructions for Network/USB File Viewer”... - Page 26 Focus ring. Press the INPUT key to select the input source. Each time you press the key, the input signal switches as follows: Input signal indicator VPL-DX10/DX11 Input-A VPL-DX15 Input-A S-Video Input signal indicator Shows the selected input channel.
- Page 27 To input from Press INPUT to display Video equipment Video connected to the VIDEO input connector Video equipment S-Video connected to the S VIDEO input connector Computer connected to a Network LAN to use the network function USB memory connected to the USB connector When the selected input is a computer signal, APA (Auto Pixel Alignment)
-
Page 28: Turning Off The Power
Turning Off the Power Press the ?/1 key. “POWER OFF? Please press ?/1 key again.” appears to confirm that you want to turn off the power. Note The message disappears if you press any key other than the ?/1 key, or if you do not press any key for five seconds. -
Page 29: Convenient Functions
B Convenient Functions Selecting the Menu Language You can select one of seventeen languages for displaying the menu and other on-screen displays. The factory setting is English. To change the menu language, proceed as follows: 4,5,6 to a wall outlet INPUT NETWORK USB MENU... -
Page 30: Resetting All Setting Values
Press the v or V key to select “Language,” then press the ENTER key. Press the v/V/b/B key to select a language, then press the ENTER key. The menu changes to the selected language. To clear the menu Press the MENU key. The menu also disappears automatically if a key is not pressed for one minute. -
Page 31: To Return The Value Of An Adjusted Item To Default
Press the v/V key to select the Picture menu then press the B or ENTER key. Select “Reset” with the v/V key from the Picture menu then press the ENTER key. For details, see to page 45. After the next window has appeared, select “Yes”, using the b/B key, then press the ENTER key. -
Page 32: To Change From The Menu
The menu automatically goes off in approximately 5 seconds after operation. To Change from the Menu INPUT NETWORK USB MENU ENTER RESET KEYSTONE AUTO FOCUS LENS /TILT PIC MUTING D ZOOM VOLUME FREEZE AUDIO MUTING Press the MENU key. The menu appears. Correcting the Trapezoidal Distortion Automatically (Auto V Keystone Correction) Press the v/V key to select the Installation setting menu then press... -
Page 33: Switching Off Smoothly After Presentation (Off & Go)
Switching off Smoothly after Presentation (Off & You can disconnect the power cord immediately after turning off the unit. So you can move it readily if necessary. Notes • Turn off the projector according to the procedure explained in “Turning Off the Power”... - Page 34 2,3,4,5 INPUT NETWORK USB MENU 2,3, ENTER RESET KEYSTONE AUTO FOCUS LENS /TILT PIC MUTING D ZOOM VOLUME FREEZE AUDIO MUTING To use the security lock Press the MENU key. The menu appears. Press the v/V key to select the Function menu then press the B or ENTER key.
-
Page 35: Panel Key Lock
Enter the password. Enter the password that was set. Note If you call Sony personnel because you have forgotten the password, you will be asked to verify the projector’s serial number and your identity. (This process may differ in other countries/regions.) Once your identity has been... -
Page 36: Security Lock (Mechanical)
To cancel Panel Key Lock with the key on the projector Press and hold the MENU key for approximately 10 seconds while the power is on. Locking is canceled, and the function is set to “Off”. Security Lock (Mechanical) A commercially available antitheft cable such as one (manufactured by Kensington) can be attached to the antitheft lock. -
Page 37: To Freeze The Image Projected (Freeze)
ratio is displayed on the screen for a few seconds. By pressing the + key repeatedly, the image size (ratio of enlargement: max. 4 times) increases. Use the arrow key (v/V/b/B) to scroll the enlarged image. To return the image to its original size Press the D ZOOM –... -
Page 38: Picture Muting (Recommended For Use Suspend From A Ceiling)
Picture Muting (Recommended for Use Suspend from a Ceiling) INPUT NETWORK USB MENU ENTER RESET KEYSTONE AUTO FOCUS LENS /TILT PIC MUTING D ZOOM VOLUME FREEZE AUDIO MUTING The projected image is muted by pressing the PIC MUTING key on the Remote Commander. -
Page 39: Adjusting The Image Quality (Smart Apa)
Adjusting the Image Quality (Smart APA) APA (Auto Pixel Alignment) automatically adjusts the picture to be clear when a computer signal is input. “Phase”, “Pitch”, and “Shift” on the Screen menu are automatically adjusted. When “Smart APA” is set to “On”, this function works whenever a signal is input. -
Page 40: Setting The Picture Mode
Setting the Picture Mode The Picture Mode can be set to suit to the projected image. The setting value is registered for each mode. Note Adjustable or selectable items are limited in accordance with the types of the input signal on some menus. -
Page 41: Starting The Network Function Or The Usb File Viewer With One Keypress (Vpl-Dx15 Only)
Starting the Network Function or the USB File Viewer With One Keypress (VPL-DX15 only) The network function or the USB file viewer can be easily started by pressing the NETWORK or USB key on the Remote Commander. INPUT NETWORK USB INPUT MENU NETWORK... -
Page 42: Projecting The File In The Usb Memory Directly (Vpl-Dx15 Only)
Projecting the File in the USB Memory Directly (VPL-DX15 only) The file in the USB memory connected to (USB) port can be displayed directly on the projected display. For details, refer to “Operating Instructions for Network/USB File Viewer” included on the supplied CD-ROM. -
Page 43: Using A Menu
To change the on-screen menu language, see “Selecting the Menu Language” on page 29. This manual contains explanations for the VPL-DX10/DX11 and VPL-DX15 all together. Be aware that the VPL-DX15 is mainly used for explanation of the display, and there may be an item that is not displayed due to the model. - Page 44 Pop-up menu Setting items Setting menu Adjustment menu Next menu window Setting items Make the setting or adjustment of an item. • When changing the adjustment level: To increase the number, press the v or B key. To decrease the number, press the V or b key.
-
Page 45: The Picture Menu
The Picture Menu The Picture menu is used for adjusting the picture. Items that can be adjusted or set depend on the kind of input signals. For details, see “Input signals and adjustable/setting items” on page 56. When the video signal is input Setting items Functions Picture Mode... - Page 46 Setting items Functions Color Temp. Adjusts the color temperature. • High: Gives white colors a blue tint. • Low: Gives white colors a red tint. Sharpness Adjusts the sharpness of the image. The higher the setting, the sharper the picture. The lower the setting, the softer the picture, thus reducing the noise.
-
Page 47: The Screen Menu
The Screen Menu The Screen menu is used to adjust the input signal. You can also adjust the aspect ratio of the picture. Items that can be adjusted or set depend on the kind of input signals. For details, see “Input signals and adjustable/setting items” on page 56. Aspect Full 1 Adjust Signal... - Page 48 Setting items Functions Adjust Signal APA (Auto Executes the APA when you press the ENTER key. Pixel The APA function adjusts PHASE, PITCH, and SHIFT Alignment) automatically to suit to the input signal. The APA function can be used only for a computer signal.
-
Page 49: About The Preset Memory No
About the Preset Memory No. This projector has 46 types (VPL-DX15)/45 types (VPL-DX10/DX11) of preset data for input signals (the preset memory). When a preset signal is input, the projector automatically detects the signal type and recalls the data for the signal from the preset memory to adjust it to an optimum picture. -
Page 50: The Setup Menu
The Setup Menu The Setup menu is used for changing the settings of the projector. Setting items Functions Status • On: Displays on-screen information (menu, etc.) on the projection screen. • Off: Turns off the on-screen displays except for the menus, message when turning off the power, and warning messages. - Page 51 Setting items Functions Volume Adjusts the volume. Input-A Signal Sel. Selects the type of signal input from the equipment connected to the INPUT A connector. Selects the type of signal input from the equipment by selecting “Input-A” with the INPUT key. •...
-
Page 52: The Function Menu
The Function Menu The Function menu is used for changing the settings of the various functions of the projector. Setting items Functions Smart APA Executes APA automatically when a computer signal is input. For details, see “Adjusting the Image Quality (Smart APA)”... - Page 53 Setting items Functions Security Lock Sets whether to require the user to input a password when turning on the power. • On: For Security Lock to be active For details, see “Using the Security Function” on page 33. • Off: For Security Lock to be inactive Notes •...
-
Page 54: The Installation Menu
The Installation Menu The Installation menu is used for changing the settings of the projector. Auto Lamp Mode Standard Direct Power ON Setting items Functions V Keystone Sets Auto V Keystone correction. • Auto: For Auto V Keystone correction to be active •... -
Page 55: The Network Setting Menu (Vpl-Dx15 Only)
The Network Setting Menu (VPL-DX15 only) The Network Setting menu is used to set the network of this unit. To Network Setting Switches to Network Setting window when you press [ENTER]. Setting items Functions Network Setting The network setting window appears. For details, refer to “Operating Instructions For Network/USB File Viewer”... -
Page 56: The Information Menu
The Information Menu The Information menu displays the model name, serial number, the horizontal and vertical frequencies of the input signal and the cumulated hours of usage of the lamp. VPL-DX15 Setting items Functions Model Name Displays the model name. Serial No. -
Page 57: Screen Menu
Item Video/ S-Video Color Temp. Sharpness Black Level Adj. Gamma Mode – z : Adjustable/can be set – : Not adjustable/cannot be set : Except B & W : NTSC and NTSC only, except B & W 3.58 4.43 : Adjustable only when the “Picture Mode” is set to “Dynamic” or “Standard” : Preset memory No. -
Page 58: Replacing The Lamp
Notes • If the lamp breaks, contact qualified Sony personnel. • Pull out the lamp by holding the handle. If you touch the lamp, you may be burned or injured. - Page 59 Caution Do not put your hands into the lamp replacement slot, and do not allow any liquid or other objects into the slot to avoid electrical shock or fire. Insert the new lamp all the way in until it is securely in place (a). Tighten the two screws (b).
-
Page 60: Cleaning The Air Filter
For details on new air filter, consult with qualified Sony personnel. • Be sure to attach the air filter cover firmly; it may cause a problem if the air filter cover is not installed properly. -
Page 61: Troubleshooting
B Others Troubleshooting If the projector appears to be operating erratically, try to diagnose and correct the problem using the following instructions. If the problem persists, consult with qualified Sony personnel. Power Symptom Cause and Remedy The power is not turned on. • The AC power cable is not connected. - Page 62 Symptom The picture is not clear. The image extends beyond the screen. The picture flickers. The aspect ratio of the display is not right. Sound Symptom No sound. Remote Commander Symptom The Remote Commander does not work. Troubleshooting Cause and Remedy •...
- Page 63 Others Symptom Cause and Remedy The control panel keys do The control panel keys are locked. c Unlock the control panel keys (page 52). not function. The fan is noisy. • Lamp Mode is set to “High”. c When the Lamp Mode is set to “High”, the sound from the fan •...
- Page 64 • The interior of the unit reached a high temperature, and the temperature fuse burned out. c Consult with qualified Sony personnel. • The internal temperature is unusually high. c Check to see that nothing is blocking the ventilation holes.
-
Page 65: Messages List
Messages List Warning Messages Use the list below to check the meaning of the messages displayed on the screen. Message Meaning and Remedy High temp.! Lamp off in 1 The internal temperature is too high. min. c Turn off the power. c Check to see that nothing is blocking the ventilation holes. -
Page 66: Specifications
Approx. 295 × 74 × 204 mm × 8 × 2 inches) (w/h/d) (without projecting parts) VPL-DX10/DX11: Approx. 2.1 kg (4 lb 11 oz) VPL-DX15: Approx. 2.2 kg (4 lb 14 oz) AC 100 V to 240 V, 3.6 to 1.6 A, 50/60 Hz VPL-DX15: Max. -
Page 67: Optional Accessories
Note Always verify that the unit is operating properly before use. SONY WILL NOT BE LIABLE FOR DAMAGES OF ANY KIND INCLUDING, BUT NOT LIMITED TO, COMPENSATION OR REIMBURSEMENT ON ACCOUNT OF THE... - Page 68 Preset signals Memory Preset signal Video 60 Hz Video 50 Hz 480/60i 575/50i 480/60p 575/50p 1080/60i 1080/50i 720/60p 720/50p 640 × 350 640 × 400 640 × 480 800 × 600 832 × 624 1024 × 768 Specifications fH (kHz) fV (Hz) Video 60 Hz 15.734 Video 50 Hz...
- Page 69 Memory Preset signal 1152 × 864 VESA 70 VESA 75 VESA 85 1152 × 900 SUN LO 1280 × 960 VESA 60 VESA 75 1280 × 1024 VESA 60 SXGA VESA75 1400 × 1050 SXGA+ 1280 × 768 1280 × 768/60 1280 ×...
-
Page 70: Installing The Projector And Installation Diagram
Installing the Projector and Installation Diagram Floor Installation (Front Projection) Wall This section describes the examples of installing the projector on a desk, etc. See the chart on page 71 concerning the installation measurements. The alphabetical letters in the illustration indicate the distances below. a: distance between the screen and the foremost side in cabinet b: distance between the floor and the center of the lens c: distance between the floor and the bottom of the adjusters of the projector... - Page 71 1160 1758 2356 1347 2037 2728 (107 x-203 x-305 x-406 (x-8) (x-12) (x-16) x-252 x-354 x-455 (x-9 (x-13 (x-17 a (N) = {(PS × 18.46/0.6299)–34.7} × 1.02 a (M) = {(PS × 22.19/0.6299)–34.6} × 0.98 b = x–(PS/0.6299 × 3.2) c = x–(PS/0.6299 ×...
-
Page 72: Ceiling Installation (Front Projection)
When installing the projector on the ceiling, use a Projector Suspension Support recommended by Sony. For ceiling installation, ask for qualified Sony personnel. See the chart on page 73 concerning the installation measurements. The alphabetical letters in the illustrations indicate the distances below. - Page 73 a’ N 1244 1842 2440 1431 2121 2812 (110 b + 240 b + 342 b + 443 (b+9 (b+13 (b+17 a’(N) = {(PS × 18.46/0.6299)–34.7} × 1.02+84 a’(M) = {(PS × 22.19/0.6299)–34.6} × 0.98+84 x = PS/0.6299 × 3.2+36.7 The alphabetical letters in the charts and calculation methods indicate the following.
-
Page 74: Dimensions
Dimensions Front 121 (4 Dimensions 295 (11 93 (3 Unit: mm (inches) Unit: mm (inches) - Page 75 Side 44 (1 4.8 ( 204 (8 Unit: mm (inches) Dimensions...
- Page 76 Rear (USB) connector (VPL-DX15 only) (Network) connector (VPL-DX15 only) Bottom Dimensions 295 (11 51.4 (2 93 (3 102.7 (4 73.4 (2 16.8 ( Unit: mm (inches) Unit: mm (inches)
-
Page 77: Index
Index Adjust Signal APA ...48 Phase ...48 Pitch ...48 Shift ...48 Adjuster ...26 Aspect ...47 Audio muting ...38 Auto Input Search ...52 Background ...52 Black Level Adj..46 Brightness ...45 Cleaning the air filter ...60 Color ...45 Color System ...51 Color Temp. - Page 78 Dynamic ...45 Presentation ...45 Standard ...45 Picture muting ...38 Pin assignment ...67 Power turn on ...25 Power Saving Mode ...50 Precautions ...10 Preset Memory No..69 Preset signals ...68 Remote Commander ...20 Replacing the lamp ...58 Reset ...45 Screen size ...66 Security lock (Mechanical) ...17, 36 Security Lock (Password) ...33, 53 Sharpness ...46...
- Page 79 Sony Corporation...