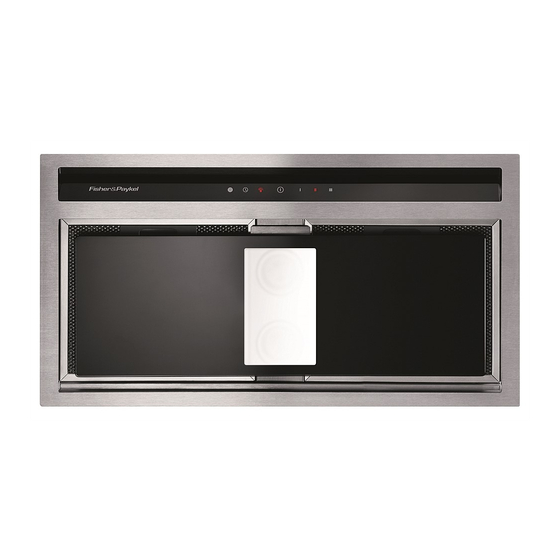
Fisher & Paykel HP60IDCHX2 Installation Instructions Manual
Hide thumbs
Also See for HP60IDCHX2:
- Installation instructions and user manual (16 pages) ,
- Installation instructions & user manual (28 pages) ,
- Installation manual/user manual (24 pages)
Advertisement
Quick Links
Installation instructions
Please read and follow the
'Safety and
warnings' and 'installation instructions' sections carefully before using your
rangehood.
150mm ducting adapter
with non return flap (1)
Installation instructions
Rangehood (1)
User guide manual (1)
13mm screw (2)
125mm ducting adapter (1)
https://producthelp.fisherpaykel.com/nz/Cook/Rangehoods/Built-in_Integrated/HP60IDCHX2/User_Guide_HP60IDCHX2/03_Installation_in
Updated: Sat, 17 Aug 2019 04:02:22 GMT
Powered by
1
Advertisement

Related Manuals for Fisher & Paykel HP60IDCHX2


Summary of Contents for Fisher & Paykel HP60IDCHX2
-
Page 1: Installation Instructions
‘installation instructions’ sections carefully before using your rangehood. 150mm ducting adapter with non return flap (1) Installation instructions Rangehood (1) User guide manual (1) 13mm screw (2) 125mm ducting adapter (1) https://producthelp.fisherpaykel.com/nz/Cook/Rangehoods/Built-in_Integrated/HP60IDCHX2/User_Guide_HP60IDCHX2/03_Installation_in Updated: Sat, 17 Aug 2019 04:02:22 GMT Powered by... -
Page 2: Product And Cabinetry Cutout Dimensions
Product and cabinetry cutout dimensions Product Dimensions HP60 HP90 350 (395) 315 (360) A. Overall height of product (with ducting adapter) https://producthelp.fisherpaykel.com/nz/Cook/Rangehoods/Built-in_Integrated/HP60IDCHX2/User_Guide_HP60IDCHX2/03_Installation_in Updated: Sat, 17 Aug 2019 04:02:22 GMT Powered by... - Page 3 O. Overall width of cutout Overall depth of cutout Base of brackets/clips to min. 15 – max. min. 15 – max. bottom of chassis Actual product dimensions may vary by ± 2 mm. Please read the entire instructions before installing the rangehood. https://producthelp.fisherpaykel.com/nz/Cook/Rangehoods/Built-in_Integrated/HP60IDCHX2/User_Guide_HP60IDCHX2/03_Installation_in Updated: Sat, 17 Aug 2019 04:02:22 GMT Powered by...
-
Page 4: Height Of Rangehood
Rangehood installation height above the cooktop is the user’s preference. Lower installation heights will improve the efficiency of capturing cooking odours, grease, and smoke. This rangehood must be installed between the minimum and maximum dimensions indicated in the table above. Venting options https://producthelp.fisherpaykel.com/nz/Cook/Rangehoods/Built-in_Integrated/HP60IDCHX2/User_Guide_HP60IDCHX2/03_Installation_in Updated: Sat, 17 Aug 2019 04:02:22 GMT Powered by... -
Page 5: Installation
Wear gloves to protect against sharp edges. The manufacturer is not liable for any damage caused by not following these instructions. Installation 1. Prepare for installation. Before installing your rangehood: • Please read the instructions carefully. https://producthelp.fisherpaykel.com/nz/Cook/Rangehoods/Built-in_Integrated/HP60IDCHX2/User_Guide_HP60IDCHX2/03_Installation_in Updated: Sat, 17 Aug 2019 04:02:22 GMT Powered by... - Page 6 2. Fit the 150 mm ducting adapter with non return flap to the rangehood using the screws supplied. 3. Provide an opening on the underside of the cupboard (see product and cabinetry cutout dimensions). 4. Remove the filters and face plate of the rangehood. https://producthelp.fisherpaykel.com/nz/Cook/Rangehoods/Built-in_Integrated/HP60IDCHX2/User_Guide_HP60IDCHX2/03_Installation_in Updated: Sat, 17 Aug 2019 04:02:22 GMT Powered by...
- Page 7 Updated: Sat, 17 Aug 2019 04:02:22 GMT Powered by...
- Page 8 5. Connect duct and plug rangehood in. 6. Lift the rangehood and fit through the opening of the cupboard till the spring loaded brackets / clips hold the product in place. https://producthelp.fisherpaykel.com/nz/Cook/Rangehoods/Built-in_Integrated/HP60IDCHX2/User_Guide_HP60IDCHX2/03_Installation_in Updated: Sat, 17 Aug 2019 04:02:22 GMT Powered by...
- Page 9 7. Secure rangehood while tightening the 4 brackets / clips. https://producthelp.fisherpaykel.com/nz/Cook/Rangehoods/Built-in_Integrated/HP60IDCHX2/User_Guide_HP60IDCHX2/03_Installation_in Updated: Sat, 17 Aug 2019 04:02:22 GMT Powered by...