Gigaset N670 IP PRO Installation, Configuration And Operation
Hide thumbs
Also See for N670 IP PRO:
- Installation, configuration and operation (120 pages) ,
- Instruction manual (104 pages)
Table of Contents
Advertisement
Advertisement
Table of Contents

Related Manuals for Gigaset N670 IP PRO


Summary of Contents for Gigaset N670 IP PRO
- Page 1 Gigaset N670 IP PRO Installation, configuration and operation...
-
Page 2: Table Of Contents
N670 IP PRO – Introduction ........ - Page 3 Using a handset connected to an N670 IP PRO base .......
-
Page 4: N670 Ip Pro - Introduction
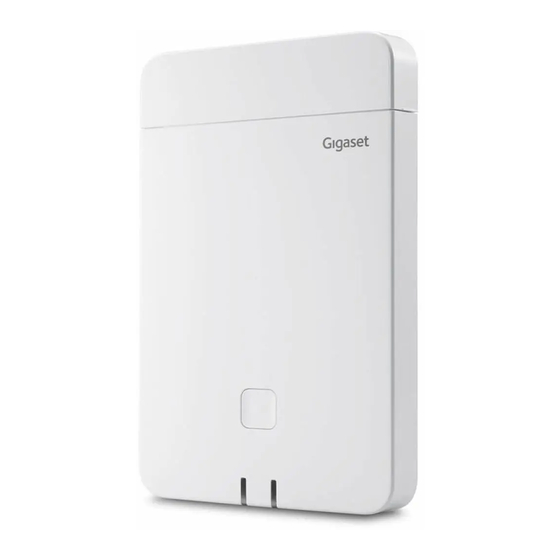
N670 IP PRO – Introduction N670 IP PRO – Introduction N670 IP PRO is a DECT base station for connecting to a VoIP PBX. It combines the options of IP telephony with the use of DECT telephony. The following illustration shows the way the N670 IP PRO is embedded in the IP telephone envi-... - Page 5 Enables central management of telephone connections, directories, network mailboxes N670 IP PRO is a single cell variant of the N870 IP PRO Multicell System. In future it will be able to upgrade the device to a multicell component by license key.
-
Page 6: Overview
N670 IP PRO – Introduction Overview Front Device button ¢ Reset the device page 10 LED displays Operation status of the device ¢ page 10 LAN and power cable slot ¢ Connecting the device page 7 Rear Wall mounting slots ¢... -
Page 7: First Steps
Connecting to the LAN You can connect the N670 IP PRO to your local network via a router, switch, or hub. A VoIP PBX is required for Internet telephony. This must be accessible via the local network and must have network access (to the Internet and/or the analogue or ISDN telephone network), because base stations do not offer any NAT-traversal support. -
Page 8: Connecting The Power Supply
System-related/device-specific passwords Connecting the power supply Your N670 IP PRO is supplied with sufficient power via PoE (Power over Ethernet) if the device is connected to an Ethernet switch with PoE functionality (PoE class IEEE802.3af). In this case, you do not need to connect the device to the mains power... -
Page 9: Wall Mounting
First steps Wall mounting N670 IP PRO is intended for wall mounting. After connecting the LAN cable you can place it to the destined location. max. ø 8 mm max. 3 mm max. ø 4 mm Fix the device to the wall with two screws: ¤... -
Page 10: Operation Hints
Operation hints Operation hints Light emitting diodes (LED) The LEDs on the front side show different operational states. The LEDs can have three different colours (red, blue, green) or can be off. LED 1 (left) LED 2 (right) Description 0.5 s 0.5 s 0.5 s 0.5 s... -
Page 11: Configuring The System
Configuring the system Configuring the system System settings are made via the web configurator of the N670 IP PRO and cannot be changed using the handsets. This applies in particular for: • Registering and de-registering the handset at the telephone system, handset name. - Page 12 Configuring the system IP address of the device If the IP address is assigned dynamically via your local network's DHCP server, you can find the current IP address on the DHCP server in the list of registered DHCP clients. The MAC address can be found on the rear of the device.
-
Page 13: Help Function
Configuring the system Logging off You will find the log off function at the top right of each web page, below the product name. ¤ Click on Logout The session is automatically terminated after ten minutes of inactivity. Always use the logout function to end the connection to the web configurator. If, for example, you close the web browser without logging off beforehand, access to the web configurator may be blocked for a few minutes. - Page 14 Configuring the system Applying/discarding changes Applying changes ¤ Select the Set button as soon as you have completed your change on a page . . . the new settings are saved and activated on the DECT manager configuration. Changes that have not been saved are lost if you move to another web page or the connection to the web configurator is lost, e.g., due to exceeding the time limit ¢...
-
Page 15: Web Configurator Menu Overview
Configuring the system Web configurator menu overview Settings Network IP/LAN page 16 Provider or PBX profiles page 19 Mobile devices Administration page 25 Registration Centre page 33 Telephony VoIP page 34 Audio page 35 Call settings page 36 Online directories Corporate page 39 page 43... -
Page 16: Network Administration
Network administration Network administration IP and VLAN settings This page is used to integrate the device into your company‘s local network. It is only available for the user role admin. ¤ Settings Network IP/LAN If you change the IP address of the device or an error occurs when you are changing the IP settings, the connection to the web User Interface may be lost. - Page 17 Network administration Subnet mask The Subnet mask specifies how many parts of an IP address the network prefix must comprise. For example, 255.255.255.0 means that the first three parts of an IP address must be the same for all devices in the network, while the last part is specific to each device. In subnet mask 255.255.0.0, only the first two parts are reserved for the network prefix.
- Page 18 Network administration VLAN Details in this area are only required if you connect your phone system to a local network that is divided into virtual subnetworks (VLAN – Virtual Local Area Network). In a tagged VLAN, data packets are assigned to the individual subnetworks via tags (markings) that consist of a VLAN identifier and the VLAN priority, amongst others.
-
Page 19: Provider And Pbx Profiles
Provider and PBX profiles Provider and PBX profiles You can use up to ten different VoIP PBX or VoIP provider profiles, e.g. • your company's VoIP PBX • and/or public providers from which you have requested VoIP services. This page allows you to create a list of systems providing VoIP connections and other services for your phones. - Page 20 Provider and PBX profiles Proxy server address The SIP proxy is your VoIP provider's gateway server and the first SIP server, where the device should send SIP requests and expects to receive requests. ¤ Enter the IP address or the (fully qualified) DNS name of your SIP proxy server (max. 74 char- acters, 0 - 9, a - z, A - Z, -, ., _).
- Page 21 Provider and PBX profiles Redundancy settings Redundancy - DNS query VoIP providers provide SIP server redundancy for load balancing and service reliability. SIP servers can be identified by DNS using different queries: Records just the specified IP addresses and the related port numbers. SRV + A Finds an available server port for the specified proxy and registration server.
- Page 22 Provider and PBX profiles Outbound server address This is the address, where the device should send all SIP requests to and where (in case of successful registration) it expects to receive requests from. ¤ Enter the (fully qualified) DNS name or the IP address of your provider's outbound proxy. Example: 10.100.0.45 or sip.domain.net or sipproxy01.domain.net If the Outbound server address field is empty, the system behaves independently of the selected mode, as with Outbound proxy mode = Never.
- Page 23 Provider and PBX profiles Send settings of DTMF transmission ¤ Make the required settings for sending DTMF signals: Audio or RFC 2833 DTMF signals are to be transmitted acoustically (in voice packets). SIP Info DTMF signals are to be transmitted as code. Settings for codecs The voice quality of VoIP calls is mainly determined by the codec used for the transmission and the available bandwidth of your network connection.
- Page 24 Provider and PBX profiles RTP Packetisation Time (ptime) Length of time in milliseconds represented by the audio data in one packet. ¤ Select the size of RTP packets to send. Select between 10 / 20 / 30 ms. Signalling options for 'Hold' in Session Description Protocol (SDP) Call hold means that a user requests to put an active call on hold.
-
Page 25: Mobile Devices
Display name from the SIP account that is assigned to the handset. The display name indicates the originator of the request when the user initiates a call. Location Name of the DECT manager the handset belongs to (for N670 IP PRO always local). DECT DECT registration state of the handset:... - Page 26 Mobile devices Actions Adding a handset to the list ¤ Click on Add . . . the mobile devices data page is opened ( page 27). Copying handset data for another configuration ¤ Select the check box next to the handset whose settings you want to copy. Click on Copy .
-
Page 27: Registering Handsets
Mobile devices Sorting the list: ¤ Click on the arrows next to the column header to sort the table on the column content in ascending or descending order. Displaying/ hiding columns: ¤ Click on the View option menu on the right Select the columns you want to be displayed in the table ( = displayed/hidden). - Page 28 Mobile devices Parameters IPUI (International Portable User Identity) Unique identifier of a handset within the DECT network. If you edit an existing handset registration entry, the IPUI is shown and cannot be changed. For a new entry: ¤ Enter the IPUI of the handset that should be allowed to register with the DECT network in the text field.
- Page 29 Mobile devices Settings for the handset When registering a handset you can define important settings and assign functions at the same time. Personal provider data Configure the VoIP account for the handset. If the handset is successfully registered, will be shown in the SIP column in the Mobile devices list.
- Page 30 Mobile devices Directory for INT key If any online directory is available and configured the user can open it by pressing the INT key (left on the handset’s control key). ¤ Choose from the list which directory is opened with the INT key. Automatic look-up ¤...
- Page 31 Mobile devices Call manager ¤ From the Accept calls directly via Call Manager option menu select whether calls that are transferred via the PBX call manager are to be accepted directly via Headset, via Handsfree or not at all (No). Missed calls and alarms You can define if missed and accepted calls should be counted and if new messages of specific types should be indicated via the MWI LED on the handset’s message key.
- Page 32 Mobile devices Use SIP credentials If activated, the credentials for the user’s SIP account (Authentication name and Authentication password are used. Alternatively, define the following credentials. Username ¤ Enter a user name for the user access to the menu (max. 22 characters). Password ¤...
-
Page 33: Handset Registration Centre
Registered and Not registered. Additionally, the page shows the total amount of DECT managers (for N670 IP PRO always 1) and if the DECT manager is currently ready to register handsets. The DECT manager is set in registra- tion status Registering when a registration process is started automatically according to the time settings on this page or when registering handsets manually. -
Page 34: Telephony Settings
Telephony settings Telephony settings General VoIP settings This page allows you to make some general settings for the VoIP connections. It is only available for the user role admin. ¤ Settings Telephony VoIP SIP port ¤ Enter the SIP port used for VoIP connections. Range: 1-65535;... -
Page 35: Audio Quality
Telephony settings Security settings The phone system supports the establishment of secure voice connections over the internet via TLS certificates. Thereby, public and private keys are used to encrypt and decrypt the messages that are exchanged between SIP entities. The public key is contained within the certificate of an IP entity and is available for everyone. -
Page 36: Call Settings
Telephony settings Call settings On this page you can make advanced settings for VoIP connections. It is only available for the user role admin. ¤ Settings Telephony Call settings Call transfer Participants can transfer a call to another participant as long as the PBX/provider supports this function. -
Page 37: Tone Selection
Telephony settings Area Codes If you use VoIP to make a call to the fixed line, you may also have to dial the area code for local calls (depending on the provider). You can set your telephone system so that the access code is automatically predialled when any VoIP call is made in the same local area, and also for national long-distance calls. -
Page 38: Xsi Services
Soft services to perform telephony-related actions and to be notified about telephony events. N670 IP PRO enables the use of XSI services to provide the user with XSI directories and call lists. If you want to use XSI services, you need to enable the services and enter the XSI server address on this page. -
Page 39: Online Directories
Online directories Online directories N670 IP PRO allows you to set up up to ten corporate directories in LDAP format, a public and a corporate directory in XML format, different XSI directories, as well as a central directory and make them available to the registered handsets. - Page 40 Online directories LDAP Search base (BaseDN) ¤ The LDAP database is hierarchical in design. With the LDAP Search base (BaseDN) param- eter, stipulate in which area the search should begin. Default: 0, the search starts at the upper area of the LDAP database. User access data If you want to define access data that have to be used by all users: ¤...
- Page 41 Online directories Examples: AND operation: (& (givenName=%) (mail=%)) Searches for entries in which the first name and mail address begin with the characters entered by the user. OR operation: (| (displayName=%) (sn=%)) Searches for entries in which the display name or surname begins with the characters entered by the user.
- Page 42 Online directories Display format In the Display format field you can stipulate how the search result is to be displayed on the handset. ¤ Enter combinations of different name and number attributes and special characters. You can select common formats from the attributes that are listed in the Configuration of directory items section of the page.
-
Page 43: Online Directories In Xml Format
Online directories Field of a directory entry Attribute name in the LDAP database City I, postalAddress postalCode Country friendlyCountryName, c Additional attribute user-defined ¤ Mark the check box Additional attribute can be dialled, if an additional attribute is defined and it is a phone number. A detailed configuration example can be found in section "LDAP directory –... -
Page 44: Online Directories - Xsi
Online directories Online directories – XSI If one or more online directories are provided via an BroadSoft XSI service, use this page to set up the server access, enable the directories and assign directory names that are to be displayed on the users‘... - Page 45 Online directories Enable list mode ¤ Define what should be initially shown, when the user opens the phone book. Activated: A list of all entries of the phone book is shown. Not activated: An editor is opened first that allows the user to select a specific search area within the phone book and thereby to reduce the number of entries.
-
Page 46: Online Services
Online services Online services Additional functions as Info services, PBX control, and customer specific RAP (XHTML) applica- tions can be made available to the user via the handset menu Info Centre . For this purpose four additional menu entries can be defined that will be inserted into the handset user interface. The additional functions must be available as well formatted XHTML pages. -
Page 47: System Settings
System settings System settings Web configurator access rights On this page you define the access rights for the web configurator user interface. It is available for both the user role admin and user. The user is only allowed to change the own password. - Page 48 System settings Activated if password is longer than 7 characters The CLI access is automatically enabled if you have entered a valid password that has more than seven characters and click on the Set button. = enabled; = disabled CLI password ¤...
-
Page 49: Provisioning And Configuration
VoIP phones support these features. However, for technical reasons auto-provisioning is not possible for all configuration parameters of the phone. Detailed information on how to establish a provisioning server and create provi- sioning profiles for Gigaset phones: wiki.gigasetpro.com ¤ Settings... -
Page 50: Security
System settings Security The page allows you to organise the certificates used for secure internet communication and to define the credentials for HTTP authentication. It is only available for the user role admin. ¤ Settings System Security Certificates The phone system supports the establishment of secure data connections on the Internet with the TLS security protocol (Transport Layer Security). -
Page 51: Date And Time
System settings Import local certificate You can make available further certificates to your phone system. The certificates must have been downloaded to your computer before. ¤ Click Browse... and select the local certificate file from your computer‘s file system click on Upload . -
Page 52: Firmware
System settings Date and time are synchronised system-wide on the base station and all handsets. It can take up to one hour until the manually changed time is visible on every handset. Synchronisation is carried out in the following cases: •... - Page 53 System settings Selecting the firmware update file ¤ In the URL to firmware file text field specify the URL of the configuration server where the firmware is located ¤ Click Browse... and select the firmware file from your computer‘s file system. Starting the firmware update ¤...
-
Page 54: Save And Restore
System settings Save and restore This page allows you to save and restore the system configuration. It is available for both the user role admin and user. The user is only allowed to save the settings but not to restore them. ¤... -
Page 55: Reboot And Reset
The roles base station + DECT manager are active. The network configuration is set to static IP. All in one is the default setting for Gigaset N670 IP PRO. All three components are active (Integrator + DECT manager + base station). -
Page 56: Dect Settings
System settings Resetting the device ¤ Click on the Reset to button to reset the device to factory condition according to the selec- tion made in Reset to device . . . a confirmation dialogue is opened confirm with The Save and restore page is opened allowing you to save the current configura- tion on your computer ( page 54). - Page 57 Due to different national regulations DECT units are required to use different frequency ranges to make them compatible with DECT systems in other areas. You can adapt the frequency range of the N670 IP PRO to the requirements of your region. DECT Radio band ¤...
-
Page 58: Diagnostics And Troubleshooting
• Number of DECT Managers with deviating Firmware Version • Base stations Number of active base stations (for N670 IP PRO always 1) • Number of pending base stations (for N670 IP PRO always 0) • Call limit for base station only •... -
Page 59: Base Station Events
DECT manager name indicates that there could be a situation which requires attention. Cluster Cluster number (for N670 IP PRO always 1), summary of the collected events ¤ Click on next to the Cluster entry to display the base station informa- tion. - Page 60 Diagnostics and troubleshooting Actions Exporting the information into a CSV file For further processing of the statistic data you can export the data into a file with CSV (Comma separated Value) format. ¤ Click on Export Select the location where the file should be stored using the system file selection dialogue.
-
Page 61: Incidents
Status Statistics Incidents Timestamp Date and time of the incident DECT Manager DECT manager affected (for N670 IP PRO always 1) Incident Type e.g. Crash, Reboot, Reset Info Detailed information, e.g., the component producing the incident Actions Downloading detailed information to a file To get detailed information about the circumstances causing the error, you can download the incident information to a file. -
Page 62: System Log And Snmp Manager
Enter the port number, where the Syslog server expects to receive requests. Range: 1-65535; Default: 514 Log level ¤ Mark/unmark the check boxes next to the log information that should be included/not included in the system log. The Use on all DECT Managers button is not relevant to N670 IP PRO. - Page 63 ¤ Enter the SNMP username and the SNMP password. The Use on all DECT Managers button is not relevant to N670 IP PRO. ¤ If the access data defined here should be used for all DECT managers, click on Use on all DECT Managers.
-
Page 64: Using A Handset Connected To An N670 Ip Pro Base
The N670 IP PRO uses a VoIP PBX or the services of a VoIP provider for Internet telephony. The availability of some phone functions depends on whether they are supported by the PBX/ provider and whether they have been enabled. -
Page 65: Accepting Calls
Using a handset connected to an N670 IP PRO base Dialling from the redial list The redial list contains the numbers last dialled with the handset. ¤ Briefly press the Talk key . . . the redial list is opened . -
Page 66: Conversation With Three Participants
Using a handset connected to an N670 IP PRO base Group pickup You can also accept incoming calls for the group. Group pickup must be activated and the call number or SIP URI of the group must be entered. This has to be configured for the handset via web configurator in the Group pick-up ¢... -
Page 67: Message Indication
Using a handset connected to an N670 IP PRO base Conference Speaking to both participants at the same time. ¤ During an external call, dial the number of a second participant (consultation call) or accept a waiting caller . . . then Initiate conference call: ¤... -
Page 68: Using Directories
The directories are displayed with the names specified in the web configurator. Example for handling a corporate directory on the handset page 76 If handsets are connected to an N670 IP PRO, it is not possible to transfer entries from the local directory to another handset. -
Page 69: Using The Network Mailbox
Using a handset connected to an N670 IP PRO base Using the network mailbox The network mailbox accepts incoming calls made via the corresponding line (corresponding VoIP phone number). Prerequisites In order to allow the user to listen voice messages stored one a network mailbox the following... -
Page 70: Ldap Directory - Configuration Example
LDAP directory – configuration example LDAP directory – configuration example To allow the entries of an LDAP directory to be displayed on the handsets, you will need to con- figure the phone’s LDAP client. This involves the following: • Setting up access to the LDAP server and database ¢... - Page 71 LDAP directory – configuration example It is also possible to use individual access data for each handset ( p. 29). LDAP Search base (BaseDN) The LDAP Search base (BaseDN) parameter specifies the starting point for the search in the LDAP directory tree. This starting point must be defined on the LDAP server and entered here for the LDAP client according to the server configuration.
-
Page 72: Filters
LDAP directory – configuration example Filters With filters you define criteria by which the phone searches for certain objects in the LDAP data- base • The name filter determines which attributes are used in the search for directory entries. • The number filter specifies which attributes are used for the automatic search in the LDAP database when phone numbers are entered. - Page 73 LDAP directory – configuration example Filter format A filter consists of one or more criteria. A criterion defines the LDAP attribute in which the entered string is to be searched for, e.g. sn=%. The percent sign (%) is a placeholder for the user input.
- Page 74 LDAP directory – configuration example Name filter The name filter determines which attributes are used for the search in the LDAP database. Examples: (displayName=%) The attribute displayName is used for the search. The percent sign (%) is replaced with the name or part of the name entered by the user.
-
Page 75: Attributes
LDAP directory – configuration example Attributes For a directory entry (an object), a series of attributes are defined in the LDAP database, e.g. sur- name, first name, phone number, address, company etc. The set of all attributes that can be stored for an entry is stored in the schema of the relevant LDAP server. -
Page 76: Display On The Handsets
LDAP directory – configuration example Specifying attributes for display on the phone In the web configurator you specify which of the available attributes from the LDAP database are to be queried and displayed on the phone. ¤ For each attribute of a directory entry, select the appropriate attribute from the LDAP data- base. -
Page 77: Searching The Directory
LDAP directory – configuration example Entries in the directory The following description shows an example for the display of an LDAP directory on a handset. The menu shows all directories that have been set up and acti- Directories vated on the Online directories page in the web configurator. Each one appears with the name entered under Directory name ¢... - Page 78 LDAP directory – configuration example Displaying a directory entry ¤ to select the entry you want. ¤ Brown, Charly Press the display key View or the navigation key Surname: ¤ Brown Press the display key Options View First Name: The directory entry is displayed with its detailed information. ¢...
-
Page 79: Appendix
For quick help and information, please refer to this user guide or visit gigasetpro.com. For online information and services concerning • Products • Documents • Interop • Firmware • • Support please refer to wiki.gigasetpro.com. For further information our Gigaset specialised reseller will be happy to help you related to your Gigaset product. -
Page 80: Authorisation
Our environmental statement We at Gigaset Communications GmbH are aware of our social responsibility. That is why we actively take steps to create a better world. In all areas of our business – from product planning and production to sales and waste of disposal –... -
Page 81: Care
Customer Service & Help Care Wipe the device with a damp cloth or an antistatic cloth. Do not use solvents or microfibre cloths. Never use a dry cloth; this can cause static. In rare cases, contact with chemical substances can cause changes to the device’s exterior. Due to the wide variety of chemical products available on the market, it was not possible to test all substances. -
Page 82: Technical Data
Technical data Technical data Specifications Power consumption N670 IP PRO (base station) < 3.8 W General specifications Power over Ethernet PoE IEEE 802.3af < 3.8 W (Class 1) LAN interface RJ45 Ethernet, 10/100 Mbps Protection class IP20 Ambient conditions for operation +5°C to +45°C indoors;... -
Page 83: Accessories
Equipment for planning and analysing your DECT multicell system. The case contains two cali- brated Gigaset S650 H PRO handsets and one Gigaset N510 IP PRO base station, plus other useful accessories for measuring the signal quality and wireless coverage on your DECT network. -
Page 84: Index
Index Index ......Authorisation ..... . Automatic search . - Page 85 ... . DiffServ (Differentiated Services) ... . Gigaset N670 IP PRO base station Directories Gigaset N720 SPK PRO (Site Planning Kit) .
- Page 86 ......N670 IP PRO ......
- Page 87 Index ........PBX (VoIP) RTP (Realtime Transport Protocol) .
- Page 88 Index ............Update Wall mounting .
- Page 89 Issued by Gigaset Communications GmbH Frankenstr. 2a, D-46395 Bocholt © Gigaset Communications GmbH 2019 Subject to availability. All rights reserved. Rights of modification reserved. www.gigasetpro.com...