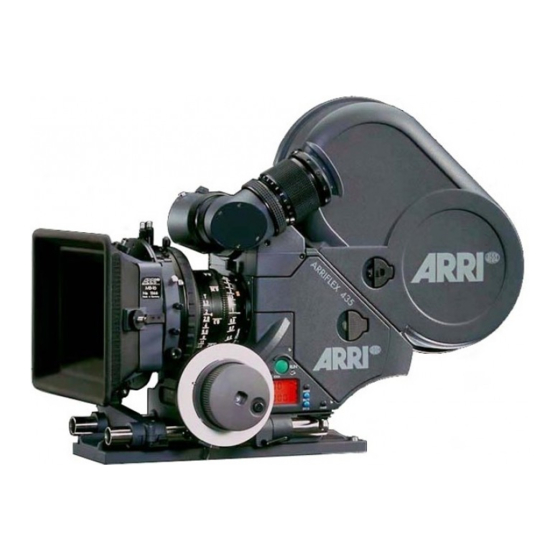
ARRI Arriflex 435 Manual
Modification of the arriflex 435 for single frame operation
Hide thumbs
Also See for Arriflex 435:
- Instruction manual (143 pages) ,
- Brochure & specs (32 pages) ,
- Quick manual (16 pages)
Table of Contents
Advertisement
Quick Links
ARRIFLEX 435
Modification of the ARRIFLEX 435
for single frame operation
As of: July 2000
A
,
-
.
LL ARTWORK
PICTURES AND TEXTS ARE COVERED BY OUR COPY
RIGHT
T
(
.
.
CD-ROM
I
-
)
.
HEY MUST NOT BE COPIED FOR REPRODUCTION
E
G
ON
DISKS OR
NTERNET
SITES
OR USED IN THEIR ENTIRE FORM OR IN EXCERPTS WITHOUT OUR PREVIOUS WRITTEN AGREEMENT
I
PDF-
I
-
,
.
F YOU ARE DOWNLOADING
FILES FROM OUR
NTERNET HOME
PAGE FOR YOUR PERSONAL USE
MAKE SURE TO CHECK FOR UPDATED VERSIONS
W
,
.
E CANNOT TAKE ANY LIABILITY WHATSOEVER FOR DOWNLOADED FILES
AS TECHNICAL DATA ARE SUBJECT TO CHANGE WITHOUT NOTICE
Advertisement
Table of Contents

Related Manuals for ARRI Arriflex 435


Summary of Contents for ARRI Arriflex 435
- Page 1 ARRIFLEX 435 Modification of the ARRIFLEX 435 for single frame operation As of: July 2000 LL ARTWORK PICTURES AND TEXTS ARE COVERED BY OUR COPY RIGHT CD-ROM HEY MUST NOT BE COPIED FOR REPRODUCTION DISKS OR NTERNET SITES OR USED IN THEIR ENTIRE FORM OR IN EXCERPTS WITHOUT OUR PREVIOUS WRITTEN AGREEMENT...
- Page 2 ARRIFLEX 435/435ES cameras. In order to avoid this, the version of the CMC print in the ARRIFLEX 435 has to be checked before the delivered MCM print is installed. To check the CMC Print version: •...
-
Page 3: Tools Needed
Caution! – stands for danger of injury. modification yourself. Should you have the slightest doubt Attention!– equipment damage possible. or not feel competent to do the modification yourself, please have the camera retrofitted by an authorized ARRI Service Note: Operational error possible! Repair Shop. -
Page 4: Product Identification
Product Identification Explanation of the Symbols When ordering or in case of enquiries please always refers to objects shown in pictures, photos or photo advise type designation and unit serial-number. graphs. - Page 5 2. Modification of the ARRIFLEX 435 for single frame operation • Switch the camera’s main switch to the ”off” position and disconnect the camera from the power supply. Manually turn the mirror shutter in such a way that the mirror edge is positioned vertically as...
- Page 6 • Take the viewfinder off by removing the three screws three fastening screws photo. • Remove the electronic cover and/or functional expansion module (FEM) and the IVS photo. screw • Completely unscrew and remove the 3 short screws (M3-8 DIN912), the 3 long screws (M3x30 DIN912) and the small screw (M2,5x6 DIN912) of the electronic cover...
- Page 7 3 short screws for the electronic cover small screw for the electronic cover 3 long screws for the electronic cover 2 screws for the connector cap...
- Page 8 • Now pull off the electronic cover approx. 5 cm away from the camera photo. • Pull out the big plug photo. • Lay the electronic cover aside in such a way that the cables in the rear part of the camera do not need to be disconnected photo.
- Page 10 • Now the electronic cover can be completely removed from the camera. • Undo the screws of the connector cover photo and remove the connector plate. Note: Make sure to carefully store the plate with the screws in case you decide to modify the camera back to its original condition.
- Page 11 plug 4 screws plug 51 pin plug...
- Page 12 DUART DUART CMC-SFMC plug fastening holes EPLD MCM print...
- Page 13 • Insert the connector of the MCM Print in the correspon- ding gap and press it in firmly photo. Slip the threaded bolts into the fastening holes from the outside of the camera. Slip one safety ring and one washer onto the threaded bolts and screw the MCM print tight.
-
Page 14: Reassembling The Camera
Reassembling the camera • Place the electronic cover back onto the camera and fasten with the 3 long, the 3 short and the one small The reassembling of the camera is done in reverse order screw (page 7). photo of the above described steps: Make sure when doing so, not to squeeze or •... -
Page 15: Arri Service
3. ARRI Service Germany ....... Arnold & Richter Cine Technik Italy ........ARRI ITALIA S.R.L. Türkenstraße 89 Viale Edison 318 D-80799 München 20099 Sesto S. Giovanni (Milano) phone: (089) 3809-0 phone: (02) 26 22 71 75 fax: (089) 3809-1244 fax: (02) 242 16 92 fax service: (089) 3809-1793 E-mail: info@arri.it... - Page 16 Technical data are subject to change without notice. © ARRI 2000 Ident. No. K5.52404.0 available languages Deutsch English ARNOLD & RICHTER CINE TECHNIK TÜRKENSTR. 89 D-80799 MÜNCHEN TEL. (089) 3809-0 • • FAX (089) 3809 - 1244 • http://www.arri.com...