Table of Contents
Advertisement
Advertisement
Table of Contents

Summary of Contents for Camtraptions PIR V3
- Page 1 Camtraptions PIR Motion Sensor v3 Manual Firmware Version 2.2...
-
Page 2: Table Of Contents
Power-up Sequence ........................9 Operating Mode & Channel Indicator ..................10 Alignment & Sensitivity Indicator .................... 10 Mounting the Sensor .................... 1 Long-term Deployment in Wet Conditions ............ 1 Controlling the Field of View ................. 1 Connecting a Wired Camera .................. 1 Connecting a Wireless Camera ................ 1 Sensitivity Dial ...................... 1 Minimizing False Triggers ......................14 Time Dial ...................... 1 Luminosity Threshold Dial .................. 1 Program Selection .................... 1 Support ........................ 1 Camtraptions PIR Motion Sensor v3 Manual Page 2... -
Page 3: What Is A Pir Motion Sensor
As a result, PIR sensors are very energy-efficient. What is new in Version 3? The following new features have been add to this PIR: 1) Added an integrated wireless transmitter, compatible with Camtraptions Wireless Receivers. 2) Redesigned sensitivity algorithm delivers faster response time with more reliable false trigger filtering. -
Page 4: Primary Controls
1 & 2: Day / Night behaviour Still mode 3: Dial function 4, 5, 6: Transmitter Program Video mode: 3: Extend video length on additional motion off/on 4, 5 & 6: Video Program Camtraptions PIR Motion Sensor v3 Manual Page 4... -
Page 5: On-Off Switch
2. Video mode: All programs focused on video shooting 3. Legacy mode: Replicates programs of PIR v2 The PIR v3 can be configured to work in one of seven different wireless channels. These channels are compatible with Camtraptions Wireless Triggers. Setting the Operating Mode & Channel It is intended that the operating mode and channel are set when the PIR is set-up for the first time. - Page 6 The jumpers are located in the top right corner under the Camtraptions logo and are labeled A, B, C and D. Place a connector so that it bridges the two jumper pins to set the state to On.
-
Page 7: Operating Mode
Setting Channel 1 Channel 2 Channel 3 Channel 4 Channel 5 Channel 6 Channel 7 Tx Disabled The corresponding channels on Camtraptions Wireless Receiver are as follows: Setting Channel 1 Channel 2 Channel 3 Channel 4 Channel 5 Channel 6... -
Page 8: Inserting Batteries
9.6 volts. When the sensor is first turned on, the red LED on the front indicates the battery voltage, see Page 9. Camtraptions PIR Motion Sensor v3 Manual Page 8... -
Page 9: Red Led Indicator
Alkaline batteries. The battery life thresholds are as follows: Number of Alkaline battery flashes life remaining More than 80% 60%-80% 40%-60% 20%-40% Less than 20% Camtraptions PIR Motion Sensor v3 Manual Page 9... -
Page 10: Operating Mode & Channel Indicator
(for example, it is possible to set a delay of up to 60 seconds after each burst) 6) Your camera may not be set-up correctly so double-check the settings in the “Quick Start” guide in the Stills Manual Camtraptions PIR Motion Sensor v3 Manual Page 10... -
Page 11: Mounting The Sensor
Therefore, it is important to mount the sensor the correct way up. Long-term Deployment in Wet Conditions The Camtraptions PIR v3 is weather-sealed but it is still possible for moisture to enter the device, particularly via the connecting cable socket. For long-term deployment in wet and humid conditions, it can be a good idea to use bathroom silicone sealant on this socket to improve the seal. -
Page 12: Controlling The Field Of View
To do this, open out the flaps on either side of the sensor to limit the sensor’s field of view. Tighten the knurled thumbscrews on the bottom of the device to secure the flaps in position. Camtraptions PIR Motion Sensor v3 Manual Page 12... -
Page 13: Connecting A Wired Camera
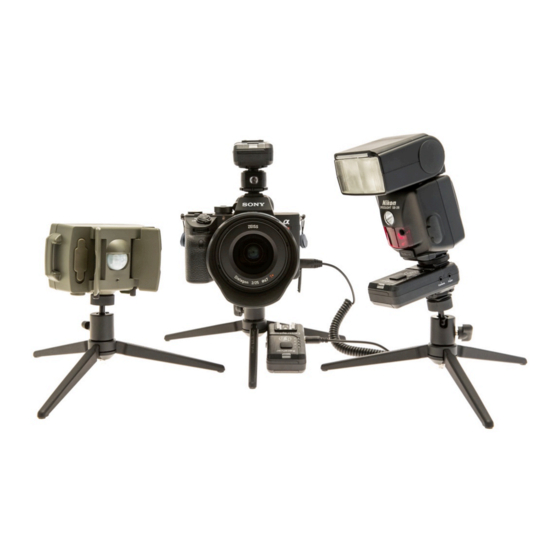
• Ensure you know which channel the PIR transmitter is set to. By default it is Channel 1. • Set the Camtraptions wireless receiver to the corresponding channel. • Connect the camera connecting cable to the “Camera” socket on the receiver and the other end to the camera’s shutter release port. -
Page 14: Sensitivity Dial
In general, you should try to position the sensor so that the subject will be much closer than anything that could cause false detections. Camtraptions PIR Motion Sensor v3 Manual Page 14... -
Page 15: Time Dial
For example, it might be used to set the duration of a burst in Stills mode or the video length in video mode. Refer to the relevant mode documentation for further details. Camtraptions PIR Motion Sensor v3 Manual Page 15... -
Page 16: Luminosity Threshold Dial
Turn the dial clockwise to increase the luminosity threshold. Turn the dial anticlockwise to decrease the luminosity threshold. The Camtraptions PIR sensor is able to vary its behaviour based on the ambient light level. For example, the PIR can be configured to work only during daylight, only during darkness or all of the time. -
Page 17: Program Selection
There are 64 unique switch combinations that can be used to select programs. Refer to the Still or Video operating mode manuals for more information. Camtraptions PIR Motion Sensor v3 Manual Page 17... -
Page 18: Support
Support For technical support, please email support@camtraptions.com. To share photographs and discuss camera trap techniques, please join our https://www.facebook.com/groups/camtraptions/ group on Facebook: Camtraptions PIR Motion Sensor v3 Manual Page 18...
