National Instruments TBX-1328 Manual
Hide thumbs
Also See for TBX-1328:
- Installation manual (17 pages) ,
- Instructions for safe use (4 pages)
Table of Contents

Related Manuals for National Instruments TBX-1328


Summary of Contents for National Instruments TBX-1328
- Page 1 National Instruments TBX-1328 Manual Get Pricing & Availability at ApexWaves.com Call Today: 1-800-915-6216 Email: sales@apexwaves.com https://www.apexwaves.com/test-measurement-misc/national-instruments/terminal-blocks/TBX-1328...
- Page 2 LabVIEW™, Measurement Studio™, National Instruments™, NI™, ni.com™, NI-DAQ™, and SCXI™ are trademarks of February 2003 National Instruments Corporation. Product and company names mentioned herein are trademarks or trade names of 371207A-01 their respective companies. For patents covering National Instruments products, refer to the appropriate location: Help»Patents in your software, the patents.txt file on your CD, or ni.com/patents.
-
Page 3: What You Need To Get Started
Italic text in this font denotes text that is a placeholder for a word or value monospace italic that you must supply. What You Need to Get Started To set up and use the TBX-1328, you need the following items: ❑ TBX-1328 high-accuracy isothermal terminal block ❑... -
Page 4: Connecting The Signals
Refer to the Read Me First: Safety and Radio-Frequency Interference document before removing equipment covers or connecting or disconnecting any signal wires. To connect the field signals to the TBX-1328 for use with the SCXI-1120 or SCXI-1121, follow the labeling on the TBX-1328 indicated along with the appropriate SCXI module type column as shown in Figure 1. - Page 5 This terminal block does not provide strain relief for field signal wires. Add strain relief, insulation, and padding for the wires, if necessary. Replace the TBX-1328 terminal block cover and tighten the captive cover screws. The signal connection is now complete.
-
Page 6: Installing The Terminal Block And Cable Assembly
Connecting the Signals section, you can install the terminal block. Complete the following steps to mount the SH32-32-A cable assembly and connect the TBX-1328 to the SCXI module while referring to Figures 2 through 4 as needed. Power off the SCXI chassis. - Page 7 Connect one end of the cable assembly to the SCXI module front connector and secure the SH32-32-A cable by tightening both backshell mounting screws. Connect the other end of the cable assembly to the TBX-1328 terminal block connector and secure the SH32-32-A cable by tightening both backshell mounting screws.
-
Page 8: Rack Mounting
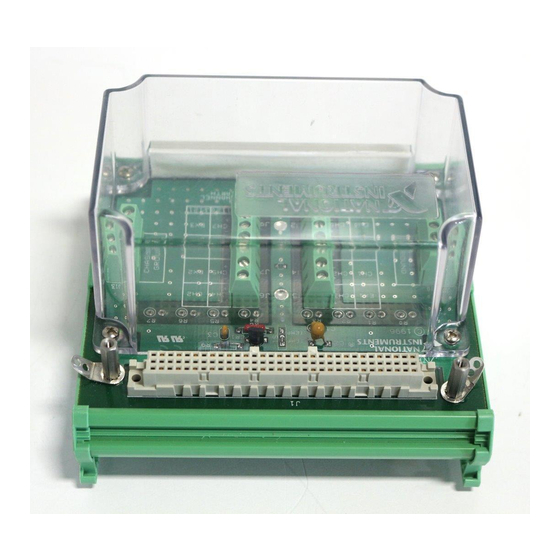
Assembly section, you can mount the TBX assembly in the rack. If you are using the National Instruments TBX Rack-Mount Assembly, refer to the TBX Rack-Mount Installation Guide for instructions. If you are not using this rack-mount assembly, complete the following steps to mount the TBX assembly directly onto the DIN rail: Snap the TBX terminal block onto the DIN rail with a firm push. -
Page 9: Specifications
The temperature-sensor circuitry accuracy includes manufacturing tolerances in all component values, effects caused by component-value temperature drift, voltage-divider loading, and thermistor self-heating. In instrumentation terminology, DC coupling means that both DC and AC signals are passed. TBX-1328 Installation Guide ni.com... -
Page 10: Maximum Working Voltage
Humidity ..........10 to 90% RH, noncondensing Maximum altitude ........2,000 m Pollution Degree (indoor use only) ..2 Safety The TBX-1328 is designed to meet the requirements of the following standards of safety for electrical equipment for measurement, control and laboratory use: •... -
Page 11: Electromagnetic Compatibility
(Class A) Compliant For EMC compliance, operate this device with shielded cabling. Note CE Compliance The TBX-1328 meets the essential requirements of applicable European Directives, as amended for CE marking, as follows: Low-Voltage Directive (safety)....73/23/EEC Electromagnetic Compatibility Directive (EMC) ........89/336/EEC... -
Page 12: Temperature Sensor Output And Accuracy
Temperature Sensor Output and Accuracy The TBX-1328 temperature sensor outputs 1.91 to 0.65 V from 0 to 50 °C. LabVIEW, Measurement Studio, and NI-DAQ can convert a thermistor voltage to the thermistor temperature for the circuit diagram shown in Figure 5. - Page 13 Celsius, respectively. Note Use the average of a large number of samples to obtain the most accurate reading. For example, sample for 1 second and average all the samples. Noisy environments require more samples for greater accuracy. TBX-1328 Installation Guide ni.com...
-
Page 14: Reading The Temperature Sensor In Labview
SCXI-1102. Strain Measurement Considerations When you use the SCXI-1121 with the TBX-1328 to measure strain, a small amount of voltage drop develops across the excitation wires in the SH32-32-A cable. This voltage drop is due to the wire resistance and the current flow in these leads when a strain gauge is connected at the TBX-1328 across the excitation outputs provided on the SCXI-1121. - Page 15 ) of the cable, based on the cable length. Note Remember to include the lead resistance of both V + and V –. Determine the bridge resistance of the strain gauge (R ) connected at the TBX-1328. TBX-1328 Installation Guide ni.com...
- Page 16 250 V CAT II MAX CHANNEL-TO-CHANNEL 250 V CAT II MAX CHANNEL-TO-EARTH = 0.21 Ω/m Note: Each sensor lead (R ) has an added lead resistance of R Figure 6. Full-Bridge Strain-Gauge Circuit Diagram © National Instruments Corporation TBX-1328 Installation Guide...
- Page 17 Now calculate the voltage drop across the field signal wires you are connecting to the TBX-1328. Perform similar calculations for the field wires as you did for the cable. Resistance can vary depending on the cable and field wires. Add this error amount to the voltage drop across the SH32-32-A cable to get a total voltage drop.