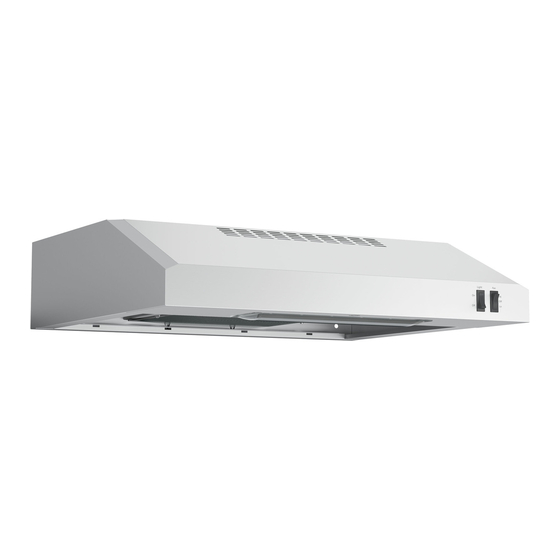
GE JVX3240 Owner's Manual & Installation Instructions
Hide thumbs
Also See for JVX3240:
- Owner's manual & installation instructions (40 pages) ,
- Owner's manual & installation instructions (48 pages) ,
- Owner's manual & installation instructions (40 pages)
Table of Contents
Advertisement
USING THE HOOD
Controls . . . . . . . . . . . . . . . . . . . . . . . . . . . . . . . . 5
Chef Connect . . . . . . . . . . . . . . . . . . . . . . . . . . . 6
CARE AND CLEANING
Filters . . . . . . . . . . . . . . . . . . . . . . . . . . . . . . . . . . 7
Surfaces . . . . . . . . . . . . . . . . . . . . . . . . . . . . . . . . 8
Lights . . . . . . . . . . . . . . . . . . . . . . . . . . . . . . . . . . 8
. . . . . . . . . . . . . . . . . . . . . . . . 21
Write the model and serial
numbers here:
Model # _________________
Serial # _________________
You can find them on a label
on the inside of the hood.
GE is a trademark of the General Electric Company. Manufactured under trademark license.
. . . . . . . . . . . . 3
. . 9
. . . . . . . . 20
. . . . . . . . . . . . . . . . . . . . . 22
. . . . . . . . 23
. . . . . . . . . . . . 26
OWNER'S MANUAL
& INSTALLATION
INSTRUCTIONS
JVX3240
JVX3300
JVX5300
JVX5360
PVX7300
PVX7360
29-6094 10-16 MCC
Advertisement
Table of Contents

Related Manuals for GE JVX3240


Summary of Contents for GE JVX3240
-
Page 1: Table Of Contents
Write the model and serial numbers here: Model # _________________ Serial # _________________ You can find them on a label on the inside of the hood. GE is a trademark of the General Electric Company. Manufactured under trademark license. 29-6094 10-16 MCC... - Page 2 THANK YOU FOR MAKING GE APPLIANCES A PART OF YOUR HOME. Whether you grew up with GE Appliances, or this is your first, we’re happy to have you in the family. We take pride in the craftsmanship, innovation and design that goes into every GE Appliances product, and we think you will too.
-
Page 3: Safety Information
IMPORTANT SAFETY INFORMATION READ ALL INSTRUCTIONS BEFORE USING WARNING WARNING TO REDUCE THE RISK OF FIRE, TO REDUCE THE RISK OF INJURY ELECTRIC SHOCK OR INJURY TO PERSONS, TO PERSONS IN THE EVENT OF A RANGE TOP OBSERVE THE FOLLOWING: GREASE FIRE, OBSERVE THE FOLLOWING*: A. - Page 4 IMPORTANT SAFETY INFORMATION READ ALL INSTRUCTIONS BEFORE USING REMOTE ENABLE EQUIPMENT (on some models) This device complies with part 15 of the FCC Rules. Operation is subject to the following two conditions: (1) This device may not cause harmful interference, and receiver.
-
Page 5: Controls
Controls On Some Models Light 1. Rangehood Control Panel: 3. Fan Power Switch: The control panel The power switch toggles is located on the front of the canopy. between fan settings Hi, Lo, and Off. 2. Light Switch: Light switch toggles between On and Off. -
Page 6: Chef Connect
Controls On Some Models 1. Rangehood Control Panel: 4. Fan Settings Pads: The glass touch Speed control for fan. Press the pad Lo for LOW speed, Med for MEDIUM control panel is located on the front of the canopy. speed and Hi for HIGH speed. Hold down the Hi 2. -
Page 7: Filters
Filters Be sure the circuit breaker is off and all surfaces are cool before cleaning or servicing any part of the vent hood. Metal Grease Filter NOTE: For this The metal filters trap grease during cooking. configuration one grease The filter must ALWAYS be in place when the hood is in filter is only used in the vented mode. -
Page 8: Surfaces
Surfaces Stainless Steel Surfaces (on some models) Do not use a steel wool pad; it will scratch the Use only a liquid cleanser free of grit and rub in the surface. direction of the brush lines with a damp soft sponge. To clean the stainless steel surface, use warm sudsy To inquire about purchasing stainless steel appliance water or a stainless steel cleaner or polish. -
Page 9: Installation Instructions
Under the Cabinet (UTC) Hoods JVX3240, JVX3300, JVX5300, JVX5360, PVX7300, Instructions PVX7360 “If you have questions, call GE Appliances at 1-800-561-3344 or visit our website at: GEAppliances.ca” BEFORE YOU BEGIN WARNING TO REDUCE THE RISK OF FIRE, Read these instructions completely and ELECTRIC SHOCK OR INJURY TO PERSONS, carefully. - Page 10 Installation Preparation DUCTWORK REQUIREMENTS WARNING TO REDUCE THE RISK OF FIRE, USE ONLY METAL DUCTWORK. NOTE: Read the ductwork sections only if you do not have existing ductwork. If you have existing ductwork, skip to the “Damage” section and proceed. The venting system must exhaust to the outside.
- Page 11 Installation Preparation PRODUCT DIMENSIONS MOUNTING SPACE 12” Bottom ” needs be 30” 24" Min require more 30" Max recommende 20” to the bottom of th surface hood *Controls may vary Size 24” 15 16 ” 30” 15 16 ” 36” 15 16 ”...
- Page 12 Installation Preparation TOOLS AND MATERIALS INSTALLATION DIMENSIONS REQUIRED (NOT SUPPLIED) 12" Safety glasses Pencil and tape measure X = Distance from hood to cooktop Wire cutter/stripper (varies depending on installation) Spirit level Required Min. = 24" Recommended Max. = 30" UL listed wire nuts Electric drill, #2 Phillips, flat head, and...
- Page 13 Installation Preparation ADVANCE PLANNING RANGE HOOD COMPONENTS A. Hood Body Vented Install Planning B. Damper/Duct Connector This hood is designed to be vented vertically using C. Mounting Bracket a 7" round duct or a 3 " x 10" rectangular duct or D.
- Page 14 Installation Preparation POWER SUPPLY FILTER AND GRID IMPORTANT – (Please read carefully) IMPORTANT – (Please read carefully) WARNING WARNING FOR PERSONAL SAFETY, THIS APPLIANCE Remove the filters one at a time by pushing them MUST BE PROPERLY GROUNDED. towards the back of the group and pulling down Remove house fuse or open circuit breaker before at the same time.
- Page 15 Installation Preparation 1 SELECT VENT OPTION THAT 2 PREPARING MOUNTING YOUR INSTALLATION WILL For cabinets with dimensions below, the REQUIRE (A-D) mounting bracket may be used for any model. Otherwise, the hood must mount directly Outside top exhaust to bottom of cabinet. Wood shims may be (Vertical duct—3 ”...
- Page 16 Installation Preparation 2 PREPARING MOUNTING (Cont) 3 PREPARE FOR ELECTRICAL AND VENTING To install to the bottom of cabinet Select the vent option that your installation will require and proceed to that section: Use the diagram or hood as a template and mark the locations on the cabinet for the Outside top exhaust keyholes screws.
- Page 17 Installation Preparation 4 REMOVE ELECTRICAL 6 REMOVE DUCT KNOCKOUT(S) FOR VENTED INSTALLATION KNOCKOUTS Use a flat blade screwdriver, remove the Determine which ducting option to use. appropriate electrical knockout from the back or Using a flat blade screwdriver, remove the appropriate duct knockout(s) from the top or the top of the hood.
- Page 18 Installation Instructions 8 FOR VENTED INSTALLATIONS 10 MOUNT THE UTC On Some Models: Place the hood onto the partially installed screws using the keyholes and slide the hood Install with vented mode deflector part. back into position. On Some Models: Install vented mode deflector part.
- Page 19 Installation Instructions 12 CONNECT DUCTWORK TO 14 FINISH THE INSTALLATION HOOD On Some Models: (Ducted installations only) For recirculation: Install the charcoal filter. Connect ducting to hood. Use duct tape to make joints secure and airtight. For ducted installation: Install the grease filters.
-
Page 20: Troubleshooting Tips
Using smaller duct pipe will cause reduced venting. noise installation. Minimize the duct run length and number of transitions and elbows. GE service technicians cannot correct this issue if installed improperly. Fan fails to circulate Obstructions in duct work. Make sure nothing is blocking the vent. Make sure your air or moves air slower wall or roof cap has a blade or door. -
Page 21: Warranty
GE Appliances with information on your appliance. If you do not want your appliance data to be sent to GE Appliances, please advise your technician not to submit the data to GE Appliances at the time of service. -
Page 22: Accessories
Accessories Looking For Something More? GE Appliances offers a variety of accessories to improve your cooking and maintenance experiences! Refer to the Consumer Support page for phone numbers and website information. The following products and more are available: Parts Charcoal Filter... -
Page 23: Product Registration
Please place in envelope and mail to: Veuillez mettre dans une enveloppe et envoyez à : OWNERSHIP REGISTRATION P.O. BOX 1780 MISSISSAUGA, ONTARIO L4Y 4G1 (FOR CANADIAN CONSUMERS ONLY - POUR RÉSIDENTS CANADIENS SEULEMENT) 29-6094... - Page 24 OWNERSHIP REGISTRATION CERTIFICATE – FICHE D’INSCRIPTION DU PROPRIÉTAIRE Please register your product to enable us to contact you in Veuillez enregistrer votre produit afin de nous permettre de the remote event a safety notice is issued for this product communiquer avec vous si jamais un avis de sécurité concernant and to allow for efficient communication under the terms of ce produit était émis et de communiquer facilement avec vous en our warranty, should the need arise.
- Page 25 Notes 29-6094...
-
Page 26: Consumer Support
Have a question or need assistance with your appliance? Try the GE Appliances Website 24 hours a day, any day of the year! You can also shop for more great GE Appliances products and take advantage of all our on-line support services designed for your convenience.