
Related Manuals for Cobra 8500 PRO HD


Summary of Contents for Cobra 8500 PRO HD
- Page 1 EnGIS Technologies, Inc. 8500 PRO HD Truck Navigation Device User Manual Version 0.3 FCC ID:BBO8500PRO IC: 906A-8500PRO...
-
Page 2: Table Of Contents
CONTENTS 1. Getting Started ......................5 Powering on your device ..................... 5 Caution Screen ......................5 Map screen features – Driving Guidance Mode ............7 Route Preview ........................ 7 2. Menu ........................... 8 3. Quick Tabs ........................9 Zoom Tab ........................9 Information Tab ...................... - Page 3 6. Manage your Route ....................33 Create Route ........................ 34 Edit Route ........................35 Detour ..........................36 Route Summary ......................37 7. Trucker Tools ......................38 Mileage Log ........................38 Trip Computer ....................... 38 Backup/Restore......................38 On Duty Timer ....................... 38 My Truck ........................
- Page 4 Guidance Settings ....................... 56 Language Settings ....................... 59 Routing Options ......................60 Home and Office ......................61 Traffic Settings ....................... 61 Exit navigation ......................61 12. User information and precautions ................62 13. Copyright ........................64 14. Contact ........................65 P a g e 8 5 0 0 P R O H D U s e r M a n u a l...
-
Page 5: Getting Started
1. Getting Started Powering on your device Press and hold the power button on the top left hand corner of your device. Caution Screen <PLEASE DRIVE SAFELY SCREEN HERE> After your device starts up, you will see the above screen. You must select your vehicle type (car or truck) and agree to the safety terms and conditions in order to use the navigation device. - Page 6 Charging the Unit To charge the unit, connect either the AC or DC power adapter. The battery light will illuminate and will take approximately 3 hours to charge. When the battery is fully charged, the red LED will turn off. Once fully charged the battery will last for approximately 2 hours during normal use.
-
Page 7: Map Screen Features - Driving Guidance Mode
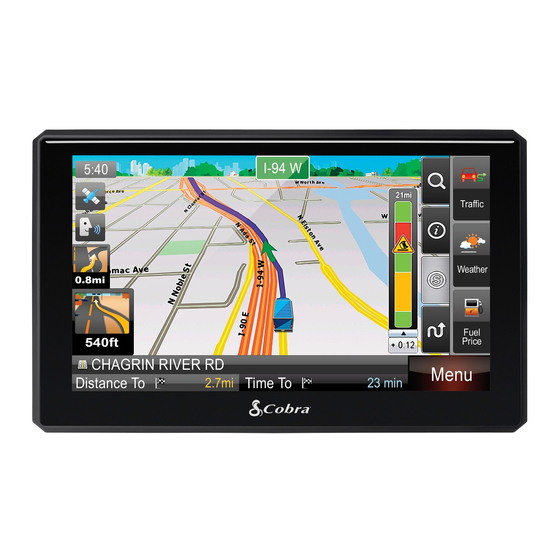
Map screen features – Driving Guidance Mode <MAIN MAP SCREENSHOT WITH LABELS FOR ELEMENTS (1-17) HERE> Current time Alert Display GPS (Tap to go to GPS screen). Zoom tab (tap to open zoom tab) Mute voice guidance Information tab (tap to open information tab) Second Turn-by-Turn instruction, Services tab (tap to open services tab) -
Page 8: Menu
Please note that the information provided for route distance, time and cost are approximations and may be incorrect. 2. Menu The main menu can be accessed by tapping the [MENU] button on the map screen. <MAIN MENU SCREEN HERE> The main menu allows access to all search options as well as route management, live services (traffic, weather, fuel prices), trucker tools and settings. -
Page 9: Quick Tabs
3. Quick Tabs Quick tabs provide quick and easy access to many commonly used functions directly from the main map screen. The quick tabs can be accessed on the right hand side of the main map screen. <MAIN MAP SCREEN HERE WITH QUICKTABS CLOSED – 4 LABELS ONE FOR EACH QUICK TAB>... -
Page 10: Route Tab
Weather information. Route Tab The route tab provides access to route specific functions and information. <MAIN MAP SCREEN HERE WITH ROUTE TAB OPEN – 6 LABELS ONE FOR EACH ELEMENT OF TAB> Clear current active route. Display list of all turns in current active route. -
Page 11: Plan A Route
4. Plan a Route All search options A destination may be searched for through any of the following options. Search by entering an address in steps: City > Street > House number. DDRESS Search by entering an intersection. INTERSECTIONS View a list of previously searched locations. ECENT Tap this button to route to a location that was previously... - Page 12 and then the Longitude. The navigation application supports several coordinate formats. Choose the format that you prefer. Step 1 <COORDINATE Enter (lat) Latitude in SCREENSHOT one of the HERE> formats supported. <COORDINATE Step 2 (long) Enter SCREENSHOT Longitude HERE> in one of the formats supported.
- Page 13 Multi Route <ICON Save and restore HERE> commonly used Multi routes. Route Multi Route interface allows save restore routes that commonly use. When Multi Route is opened you will see a list of any saved routes that you currently have (the first time you use the device this list will be empty).
-
Page 14: Address
Note: If you would like to save your current active route to Multi Route you can use the [SAVE] function in [My Route] > [Edit Route]. MULTI ROUTE Save and restore commonly used routes. Address Tap the [ADDRESS] button on Main Menu to plan a route by entering an address. - Page 15 3. Search for a City name or <ADDRESS ENTRY (CITY) SCREENSHOT HERE> Zip Code by typing letters. Then choose it on the result list. <ADDRESS ENTRY (STREET) SCREENSHOT> 4. Search for a street name typing letters then choose it on the result list. <ADDRESS ENTRY (HOUSE NUMBER) SCREENSHOT HERE>...
- Page 16 Hide / Show Keyboard: The keyboard may be hidden or shown at any time during address entry. You may wish to hide the keyboard to see all items in the result list. Simply tap the keyboard icon on the top-right of the screen, or tap anywhere in the visible area of the result list area.
-
Page 17: Intersections
Intersections Tap the [INTERSECTIONS] button on Main Menu to plan a <ICON HERE> route by entering an intersection. Intersections As per the address search <INTERSECTION ADDRESS ENTRY SCREENSHOT HERE> above, enter State/Province, followed by the City and then the Street. <INTERSECTION LIST SCREENSHOT HERE>... -
Page 18: Poi
Tap the [POI] icon on the Main Menu to search by POI (Point of Interest) When you select POI from the main menu you will first need to select between Normal POIs (e.g. Hotels, Airports, Restaurants, Banks, etc.) and Truck Specific POIs (e.g. Truck Repairs, Truck Stops, State Weigh Scales, etc.). - Page 19 Search by Category: Tap the [CATEGORY] button. You can search for POIs near your current location using the POI category search. First, simply select the category you wish to use; for example ‘Fuel & Auto’, then select a POI from the result list. The distance and direction to the POI is displayed on the left. You may sort the results by distance or in alphabetical order.
- Page 20 Search by POI Name: Tap the [NAME] button. The previously searched state/province name and city name are initially selected. If you want to change state/province or city, tap the State or City button. Type the POI Name you wish to search for then tap the [NEXT] button. It will list POI names corresponding to the letters you’ve typed.
- Page 21 Search for POI by City Tap the [IN CITY] button. The previously searched state/province name is initially selected. If you want to change state/province, tap the State button. Type the city name then select for the list of categories. The distance and direction to the POI is displayed on the left.
- Page 22 Search for POI Along Route Tap the [ALONG ROUTE] button. You can search for POIs of a selected category that are situated on, or close by to, your current route. When you select a POI category to search within a list of all POIs from that category that are on your route will be displayed.
-
Page 23: Favorites
Favorites Tap the [FAVORITES] button to select or add a Favorite as your destination. Favorites The favorites option allows you to save and route to commonly visited destinations, including home and office locations. Sort: You can sort existing favorites by distance, alphabetical order or date created Add: Tap the [ADD] button to add a favorite to the app. -
Page 24: Recent List
Recent List Tap the [RECENT LIST] button to view a list of previously searched locations. Recent List 1. Tap the [RECENT LIST] on the Menu. 2. You will see a list Recent Destinations and Recent Searches. 3. Select one of locations on the list then tap the [GO] button to route directly to the location. -
Page 25: Current Location
Current Location Tap this button to find details about your current location. Current Location You will need a valid GPS signal to get accurate and current positioning information. <CURRENT LOCATION SCREENSHOT HERE> The following details are listed: Nearest Address; Nearest Intersection;... - Page 26 There are two steps involved in entering coordinates. You must first enter the Latitude and then the Longitude. The navigation application supports several coordinate formats. Choose the format that you prefer. Step 1 <COORDINATE (lat) SCREENSHOT HERE> Enter the Latitude in one of the formats supported.
-
Page 27: Multi Route
Multi Route <ICON HERE> Save and restore commonly used routes. Multi Route The Multi Route interface allows you to save and restore routes that you commonly use. When Multi Route is opened you will see a list of any saved routes that you currently have (the first time you use the device this list will be empty). -
Page 28: Map View
Map view Tap a point on the map to choose a location as your destination. The address of the point you choose is displayed in a grey information box directly above the point you chose. <MAP VIEW SCREENSHOT HERE> Route: Choose to add the location as a Start point, Waypoint, or destination. More: Tap the [MORE] button to: Save the location as a Favorite, or ... -
Page 29: Guidance While Driving
5. Guidance while Driving After you have set a destination, the system will calculate a route. Once you begin moving, the system will use the GPS information to update your position on the map and start to give you guidance. <MAIN MAP SCREENSHOT HERE>... -
Page 30: Lane Guidance
Lane Guidance Lane Guidance helps you safely prepare for your next maneuver by displaying the correct lane(s) to stay in. Lane Guidance appears below the Next Street Name box. The highlighted white arrow indicates the correct lane(s) to be in. In the example below, there is one highlighted lane turning right;... -
Page 31: Alerts
Please be aware that Lane Guidance, Signposts and Junction View are available for some, but not all junctions. Alerts Your unit will display visual alerts on the main map screen when approaching a location that requires attention. Alerts can be divided into three groups: Aura alerts (warnings of upcoming red light cameras, speed cameras, dangerous intersections and mobile speed traps);... - Page 32 Time zone backward: displayed when approaching change in time zone with the time going backward by an hour. Weigh station: displayed when you are approaching a weight station. Hazmat restriction: displayed when Truck you are approaching a location for Restrictions which your current...
- Page 33 It is the user’s responsibility to account for the vehicle’s height, width, length, HAZMAT, and other restrictions while driving. Restriction details and locations may change over time, always follow posted road signs and be aware of road conditions when making driving decisions.
-
Page 34: Turn By Turn (Tbt)
Turn by Turn (TBT) The Turn by Turn screen offers a more simplified guidance mode. To access this screen, tap [Menu] > [My Route] > [Turn by Turn]. <TBT SCREENSHOT HERE> The Turn By Turn screen presents an enlarged maneuver image and text to indicate the next turn. - Page 35 In addition to this, any waypoint that was unreached in the journey will be remembered. By going to [Menu] > [My Route], you can check waypoints and destination points. 35 | P a g e 8 5 0 0 P R O H D U s e r M a n u a l...
-
Page 36: Manage Your Route
6. Manage your Route Routing Options may be used to create a new route or to edit an existing route. Create Route / Edit Route buttons will change depending on situation. [Menu] > [My Route] <MY ROUTE SCREENSHOT HERE> Create Route / Edit Route: [Create Route] is available if a route has not been set. [Edit Route] is available if a route has already been set. -
Page 37: Create Route
Create Route This option is available if no route has been set. <MY ROUTE (CREATE ROUTE) SCREENSHOT HERE> Add a Location to your route • Tap the [ADD] button to add a location to your route. For short routes, you may add up to 5 waypoints. -
Page 38: Edit Route
Edit Route This option is available only if a route already exists. <MY ROUTE (EDIT ROUTE) SCREENSHOT HERE> Add a Location to your route • Tap the [ADD] button to add another location to your route. Position the location within the route •... -
Page 39: Detour
Detour This function is for editing your route. After editing your route preferences, the navigation application will recalculate a new route automatically. <DETOUR SCREENSHOT HERE> <AVOID PART OF ROUTE SCREENSHOT HERE> <AVOID BY DISTANCE SCREENSHOT HERE> You can modify your route by using the following: Avoid Part of route •... -
Page 40: Route Summary
Route Summary Route Summary is available on the ‘My Route’ screen. In this screen, you can check route information such as total distance, time, etc. <ROUTE SUMMARY SCREENSHOT HERE> Route Preferences: Recalculate your route with different preferences, e.g. avoid toll roads, user STAA roads, etc. -
Page 41: Trucker Tools
7. Trucker Tools The Trucker tools menu provides a range of different functions that are particularly helpful to truck drivers, to access the trucker tools menu, simply tap [TRUCKER TOOLS] at the bottom of the main menu. Mileage Log <MILEAGE LOG SCREENSHOT HERE> The mileage log automatically records the number of miles that you drive. -
Page 42: My Truck
Driving or Off Duty). When the On Duty Timer is set to Auto, the timer will automatically change to On Duty Driving after your vehicle has been in motion for 5 minutes, once the vehicle is stationary for 5 minutes the timer will change to On Duty. You can view and change the settings for the On Duty Timer, reset totals, change between auto and manual or manually alter the maximum time allowed and time remaining in the On Duty Timer menu. -
Page 43: Calculator
To add a new truck to your list of vehicles, simply tap [ADD] at the bottom of the screen. <TRUCK TYPE SCREENSHOT HERE> You will be provided with a list of different truck type axle configurations, to switch between the different lists for USA and Canada, simply select the appropriate country name at the top of the list. -
Page 44: Traffic
8. Traffic Live traffic will provide up-to-date, real-time traffic information to BringGo. Live Traffic includes detailed incident reports and the ability to reroute to avoid any incident. The traffic service requires an active internet connection to download the traffic information. The navigation device receives traffic data from a traffic service provider and displays this information on the device. - Page 45 The Yellow icon means that you have an active traffic service connection, and there are traffic incidents on your route. The Red rotating icons means that traffic information is currently downloading. 45 | P a g e 8 5 0 0 P R O H D U s e r M a n u a l...
-
Page 46: Traffic On Route
Traffic On Route Expand / Collapse the Traffic bar Distance from current position. Traffic Congestion Extent Traffic Status Icon (Tap to go to Traffic Details) Traffic Incident Estimated Delay If a traffic event (an incident such as a roadblock) occurs on your route, the Traffic Status Icon on the main map will change to yellow and the Traffic bar will appear. -
Page 47: Traffic Map
To get more details on these traffic events, or get the option to avoid these events, simply tap the Traffic Status Icon to see the Traffic Details screen for each event. The Traffic bar will appear for 30 seconds when an incident occurs or is updated on your route. -
Page 48: Traffic Flow
Traffic Flow The Traffic map contains traffic flow information. The line colors: yellow, red and black represent the speed at which traffic is moving. The purple line represents an incident’s extent (i.e. the where it begins and ends) and means that traffic is flowing normally. Color Meaning Speed Range... -
Page 49: Traffic Details
Traffic Details At times, you may need to get more information on a specific traffic event. When in the Traffic map or Traffic List screen, simply tap any event for more details. <TRAFFIC DETAILS SCREENSHOT HERE> Traffic Event Icon. The icon is Traffic Event Icon. -
Page 50: Traffic List
Traffic List Traffic messages are organized into two groups: On My Route: Traffic events on your calculated route. You may only avoid ‘On • Route’ traffic events. All Messages: Traffic events that are within 50km of your vehicle’s position in all •... -
Page 51: Traffic Event Classes
Traffic Event Classes Traffic messages are organized into classes and each class has a name and symbol. This symbol will appear next to each event in the list, detail and map. The traffic event icons are color-coded to indicate their status: On Route: These “Red &... -
Page 52: Traffic Settings
Traffic Settings <TRAFFIC SETTINGS SCREENSHOT HERE> Use Traffic Data Select to turn the traffic service on or off. Traffic Event Settings Traffic information may be turned on/off for certain traffic event classes. The following options are available: Show: Show this traffic event class on the map/list etc. •... -
Page 53: Weather
9. Weather Your device allows you to view live weather information in a number of different ways; different weather overlays may be viewed on map, or a summary of current weather conditions may be viewed for your current location or for your destination. On Map To view weather conditions on a map, tap [SERVICES] and then tap [WEATHER], you can then select from 9 different weather overlays to display on the map. -
Page 54: At Destination
At Destination If you have an active route in navigation then you can also view a summary of weather conditions for your destination location. To access this summary, simply tap [AT DESTINATION] on the bottom of weather map. <WEATHER AT DESTINATION SCREENSHOT HERE> 54 | P a g e 8 5 0 0 P R O H D U s e r M a n u a l... -
Page 55: Fuel Prices
10. Fuel Prices The fuel price interface allows you to search for live fuel price information for gas stations. At Your Location <FUEL PRICE AT YOUR LOCATION SCREENSHOT HERE> To view a list of fuel prices at gas stations near your current location, simply tap [SERVICES] on the main menu. -
Page 56: Settings
11. Settings In this screen, you can customize the settings of the Navigation application. Descriptions of each option are as follows: Control the display settings of the map view. Display Settings Control the settings for guidance announcements. Guidance Settings Language Set language used for voice guidance and displayed text. -
Page 57: Display Settings
Display Settings Control the display settings of the map view. Display Setting <DISPLAY SETTINGS SCREENSHOT HERE> Day/Night: Set the color mode of map as ‘Daytime’, ‘Nighttime’, or ‘Auto mode’. Auto mode will allow the navigation application to automatically choose day or night mode. Map Colors: Change the map color. - Page 58 Day/Night Change the color scheme of the map as ‘Daytime’, ‘Nighttime’, or ‘Auto’ mode. <DAY/NIGHT SCREENSHOT HERE> Daytime: Daytime color scheme. Nighttime: Nighttime color scheme. Auto: Automatically change the map scheme. Map Colors You can change the map color.By touching the map images, change day or night color of map screen according to your preference.
-
Page 59: Guidance Settings
View Options You can turn select which Aura points are displayed on the main map and turn Junction View on or off. <VIEW OPTIONS SCREENSHOT HERE> Map Overlay You can turn on/off displaying some labels on map.Select options that you wish to be displayed on the map screen, then tap the [APPLY] button to apply these settings on the map screen. - Page 60 Units: Set the distance units used in guidance. Auto Zoom You can turn on/off automatic zooming at the intersection and automatic zooming on speed options. <AUTO ZOOM SCREENSHOT HERE> On Speed: Automatically adjust map scale level according to the speed of car. The map zooms out to a small scale map when you increase speed;...
- Page 61 Highway: represents driving on a mixture of rural and interstate highway • driving, typical of longer trips in free-flowing traffic. Please be aware that the actual fuel cost may vary according to other factors which affect the fuel consumption; for example, driver behavior, driving conditions, vehicle maintenance, fuel characteristics, and weather.
-
Page 62: Language Settings
Language Settings <ICON HERE> Language Set the language used for voice guidance and for displayed text. Settings <LANGUAGE SETTINGS SCREENSHOT HERE> You may select from three languages for voice guidance and displayed text: English (USA), French (Canada) and Spanish (USA). Simply tap [Voice] and/or [Text] and select the language that you want to use. -
Page 63: Routing Options
Routing Options Change routing options for the system. Routing Options <ROUTING OPTIONS SCREENSHOT HERE> Routing Selection: To calculate a route for faster time, select ‘Faster Time’ option. To calculate a route for shorter distance, select ‘Shorter Distance’ option. Route Preferences: Tap the [Route Preferences] button if you wish to avoid or prefer certain features or road types (e.g. -
Page 64: Home And Office
Home and Office Set an address for your Home and/or Office. Set your office address Office Set your Home address Home When the addresses for home and office locations have been entered and saved, you can then plan a route to your home or office simply by tapping the respective icon on the main menu. - Page 65 12. Trucker Tools The Trucker tools menu provides a range of different functions that are particularly helpful to truck drivers, to access the trucker tools menu, simply tap [TRUCKER TOOLS] at the bottom of the main menu. Mileage Log <MILEAGE LOG SCREENSHOT HERE> The mileage log automatically records the number of miles that you drive.
- Page 66 When the On Duty Timer is set to manual, your work time will be calculated depending on the setting you make in the information tab on the main map (e.g. On Duty, On Duty Driving or Off Duty). When the On Duty Timer is set to Auto, the timer will automatically change to On Duty Driving after your vehicle has been in motion for 5 minutes, once the vehicle is stationary for 5 minutes the timer will change to On Duty.
- Page 67 The My Vehicle screen displays all the vehicles that you have available for use. When using your device for the first time, you will have two default vehicle profiles, one truck (Truck 1) and one car (Car). To add a new truck to your list of vehicles, simply tap [ADD] at the bottom of the screen. <TRUCK TYPE SCREENSHOT HERE>...
- Page 68 <CALCULATOR SCREENSHOT HERE> 68 | P a g e 8 5 0 0 P R O H D U s e r M a n u a l...
-
Page 69: Exit Navigation
Traffic section for more information. Exit navigation Exit the navigation application. Exit Tap the [Exit] button to completely close the navigation application. Bluetooth 1.Power on the unit and press "MODE" button to change to bluetooth mode or press “BT” button on the remote, the LED display will display “bt”. -
Page 70: User Information And Precautions
13. User information and precautions 1. EnGIS is not responsible for any accident that occurs while operating our software. 2. The suggested route and guidance may be different with actual traffic and road conditions. Please drive safely and obey traffic rules. 3. - Page 71 make amendments to the content of this document without obligation to inform any organization or user of such changes. 71 | P a g e 8 5 0 0 P R O H D U s e r M a n u a l...
-
Page 72: Copyright
14. Copyright 1. Copyright and intellectual property rights of all documents written by EnGIS Technologies, Inc. are the property of EnGIS Technologies, Inc. 2. EnGIS Technologies, Inc. has copyright and intellectual property rights of our software and documents including this manual, and the use of product follows license agreement. -
Page 73: Contact
Total Traffic Network Data Distribution Services. Total Traffic Network is a mark (or registered mark) of Clear Channel in the United States and other countries and hereby used under license. Text-To-Speech (TTS) Copyright © DIOTEK, SVOX TTS Live Weather Information <TEXT HERE>... - Page 74 This device complies with part 15 of the FCC rules. Operation is subject to the following two conditions: (1) this device may not cause harmful interference, and (2) this device must accept any interference received, including interference that may cause undesired operation. *RF warning for Portable device: The device has been evaluated to meet general RF exposure requirement.
- Page 75 This device complies with Industry Canada licenceexempt RSS standard(s). Operation is subject to the following two conditions: (1) this device may not cause interference, and (2) this device must accept any interference, including interference that may cause undesired operation of the device. Le présent appareil est conforme aux CNR d'Industrie Canada applicables aux appareils radio exempts de licence. L'exploitation est autorisée aux deux conditions suivantes : (1) l'appareil ne doit pas produire de brouillage, et (2) l'utilisateur de l'appareil doit accepter tout brouillage radioélectrique subi, même si le brouillage est susceptible d'en compromettre le fonctionnement. ...