Advertisement
Quick Links
Advertisement

Related Manuals for FUTABA Sky Leaf Samba f


Summary of Contents for FUTABA Sky Leaf Samba f
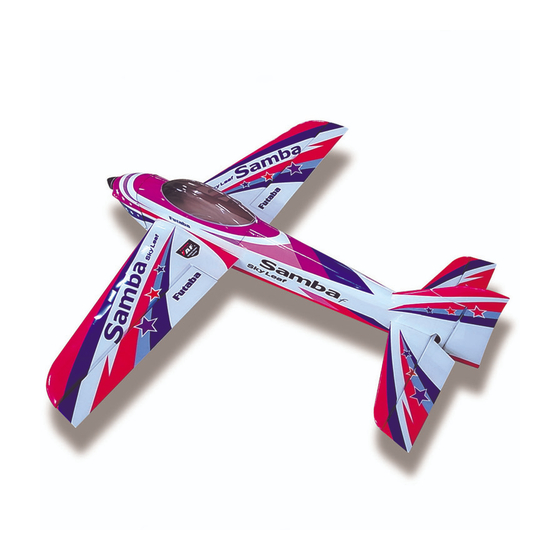
- Page 1 1M23Z06701...
-
Page 2: Instruction Manual
2. Modification, adjustment, and parts replacement: Futaba is not responsible for unauthorized modification, adjustment, or replacement of parts on this product. 3. Your Sky Leaf should not be considered a toy, but rather a sophisticated, working model that functions very much like a full- size airplane. -
Page 3: Assembly Precautions
■ Futaba is not responsible for damage sustained by combination the factory on the airplane. with other than Futaba Genuine Parts. Use the parts specified in the instruction manual and catalog. ■ If the airplane is changed too much, the manufacture cannot... -
Page 4: Flying Precautions
Flying Precautions DANGER Take enough safety precautions prior to operating this Do not touch the motor, motor controller during and model. You are responsible for this model's assembly and immediately after use. safe operation. ■ These items may become hot during use. First-time fliers should seek advice for hints in pre- For safety, fly so that the aircraft is visible at all times. - Page 5 Battery and Charger Handling Precautions DANGER ■ Charging the battery past the specified value may cause a fire, D o n o t r e c h a r g e a b a t t e r y t h a t i s d a m a g e d , combustion, rupture, or liquid leakage.
- Page 6 ● RC system 5-channel minimum radio with mixing functions. ● Exacto Knife ● Wire cutters (e.g. Futaba 6K,10J,14SG,16SZ,18SZ,18MZ -T/R Set) ● Needle nose pliers ●(For the servo less version → 4 Micro servos) ● Scissors ● Servo Extension Code ● Screwdriver ◇...
- Page 7 M2.3×12 ×2 M3×10 Hexagon Tapping screw ×2 head bolt M2×20 Screw ×1 Wing Bolt M2 Nut M3×16 ×4 Tapping screw Tail gear rod ×1 M3×10 ×4 Tapping screw Tail gear mount ×1 M2×8 Tapping ×6 screw Tail gear arm Tire shaft ×1 M4 Nut ×2...
- Page 8 ● Push the aileron into the wings. Glue the paper hinge to the aileron. ● Fit the paper hinges into the wing, making sure that you align each one. Push in Wing ● Hold vertical in the direction that Aileron you want to glue to wick into the paper hinge and surface.
- Page 9 ● Prepare aileron servo with a 100mm extension. ! The the raised ball link on the servo side. 100mm Extension ● Use the inside hole. ● Place the aileron servos in position and use a drill to make the mounting holes for your servos into the wing.
- Page 10 ● Wick CA glue into the paper hinges on the elevator side. ● Fit the paper hinges into the elevator, making sure that you align each one. CA glue Paper Hinges Elevator ! Make glue wick to the interior. ● Make it the same length. ●...
- Page 11 ● Glue a Control Horn in the elevator. Control Horn ● Fit the paper hinges into the rudder, making sure that you align each one. ● Ruff up the bottom of the control horn with sandpaper to help the glue stick to the horn. CA glue Elevator ●...
- Page 12 ● Prepare Elevator servo with Rudder Linkage a 400mm Extension. ● Prepare Rudder servo with ● Adjust the length of the rod a 500mm Extension. so that the surface is neutral and secure the ball link. EXTENSION M2 Nut Ball Link ●...
- Page 13 ● Fit the cowling to the fuselage and use a drill bit to start the holes for the self tapping screws. ● This mark is for O.S. OMA- 3820-1200 Motor (Not furnished). ● If another motor is used, drill the motor bracket ●...
- Page 14 ● Main Tire and Wheel Pants are installed on ● Use a drill to mark hole in the wheel pants side. the Tire shaft. ● Tire shaft ● Put on the M2 × 8 Tapping Screw ● M3 Nut Forward Main Gear Forward ●...
- Page 15 ● Use a hook and loop band to mount the battery. forward Drive battery Hook-and-Loop Band Receiver Connect two 100mm extensions to the aileron channels in the RX. Use hook and loop tape ! The battery is heavy, so make Drive battery to secure the battery to sure it is mounted securely.
- Page 16 ● Locate the Wing Tube and slide it into the fuselage. ● Use both wing bolts to secure the wings. ! If the wing tube fits tight, lightly sand the hole with sandpaper until it fits. ● Pull the aileron servo leads into the fuselage and install the wings.
- Page 17 ● Install a propeller and spinner (Not furnished) with the most suitable size. Securely tighten the nut holding the propeller so it does not come off when the motor is spinning. ■ If coming off, there is a high risk of injury. ●...
- Page 18 To ensure a successful flight, fly your skyleaf set up only according to the C.G. in this manual. This provides you with the best chance for success and enjoyable first flights that should be surprise-free. A model that is not properly setup may be unstable and possibly unflyable. ●...
- Page 19 2013 ∼ 2018 F3A Japan Championship 2nd 4.0V ∼ 6.0V ! No dry battery use The product is not repairable by Futaba service center if damaged. The covered film may become wrinkly due to variations of temperature. Smooth out as explained right.