Advertisement
Quick Links
Advertisement

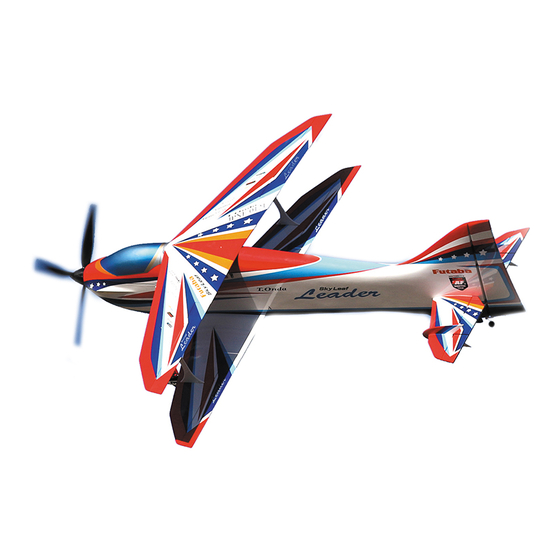
Related Manuals for FUTABA SkyLeaf Leader


Summary of Contents for FUTABA SkyLeaf Leader
- Page 1 1M23Z06706...
- Page 2 2. Modification, adjustment, and parts replacement: Futaba is not responsible for unauthorized modification, adjustment, or replacement of parts on this product. 3. Your Sky Leaf should not be considered a toy, but rather a sophisticated, working model that functions very much like a full- size airplane.
-
Page 3: Assembly Precautions
■ Futaba is not responsible for damage sustained by combination the factory on the airplane. with other than Futaba Genuine Parts. Use the parts specified in the instruction manual and catalog. ■ If the airplane is changed too much, the manufacture cannot... -
Page 4: Flying Precautions
Flying precautions DANGER Take enough safety precautions prior to operating this Do not touch the motor, motor controller, during and model. You are responsible for this model's assembly and immediately after use. safe operation. ■ These items may become hot during use. First-time fliers should seek advice for hints in pre- For safety, fly so that the aircraft is visible at all times. - Page 5 Battery and charger handling precautions DANGER ■ Charging the battery past the specified value may cause a fire, D o n o t r e c h a r g e a b a t t e r y t h a t i s d a m a g e d , combustion, rupture, or liquid leakage.
- Page 6 Installation of aileron, elevator, rudder, hinge The explanation is showing the aileron as an example, but attach the elevator and rudder hinge in the same way. Insert half the hinge into the aileron and adhere the CA glue. After drying, insert the aileron into the main wing and pour the CA glue into the hinge.
- Page 7 Installation of aileron servo. Aileron linkage Recommendation: BLS173SVi × 4, EXT code 200 mm × 4, S.BUS HUB 120 - 70 × 2 Cut the film at the exit of the servo wire in the center of the main wing. Pass the servo wire inside the main wing.
- Page 8 Installation of elevator servo. Elevator linkage Recommendation: BLS173SVi × 2 The servo is mounted inside the horizontal stabilizer. First, connect the servo to the receiver and place it in the neutral position. Attach Horn A to the servo, find the arm that is about 15 degrees forward and cut off the other extra arm. Remove the servo horn and place the servo on the horizontal stabilizer.
- Page 9 Motor mount This manual explains the front mount such as Adverrun Contra unit. O.S. F3A motor (motor reduction). Necessary: Wood made (5-6 mm) motor mount (according to the last figure of this manual), Epoxy glue, Micro balloon, Glass cloth. Cut the front part of the fuselage like #18. The down thrust fits the front of the fuselage. For a normal propeller, make sure the side thrust is at right 3 degrees.
- Page 10 Installation of Motor unit This manual explains the front mount such as Adverrun Contra unit. Attach the front mount to the motor unit. Then attach it to the fuselage mount with M3 cap bolt. Make sure that the screw and the spinner do not interfere. Make a rear mount with 3 mm wood plate.
- Page 11 Installation of rudder servo, Rudder linkage, tail wheel Recommendation: BLS175SV Make a pipe that passes the wiring like #25, with paper. Make plates like #26, #27 in balsa wood. Install it on the fuselage like #28 and pass the servo wire. Attach the rudder servo mount to the fuselage and mount the rudder servo.
- Page 12 Installation of horizontal stabilizer The horizontal stabilizer is attached to the body with a carbon tube. Bond one of the carbon tubes to the horizontal stabilizer. Fix another horizontal stabilizer with tapping screws. Search for the screw hole in #34 horizontal stabilizer, and make a hole in the film. Make sure the carbon tube is in the correct position and then bond the carbon tube to #35 horizontal stabilizer.
- Page 13 Installation of bottom wing dowel, top wing T-nut Attach the dowels to the bottom wing. Then cut two M3 screw holes in the bottom wing. Adhere the reinforcing plate of the screw hole to the bottom wing. Cut the adhesive film beforehand. Cut the film in the M3 screw mounting hole of the top wing.
- Page 14 Main gear Mount the T-nut on the bottom of the main gear. Drill a small hole with a drill so that the nail bites as the material is hard. Then fix T-nut with epoxy glue. Assemble the wheel and the wheel pants. Make sure the wheels are located in the center of the wheel pants with the supplied wood washers.
- Page 15 Installation of tail fin Adhere the tail fins like #47 to the tail bottom of the fuselage. Prepare with sandpaper in advance and paint. Adhere the fins to the horizontal stabilizer like #48. Adhere parallel to the fuselage to the position of 190 mm from the base of the horizontal stabilizer.
- Page 16 Required for flight (Purchase separately) BLS173SVi×6(Aileron/Elevator) BLS175SV×1(Rudder) R7008SB or R7003SB etc, MC9100A(ESC) ESW-1J(Receiver Switch) FR2F900(Receiver Battery) 6-terminal box (TB16PP) Extension code(200J×4, S.BUS HUB 120-70mm×2, S.BUS HUB 1,000mm×1 ) Extension code for aileron(300J×1, 400J×1) Extension code for ESC(400J×1) Hook-and-Loop Tape...
- Page 17 Figure 1/2 Cut this part slanted Front mount Making with 5-6 mm hard wood ㎜ ㎜ ㎜ ㎜ ㎜ ㎜ ㎜ ㎜ ㎜ ㎜ ㎜ Optional battery mount Make it from 3 mm wood plate.
- Page 18 Figure 2/2 Position of air vent (fuselage bottom) Wing trading edge line Inside of fuselage 25 x 10 x 230 mm Hard balsa reinforced mounting position ㎜ ㎜ ㎜ ㎜ ㎜ ㎜ ㎜ ㎜ ㎜ ㎜ ㎜...
- Page 20 FUTABA Corporation of America 2681 Wall Triana Hwy Huntsville, AL 35824, U.S.A. Phone:1-256-461-9399 FAX:1-256-461-1059 https://www.futabausa.com/ E-mail: service@futabaUSA.com ©FUTABA CORPORATION 2019, 3 (1)