Table of Contents
Advertisement
Quick Links
DIGITAL MULTIMETER
Operation MANUAL
WARNING
To avoid electric shock or injured
or damage the instrument, please
read the manual carefully before
operation.
Ⅰ . SAFETY RULES
This
series
meter
meets
the
standard of IEC1010. Read it
before operation.
0
Advertisement
Table of Contents

Related Manuals for Victor VC921


Summary of Contents for Victor VC921
- Page 1 DIGITAL MULTIMETER OPERATION MANUAL WARNING To avoid electric shock or injured or damage the instrument, please read the manual carefully before operation. Ⅰ . SAFETY RULES This series meter meets standard of IEC1010. Read it before operation.
- Page 2 1 . Check the case of the meter and test leads before operation. 2 . Do not input over range when testing. Be careful when measuring voltage over ACV 40V or DCV 60V. 4 . When measuring, must select correct function and range. 5 ....
- Page 3 and endanger personal safety. 7. Safety symbols “ ” exists high voltage , “ ” dual insulation ,“ ” warning 8 . Electric symbols “ ”GND , “ ” low battery “ ” AC “ ” DC “ ”continuity test “...
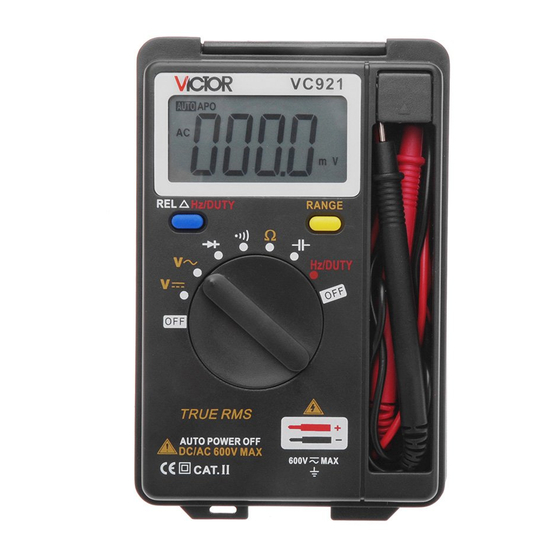
- Page 4 back to zero , enter into relative measurement ,LCD display “ ” symbol, press it again, out from the relative value measurement function .when at Hz range, can switch to frequency or duty cycle (0.1~99.9%) measurement mode. 2.RANGE key :selecting operation mode of auto range or manual range .the default mode of this meter is auto range , LCD display“...
- Page 5 one more time to increase a new range, from low to high cycle in turn .press the key for more than 2 seconds, will back to auto range mode. Ⅲ . SPECIFICATION 3-1 . GENERAL 3-1-1 . Displaying displaying 3-1-2 . Max. indication: 3999 ( 3 3/4 )...
- Page 6 3-1-4 . Sampling rate: approx. 3 times/sec 3-1-5 . Over range indication: displays “OL” 3-1-6 . Low battery indication: “ ” symbol displays 3-1-7 Operation: . ~ 40)℃ , relative humidity <80% 3-1-8 . Power : 2×1.5V battery 3-1-9 . Meas.:124×80×20 mm 3-1-10 Weight: approx.
- Page 7 3-2 . TECHNICAL DATA 3-2-1 . Accuracy: ± ( RDG ×a % + digit ) at (23±5) ,<75%RH ℃ year guarantee from production date 3-2-2 .DCV RANG ACCURACY RESOLUTION 400mV 0.1mV ±(0.5%+4) 10mV 400V 100mV 600V ±(1.0%+4)
- Page 8 Input resistance : 10MΩ Overload protection: 400Mv range:250V RMS < 10seconds ;other ranges 600VRMS < 10seconds . 3-2-3. True Measurement RANGE ACCURACY RESOLU7TIO 400mV ±(1.5%+6) 100μV ±(0.8%+6) 10mV 400V 100mV...
- Page 9 600V ±(1.0%+6) Input resistance: 10MΩ Overload protection: 400mV range: 250V < 10seconds(manual range only). Other ranges 600VRMS < 10seconds. Frequency response: Sine wave triangular wave (40~1000)Hz, other waveform: ( 40~400)Hz Displaying: True RMS response...
-
Page 10: Continuity Test
3-2-4. CONTINUITY TEST Overload protection: 250VRMS Warning: do not input voltage at this range. Range Display Test Condition Buzzer sound OCV: about 0.5V less than (50±30)Ω... - Page 11 DISPLAYING TEST RANGE VALUE CONDITION Forward Forward approx. voltage drop 0.5mA , bac of diode kward voltage approx. 1.5V...
- Page 12 3-2-5. DIODE Overload protection:250VRMS Warning: do not input voltage at this range. 3-2-6. RESISTANCE ( Ω ) RANG ACCURACY RESOLUTION 400Ω ±(0.8%+5) 0.1Ω 4kΩ 1Ω 40kΩ 10Ω ±(0.8%+4) 400kΩ 100Ω 4MΩ 1kΩ 40MΩ ±[1.2%+ 5] 10kΩ...
- Page 13 OCV: more than 400mV Overload protection: 250VRMS. NOTE: At 400Ω range, you should make the test leads short to measure wire resistance, then, subtracts from the real measurement. 3-2-7 . CAPACITANCE RANG ACCURACY RESOLUTION ±(5.0%+40) 40nF ±(3.5%+8) 10pF 400nF 100pF...
- Page 14 40uF 10nF 2000uF ±(5.0%+8) 100 nF Overload protection: 250VRMS Warning: do not input voltage at this range. 3-2-8. Frequency(Hz/DUTY) Range Accuracy Resolution 100Hz ±(0.5% 0.01Hz 1000Hz 0.1Hz 10kHz 100kHz 10Hz 1MHz 100Hz...
- Page 15 10MHz 1kHz Input sensitivity: 3V Vp-p ( range 10MHz: more than 3.5V Vp-p) Overload protection: 250V DC/AC peak value. Ⅳ . OPERATION 4-1 . DCV MEASUREMENT 4-1-1. Set the knob to a proper “V” range. 4-1-2. The default mode of this meter is auto range , LCD display“...
- Page 16 “RANGE” change manual range, it can select the range 400mV,4V,40V,400V,600V. 4-1-3 . connect the test lead to the circuit under tested, the voltage and polarity of the point which the red test lead connect to will shown on LCD. NOTE: 1 ....
- Page 17 the knob to a higher range. 2 . Do not input voltage over DC 600V, or, the circuit might be damaged. 3 . Be careful when measuring high voltage circuit. 4-2 . ACV MEASUREMENT 4-2-1. Set the knob to a proper “V” range.
- Page 18 range 400mV,4V,40V,400V,600V. 4-2-3 . Connect the test lead to the circuit under tested, the voltage value of the two point which the test lead connect to will shown on LCD. NOTE: 1 . If LCD displays “OL” , it means over range, should set the knob to a higher range.
- Page 19 3 . Be careful when measuring high volt circuit. 4-3 . CONTINUITY TEST 4-3-1. Set the knob to “ ” range. 4-3-2.Apply test leads to two points of tested circuit, if the inner buzzer sounds, resistance less than (50±30)Ω. NOTE: Do not input any voltage at this range .
- Page 20 4-4-1.Set the knob to “ ” range, 4-4-2.Positive measurement: connect the red test lead to the anode terminal and the black one to the cathode terminal of the diode under tested. will display the approx value of the diode forward voltage drop.
- Page 21 the cathode terminal and the black one to the anode terminal of the diode under tested. The LCD display “OL”. 4-4-4. Diode testing including positive reverse measurement, if not in conformity with the above test result, means the diode is damaged. 4-5.RESISTANCE MEASUREMENT 4-5-1.Set the function knob to...
- Page 22 “ Ω ” range, connect test leads crossly to the resistor under tested. 4-5-2.Press the “RANGE” key to select the mode of auto/manual range 4-5-3. If the measured resistance is low ,it should make the test leads short, press the “...
- Page 23 measurement mode, if have no idea measured resistance range beforehand, should set the range knob to a higher one. 2 . If resistance is over selected range value, “OL” displays, should set the knob to a higher range. When measuring value is over 1MΩ, the reading will take a few seconds to be stable, it’s normal for high...
- Page 24 open circuit, overload display “OL” 4 . When measuring line resistor, be sure that power is turned off and all capacitors are released completely. 5 . Do not input any volt at this range. 4-6.CAPACITANCE MEASUREMENT 4-6-1.Set the function switch to “ ”range.
- Page 25 is not zero ,press “ ” key back to zero. 4-6-3.Apply the test lead to the capacity polarity (red test lead polarity is “ +” ,the black test lead polarity is “ —” ), the LCD will display capacity value . NOTE: 1 ....
- Page 26 the displayed value back to zero to ensure the accuracy of the measurement. 3 . The operation mode is auto range only at this range . 4 . When measure the high-end signals over 80% at 4nF range, will automatic convert range.
- Page 27 MEASUREMENT 4-7-1.Set range knob “Hz/DUTY” ,connect the test lead to the circuit under tested . 4-7-2.Press the “ ” key to switch frequency and duty circle,LCD display readings of frequency and duty circle under tested . NOTE: 1. The operation mode is auto range only at this range .
- Page 28 2. In noise environment, should better use the shielded cable when measure small signal. 3. Do not touch the high voltage circuit. 4. Do not input the value over DC 250V or AC peak value to avoid damage the instrument. 4-8.AUTO POWER OFF After stop working for 15 minutes, the meter will be...
- Page 29 should switch the knob to “off” range to restart the power. Ⅴ . MAINTANENCE Do not try to modify the circuit. 1. Keep the meter away from water, dust and shock. 2. Do not store and operate the meter under the condition of high temperature, high...
- Page 30 and detergent, do not use abrasives and alcohol. 4. If do not operate for a long time, should take out the battery to avoid leakage. 4-1. When signal displays, should replace the battery following the steps: 4-1-1. Unlock the button and remove the battery case.
-
Page 31: If The Meter Does Not Work
4-1-3. Fit on the battery case and lock the button. 4-2. Fuse replacement Use the same type fuse as specified. 6. TROUBLE SHOOTING If the meter does not work... - Page 32 properly, check the meter as following: WAY TO CONDITIONS SOLVE ● The power is not turned DISPLAYING ● replace battery symbol ● replace displays battery ● replace BIG ERROR battery...
- Page 33 ● The specifications are subject to change without notice. ● The content this manual is regarded as correct, error or omits Pls. contact with factory. ● We hereby will not be responsible accident damage caused improper operation. ● The function stated for this User Manual cannot...
- Page 34 be the reason of special usage. 601E-0921-000D...