Invacare Leo Service Manual
Hide thumbs
Also See for Leo:
- User manual (88 pages) ,
- Operating manual (67 pages) ,
- Service manual (44 pages)

Related Manuals for Invacare Leo


Summary of Contents for Invacare Leo
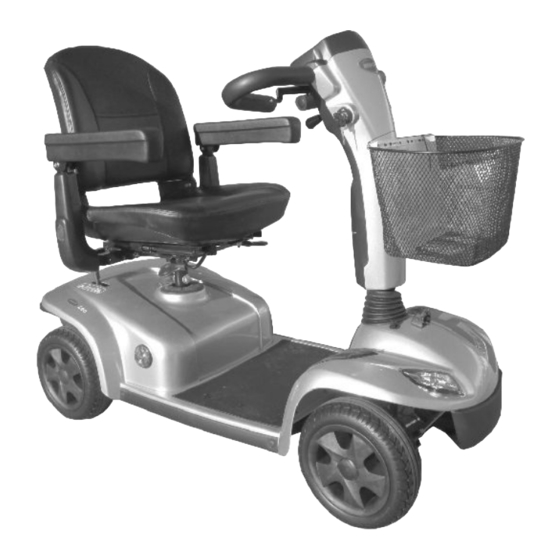
- Page 1 Invacare® Leo en Scooter Service Manual DEALER: Keep this manual. The procedures in this manual MUST be performed by a qualified technician.
- Page 2 All rights reserved. Republication, duplication or modification in whole or in part is prohibited without prior written permission from Invacare. Trademarks are identified by ™ and ®. All trademarks are owned by or licensed to Invacare Corporation or its subsidiaries unless otherwise noted.
-
Page 3: Table Of Contents
Contents 1 General ......... 4 1.1 General information . -
Page 4: General
• You can find information about ordering spare parts maintenance or overhaul work lead to the exclusion in the spare parts catalogue. of all liability on the side of Invacare. • Spare parts must match original Invacare parts. • If you have any problems or questions contact your Only use spare parts which have been approved by provider. -
Page 5: Safety
Safety 2 Safety CAUTION! Injury hazard if the mobility device starts moving unintentionally during repair work 2.1 Safety and fitting instructions – Switch the power supply off (ON/OFF key). – Engage the drive. These safety instructions are intended to prevent accidents –... - Page 6 Mechanical locks which prevent release of the carried out by trained Invacare providers. connecting plugs during operation. To release – Invacare supplies all mobility devices with a the connecting plugs the safety devices must be standard drive program ex-works. Invacare pressed in.
-
Page 7: Hygiene
Use saturated Cleaning and reconditioning disinfectant wipes disinfection and clean* the device surface. *Invacare uses detergent "Nücosept special" 1.5% in water ml/ml Disinfection tools • Disposable wipes (fleece) • Brushes to clean areas difficult to access Further information For more information contact your Invacare service department. -
Page 8: Service
Invacare® Leo 4 Service which no specific values have been determined. All values assume dry and de-greased threads. Thread Tightening torque in 4.1 General safety information on Nm ±10% installation work 3 Nm 6 Nm Risk of damage to mobility device... -
Page 9: Error Codes And Diagnostic Codes
Check the cabling for open or short-circuited circuitry. • Potentiometer is not correctly adjusted and must be replaced. Contact your Invacare provider. Motor voltage error Stops driving • The motor or its cabling is defective. Check the cabling for open or short-circuited circuitry. -
Page 10: Service Plan
Invacare® Leo 4.3.4 Service Plan Component Notes Check Remedy Seat Check welded Tighten screws, seams, fixings and replace parts if upholstery damaged Check seat Grease the spring See Replacing seat suspension generously, replace suspension/spring parts if damaged Check fixings, Tighten screws,... -
Page 11: Controls
Put small parts down software or hand programming device and so that they can be installed in the right sequence. controls system installation manual, available from Invacare®. • Phillips screwdriver Removing power module 1. Remove seat. -
Page 12: Replacing Controls
Invacare® Leo 8. Replace operating console. 9. Install parts in reverse order. 10. Test all functions. 4.4.3 Replacing controls WARNING! Risk of accident When parking the scooter on the scooter support wheels is no longer slowed by the engine brake. The scooter can roll away out of control. -
Page 13: Checking Cables
11. Test all functions of the mobility device. 4.4.6 Updating driving program The driving programs for electric wheelchairs are continually updated and improved by Invacare®. For this reason, you should check whether the version number is still up to date each time a wheelchair comes in for repairs, and also during regular inspections. -
Page 14: Lighting Unit
Invacare® Leo 9. Replace bulb(s) in headlight. • Dynamic® Wizard software 10. Test function. • User manual for the Wizard software • For further information on other requirements - such as the minimum system configuration of 4.5.2 Replacing front direction indicators... -
Page 15: Replacing Center Brake Light
Service Remove screws (3) on glass. Disconnect plug (4). 6. Remove glass. 7. Loosen screws (4) on orange-colored cap (5) and remove cap. 8. Replace lightbulb. 9. Install parts in reverse order. 10. Test function. 4.5.3 Replacing center brake light CAUTION! Risk of burning if power cable is shorted –... -
Page 16: Shrouds
Invacare® Leo 1. Remove seat. 2. Remove shroud. Remove glass (1). 10. Replace lightbulbs (2). Disconnect battery cable A. 11. Install parts in reverse order. 12. Test function. 4.6 Shrouds 4.6.1 Removing shroud CAUTION! Risk of damage to shroud – Do not pull shroud straight up to remove. -
Page 17: Wheels
Service 4. Take off front shroud. 5. Install parts in reverse order. 4.7 Wheels 4.7.1 Replacing wheel suspension WARNING! Risk of accidents Accidents may result from standing the chassis upright on its end. Remove screws (1) beneath control console. – Secure chassis against falling over. 6. - Page 18 Invacare® Leo Place chassis upright on its seat adapter (1). Disconnect cables (1, 2) from cable loom. Secure chassis against falling over. 22. Press 6 fixation clips in (in the middle of the clips). 23. Remove fixation clips. 24. Remove foot mat.
-
Page 19: Removing And Installing Wheels (4-Wheel Version And Rear Wheels On 3-Wheel Version)
Service 31. Loosen fork bolt (2). 32. Remove retaining ring. 33. Remove serrated washer. 34. Remove knurled screw (3). 35. Pull steering column up and out. Remove chassis by pulling it upwards. 28. Remove front wheel (see chapter 6.2). Remove ball bearing (1). 37. -
Page 20: Replacing Front Axle (4-Wheel Version)
Invacare® Leo Removing wheel 5. Secure chassis against falling over. 6. Remove wheel (1). (see chapter 6.3) 7. Loosen and remove nut on the track rod (1) (see note below). 8. Remove track rod from the steering knuckle. Loosen nut A. -
Page 21: Removing/Installing The Drive Wheels
Service Tools: • 17 mm spanner • Rubber mallet • Screwdriver • 17 mm safety nut The crash protection bar (1) serves to protect scooter from damage. 2. Remove seat. 3. Remove batteries. 4. Remove drive unit. Removing the Drive Wheels 1. -
Page 22: Removing/Installing The Front Wheels - Four Wheel
Invacare® Leo 1. Turn power off and remove the key from the ignition. 2. Place the front of the scooter up on blocks so that the front wheel is off the ground. 3. Remove the bolt A, axle B, washer C, nut D and 1. -
Page 23: Replacing Brake Cable
Service 3. Disconnect battery cable. 4. Place a supporting wooden block under the front part of the frame so that the front wheel is no longer touching the floor. 1. Slacken brake cables. 2. Disconnect brake cable at affected wheel. Slacken brake cable using setting screw A. -
Page 24: Seat System
Invacare® Leo 13. Remove motor downwards out of the mobility device frame. Cut through cable ties (1) and remove. 7. Fold up controls shroud (2). Check rubber bearing (1) on motor suspension. Replace damaged rubber bearings. 15. Install motor in reverse order. -
Page 25: Accessories
12. Reposition bolt (7), nut and washers. • Can holder • Off-board charger kit • Covers: Storage cover (Full scooter cover), Seat Cover (Rain & Dirt protection) The installation instructions for additional accessories are available at your Invacare® provider or directly from Invacare®. 1509707-E... - Page 26 Notes...
- Page 27 Notes...
- Page 28 Invacare representatives/distributors Australia: Canada: Ireland: New Zealand: Invacare Australia Pty. Ltd. Invacare Canada L.P. Invacare Ireland Ltd, Invacare New Zealand Ltd 1 Lenton Place, North Rocks NSW 570 Matheson Blvd East, Unit 8 Unit 5 Seatown Business Campus 4 Westfield Place, Mt Wellington 1060 2151 CDN Mississauga, On.