Table of Contents
Advertisement
Quick Links
Advertisement
Table of Contents

Related Manuals for Kenmore 385.1884180


Summary of Contents for Kenmore 385.1884180
- Page 1 OWNER'S MANUAL S _A/RS SEWING MACHINE 1884180 MODEL 385.
- Page 2 SEARS CANADA Dear Customer: have just invested m a very fine zigzag sewing please pause for a moment and carefully read this booklet and care for your machine. Specific instructions are given on threading, tension obtain the best sewing results...
-
Page 3: Table Of Contents
SECTION KNOW YOUR MACHINE A Portable Case or Cabinet _sAvailable ... Locate and Identify the Parts ... Identify the Accessories ... SECTION PREPARE YOUR MACHINE FOR SEWING Set Up the Machine Plug in the Machine and Switch on the Power Foot Control •... -
Page 4: Product View
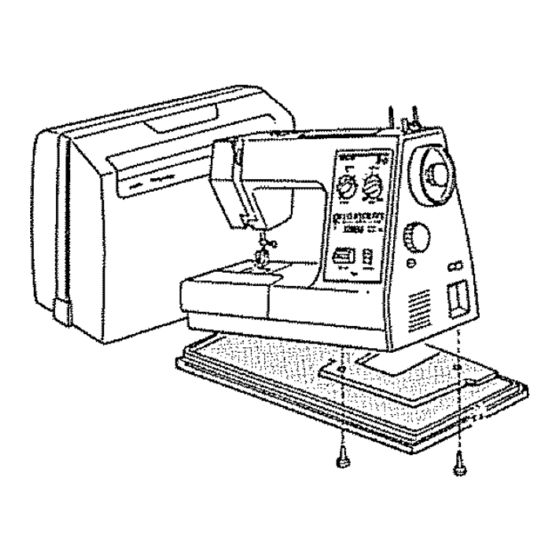
SECTION KNOW YOUR MACHINE A Portable Case or Cabinet is Available A full line of sewing cabinets is available at your nearest Sears retail store through general catalog. Another option a Carrying Case : = then your Kenmore goes anywhere,... -
Page 5: Components View
Cover Plate Hand Wheel Push-Pull Clutch Stitch SeSector Strelch Stitch Adjuster Light Power Swttch P_ug Connector Carrying Handle Presser Foot Thumb Screw Presser Foot Presser Foot Lever Free Arm Nomenclature Plate Foot Control Thread Guide Needle Clamp Snap-on Button... -
Page 6: Accessories
Bobbin Buttonhole opener Darmng plate Large st:rew dr_ver Quilter Straight stitch foot Blind Zipper foot stitch foot Buttonhole gutde p,a,o / _'_. _ Needle Smell screw driver Sliding buttonhoSe foot Overedge foot Base plat Buttonh o_e templates Lint brush Spool pin telt Satin stitch... - Page 7 Plug in the Machine and Switch on the Power Power supply plug Power supply Plug connector Machine plug NOTE: Before inserting plug into your machine, be sure power switch Check your outlet to be sure it is a 110to Volt AC outlet, Insert machine...
-
Page 8: Set The Pressure Dial
Your machine has two ranges of speed--a work and a high one for faster, general work. On the low setting the machine will sew no faster than approximately two4hird the speed of the high even when the foot control is fully depressed. -
Page 9: Setting Spool Pins
Setting Spool Pins _poo_ fe,t_ spool pros are used holding spools of thread in order to feed thread the machine. To use, pult up the spool pins, Place _he spool felt pros. Push down storage, Adjust the Presser Foot Lever Presser Foot Lever... -
Page 10: Accessory Storage Box
Fit the tabs into the slot, as shown. With your thumb and index finger, gently snap in. Your sewing machine can do free arm sewing. This feature makes sewing easy for: Bar tacking to reinforce pockets, plackets waistlines on ready-made... - Page 11 * Darning s ocks o r mending knees, elbows, * Sewing buttons onsleeves, waistbands, * Stitching sleeves, waistbands, pantlegs, orareas o fwear i nchildren's clothes. etc. oranycircular garment area.
- Page 12 The Presser feet are an important feature of this machine. what each foot does in order to use them effectively. Your presser foot is held in place by a Foot Holder. snaps on the foot holder, which is seldom removed. If you need to remove or attach the foot holder, here is what you do: To Remove: To Attach:...
- Page 13 To Snap On To Snap On the Presser Foot; Place the presser foot so the hori- zontal on the foot lies just under groove foot holder. Lower the presser foot holder lock the presser foot in place. NOTE: hear presser foot snap in place,...
- Page 14 o Presser Foot Types (Continued) Sliding Buttonhole Foot Sliding buttonhole foot this foot buttonholes buift-ln system. is marked measure your buttonhofes accurately. Uses: Buttonhole making {see page 45). Zipper Foot Zipper foot This foot can be set to sew on each side of your zipper.
- Page 15 Blind Hem Stitch Foot stitch foot Blind this foot perfect blind hemming. The foot has ridges on the bottom to keep the fabric from slipping and a guide screw on top to guide the folded edge of your hem. Uses: Blind hemming (see page 43}...
-
Page 16: Check Your Needle
= Presser Foot Types (Continued) Buttonhole Foot Buttonhole foot Use this foot when making buttonholes with buttonhole attachment system. Uses: Buttonhole making tsee page 48) Your choice of needle and thread depends on the fabric tn your needle case, you will find the following color-coded Btue (t 1 ) ... -
Page 17: Fabric, Needle, Thread, Stitch Length Chart
;titch Length Chart Fabric, Needte, Thread NEEDLE FABRIC SIZE COLOR Lightweight: Polyester Batiste, Dimtty, Chiffon, Wrap 11.ORANGE Silks, Fine Lace° Organza, Fine Mercerized Crepe, Tar{eta, Voile, Silk A Organdy Medium Wetght: Cotton, Cotton Blends, 50 Mercerized Percale_ G ingham_ Polyester 14-RED Shantung, Pique,... -
Page 18: Prepare The Bobbin
= To Remove the Bobbin from the Machine Gently push down on the bobbin cover plate =t towards you. Set aside. Lift out the bobbin, as shown. = Wind the Bobbin and slide Put your spool of thread shown. Pull clutch away from... -
Page 19: Insert Bobbin Into Bobbin Holder
Insert the Bobbin into the Bobbin Hotder bobbin into bobbin Pull holder so that thread feeds toward counter-clockwise (left)_ slot about inches thread Then pull toward back through tension through the slot ® thread clockwise Slide the bobbin cover plate of the machine pushing... -
Page 20: O Thread Your Needle
o Thread Your Needle ,,PI, 7 --I l The numbered steps above follow the numbers on the illustrations. Dotted lines show places where thread loops and then is pulled tight. Raise take-up lever to its highest position by turning Raise presser foot lever. - Page 21 Pick Up Your Bobbin Thread Raise presser foot lever. Hold Bring bobbin needle thread loosely in left hand top thread, rotate handwheet toward you one complete turn, Pull both threads under thread up by pulling back of the presser foot, to 6 inches of thread clear.
-
Page 22: Adjust Top Thread Tension
m Adjust the Top Thread Tension Top side of fabric SelUng Top ___ thread Tighlen For Straight Stitch ideal straght stttch witl have threads locked between fabric, as shown above, magnified to show detail. If you look at the stitch, front and backt you will... - Page 23 For Zigzag Stitch in the correct zigzag stitch, the bobbin threads will not show of fabric and the top threads will show slightly on the bottom below the correct appearance. To match this appearance, tension. Top tension Top tension Too Tight Too Loose s_de of Fabric Top side of Fabric...
- Page 24 V Length Stremh Stitch The stitch length controt regulates the length of stitch, stitches setting. The higher the number, the longer the stitch. 0 means no feed. To select Stretch Stitches, set this control at Stretch NOTE : When select decorative stitches (green)
- Page 25 :',Stitch WidthControl The stitch width control regulates the width of the stitch you select. The htgher the number, the wider the stitch. = Three Needle Position V Width _ 2 3_4 The stitch width control also regulates needle positions for straight stitching.
- Page 26 Three Needle Position Left Needle Position Set the dial at left needle position when sewing the edge of the fabric. Right Needle Position dial Right needle position top stitching when sewing on collar of jacket etc.
- Page 27 To reverse stitch, hold down this con- trol during sewing. Release to sew forward again. Now that you are famillar with the controls on your are ready to start to sew with your new Kenmore each time you sit down to sew: Inspect the needle,...
- Page 28 Stitch Stitch Selection Foot and Other Attach. STRAIGHT Straight _ilter_'? Darning Zipper Plate foot STRAIGHT Straight STRETCH ZIGZAG Zigzag RICK-RACK Zigza9 STRETCH BLIND Blind hem stitch STtTCH Thread Stitch Stitch Needle Tension Length Width Check Orange Regular searms, Chart Zone etc.
- Page 29 Stitch Stitch Foot and Other Attach. Selection OVERCAST Zigzag STRETCH < < THREE-STEP Zigzag ZIGZAG < SMOCKING Zigzag STITCH SHELL Satin STITCH SERGING Overedge Thread Stitch Stitch Needle Tension Width Length Check Yellow Use for swimwaar, Chart Stretch garments Stitch Position on p_ 15 0.5_...
- Page 30 Stitch Stitch Selection Foot and Other Attach. Zigzag STITCHING ELASTIC STRETCH < FAGOTING STRETCH PATCH IN G < < < TWO-POINT SHE LL Zigzeg STITCHING L> L> Thread Stitch Stitch Needle Tension Length Width Check 3 _ 8 Orange 3 _ 6 Use for overlapping Chert Zone...
- Page 31 Stitch Stitch Foot and Other Attach. Selection HERRING BONE Zigzag STRETCH TWO-POINT Zigzag BOX STITCH OVEREDGE Zigzag STITCH STRETCH Zigzag STITCH DECORATIVE DECORATIVE Satin GEOMETRICS Stitch Thread Stitch Needle Tension Length Width Check Yellow Use as hemming Chart Stretch and draperies. Stitch on p.
- Page 32 Foot and Other Attach. Sliding buttonhole BUTTONHOLE Buttonhole SATIN STITCH Satin Thread Stitch Stitch Needle Tension Length Width 2 _ 6 Blue 3 _ 6 Buttonholes: Check Zone Cha_ on p. 15 Check Straight Cha_ buttonholes, on p. 1__55 Check 0.5~ Use for applique Chart...
-
Page 33: Straight Stitches
Straight Stitch Set the Machine Stitch width control 0 or(_D lop thread tension control 2 to t3 Stitch length control orange Before sewing zone foot, always control to 0 or (_ the needle. Raise the presser foot. Raise position. Stretch Stitch Place H: Straight foot a stitching... - Page 34 Use the Darning Plate Darning plate Sometimes when sew, want control Darning Plate covers the feed dogs so that they do not touch To Put on the Darning Plate: NOTE: rectangular holes in the Darning Plate needte plate. In the darning plate, these holes right...
- Page 35 Straight Stitches Quilting Set the Machine Stitch width contro_ 0 or Stitch length Top thread tension control orange control 2 to 6 zone Stretch Stitch H: Straight foot A: Zigzag foot The Stitch and Its Uses Quilting is stitching layers fabric together with...
- Page 36 Set the Machine Stitch width control 0 or C_ thread tension contro_ Stitch length 2to6 control any number (not necessary to adjust} Here's How (see page 32). No presser Remove foot (see page Stretch Stitch ernbroidew Draw Darning plate fabric stitch start darning.
- Page 37 : Zigzag Stitches Basle Zigzag Set the Machine Stitch w_dth contro_ I to 6 Top thread tension Stitch }ength control 3 to 8 control Or'e rtge Zone Stretch Stitch A: Zigzag foot The Stitch and Its Uses zigzag stitch is one of the most common and most versatile stitches...
- Page 38 ¸:¸ Satin Stitch Set the Machine Stitch width € _controf2tO_l 4- s Top thread teRston contro_ 3 to 8 Stitch tenglh control 0.5 to 1 Stretch Stitch F: Satin stitch foot Pressuredial: 1 or The Stitch and Its Uses The Satin stitch is a versatile and often used decorative...
- Page 39 Applique Set the Machine Stitch width control 2 to 6 Top thread tens=on control 2 to 6 Stitch length controt 0.5 to 1 Baste joiner) apptique Stitch around sure needte edge of the applique, Stretch Stitch When sewing corners, Satin sttteh toot down into...
- Page 40 Monogramming Set the Machine Stitch width control 5 to 6 Top thread tension control 2 to 6 Stitch length control 0.5 to Set the same as satin stitch. Back 0_;_ Herc:'s How {nterfacing. Stretch Stitch Draw with tailor's F_ Satin stitch Satin foot width...
- Page 41 Sew a Button Set the Machine Stitch w=dth control Top thread tension control 2 to 6 Stitch length control Any number inot Use the darning necessary;o adjust) Match foot, Adjust Stretch Stitch Lower Turn the hand button. Zigzag foot Darning plate Stitch plate for button sewing...
- Page 42 Set the Machine Stitch width control 3 to 6 Top thread tension control 3 to8 Stitch length control orange zone Helpfut Hints Start overcasting corner right at the edge, the fabric Stretch Stitch tangled. Overedga foot The Stitch and Its Uses ThLs zigzag variation is very...
- Page 43 Three-Step Zigzag Set tha Machine Stitch width control 5 to 6 Stitch length control 0.5 to 'i Seam Finishing Piace the fabric so that the edge will the r_ght hand side of the presser foot, Gu=de Stretch Stitch stitches fail at the edge of the fabric. Zigzag foot ]-he Stitch and its Uses...
- Page 44 Overcast Stretch Stitching Set the Machine Stitch width control 3 to 6 Top thread tension Stitch length controt 2 to 6 control yellow stretch stitch position Here's How Place the LEFT. of the needle Stitch so the needle pierces lust short Stretch Stitch Or, place your seam,...
- Page 45 Set the Machine Stitch width control 2 to :3 Light Weight Fabric Fop thread tension control 2 to 6 Stitch length control orange zone Heavy Weight Fabric Finish the raw edge of your Measure, Stretch Stitch NOTE: Blind Hem Stitch Foot G Fold showing.
- Page 46 ilili!!ii!iiilji Set the Machine Stitch width control 2 to 3 Fop thread tension 2 to 6 controt Stitch _ength control ! Stretch Stitch Lace adds blouses Zigzag foot pillows wh_,m trimmed Turn raw edge of fabric 5/8", Place stitch using stretch excess fabric a fanciful, feminine...
- Page 47 = Learningto Sew Buttonholes With your Kenmore sewing machine you have two methods buttonholes. use the built-in system or you snap-in automatic buttonhole attachment system, Choose the buttonhole style Built-in bottonholes (rectangular). Choose this st'_le for waistband, cuffs, belt slots or where you w_ll need only one or two buttons.
- Page 48 Set the Machine Stitch w_dth "_ control 3 to 6 Stitch length controt Blue zone F==_ 1, a. Carefully length on your b, Change foot, top thread tension controt 2 to 6 c. _nser_ foot Stiding buttonhole foot ing runnmg Stretch Stitch Ad usting the Stitch...
- Page 49 4. a. Set the stitch selector 5° a. Set the stitch b. Sew 4 to 6 stitches. b. Sew until the buttonhole. Stop sewing at the right stitch. c. Stop NOTE: When sewing at the edge of fabric, sliding buttonhole foot as illustrated 6.
- Page 50 Buttonhole Attachment System more varied and accurate buttonholes, will hole attachment and templates. Know the parts read carefully your machine properly. will need these attachment system. Guide slot Measuremen t ark_ng Catch Buttonhole guide plate Base plate enjoy using the button- how to set up items buttonhole...
- Page 51 Set the Machine Stitch w_dth Top thread tension control 2 to 6 Stitch length control Stretch Stitch Buttonhole toot Helpful Hints obtain best results light weight threads bobbin thread. NOTE: is advisable to use a blue stretch fabric needle when sewing knits synthetic...
- Page 52 Buttonh_e guide ptete _,T_-- I "_ ""Catch Setting Mark Gu de bock "'" _" _,-.----- Gear '=::: " Base plate When have selected the template with hole you need, slide the template into the guide plate. Pull catch toward while slidin!] the template hole size you...
- Page 53 Marked buttonhole Cerl[er marking" Mark your buttonhole position carefully on the garment. Placing your garment behind the machine, plate and the buttonhole foot as shown. Align marked buttonhole with center marking Line up your fabric edge with the measurement plate just in front of the buttonhole foot as shown,...
- Page 54 Fabric Preparation: Put the top sides of the fabric together zipper opening. Use the reverse to lock stitches. zipper opening with stitch length at "4"' and top thread tension at °'3", Top thread control 2 to 6 End ol opemng stde of fabric E: Zipper...
- Page 55 8, Open thezipper. 10.C_ose t he 9, Lower t hepresser footandstitch fabric therest o f theseam, zipper turn 1, Remove top side up. attach presser pins on the zipper 12. Stitch across and below tom of the zipper. 13. Turn the corner guide foot...
- Page 56 Set the Machine Stitch width control 3 to 6 Top thread tension eontro| 4 to 9 Stitch length control orange Here's zone For best effect: Stretch Stitch F: Satin stitch foot If you The Stitch and Its Uses space the rows 5/8" The Shell Stitch is formed...
-
Page 57: Stitch Length Controi
Smocking Set the Machine Stitch width control 3 to 6 Top thread tenston :ontro! 2 to 6 Stitch length control yeitow stretch stitch pOSJl[lOn Stretch Stitch A: Zigzag foot With straight stitching across the area to be smocked. Knot the threads bobbin gathers evenly. - Page 58 Sot the Machine Stitch width control 5 to 6 Top thread tension :ontrol 3 to 8 Stitch length control 0.5 to 2 Here's Fold and press. Stretch Stitch tear-away so the A: Zigzag foot edge on each side. The Stitch and Its Uses Use this stitch...
- Page 59 Stitch Sot the Machine St_l;chwidth control 3 to 6 Top thread tension Stitch length control 3 to 6 control yellow stretch stitch position Stretch Stitch A: Zigzag toot Choose this garments. Mark match center Place under foot and stitch sure bu ted, Sot the Machine Fop thread...
- Page 60 ¸¸ Set rite Machine Stitch width control 3 to 6 TOp thread tension control 3 to B Stitch length control Thi,.; stitch join them Stretch Stitch Zigzag foot i!iii ¸!iii:iii¸_i_i Set the Machine Top thread tension controJ 3 to 8 Stitch control is useful...
- Page 61 Decorative StretchPatterns Set the Machine Top thread tenslon controt 2 to 6 Stitch length controt yellow stretch stitch positron A: Zigzag foot Stretch Stitch Stitch width control 3 to 6 The Stitch and Its Uses Decorative stretch touch to the items you sew for your You can decorate patterns can be used for...
- Page 62 Set the Machirt_ Top thread tension control 3 to8 F: Satin stitch foot The Stitches and The,r Uses These stitches are pu rely decorative. can sew one row or severa[ or vary the stitch special effects. Experiment on a scrap of fabric to see what spemal effects Stitchw_dth control...
- Page 63 ;:Whatto DO when PROBLEM _ncorrect Improper Loose upper Irregular Stitches Puiling Loose presser foot, Unevenly Nicks Pulling Incorrect Breaking Needle incorrect Loose presser Upper Bunching of Thread under Incorrect Using two different Bent or blunt Puckering Loose presser foot. Fabric PROBABLE CAUSE s_ze needle.
- Page 64 PROBLEM incorrect SMpping Stitches Bent Incorrect Tight Starting improper Tight Breaking Upper Thread Incorrect Sharp eye m needle. Nicks Improper Breaking Bobbin Thread Lint Darning Stitch Fabric not Moving Thread Push-pull Thread Machine Jamming Knocking Noise Lint PROBABLE CAUSE s_ze needle, Choose or blunt needle,...
- Page 65 Bulb insure essential parts clean at all times. The bobbin or knock Unplug the machine and open the face cover. CAUTION_ _ight butb will HOT, Protect your fingers when handle Follow Turn Push bulb up and turn machine. bulb counter-clockwise to remove Remove firmly...
- Page 66 Unplug machine and remove Take out the bobbin. the presser foot and needle. bobbin Remove bobbin face cover plate. Remove the screw on the teft side of the needle w_th the large screw driver. Remove the needle plate. lint brush clean Line up the...
- Page 67 PARTS LIST...
- Page 68 All parts listed herein may be ordered from any Sears store or service center. WHEN ORDERING REPAIR PARTS, ALWAYS GIVE THE FOLLOWING INFORMATION: PART NUMBER PART DESCRIPTION MODEL NUMBER NAME OF ITEM If the parts you need are not stocked...
-
Page 69: Reverse Stitch Control
Accessory storage box ... 2, 8 Appliqueing 26, 37 Bar tacking 26, 37 Base ... Base plate ... 4, 48, 65_-66 Basic zigzag ... 26, 35 Blind hemming ... 26, 43_44 Blind hem stitch foot . . _ 4, 13, 26, 43, 65_66 Bobbin ... -
Page 70: Three-Step Zigzag
Thread cutter ... 2, 7 Thread guide 2_3, 18 Three-step zigzag ... 27, 41 Topstitching 26, 32 Top thread 18_21 Top thread tension 20_2t Top thread tension control 2, 20"_21 Turning a square corner ... Two-point box stitching ... 29, 58 Two-point shell stitching 28, 54... - Page 71 SETTINGUPYOURMACHINE 1. You'll find spool pins cover, Pull up the spool pins and place spool pin felt on the pins. Plug foot control into machine receptacle_ Then connect cord 1!0 -" t20 volt A.,C wall outlet. Your Kenmore sewing machine been thoroughly oiled...
-
Page 73: Smocking
STITCH STRA ZIGZAG BLIND MENDING _HE'L ..FAGOT,NG _O-PO,NTSHELL TWO-POINT OVE:R EDGE ,TRA,GHTSTRETOH RICK-RAcK SMOCKING ELASTIC PATCHING "ERR,NG_ONE STR ETCH DECORATIVE BU_ONHOLE ' "B UTTO N HO LE''"" i_l DECORATIVE ".. S ATIN PRACTICAL STITCH CHART LENGTH SELECTOR DIAL ---- ORANG ORANGE... - Page 74 CANADA. This warranty applies only while This warranty gives you specific legal rights, WARRANTY MACHINE HEAD Sears will, free of charge, repair defects ON ELECTRICAL EQUIPMENT OF SEWING Sears will, free of charge, repair equipment of the sewing machine,...
- Page 75 Repair Parts Distribution Center for handling. SEARS CANADA S-385 Sewing Machine, should a need ever exist for repair Sears Serwce Center, Be sure to pertinent facts when you call or will be shown on your nomenclature plate ALWAYS GIVE...