Table of Contents
Advertisement
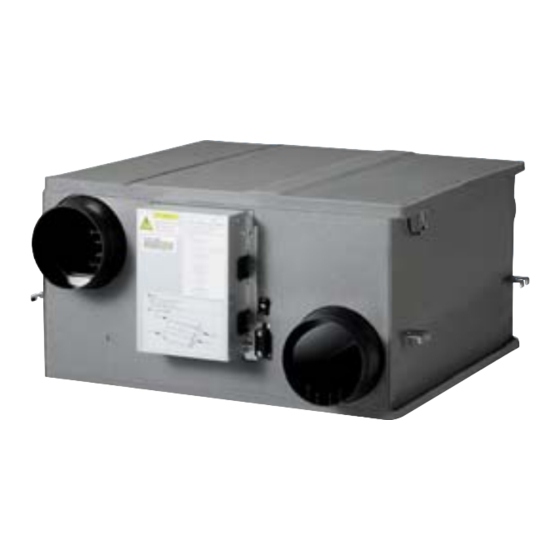
ERV(Energy Recovery Ventilator)
AN035JSKLKN, AN050JSKLKN
AN080JSKLKN, AN100JSKLKN
ERV
(Energy Recovery Ventilator)
Basic : RHF025EE/035EE/050EE/080EE/100EE
Model : AN026JSKLKN
AN035JSKLKN
AN050JSKLKN
AN080JSKLKN
AN100JSKLKN
Model Code : AN026JSKLKN/EU
AN035JSKLKN/EU
AN050JSKLKN/EU
AN080JSKLKN/EU
AN100JSKLKN/EU
CONTENTS
6. Circuit Descriptions
Advertisement
Table of Contents

Related Manuals for Samsung ERV


Summary of Contents for Samsung ERV
- Page 1 Model : AN026JSKLKN AN035JSKLKN AN050JSKLKN AN080JSKLKN AN100JSKLKN Model Code : AN026JSKLKN/EU AN035JSKLKN/EU AN050JSKLKN/EU AN080JSKLKN/EU AN100JSKLKN/EU ERV(Energy Recovery Ventilator) CONTENTS 1. Precautions 2. Product Specifications 3. Alignment and Adjustments 4. Disassembly and Reassembly 5. Wiring Diagram AN026JSKLKN 6. Circuit Descriptions 7. PCB Diagram 8.
-
Page 2: Table Of Contents
··················································································································· 7. PCB Diagram ······································································································································ 8. Operating Instructions ··············································································································· 8-1 Name of Each Part ····························································································································· 8-2 Using installation/service mode of ERV wired remote controller ············································ 9. Troubleshooting ····························································································································· 9-1 Items to be checked first ·················································································································· 9-2 When Ventilator stops operation ····································································································... - Page 3 10-1 ······························································································································· 10-1 Ventilator Operation Priniple 10-1 ········································································································ 10-2 Index for Model Name 10-2 ··················································································································· 10-3 Cleaning the Dust Filter 10-3 ················································································································· 10-4 Cleaning the Heat Exchange Element 10-5 ························································································· 10-5 Q & A for Non-trouble 10-7 ···················································································································· Samsung Electronics...
-
Page 4: Precautions
– If the product is installed out of the insulation, it may result in electric shock or malfunction due to moisture generated in the product. Do not install the product in humid place such as bathroom. – It may cause electric shock or malfunction. Samsung Electronics... - Page 5 Do not install the electric wire to get tension. - The electric wire may disconnect and cause fire. Do not utilize ERV wired remote control with wet hands. – It may cause electric shock. If the power cable is damaged, replace it by the manufacturer or qualified personnel to avoid the risk.
- Page 6 Make sure air fan stops rotating before cleaning and other treatment. – If not, it may cause electric shock or injury. Do not utilize steel scrubber or chemicals such as benzene or thinner. – It may cause discoloration or unit falling. Samsung Electronics...
-
Page 7: Product Specifications
Fresh air conditions are guaranteed by recovering moisture in winter while exhausting it in summer. Operation at Cold Area Optimized automatic ventilation operation is conducted to prevent condensation and air volume reduction. Low Noise and Low Power With highly efficient motor and optimized system design, operation noise and electric consumption is minimized. Samsung Electronics... - Page 8 1. Air Volume/ External Static Pressure, Comply with KS Heat Exhaust Ventilation System Standards(KS B6879). 2. Heat Exchange/Temperature Exchange Efficiency, Comply with regulations to pro- Trial Operation Conditions mote high efficiency energy devices, [Cooling], Indoor(24˚C DB/17˚C WB), Outdoor(35˚C DB/24˚C WB) [Heating], Indoor(22˚C DB/13.9˚C WB), Outdoor(2˚C DB/0.44˚C WB) Samsung Electronics...
- Page 9 1. Air Volume/ External Static Pressure, Comply with KS Heat Exhaust Ventilation System Standards(KS B6879). 2. Heat Exchange/Temperature Exchange Efficiency, Comply with regulations to pro- Trial Operation Conditions mote high efficiency energy devices, [Cooling], Indoor(24˚C DB/17˚C WB), Outdoor(35˚C DB/24˚C WB) [Heating], Indoor(22˚C DB/13.9˚C WB), Outdoor(2˚C DB/0.44˚C WB) Samsung Electronics...
- Page 10 1. Air Volume/ External Static Pressure, Comply with KS Heat Exhaust Ventilation System Standards(KS B6879). 2. Heat Exchange/Temperature Exchange Efficiency, Comply with regulations to pro- Trial Operation Conditions mote high efficiency energy devices, [Cooling], Indoor(24˚C DB/17˚C WB), Outdoor(35˚C DB/24˚C WB) [Heating], Indoor(22˚C DB/13.9˚C WB), Outdoor(2˚C DB/0.44˚C WB) Samsung Electronics...
- Page 11 Code-No Q'TY Separate Sale ASS'Y CO SENSOR DB95-00740A MWR-VH12N (Wired Remote Controller) Item Descriptions Code-No Q'TY Remark ASS'Y ERV REMOCON DB93-14406C Separate Sale MSD-EAN1(Assy-SPI Device Option Kit ) Item Descriptions Code-No Q'TY Remark ASS'Y-SPi DEIVICE DB97-09494B Separate Sale OPTION KIT 2-3-2.
-
Page 12: Alignment And Adjustments
· Need to reset option. · Check connector disconnection of humidity sensor and connection conditions. E183 Outdoor Humidity Sensor Error(ERV) · A Check of outdoor humidity value is possible when KEY2 switch is entered 8 times. Set operates normall regardless of error. - Page 13 3-2 Option Switch & Key Function Address If you use a existing EEPROM after replace MAIN PBA, don't need to reset option. SUB EEPROM PBA Samsung Electronics...
- Page 14 Trial operation is stopped 30 minutes later, it returns to DISPLAY Default state 30 minutes later. 2) KEY 2 : Data display The marked contents is changed whenever you press KEY2 once. Press the KEY2 switch for more than 3 seconds to reset. Samsung Electronics...
- Page 15 Exhaust Air FAN RPM 1,350RPM Supply Air FAN RPM 950RPM Turn Off Indoor Temperature 25°C Turn Off Outdoor Temperature 30°C Turn Off Density 1,220ppm Installed Unit Number 3 unit Turn Off Turn Off Numbers and Alphabets on PCB Display Samsung Electronics...
-
Page 16: Disassembly And Reassembly
4. Disassembly and Reassembly Necessary Tools Item Remark +SCREW DRIVER MONKEY SPANNER Samsung Electronics... - Page 17 Ass’y Cabi 1) Remove the 3 bolts on Cover Element to Cover Element detach it.(Use +Screw Driver.) 2) Loosen the clips connected to the Cover. 3) Separate the connector connected to the Damper by pulling out the connector body. Samsung Electronics...
- Page 18 Ass’y Element 1) Pull up the 2 strings hanging out from the 2 ends of Element to detach the Element. Bracket Body 1) Remove the 4 bolts and separate Bracket Element, A Body Element, A. (Use +Screw Driver.) Samsung Electronics...
- Page 19 Procedure Remark Cushion Bypass 1) Slide Cushion Bypass to the direction seen in the picture besides. Take caution not to break down EPS structure. 2) Find Wire connected to the temperature sensor. Separate the 2 temperature sensor connectors. Samsung Electronics...
- Page 20 Parts Procedure Remark Cabi Cover 1) Detach Cabi Cover by removing 9 bolts. (Use +Screw Driver.) Cushion Mid 1) Slide Cushion Mid to the direction seen in the picture besides. Take caution not to break down EPS structure. Samsung Electronics...
- Page 21 The bolts are not required to be removed. 4) Detach the whole Ass’y Blower Motor (which is made up of Fan, Motor, Bracket Motor, and Cover Bell Mouse). 5) 2 Motors are placed within the unit for input and outlet. Samsung Electronics...
- Page 22 1) Unscrew the nuts fixing Fan by rotating them right. (Use Monkey Spanner.) Do not touch the Fan. Its sharp edge may cause injury. 2) Detach the Motor with removing the 4 bolts fixing Bracket. (Use +Screw Driver.) Samsung Electronics...
- Page 23 Procedure Remark Ass’y Case Blower 1) Remove the 2 bolts attached at the sides of the body. (Use +Screw Driver.) 2) Remove the 4 bolts on the other side of Cabi Cover to detach it. (Use +Screw Driver.) Samsung Electronics...
- Page 24 Parts Procedure Remark 3) Detach the Ass’y Case Blower. 4) Unscrew the Bracket Case Blower and the Case Blower. (Use +Screw Driver.) Samsung Electronics...
- Page 25 Parts Procedure Remark Ass’y Damper/ 1) Remove all bolts to separate Bracket and Ass’y-Lever Bypass Cam. (Use +Screw Driver.) 4-10 Samsung Electronics...
- Page 26 1) Remove the 3 bolts on Cover Element to Cover Element detach it.(Use +Screw Driver.) 2) Loosen the clips connected to the Cover. 3) Separate the connector connected to the Damper by pulling out the connector body. Samsung Electronics 4-11...
- Page 27 Parts Procedure Remark 4-12 Samsung Electronics...
- Page 28 Parts Procedure Remark Ass'y Element 1) Remove the 4 bolts and separate Bracket Body Element, B. (Use +Screw Driver.) 2) Pull down the 2 strings hanging out from the 2 ends of Element to detach the Element. Samsung Electronics 4-13...
- Page 29 Take caution not to break down EPS structure. Cushion Mid 1) Slide Cushion Mid to the direction seen in the picture besides. 2) Separate the 2 temperature sensor connectors. Take caution not to break down EPS structure. 4-14 Samsung Electronics...
- Page 30 The bolts are not required to be removed. 4) Detach the whole Ass’y Blower Motor (which is made up of Fan, Motor, Bracket Motor, and Cover Bell Mouse). 5) 2 Motors are placed within the unit for input and outlet. Samsung Electronics 4-15...
-
Page 31: An035Jsklkn/An050Jsklkn/An080Jsklkn/An100Jsklkn ··················································
(Use +Screw Driver.) 2) Find the Element and 2 Dust Filters. Ass’y Element 1) Detach Element and Filter from the unit. Ass’y Filter Make sure detach the Filter before the Element. 2) There are 2 Element within the product. 4-16 Samsung Electronics... - Page 32 Each guide is attached to the product with 1 bolt. Thermistor 1) Separate the Temperature Sensor from Ass'y Wire the fixed part. The Temperature Sensor is attached with wire clips. 2) The input and output channel has 1 Temperature Sensor each. Samsung Electronics 4-17...
- Page 33 Cushion Mid 1) Slide the EPS structure to the side and detach it, as seen in the picture besides. 2) Slide and pull the EPS structure to separate it, as seen in the picture besides. 4-18 Samsung Electronics...
- Page 34 Cushion Mid. Put the part written with “Down↓” downwards and put the part with “Motor→” towards the Motor when assembling the unit. Make sure not to break down EPS structure. Samsung Electronics 4-19...
- Page 35 Remark Connector 1) Separate the Damper from the unit. Damper Cam (Use +Screw Driver.) 2) Separate the connectors by holding their bodies and pulling them out. 3) Unscrew bolts attached to Bracket and Cam. (Use +Screw Driver.) 4-20 Samsung Electronics...
- Page 36 1) Unscrew the nuts fixing the Fan by rotating them left. (Use Monkey Spanner.) 2) Unscrew the bolts fixing Motor to detach if from the Motor Bracket. It has 4 bolts. (Use +Screw Driver.) Do not touch the Fan. Its sharp edge may cause injury. Samsung Electronics 4-21...
- Page 37 2) Separate the Case Blower by sliding the Case Blower upwards. Cushion Blower-EA 1) Detach the EPS structure fixed to Case Cushion Blower-SA Blower by sliding the structure to the side. Make sure not to break down the EPS structure. 4-22 Samsung Electronics...
- Page 38 (Use +Screw Driver.) 2) Find the Element and 2 Dust Filters. Ass’y Element 1) Detach Element and Filter from the unit. Ass’y Filter Make sure detach the Filter before the Element. 2) There are 2 Element within the product. Samsung Electronics 4-23...
- Page 39 Each guide is attached to the product with 1 bolt. Ass’y Fan Parts 1) Separate motor connectors. 2) Loosen the holder fixing the motor wire by twisting it slightly. 3) 2 Motors are placed within the product for supply air and exhaust air. 4-24 Samsung Electronics...
- Page 40 Cushion Mid. Put the part written with “Down↓” downwards and put the part with “Motor→” towards the Motor when assembling the unit. Make sure not to break down EPS structure. Samsung Electronics 4-25...
- Page 41 Remark Connector 1) Separate the Damper from the unit. Damper Cam (Use +Screw Driver.) 2) Separate the connectors by holding their bodies and pulling them out. 3) Unscrew bolts attached to Bracket and Cam. (Use +Screw Driver.) 4-26 Samsung Electronics...
- Page 42 1) Detach the whole Ass’y Blower Motor (which is made up of Fan, Motor, Bracket Motor, and Cover Bell Mouse) through the inspection hole. 2) 2 Motors are placed within the unit for supply air and exhaust air. Samsung Electronics 4-27...
- Page 43 1) Unscrew the nuts fixing the Fan by rotating them left. (Use Monkey Spanner.) 2) Unscrew the bolts fixing otor to detach if from the Motor Bracket. It has 4 bolts. (Use +Screw Driver.) Do not touch the Fan. Its sharp edge may cause injury. 4-28 Samsung Electronics...
-
Page 44: Wiring Diagram
5. Wiring Diagram AN026JSKLKN/AN035JSKLKN/AN050JSKLKN/AN080JSKLKN/AN100JSKLKN OPTION OPTION OPTION OPTION OPTION OPTION: This Document can not be used without Samsung’s authorization. Samsung Electronics... -
Page 45: Circuit Descriptions
6. Circuit Descriptions 6-1 PCB Circuit Descriptions SMPS Circuit Part Motor Load Circuit Part Comm. Circuit Part This Document can not be used without Samsung’s authorization. Samsung Electronics Samsung Electronics... - Page 46 6. SWITCHING DIODE of secondary side should not utilize usual rectification DIODE because SWITCHING speed of SMPS reaches 130kHz. High speed SWITCHING DIODE is required. 7. SMPS stops operation if SHORT occurs post voltage of DC12V because of FEEDBACK from DC12V. Samsung Electronics...
- Page 47 CONTROL IC of BLDC. It may cause SHORT of DC15V or DC310V. 6. If SHORT of DC15V or DC310V takes place, 2A FUSE (F702) opens and DC15V rectification DIODE may be damaged, which stops operation of SMPS. Samsung Electronics...
- Page 48 : A-B>200mV : HIGH, B-A>200mV : LOW ● DATA is received and prepared with “R” PORT. When sending the DATA, HIGH is input at ENABLE. 4. EXCLUSIVE GATE Non-polar communication realization element to change signal LEVEL with utilizing INVERSE when connections is switched. Samsung Electronics...
-
Page 49: Pcb Diagram
7. PCB Diagram This Document can not be used without Samsung’s authorization. Samsung Electronics... - Page 50 This Document can not be used without Samsung’s authorization. Samsung Electronics...
- Page 51 ⑰ Display part Display part KEY input part to execute trial operation, reset or view ⑱ KEY input part mode ⑲ Exhaust motor EA (Exhaust air) motor connector CN73(WHT) ⑳ Supply motor SA (Supplied air) motor connector CN74(BLU) Samsung Electronics...
-
Page 52: Operating Instructions
Dust filter protects heat exchange element and filter supplied air. Electric Component Box It is made up of circulation of the unit. Duct Connection Flange It refers to the pipe connected to the duct for supply air, outdoor air, indoor air and exhaust air. Samsung Electronics... - Page 53 Dust filter protects heat exchange element and filter supplied air. Electric Component Box It is made up of circulation of the unit. Duct Connection Flange It refers to the pipe connected to the duct for supply air, outdoor air, indoor air and exhaust air. Samsung Electronics...
- Page 54 Displays operation mode ② Displays set time ③ Displays Away mode ④ ⑤ Displays fan speed ⑥ Displays SPI (Optional) ⑦ Displays CO sensor (Optional) ⑧ Displays inspection, invalid, and lock ⑨ Displays range hood, central control and external interlock Samsung Electronics...
- Page 55 Cancels the timer function (Press the button for more than 3 seconds.) ⑤ Fan speed button Adjusts the fan speed. Selects the Away mode/ ⑥ Away/Filter reset button the button for more than 3 seconds.) ⑦ Time control button Samsung Electronics...
- Page 56 Up and down Set, Cancel 1. If you want to use the various additional functions for the ERV wired remote controller, press the Mode and ∧ buttons at the same time for more than three seconds. You will enter the additional function settings, and the main menu is displayed.
- Page 57 Using installation/service mode of ERV wired remote controller(cont.) Installation/service setting mode If communication initialization is needed after the setting, the system resets automatically and communication is initialized. Note Main Factory Page Function Range Remarks menu menu setting number Reset to default value...
- Page 58 Using installation/service mode of ERV wired remote controller(cont.) Main Factory Page Function Range Remarks menu menu setting number Address of Setting/checking indoor Indoor unit registered devices / None unit View Master View Master Setting/ hexadecimal 5)* checking Address of View Master...
- Page 59 2) * When setting the address or option, you can set the target device with sub menu no.1. 3) * Power Master Reset is a setting needed to supply optimized power to ERV wired remote controller when multiple indoor units or ERVs are connected to ERV wired remote controller in a group.
- Page 60 Using installation/service mode of ERV wired remote controller(cont.) Address is displayed in hexadecimal. Refer to the table below. Note Hexadecimal Decimal Hexadecimal Decimal Hexadecimal Decimal Hexadecimal Decimal Hexadecimal Decimal Samsung Electronics...
- Page 61 Using installation/service mode of ERV wired remote controller(cont.) The example of setting ERV wired remote controller options 1. Press the Mode and buttons at the same time for more than 3 seconds. ▶ When main menu is displayed, press the button to select no.5.
-
Page 62: Troubleshooting
Check assembly or replace motor Check whether outdoor temperature Wait until the outdoor temperature Operation at cold places If supply air fan or exhaust air fan are is below -15˚C reaches -15˚C not working Check outdoor temperature sensor Replace sensor (SHORT/OPEN) Samsung Electronics... - Page 63 Prohibition of operation under outside & indoor temperature 0 ° E561 Supply air(SA) fan motor error E562 Exhaust air(EA) fan motor error E654 Inside damper error 602~609 indicate errors due to ERV wired remote control. Refer to the ERV wired remote control installation manual. Samsung Electronics...
- Page 64 PCB, to measure resistance between the two electrodes. Is measured resistance a lot different from the value 12.1 specified by the table besides? 18.0 Outdoor temperature 27.3 thermistor disorder(replacement) 43.0 Restart the unit after having replaced PCB. Samsung Electronics...
- Page 65 DATA once in six seconds. It waits for 5 seconds and conducts data check for one second. sensor and LED 1 light up for 1 second when the sensor check DATA. Sensor checks DATA ranges 400PPM~2,000PPM. Samsung Electronics...
- Page 66 PCB dislocated from PCB? Assembly connector Check product operation Does Motor rotate in case of operation? Is Motor RPM is lower than 120? Is DC0V~DC6V power measured from Motor ③↔⑤? Motor check or PCB check or replacement replacement Samsung Electronics...
- Page 67 PCB dislocated from PCB? Assembly connector Check product operation Does Motor rotate in case of operation? Is Motor RPM is lower than 120? Is DC0V~DC6V power measured from Motor ③↔⑤? Motor check or PCB check or replacement replacement Samsung Electronics...
- Page 68 Reconnect communication line between Mster and Slave. Eliminate all communication connectors on Slave PCB and connect them again one by one. Find out the Slave interrupting communication and check its lines. Then, replace Slave PCB. Good +0.7V -0.7V Samsung Electronics...
- Page 69 Eliminate all PCB communication line and communication connectors on PCB and connect connector and replace PCB. them again one by one. Find out the ventilator interrupting communication and check its lines. Then, replace PCB. Good +0.7V -0.7V Samsung Electronics...
- Page 70 Turn on the unit. Occurrence of E162 Is EEPROM SUB PBA reassembled correctly? EEPROM PBA CODE : DB93-12483A EEPROM Reassembly Is any problem such as short or unsoldering between EEPROM PIN? Remove short or unsoldering Replace EEPROM PBA. Samsung Electronics...
- Page 71 Check operation Is AC220-240V power measured from Is DAMPER switch working? connector (CN72) ①↔③? PCB check or replacement PCB check or replacement Is OPEN/SHORT signal working at connector (CN51)? Switch check or replacement PCB check or replacement 9-10 Samsung Electronics...
- Page 72 Sensor SPEC. Occurring E198. Is the CN140 Connector of PCB correctly connected to wire? Restart after connecting connector. Check both ends of the connector connected terminal block. Is the ends of the connector shorted? Replace MAIN PBA. Samsung Electronics 9-11...
- Page 73 Option setting error Display E163 Check Method Entering incorrect ERV option or entering no ERV option at all Cause Entering incorrect ERV option or entering no ERV option at all Sensor SPEC. Progress re-input after reconfirming option by model attached below.
- Page 74 Clean or replace the filter if it is damaged. Is filter working properly? Clean or replace the heat exchange element Is heat exchange element working properly? if it is damaged. Clean or replace the duct if it is damaged. Is duct working properly? Samsung Electronics 9-13...
- Page 75 9-4-14 When cold air is infused Is the unit infusing cold air? DAMPER → Heat-EX mode ? Control DAMPER (Change to Heat-EX mode) Is heat exchange element Check heat exchange element and fix it. working properly? 9-14 Samsung Electronics...
- Page 76 Are Filter well cleaned? Are Heat Exchange Element well cleaned? Eliminate Dust or other substance. Eliminate the substance. Is there any substance inside the Duct? Measure RPM and fix it. Is Fan Motor working properly? Replace or repair PCB. Samsung Electronics 9-15...
-
Page 77: Reference Sheet
Heat-EX mode : Temperature and humidity of indoor air and outdoor air are exchanged (The function minimizes heat loss from the process of ventilation). By-Pass mode : Ventilation process without exchanging heat of indoor and outdoor air. Samsung Electronics 10-1... - Page 78 COMMERICIAL/HIGH VTL HEAT PUMP R410a COMMERICIAL/STANDARD HEAT RECOVERY MINI/HIGH VTL COOLING ONLY ERV with DX coil HEAT PUMP Cooling only R134A Heat Pump ※ "/" can be removed from the buyer card if there are not enough digits. 10-2 Samsung Electronics...
- Page 79 Make sure to insert the dust filters correctly. If not, dust may accumulate on the heat exchange element and decrease the efficiency. replacement may vary according to the used period and condition. or an agency that you bought the product. Samsung Electronics 10-3...
- Page 80 Make sure to insert the dust filters correctly. If not, dust may accumulate on the heat exchange element and decrease the efficiency. replacement may vary according to the used period and condition. or an agency that you bought the product. 10-4 Samsung Electronics...
- Page 81 It may damage the heat exchange element. 5. Reassemble the heat exchange element and the maintenance cover. in a service center or an agency that you bought the product. Do not wash the heat exchange element. It may decrease its efficiency. Samsung Electronics 10-5...
- Page 82 It may damage the heat exchange element. Heat exchange element 5. Reassemble the heat exchange elements and maintenance cover. in a service center or an agency that you bought the product. Do not wash the heat exchange element. It may decrease its efficiency. 10-6 Samsung Electronics...
- Page 83 - Replacement period : If it is not damaged or modified, it can be used permanently because it is made of paper. Filter - Dust filter (Standard) : Clean the element with vacuum cleaner (once in 6 months) environment.) Samsung Electronics 10-7...
- Page 84 China china.samsungportal.com © Samsung Electronics Co., Ltd. April. 2015. This Service Manual is a property of Samsung Electronics Co., Ltd. Printed in Korea. Any unauthorized use of Manual can be punished under applicable International and/or domestic law. Code No. AC-AC-00113E_1...