Zoom Q2n-4k Original Operation Manual
Hide thumbs
Also See for Q2n-4k:
- Quick manual (8 pages) ,
- Supplementary manual (7 pages) ,
- Firmware update manual (7 pages)
Table of Contents
Advertisement
Advertisement
Table of Contents

Related Manuals for Zoom Q2n-4k


Summary of Contents for Zoom Q2n-4k
- Page 1 Operation Manual You must read the Usage and Safety Precautions before use. This document cannot be displayed properly on black-and-white displays. © 2018 ZOOM CORPORATION Copying or reprinting this manual in part or in whole without permission is prohibited.
- Page 2 Recording from copyrighted sources, including CDs, records, tapes, live performances, video works and broadcasts, without permission of the copyright holder for any purpose other than personal use is prohib- ited by law. Zoom Corporation will not assume any responsibility related to infringements of copyrights.
-
Page 3: Introduction
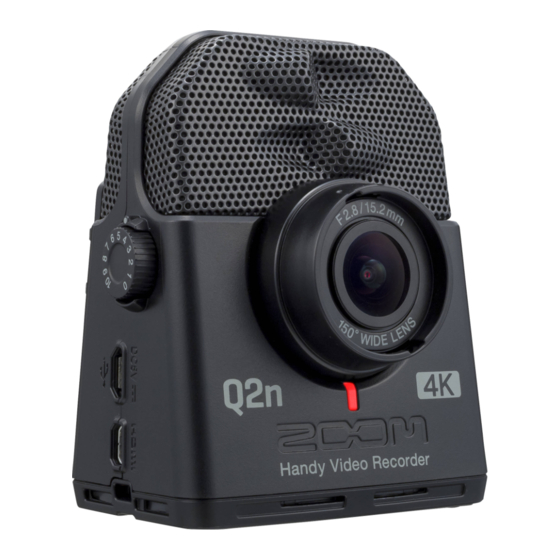
Introduction Thank you very much for purchasing a ZOOM Handy Video Recorder (hereafter, “ ”). has the following features. Capture the immediacy of live performances in both audio and video Using the wide angle lens, you can record video even when close to the subject. With the XY format con- denser mic that has excellent sound pressure resistance, you can record even clearer stereo images at high resolutions up to 24-bit/96 kHz. -
Page 4: Table Of Contents
Contents Introduction ..............................3 Contents ................................ 4 Names of parts ............................. 6 Preparations ..............................10 Supplying power ............................ 10 Using batteries ............................ 10 Using an AC adapter ..........................11 Inserting microSD cards ........................12 Turning the power on/off ........................13 Turning the power on ......................... 13 Setting up when first turned on ...................... - Page 5 Using as a web camera ......................... 38 Compensating for lags between video and audio ................38 Using as a card reader ........................... 39 Using as a USB mic ..........................40 Enabling direct monitoring ......................... 40 Battery settings ............................41 Setting the type of battery used ......................41 Enabling energy saving .........................
-
Page 6: Names Of Parts
Names of parts Front Built-in XY mic Lens REC LED Built-in XY mic The two crossing directional mics can record a three-dimensional sound with natural depth and width. Lens This lens has an F2.8 brightness and 150° wide angle. REC LED This LED shows the recording status. - Page 7 Back Display (LCD) Function buttons Function buttons POWER/PLAY button SETTING/EXIT button REC button Display (LCD) This shows the video and various types of information. Function buttons Use these to operate the functions shown on the display. POWER/PLAY button Use this to turn the power ON/OFF and to start video playback. REC button Use this to start and stop recording.
- Page 8 USB port Connect this to a computer or iOS device to use as a web camera, card reader or USB mic. The dedicated AC adapter (ZOOM AD-17) can also be connected here to use AC power. Micro HDMI connector This can output video and audio to an HDMI-compatible TV or other device.
- Page 9 Bottom Battery/SD card compartment cover Tripod mounting threads Battery/SD card compartment cover Remove when installing batteries and microSD cards. Tripod mounting threads Use these screw threads to attach a tripod (not included).
-
Page 10: Preparations
Preparations Supplying power Using batteries Open the battery/card compartment cover. Install the batteries. AA batteries Close the battery/card compartment cover. NOTE After installing batteries, set the correct battery type. ( “Setting the type of battery used” on page... -
Page 11: Using An Ac Adapter
Using an AC adapter Connect the cable of an AD-17 AC adapter to the USB port. Plug the AC adapter into an outlet. HINT When connected to a computer, power can be supplied by USB. -
Page 12: Inserting Microsd Cards
Inserting microSD cards Open the battery/card compartment cover. Insert the microSD card into the card slot. microSD card To remove a microSD card, push it further into the slot and then pull it out. Close the battery/card compartment cover. NOTE •... -
Page 13: Turning The Power On/Off
Turning the power on/off Turning the power on Press and hold After startup completes, the REC LED on the front will light green and the Recording Screen will ap- pear on the display. HINT To turn the power off, keep pressing until "Goodbye See You!”... -
Page 14: Setting Up When First Turned On
Setting up when first turned on The first time the is turned on, the display language and the date and time must be set. HINT Language display and date and time settings can be changed later on the Setting Screen. ( “Setting the language shown”... -
Page 15: Setting The Date And Time
Setting the date and time Press the button for the item to be set. VIDEO LO CUT AUDIO SCENE AUTO GAIN EXIT Press to confirm. VIDEO LO CUT AUDIO SCENE AUTO GAIN EXIT... -
Page 16: Recording
Recording Recording Screen overview The Recording Screen opens when the power is turned on. When recording: recording time In recording standby: available recording time Remaining battery charge VIDEO setting LO CUT setting AUDIO setting FOV setting SCENE setting AUTO GAIN setting Level meters Peak indicators HINT... -
Page 17: Making Video Recording Settings
Making video recording settings Use the buttons on both sides of the display to change settings. Video quality Low-frequency noise reduction Field of view Audio quality Scene Setting the video quality The video quality (resolution) and frame rate per second can be set. VIDEO Press on the Recording Screen to set the video quality. -
Page 18: Setting The Field Of View
Setting the field of view This sets the field of view (FOV) for videos. Press on the Recording Screen to set the field of view. VIDEO LO CUT AUDIO SCENE AUTO GAIN EXIT Setting Explanation Distortion correction WIDE This widens the field of view. —... -
Page 19: Setting The Scene Type
Setting the scene type This sets the camera settings for the recording conditions (scene). SCENE Press on the Recording Screen to set the scene type. VIDEO LO CUT AUDIO SCENE AUTO GAIN EXIT Setting Explanation AUTO Settings change according to the recording conditions. OUTDOOR Settings are optimized for outdoor recording. -
Page 20: Setting Low-Frequency Noise Reduction
Setting low-frequency noise reduction The low-cut filter can be set to reduce the sound of wind, vocal pops and other noise. LO CUT Press on the Recording Screen to set the low-frequency noise reduction. VIDEO LO CUT AUDIO SCENE AUTO GAIN EXIT Setting Explanation... -
Page 21: Adjusting Recording Levels
Adjusting recording levels Adjusting levels manually Turn to adjust the recording level. High Adjust so that the level meters are around −12 dB with the loudest sounds. Level meters Peak indicators NOTE • The peak indicators light and the REC LED on the front blinks when loud sounds are input. •... -
Page 22: Using Automatic Level Adjustment
Using automatic level adjustment The recording level can be adjusted automatically according to the use conditions. AUTO GAIN Press on the Recording Screen to set the automatic gain adjustment. VIDEO LO CUT AUDIO SCENE AUTO GAIN EXIT Setting Explanation This disables automatic level adjustment. Adjust the recording level manually. This is suitable for recording band performances, concerts and other loud situa- CONCERT tions. -
Page 23: Recording
Recording Recording video Press VIDEO LO CUT AUDIO SCENE AUTO GAIN EXIT This starts video recording. Press again to stop video recording. NOTE • The energy saving function will make the screen dim during recording. ( “Setting the display back- light time”... -
Page 24: Connecting External Input Devices
Connecting external input devices You can capture audio with an external mic or audio device when recording video or audio. Connect the external mic or audio device to the external input jack. EXT IN NOTE The built-in mics are disabled when an external device is connected to the external input jack. HINT •... -
Page 25: Playing Recordings
Playing recordings Playback Screen overview From the Recording Screen, press to open the Playback Screen. Status indicator Playing : Remaining playback time Paused : Stopped : Remaining battery charge Current file/total File name number of files Level meters Peak indicators Progress bar (shows playback position) -
Page 26: Playing Recordings
Playing recordings Press on the Recording Screen. VIDEO LO CUT AUDIO SCENE AUTO GAIN EXIT Playback of the last recorded file or the most recently played file will start. NOTE • The can only play videos that it recorded. Press to stop playback and reopen the Recording Screen. -
Page 27: Playback Operations
Playback operations The following operations are possible during playback. Changing the playback position Pause/resume Press Search forward Press and hold Search backward Press and hold Selecting files Move to next file Press Move to previous file Press Playing files continuously Playback can be set so that after playback of one file completes the next file can be played back without stopping. -
Page 28: Adjusting The Output Volume
Adjusting the output volume to adjust the volume. VIDEO LO CUT AUDIO SCENE AUTO GAIN EXIT HINT • The volume can be adjusted separately for the speaker and headphones. • The volume can be set from 0 to 30. -
Page 29: Headphone/Line Output
Headphone/line output You can listen to the audio with headphones or an external audio amplifier. Connect headphones or audio equipment to the headphone jack using a stereo mini plug cable. HINT When the Recording Screen is open, you can monitor the input sound. -
Page 30: Viewing On An Hdmi-Compatible Tv
Viewing on an HDMI-compatible TV Use an HDMI cable to connect with an HDMI-compatible TV to view video recordings on it. Connect an HDMI cable (not included) to the Micro HDMI connector. Press to play the video and audio. VIDEO LO CUT AUDIO SCENE... -
Page 31: Managing Files
Managing files Checking file information You can view a variety of information about the current playback file. Press on the Playback Screen. VIDEO LO CUT AUDIO SCENE AUTO GAIN EXIT This shows information about the current playback file. Information about the duration, size, date, time, video and audio can be checked. Press This reopens the Playback Screen. -
Page 32: Deleting Files
Deleting files You can delete files that you do not need. Press on the Playback Screen. VIDEO LO CUT AUDIO SCENE AUTO GAIN EXIT The deletion screen will open. Press to select a file. VIDEO LO CUT AUDIO SCENE AUTO GAIN EXIT A check will appear in the box at the top left of the file image. - Page 33 Press to select Yes VIDEO LO CUT AUDIO SCENE AUTO GAIN EXIT The checked files will be deleted. To cancel deletion, press to select No ×.
-
Page 34: Using Usb Functions
Using USB functions Connecting to computers and iOS devices Use a USB cable to connect to a computer or iOS device and use the recorder as a web camera, card reader or USB mic. Press on the Recording Screen. VIDEO LO CUT AUDIO SCENE... - Page 35 Press the button for the function to be used. VIDEO LO CUT AUDIO SCENE AUTO GAIN EXIT Function Explanation Use as a web camera with a computer ( “Using as a web camera” on page WEB Camera Card Reader Use as an SD card reader with a computer ( “Using as a card reader”...
- Page 36 • When connected to a computer, power can be supplied by USB. • When connected to an iOS device, use batteries because power cannot be supplied by USB. • A list of iOS devices that have been confirmed to work with this unit can be checked at www.zoom. co.jp.
-
Page 37: Turning The Power On When Connected To A Computer
Turning the power on when connected to a computer If the power is turned on when connected to a computer, the USB function selection screen will open. Use < and > to select the function to use. VIDEO LO CUT AUDIO SCENE AUTO GAIN... -
Page 38: Using As A Web Camera
Using as a web camera can be used as a web camera to input audio and video to a computer. Connect the with a computer. “Connecting to computers and iOS devices” on page NOTE Web camera use is not possible with an iOS device. Launch an application that uses a camera on the computer, and select the NOTE •... -
Page 39: Using As A Card Reader
Using as a card reader can be used as a card reader to read and write data from computers and iOS devices. Connect the to a computer or iOS device. “Connecting to computers and iOS devices” on page Open a file management screen on the computer or iOS device and show the contents of the mi- croSD card in the Work with the files on the microSD card. -
Page 40: Using As A Usb Mic
Using as a USB mic can be used as a USB mic to input audio to a computer or iOS device. Connect the to a computer or iOS device. “Connecting to computers and iOS devices” on page Launch an application that uses a mic on the computer or iOS device, and select the HINT Refer to the manual for the application that you are using for the procedures to select the To end the connection, conduct the necessary disconnection procedures on the computer or iOS de-... -
Page 41: Battery Settings
Battery settings Setting the type of battery used Set the type of battery used so that the amount of remaining battery charge can be accurately displayed. Press on the Recording Screen. VIDEO LO CUT AUDIO SCENE AUTO GAIN EXIT This opens the Setting Screen. Press three times to change the Setting Screen. - Page 42 Press Battery Type to set the type of battery used. VIDEO LO CUT AUDIO SCENE AUTO GAIN EXIT The options are Alkaline, Ni-MH and Lithium. Press This reopens the Recording Screen.
-
Page 43: Enabling Energy Saving
Enabling energy saving Setting the display backlight time Power can be saved by shortening the amount of time that the backlight stays lit. Press on the Recording Screen. VIDEO LO CUT AUDIO SCENE AUTO GAIN EXIT This opens the Setting Screen. Press three times to change the Setting Screen. - Page 44 Press Power Save, and set the time until the backlight dims. VIDEO LO CUT AUDIO SCENE AUTO GAIN EXIT Setting Explanation The backlight always stays bright. The backlight dims if no operation occurs for 1 minute. 1 min 3 min The backlight dims if no operation occurs for 3 minutes.
-
Page 45: Setting The Auto Power Off Function
Setting the Auto Power Off function Set to turn off automatically if not used at all for a set amount of time when running on battery power. NOTE This function is disabled during recording and playback as well as when it is powered through its USB port. - Page 46 Press Auto Power Off, and set the time until the power turns off. VIDEO LO CUT AUDIO SCENE AUTO GAIN EXIT Setting Explanation The Auto Power Off function is disabled. The power will turn off automatically 1 minute after the last operation. 1 min 3 min The power will turn off automatically 3 minutes after the last operation.
-
Page 47: Setting The Date And Time
Setting the date and time If the date and time are set, the recorder can add the recording date and time to files. Press on the Recording Screen. VIDEO LO CUT AUDIO SCENE AUTO GAIN EXIT This opens the Setting Screen. Press two times to change the Setting Screen. -
Page 48: Setting The Volume Of The Operation Sound
Setting the volume of the operation sound Set the volume of the operation sound. Press on the Recording Screen. VIDEO LO CUT AUDIO SCENE AUTO GAIN EXIT This opens the Setting Screen. Press Beep, and set the volume. VIDEO LO CUT AUDIO SCENE AUTO GAIN... -
Page 49: Enabling Continuous Playback
Enabling continuous playback Playback can be set so that after playback of one file completes the next file can be played back without stopping. Press on the Recording Screen. VIDEO LO CUT AUDIO SCENE AUTO GAIN EXIT This opens the Setting Screen. Press Play Mode, and set whether continuous playback is enabled. -
Page 50: Using Mics That Support Plug-In Power
Using mics that support plug-in power Enable plug-in power from the for mics that support it. Press on the Recording Screen. VIDEO LO CUT AUDIO SCENE AUTO GAIN EXIT This opens the Setting Screen. Press Plug-in Power and set it to On. VIDEO LO CUT AUDIO... -
Page 51: Setting The Standard Frame Rate
Setting the standard frame rate This sets the standard recording frame rate used according to the regional video format. Press on the Recording Screen. VIDEO LO CUT AUDIO SCENE AUTO GAIN EXIT This opens the Setting Screen. Press NTSC/PAL to set the standard frame rate. VIDEO LO CUT AUDIO... -
Page 52: Setting The Language Shown
Setting the language shown Set the language shown on the display. Press on the Recording Screen. VIDEO LO CUT AUDIO SCENE AUTO GAIN EXIT This opens the Setting Screen. Press three times to change the Setting Screen. VIDEO LO CUT AUDIO SCENE AUTO GAIN... -
Page 53: Formatting Microsd Cards
Formatting microSD cards To maximize the performance of a microSD card, use the to format it. Press on the Recording Screen. VIDEO LO CUT AUDIO SCENE AUTO GAIN EXIT This opens the Setting Screen. Press SD Format. VIDEO LO CUT AUDIO SCENE AUTO GAIN... -
Page 54: Restoring Factory Default Settings
Restoring factory default settings You can restore all settings to their factory defaults. Press on the Recording Screen. VIDEO LO CUT AUDIO SCENE AUTO GAIN EXIT This opens the Setting Screen. Press three times to change the Setting Screen. VIDEO LO CUT AUDIO SCENE... - Page 55 Press to select Yes VIDEO LO CUT AUDIO SCENE AUTO GAIN EXIT This starts resetting the After resetting completes, the power will automatically turn off.
-
Page 56: Updating The Firmware
Executing a firmware update is not possible if the remaining battery power is low. Copy the firmware update file to the root directory on a microSD card. The latest firmware update file can be downloaded from www.zoom.co.jp. Insert the microSD card into the microSD card slot. - Page 57 Press to select Yes After updating completes, a notification screen appears. NOTE Do not turn the power off during a firmware update. Press and hold to turn the power off.
-
Page 58: Responding To Warning Messages
Use a microSD card that has been formatted by the and con- firmed to work with it. Please check the list of cards that have been confirmed to work on the ZOOM website (www.zoom.co.jp). The microSD became full. Delete unneeded data or replace it with a new microSD card. -
Page 59: Troubleshooting
“Formatting microSD cards” on page • If formatting a microSD card does not improve this, we recommend replacing the card. Please check the list of cards that have been confirmed to work on the ZOOM website (www.zoom.co.jp). NOTE This is not a guarantee of specific microSD card recording performance for microSD cards that have been confirmed to work. -
Page 60: Specifications
Note: card reader and USB mic functions support iOS devices Power 2 AA batteries : alkaline LR6 (1.5 V), nickel metal hydride HR6 (1.2 V) or lithium FR6 (1.5 V) AC adapter (ZOOM AD-17): DC 5 V/1 A Note: USB bus power supported Estimated continuous recording time using Video resolution Alkaline LR6 (1.5 V) Ni-MH HR6 (1.2 V) Lithium FR6 (1.5 V) - Page 61 ZOOM CORPORATION 4-4-3 Kanda-surugadai, Chiyoda-ku, Tokyo 101-0062 Japan www.zoom.co.jp Z2I-3402-01...