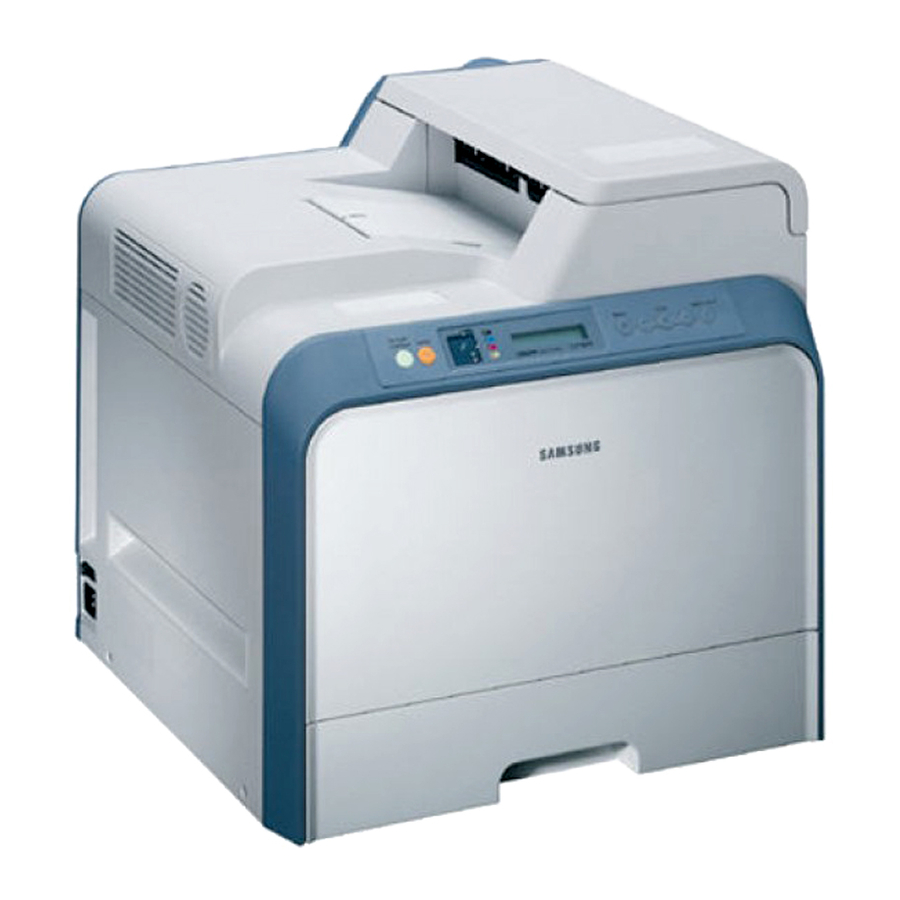
Samsung CLP-600 Series User Manual
Samsung color laser printer user's guide
Hide thumbs
Also See for CLP-600 Series:
- Service manual (256 pages) ,
- Brochure & specs (8 pages) ,
- User manual (227 pages)
Table of Contents
Advertisement
Advertisement
Chapters
Table of Contents
Troubleshooting

Related Manuals for Samsung CLP-600 Series


Summary of Contents for Samsung CLP-600 Series
- Page 2 This manual is provided for information purposes only. All information included herein is subject to change without notice. Samsung Electronics is not responsible for any changes, direct or indirect, arising from or related to use of this manual. © 2005 Samsung Electronics Co., Ltd. All rights reserved.
- Page 3 If you have any comments or questions regarding Samsung products, contact the SAMSUNG customer care center. Country Customer Care Center CANADA 1-800-SAMSUNG (7267864) MEXICO 01-800-SAMSUNG (7267864) U.S.A 1-800-SAMSUNG (7267864) ARGENTINE 0800-333-3733 BRAZIL 0800-124-421 CHILE 800-726-7864 (SAMSUNG) COSTA RICA 0-800-507-7267 ECUADOR...
-
Page 4: Table Of Contents
ONTENTS 1. Introduction Special Features ... 1.1 Printer Components ... 1.2 Front View ... 1.2 Right Side View ... 1.2 2. Setting Up Your Printer Unpacking ... 2.1 Installing the Toner Cartridges ... 2.2 Loading Paper ... 2.4 Changing the Size of the Paper in the Tray ... 2.5 Connecting a Printer Cable ... - Page 5 6. Maintaining Your Printer Printing a Configuration Page ... 6.1 Replacing Supplies ... 6.2 Managing Toner Cartridges ... 6.2 Toner Cartridge Storage ... 6.2 Toner Cartridge Life Expectancy ... 6.2 Redistributing Toner ... 6.2 Replacing Toner Cartridges ... 6.4 Replacing the Paper Transfer Belt ... 6.5 Replacing the Fuser Unit ...
-
Page 6: Laser Safety Statement
However, it is advisable that the machine be operated in a well ventilated area. If you need additional information about ozone, please contact your nearest Samsung dealer. Power Saver This printer contains advanced energy conservation technology that reduces power consumption when it is not in active use. -
Page 7: Radio Frequency Emissions
Declaration of Conformity (European Countries) Approvals and Certifications The CE marking applied to this product symbolises Samsung Electronics Co., Ltd. Declaration of Conformity with the following applicable 93/68/EEC Directives of the European Union as of the dates indicated: January 1, 1995: Council Directive 73/23/EEC Approximation of the laws of the member states related to low voltage equipment. -
Page 8: Regulatory Compliance Statements
Directive 1999/5/EC. The product has been designed to work with the national PSTNs and compatible PBXs of the European countries: In the event of problems, you should contact the Euro QA Lab of Samsung Electronics Co., Ltd. in the first instance. - Page 9 Replacing the Fitted Plug (for UK Only) MPORTANT The mains lead for this machine is fitted with a standard (BS 1363) 13 amp plug and has a 13 amp fuse. When you change or examine the fuse, you must re-fit the correct 13 amp fuse.
-
Page 10: Introduction
Linux OS. • Your printer comes with a USB interface. • The CLP-600N comes with a built-in Network interface, 10/100 Base TX. The CLP-600 does not support a network interface. • To use the CLP-600N in both wired and wireless network environments, you can install an optional wired/wireless network interface card. -
Page 11: Printer Components
Printer Components These are the main components of your printer. Note that all illustrations on this User’s Guide are from the CLP-600N and that some parts may be different from your printer. Front View Output Support USB Port Wireless Network Antenna Network Port Tray2 Cable... -
Page 12: Setting Up Your Printer
Setting Up Your Printer This chapter gives you step-by-step instructions for setting up your printer. This chapter includes: • Unpacking • Installing the Toner Cartridges • Loading Paper • Connecting a Printer Cable • Turning the Printer On • Printing a Demo Page •... -
Page 13: Installing The Toner Cartridges
Carefully remove all of the packing tape from the printer. Pull the paper tray out of the printer and remove the packing tape from the tray. Select a location for the printer: • Leave enough room to open the printer trays and covers, and to allow for proper ventilation. - Page 14 Holding both handles on the toner cartridges, gently rock them from side to side to evenly distribute the toner. Place the toner cartridges on a flat surface, as shown, and remove the paper covering the toner cartridges by removing the tape. : If toner gets on your clothing, wipe it off with a dry cloth and wash it in cold water.
-
Page 15: Loading Paper
Loading Paper The tray (Tray1) can hold a maximum of 250 sheets of plain paper. You can use A4 and letter-sized paper. To load paper: Pull the tray out of the printer. Push down on the metal plate until it locks into position. Flex the paper sheets back and forth to separate the pages and then fan them while holding one edge. -
Page 16: Changing The Size Of The Paper In The Tray
Changing the Size of the Paper in the Tray The tray is preset to Letter or A4 size, depending on your country. To change the size to A4 or Letter, you must adjust the paper length guide properly. Pull the tray open. After you pull it all the way out, lift up the front part of the tray slightly to release the tray from the printer. -
Page 17: Connecting A Printer Cable
Squeeze the paper width guide, as shown and slide it to the stack of paper until it lightly touches the side of the stack. Do not push the guide too tightly against the edge of the paper as it may cause the paper to bend. OTE S •... -
Page 18: For Network Printing (Clp-600N Only)
If you want to use the printer in both wired and wireless network environments, you need to install an optional wired/ wireless network interface card. Contact your Samsung dealer or the retailer where you bought the printer. We strongly recommend that the card be installed by a trained service professional. -
Page 19: Changing The Display Language (Clp-600N Only)
CD. • Printer driver for Windows. Use this driver to take full advantage of your printer’s features. See the Software section for details about installing the Samsung printer driver. • SmartPanel. Appears when printing errors occur. See the Software section for details about installing the SmartPanel program. -
Page 20: Printer Driver Features
Printer Driver Features Your printer drivers will support the following standard features: • Paper source selection • Paper size, orientation, and media type • number of copies The table below lists a general overview of features supported by your printer drivers. Printer driver Feature Win98SE/... -
Page 21: Using The Control Panel
• Using Control Panel Menus (CLP-600N Only) Understanding the Control Panel The control panel on the top right side of your CLP-600N printer has a display and seven buttons. For the CLP-600, the control panel has no display and two buttons. Status Map Toner LEDs... - Page 22 *If paper Or, if you have installed an invalid toner transfer belt cartridge, a corresponding lamp turns on. is not Install only Samsung toner cartridges, installed in designed for your printer. the printer, Otherwise, if you have installed the toner...
-
Page 23: Using Control Panel Menus (Clp-600N Only)
Using Control Panel Menus 600N Only) A number of menus are available to make it easy for you to change printer settings. The diagram on page 3.3 shows the menus and all of the items available in each menu. The items in each menu and the options you can select are described in more detail in the tables beginning on page 3.3. -
Page 24: Color Menu
Item Explanation The menu map shows the layout and current Menu Map settings of the control panel menu items. The demo page allows you to check to see if Demo Page your printer is printing properly. Color Menu This menu allows you to adjust the color setting. (*: the default setting) Item Explanation... -
Page 25: Network Menu
Item Explanation This item allows you to maintain the toner cartridges and other consumables. • Check Others: This item allows you to view the usage status of consumables. Items you can check: - Fuser - MP Pickroll, Tray1 Pickroll, Tray2 Pick Maintenance roll: These items are only for service technicians. - Page 26 Item Explanation This item performs a simple reset and restores the factory default for the wireless configuration. WLAN Default : This menu only appears when an optional wired/wireless network interface card has been installed. Options: On, Off You can select whether or not to use the Netware protocol.
-
Page 27: Using Print Materials
Using Print Materials This chapter will help you understand the types of paper you can use with your printer and how to properly load paper in the different paper trays for the best print quality. This chapter includes: • Choosing Paper and Other Materials •... -
Page 28: Loading Paper
: Do not use carbonless paper or tracing paper. These types of paper are unstable at the fusing temperature and can give off fumes, or cause damage to the printer. Loading Paper Proper paper loading helps prevent paper jams and ensures trouble-free printing. -
Page 29: Using The Manual Feed
To load print material in the Multi-purpose Tray: Lower the Multi-purpose Tray and unfold the paper support extension, as shown. If you are using paper, flex or fan the edge of the paper stack to separate the pages before loading. Load the print material with the print side down. -
Page 30: Printing On Special Print Materials
Squeeze the paper width guide and slide it to the edge of the paper without causing it to bend. When you print a document, set the paper source to Manual Feed and select the appropriate paper size and type in the software application. For details, see the Software section. -
Page 31: Printing On Labels
Printing on Labels • Only use labels recommended for laser printers. • Verify that the labels’ adhesive material can tolerate a fusing temperature of 180°C (356°F) for 0.1 seconds. • Make sure that there is no exposed adhesive material between the labels. Exposed areas can cause labels to peel off during printing, which can cause paper jams. -
Page 32: Printing On Card Stock Or Custom-Sized Materials
Printing on Card Stock or Custom- sized Materials • Postcards, 3.5in. by 5.5in. (index) cards and other custom- sized materials can be printed with your printer. The minimum size is 3.5in. by 5.5in. (90mm by 140mm) and the maximum size is 8.5in. by 14in. (216mm by 356mm). •... -
Page 33: Basic Printing
Click the Windows Start button. For Windows 98SE/NT 4.0/2000/Me, select Settings and then Printers. For Windows XP/2003, select Printers and Faxes. Double-click the Samsung CLP-600 Series icon. From the Document menu, select Cancel Printing (Windows 98SE/Me) or Cancel (Windows NT 4.0/2000/ XP/2003). -
Page 34: Maintaining Your Printer
If you have an CLP-600: In ready mode, press and hold the On Line/Continue button ) on the control panel for 10 ~ 15 seconds to print a configuration page. -
Page 35: Replacing Supplies
** The number of pages may be affected by operating environment, media type, and media size. Contact a service representative. To purchase replacement parts, contact your Samsung dealer or the retailer where you bought your printer. We strongly recommend that items be installed by a trained service professional, except for the toner cartridges (see 6.4), the... - Page 36 To redistribute the toner: Using the handle, completely open the access door. AUTION • Do not touch the green surface, the OPC drum, on the front of the toner cartridge with your hands or any other material. Use the handle on each cartridge in order to avoid touching this area.
-
Page 37: Replacing Toner Cartridges
Replacing Toner Cartridges The printer uses four colors and has a different toner cartridge for each one: yellow (Y), magenta (M), cyan (C), and black (K). When the Toner LEDs, ( ) on the control panel, indicating each individual toner cartridge according to its color, turn on, the printer stops printing. -
Page 38: Replacing The Paper Transfer Belt
Place the toner cartridge on a flat surface, as shown, and remove the paper covering the toner cartridge by removing the tape. : If toner gets on your clothing, wipe it off with a dry cloth and wash it in cold water. Hot water sets toner into fabric. - Page 39 Locate the green release button on the inside of the access door (near the left side of the paper transfer belt). Press the button to release the paper transfer belt. Holding the handle on the paper transfer belt, lift it out of the printer. Green release button Take a new paper transfer belt out of its package.
-
Page 40: Replacing The Fuser Unit
Replacing the Fuser Unit The life of the fuser unit is approximately 50,000 black and color pages. When the life span of the fuser unit has expired, the printer will stop printing until a new fuser unit is placed into the printer. -
Page 41: Cleaning The Printer
Cleaning the Printer During the printing process, particles of paper, toner, and dust can accumulate inside the printer. Over time, this build-up can cause print quality problems such as toner specks or smearing. Your printer has a cleaning mode that can correct and prevent these types of problems. -
Page 42: Managing The Printer From The Website (Clp-600N Only)
Grasp the handles on each toner cartridge. Align the toner cartridges with the slots inside the printer and insert them into their corresponding positions in the following order: Yellow, Magenta, Cyan, and then Black, until they click into place. Close the access door. Make sure that the door is securely latched. -
Page 43: Solving Problems
Solving Problems This chapter provides helpful information for what to do if you encounter an error while using your printer. This chapter includes: • Troubleshooting Checklist • Solving General Printing Problems • Clearing Paper Jams • Solving Print Quality Problems •... -
Page 44: Solving General Printing Problems
Check the power switch and the print. power source. The printer is not Select Samsung CLP-600 Series selected as the as your default printer. default printer. Check the printer for After locating the problem, clear it. If... - Page 45 Problem Possible Cause Half the The page orientation Change the page orientation in your page is setting may be application. For details, see the blank. incorrect. Software section. The paper size and Ensure that the paper size in the the paper size printer driver settings matches the settings do not paper in the tray.
-
Page 46: Clearing Paper Jams
Clearing Paper Jams : When removing paper that is jammed in the printer, if possible always pull the paper in the direction that it normally moves so as not to damage internal components. Always pull firmly and evenly; do not jerk the paper. If the paper tears, ensure that all fragments of paper are removed;... -
Page 47: In The Multi-Purpose Tray
Pull the tray open. After you pull it all the way out, lift up the front part of the tray slightly to release the tray from the printer. Remove the jammed paper by gently pulling it straight out as shown below. To replace the tray, lower the rear edge, align it with the slot, and slide it into the printer. -
Page 48: Inside The Printer
AUTION • Do not touch the green surface, the OPC drum, on the front of each toner cartridge with your hands or any other material. Use the handle on each cartridge in order to avoid touching this area. • Be careful not to scratch the surface of the paper transfer belt. -
Page 49: In The Paper Exit Area
After removing the jammed paper, check for paper which may be jammed in other parts of the printer. After making sure that the access door is open, close the top cover. Make sure that it is securely latched. Close the access door firmly. The printer will resume printing. - Page 50 Push the levers up. The fuser is hot! Open the inner cover using the handle on it and carefully take the jammed paper out of the printer. Close the inner cover and push the levers down. : Do not touch the fuser inside the inner cover. It is AUTION hot and could cause burns! The fuser’s operating temperature is 180°C (356°F).
-
Page 51: In The Optional Tray2
In the Optional Tray2 If paper is jammed in the optional Tray2, a lamp turns on at the corresponding location on the Status map. If you use the CLP- 600N, “Jam0 In Tray2” also appears on the display. Using the handle, completely open the access door. Open the top cover. - Page 52 AUTION • Do not touch the fuser inside the inner cover. It is hot and could cause burns! The fuser’s operating temperature is 180°C (356°F). Take care when removing paper from the printer. • Do not touch the green surface, the OPC drum, on the front of each toner cartridge with your hands or any other material.
- Page 53 Pull the optional Tray2 open. After you pull it all the way out, lift up the front part of the tray slightly to release the tray from the printer. If you see the jammed paper, remove the paper from the printer by gently pulling it straight out as shown below.
-
Page 54: Tips For Avoiding Paper Jams
Close the access door firmly. The printer will resume printing. : If the top cover and access door are not completely AUTION closed, the printer will not operate. Tips for Avoiding Paper Jams By selecting the correct paper types, most paper jams can be avoided. - Page 55 Problem Solution Vertical lines If black vertical streaks appear on the page: • A toner cartridge has probably been scratched. AaBbCc Remove the toner cartridge and install a new one. AaBbCc See page 6.4. If white vertical lines appear on the page: AaBbCc •...
-
Page 56: Understanding Display Messages
Problem Solution Back of • The transfer roller may be dirty. See “Cleaning the printouts are Inside of the Printer” on page 6.8. dirty • Check for leaking toner. Clean the inside of the printer. Solid Color or • The toner cartridge may not be installed properly. Black pages Remove the toner cartridge and reinsert. - Page 57 If the problem persists, call for service. Install the corresponding color toner cartridge. Install the paper transfer belt. Left Fan Error Install only Samsung toner cartridges, designed for your Main Motor printer. Or install the toner Error cartridge into each proper cartridge slot.
- Page 58 Message Status Press The printer is waiting Continue Button for the user’s action before printing from the Multi-purpose Tray using the manual feed mode. Ready [Color] The corresponding Low Toner toner cartridge in your printer is low on toner. Ready The IP address of the IP Conflict printer conflicts with...
-
Page 59: Common Windows Problems
Common Windows Problems Problem Possible Cause and Solution “File in Use” message Exit all software applications. Remove all software appears during from the StartUp Group, then restart Windows. installation. Reinstall the printer driver. “Error Writing to LPTx” • Ensure that all cables are connected correctly message appears. - Page 60 Problem Possible Cause and Solution The N-up setting does The N-up feature is achieved through post- not work correctly for processing of the PostScript data that is sent to the some of my printing system. However, such post-processing can documents. only be adequately achieved if the PostScript data conforms to the Adobe Document Structing Conventions.
-
Page 61: Using Your Printer On A Network (Clp-600N Only)
• About Sharing the Printer on a Network • Setting Up a Network-Connected Printer : If you are a CLP-600 user, you can only connect your printer to a network locally, for use via a single computer. About Sharing the Printer on a... -
Page 62: Printing A Network Configuration Page
Printing a Network Configuration Page The Network Configuration page shows how the network interface card on your printer is configured. The default settings which are suitable for most applications are enabled. In ready mode, press the Menu button ( “Network” on the bottom line of the display. Press the Enter button ( ) to access the menu. - Page 63 Repeat step 12 to complete the address from the 1st byte to the 4th byte. To select other parameters, such as the Subnet Mask or Gateway, press the scroll button ( Enter button ( Repeat steps 12 through 13 to configure the other TCP/IP parameters.
-
Page 64: Restoring The Network Configuration
Access Point. • Frequency Mode: “802.11a”, “802.11b/g”, or “802.11a/b/ g”. The Samsung print server can be configured to operate in the following frequency modes: - 802.11a mode: The radio uses IEEE802.11a standard(5GHz). - Page 65 • Security Mode: “None”, “Static WEP”, or “Enhanced” The Samsung print server provides three kinds of Security Modes (such as “None” Static WEP, and Enhanced) for easy setting of wireless network security. “None” security mode is used when the validation of wireless device's identity and data encryption are not required for your network.
-
Page 66: Installing Printer Options
Your printer is a full-featured laser printer that has been optimized to meet most of your printing needs. Recognizing that each user may have different requirements, however, Samsung makes several options available to enhance the printer’s capabilities. This chapter includes: •... -
Page 67: Installing A Network Interface Card (Clp-600N Only)
For Windows 98SE/Me/NT 4.0/2000, select then Printers For Windows XP/2003, select Printers and Faxes. Select the Samsung CLP-600 Series printer icon. Right-click on the printer icon and select Click the Printer tab, and select Tray2 from the Optional Tray drop-down list. - Page 68 Remove the four screws on the back of the printer. Remove the control board cover from the printer. Remove the five screws holding the metal plate in place, and then remove the metal cover, as shown below. To remove an existing wired network interface card, remove the two screws and the card.
- Page 69 Insert the two screws included with the interface card package into the appropriate holes above and below the Ethernet network port, as shown below. Carefully tighten them. Insert the antenna counter clockwise and flip it upright, as shown. Replace the metal cover, as shown below, and replace the four screws you removed in step 4.
-
Page 70: Specifications
• Some paper may meet all of the guidelines in this guide and still not produce satisfactory results. This may be the result of improper handling, unacceptable temperature and humidity levels, or other variables over which Samsung has no control. • Before purchasing large quantities of paper, ensure that the paper meets the requirements specified in this User’s Guide. -
Page 71: Supported Sizes Of Paper
Supported Sizes of Paper Tray1/ Dimensions Weight Tray2 Letter 8.5 x 11in. (216 75 to 90g/m x 279mm) (20 to 24lb) for single-sided printing 8.27 x 11.7in. (210 x 297mm) Multi-purpose Dimensions Weight Tray Minimum Size 3.5 x 5.5in. (90 x 75 to 163g/m (custom) 140mm) -
Page 72: Paper Specifications
Paper Specifications Category Specifications Acid Content 5.5 ~ 8.0pH Caliper 0.094 ~ 0.18mm (3.0 ~ 7.0mils) Curl in Ream Flat within 5mm (0.02in.) Cut Edge Conditions Cut with sharp blades with no visible fray. Fusing Compatibility Must not scorch, melt, offset, or release hazardous emissions when heated to 180°C (356°F) for 0.1 second. -
Page 73: Envelopes
Envelopes Envelope construction is critical. Envelope fold lines can vary considerably, not only between manufacturers, but also within a box from the same manufacturer. Successful printing on envelopes depends upon the quality of the envelopes. When selecting envelopes, consider the following factors: •... - Page 74 NDEX card stock, print 4.6 cleaning inside 6.8 outside 6.8 components 1.2 configuration page, print 6.1 connecting, USB 2.6 control panel 3.1 buttons 3.1 display 3.1 menus 3.3 custom-sized materials, print 4.6 envelopes, print 4.4 error messages 7.14 Ethernet cable, connect 2.7 features printer 1.1 labels, print 4.5...
- Page 75 Samsung Printer Software section...
- Page 76 OFTWARE SECTION ONTENTS NSTALLING Chapter 1: Installing Printer Software ... 4 Installing Software for Local Printing ... 4 Installing Software for Network Printing ... 7 Changing the Software Language ... 10 Reinstalling Printer Software ... 10 Removing Printer Software ... 11 ASIC Chapter 2: Printing a Document ...
- Page 77 Using an Existing Watermark ... 22 Creating a Watermark ... 22 Editing a Watermark ... 23 Deleting a Watermark ... 23 Using Overlays ... 23 What is an Overlay? ... 23 Creating a New Page Overlay ... 23 Using a Page Overlay ... 24 Deleting a Page Overlay ...
- Page 78 For a USB-connected Macintosh ... 35 Printing ... 36 Printing a Document ... 36 Changing Printer Settings ... 36 Printing Multiple Pages on One Sheet of Paper ... 37...
-
Page 79: Installing Printer Software In Windows
Installing Printer Software in Windows This chapter includes: • Installing Printer Software • Changing the Software Language • Reinstalling Printer Software • Removing Printer Software Installing Printer Software You can install the printer software for local printing or network printing. To install the printer software on the computer, perform the appropriate installation procedure depending on the printer in use. -
Page 80: Custom Installation
If the test page prints out correctly, click Yes. If not, click No to reprint it. To register yourself as a user of Samsung Printers in order to receive information from Samsung, select the checkbox and click Finish. You are now sent to the Samsung web site. - Page 81 Click Next. • If necessary, select a language from the drop-down list. • View User’s Guide: Allows you to view the User’s Guide. If your computer doesn’t have Adobe Acrobat, click on this option and it will automatically install Adobe Acrobat Reader for you.
-
Page 82: Installing Software For Network Printing
To register yourself as a user of Samsung Printers in order to receive information from Samsung, select the checkbox and click Finish. You are now sent to the Samsung web site. Otherwise, just click Finish. Installing Software for Network Printing When you connect your printer to a network, you must first configure the TCP/IP settings for the printer. - Page 83 After the installation is finished, a window appears asking you to print a test page and to register yourself as a user of Samsung Printers in order to receive information from Samsung. If you so desire, select the corresponding checkbox(es) and click Finish.
- Page 84 After the installation is finished, a window appears asking you to print a test page and to register yourself as a user of Samsung Printers in order to receive information from Samsung. If you so desire, select the corresponding checkbox(es) and click Finish.
-
Page 85: Changing The Software Language
Changing the Software Language After installation of the software, you can change the display language. Click the Windows Start menu. Select Programs or All Programs and then your printer driver name. Select Language Selection. Select the desired language from the language selection window, and click OK. -
Page 86: Removing Printer Software
Removing Printer Software Start Windows. From the Start menu select Programs or All Programs → your printer driver name → Maintenance. Select Remove and click Next. You will see a component list so that you can remove any item individually. Select the components you want to remove and then click Next. -
Page 87: Basic Printing
Basic Printing This chapter explains the printing options and common printing tasks in Windows. This chapter includes: • Printing a Document • Printer Settings - Layout Tab - Paper Tab - Graphics Tab - Extras Tab - About Tab - Printer Tab - Using a Favorite Setting - Using Help Printing a Document... -
Page 88: Printer Settings
Printer Settings You can use the printer properties window, which allows you to access all of the printer options you need when using your printer. When the printer properties are displayed, you can review and change the settings needed for your print job. Your printer properties window may differ, depending on your operating system. -
Page 89: Paper Tab
Paper Tab Use the following options to set the basic paper handling specifications when you access the printer properties. See “Printing a Document” on page 12 for more information on accessing printer properties. Click the Paper tab to access various paper properties. Copies Copies allows you to choose the number of copies to be printed. -
Page 90: Graphics Tab
Graphics Tab Use the following Graphic options to adjust the print quality for your specific printing needs. See “Printing a Document” on page 12 for more information on accessing printer properties. Click the Graphics tab to display the properties shown below.. Quality The Resolution options you can select may vary depending on your printer model. -
Page 91: Extras Tab
Extras Tab You can select output options for your document. See “Printing a Document” on page 12 for more information about accessing the printer properties. Click the Extras tab to access the following feature: Watermark You can create a background text image to be printed on each page of your document. -
Page 92: Using A Favorite Setting
Using a Favorite Setting The Favorites option, which is visible on each properties tab, allows you to save the current properties settings for future use. To save a Favorites item: Change the settings as needed on each tab. Enter a name for the item in the Favorites input box. Click Save. -
Page 93: Advanced Printing
Advanced Printing This chapter explains printing options and advanced printing tasks. • Your printer driver Properties window that appears in this User’s Guide may differ depending on the printer in use. However the composition of the printer properties window is similar. -
Page 94: Printing Posters
Printing Posters This feature allows you to print a single-page document onto 4, 9, or 16 sheets of paper, for the purpose of pasting the sheets together to form one poster-size document. To change the print settings from your software application, access printer properties. -
Page 95: Printing On Both Sides Of Paper
Printing on Both Sides of Paper You can print on both sides of a sheet of paper. Before printing, decide how you want your document oriented. The options are: • Printer Setting, if you select this option, this feature is determined by the setting you’ve made on the control panel of the printer. -
Page 96: Printing A Reduced Or Enlarged Document
Printing a Reduced or Enlarged Document You can change the size of a page’s content to appear larger or smaller on the printed page. To change the print settings from your software application, access printer properties. See “Printing a Document” on page 12. From the Paper tab, select Reduce/Enlarge in the Type drop-down list. -
Page 97: Using Watermarks
Using Watermarks The Watermark option allows you to print text over an existing document. For example, you may want to have large gray letters reading “DRAFT” or “CONFIDENTIAL” printed diagonally across the first page or all pages of a document. There are several predefined watermarks that come with the printer, and they can be modified, or you can add new ones to the list. -
Page 98: Editing A Watermark
Editing a Watermark To change the print settings from your software application, access printer properties. See “Printing a Document” on page 12. Click the Extras tab and click the Edit button in the Watermark section. The Edit Watermark window appears. Select the watermark you want to edit from the Current Watermarks list and change the watermark message and options. -
Page 99: Using A Page Overlay
In the Edit Overlay window, click Create Overlay. In the Create Overlay window, type a name in the File name box. Select the destination path, if necessary. (The default is C:\Formover). Click Save. The name appears on the Overlay List box. Click OK or Yes to finish creating. -
Page 100: Deleting A Page Overlay
If necessary, click Confirm Page Overlay When Printing. If this box is checked, a message window appears each time you submit a document for printing, asking you to confirm your wish to print an overlay on your document. If this box is not checked and an overlay has been selected, the overlay automatically prints with your document. -
Page 101: Sharing The Printer Locally
Sharing the Printer Locally You can connect the printer directly to a selected computer, which is called “host computer,” on the network. The following procedure is for Windows XP. For other Windows OS, refer to the corresponding Windows User's Guide or online help. -
Page 102: Using Smart Panel
Or, from the Start menu, select Programs or All Programs → your printer driver name → Smart Panel. OTES • If you have already installed more than one Samsung printer, first select the printer model you want in order to use the corresponding Smart Panel. Right-click the Smart Panel icon on the Windows task bar and select your printer name. -
Page 103: Using Printer Settings Utility
Using Printer Settings Utility Using the Printer Settings Utility, you can configure and check print settings. Right-click the Smart Panel icon on the Windows task bar and select Printer Setting. Change the settings. To send the changes to the printer, click the Send button. If you connect your printer to a network, the OTES SyncThru Web Service window appears instead of the... -
Page 104: Using Your Printer In Linux
Using Your Printer in Linux You can use your printer in a Linux environment. This chapter includes: • System Requirements • Installing the Printer Driver • Changing the Printer Connection Method • Uninstalling the Printer Driver • Using the Configuration Tool •... -
Page 105: Installing The Printer Driver
Installing the Printer Driver Make sure that you connect the printer to your computer. Turn both the computer and the printer on. When the Administrator Login window appears, type in “root” in the Login field and enter the system password. : You must log in as a super user (root) to install the printer software. -
Page 106: Changing The Printer Connection Method
Click the Connection tab and ensure that the printer port is set properly. If it is not, change the device setting. You can use the Settings tab and the Queue tab to view the printer’s current settings. If necessary, you can change the settings. -
Page 107: Uninstalling The Printer Driver
The Info tab shows general information about the printer. If you are an Internet user, you can click Go to the Web page for this printer to access the Samsung web page. Click the Job tab to inspect and manage the job queue for the selected printer. -
Page 108: Changing Llpr Properties
The Properties tab allows you to change the default printer settings. : Regular users are able to override the system-wide default settings defined by the administrator. When a regular user clicks Apply, these custom settings will be saved in the user’s profile and may be used later with LLPR. -
Page 109: Using Your Printer With A Macintosh
Double-click the Printer folder. Double-click the Samsung SPLC Installer icon. Enter the password and click OK. The Samsung SPL Installer window opens. Click Continue and then click Continue. Select Easy Install and click Install. After the installation is finished, click Quit. -
Page 110: Setting Up The Printer
Enter the queue name in the Queue Name field. If you cannot determine the queue name for your printer server, try using the default queue first. Select Samsung in Printer Model and your printer in Model Name. Click Add. Your printer’s IP address appears on the Printer List, and is set as the default printer. -
Page 111: Changing Printer Settings
Printing OTES • The Macintosh printer’s properties window that appears in this User’s Guide may differ depending on the printer in use. However the composition of the printer properties window is similar. • You can check your printer name in the supplied Printer software CD. -
Page 112: Printing Multiple Pages On One Sheet Of Paper
Printer Features Setting The Printer Features tab provides options for selecting the paper type and adjusting print quality. Select Printer Features from the Presets drop-down list to access the following features: ▲ Mac OS 10.3 Paper Type Set type to correspond to the paper loaded in the tray from which you want to print. - Page 113 OFTWARE SECTION NDEX advanced printing, use 18 booklet printing 19 document, print Macintosh 36 Windows 12 double-sided printing 20 Extras properties, set 16 favorites settings, use 17 Graphics properties, set 15 help, use 17 install printer driver Linux 30 Macintosh 34 Windows 4 language, change 10 Layout properties, set...
- Page 114 Macintosh 34 Windows 4 reinstall Windows 10 system requirements Linux 29 Macintosh 34 uninstall Linux 32 Macintosh 34 Windows 11 status monitor, use 27 system requirements Linux 29 Macintosh 34 toner save, set 15 uninstall, software Linux 32 Macintosh 34 Windows 11 watermark create 22...
- Page 115 www.samsungprinter.com Rev. 1.06...