Samsung NV11 User Manual
Samsung digital camera user manual
Hide thumbs
Also See for NV11:
- Manual del usuario (90 pages) ,
- User manual (90 pages) ,
- Specifications (12 pages)
Table of Contents
Advertisement
Quick Links
Advertisement
Table of Contents

Related Manuals for Samsung NV11


Summary of Contents for Samsung NV11
-
Page 1: User Manual
User Manual Thank you for buying a Samsung camera. This manual will guide you through using the camera, including capturing images, downloading images and using the application software. Please read this manual carefully before using your new camera. ENGLISH... -
Page 2: Getting To Know Your Camera
Please check that the camera is operating properly before you intend to use it (e.g. for a trip or an important event) to avoid disappointment. Samsung camera takes no responsibility for any loss or damages that may result from camera malfunction. - Page 3 Should any form of liquid or a foreign object enter the camera, do not use it. Switch off the camera, and then disconnect the power source. You must contact your dealer or Samsung Camera Service centre. Do not continue to use the camera as this may cause a fire or electric shock.
-
Page 4: Table Of Contents
Caution CAUTION indicates a potentially hazardous situation which, if not avoided, may result in a minor or moderate injury. Leaking, overheating, or damaged battery could result in fire or injury. Use battery with the correct specification for the camera. Do not short circuit, heat or dispose of battery in fire. Do not insert the battery with the polarities reversed. - Page 5 Contents Using the LCD monitor to set the PLAY camera Starting play mode Color tone Playing back a still image Brightness Playing back a movie clip Selecting focus type Movie clip capture function Flash On camera movie trimming Size Playing back a recorded voice Continuous shot Playing back a recorded Metering...
-
Page 6: System Chart
System chart Please check that you have the correct contents before using this product. The contents can vary depending on the sales region. To buy the optional equipment, contact your nearest Samsung dealer or Samsung service centre. User manual, Camera case... -
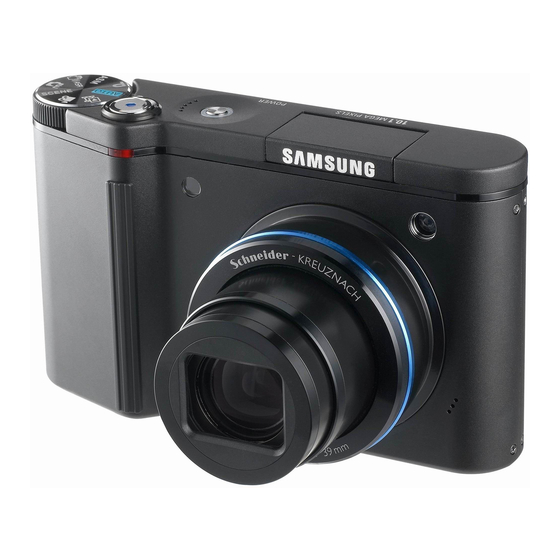
Page 7: Identification Of Features
Identification of features Front & Top Mode dial Self-timer lamp Remote control sensor Instructions for the Built-in flash - The flash opens automatically when you press the shutter button down half way. - Do not open the flash by force. It may break the camera. -
Page 8: Back & Bottom
Identification of features Back & Bottom Camera status lamp Zoom W button (Thumbnail) Zoom T button (Digital zoom) LCD monitor Smart button Eyelet for camera strap Smart button BACK button / FR button Play mode button Tripod socket USB / AV connection terminal... -
Page 9: Bottom
Identification of features Bottom Battery chamber cover Battery chamber Memory card slot To open the battery chamber cover, slide it in the direction shown above. Self-timer lamp Icon Battery holder Camera Status Lamp Battery cover lever After taking a picture While voice memo recording When the USB cable is inserted to a PC... -
Page 10: Mode Dial
Identification of features Mode dial You can select the desired working mode by using the mode dial located on the top of the camera. AUTO mode Select this mode for quick and easy picture taking with minimal user interaction. PROGRAM mode Selecting the program mode will configure the camera with optimal settings. -
Page 11: Mode Icon
Using the flash on every second shot. Using the camera for 5 minutes and then Powering it off for 1 minute. These figures are measured under Samsung’s standard conditions and shooting conditions and may vary depending on the user's methods. SLB-1137D... - Page 12 a C onnecting to a Power Source INFORMATION Important information about battery usage. When the camera is not used, turn off the camera power. Please remove the battery if the camera will not be used for long periods. Battery can lose power over time and are prone to leaking if kept inside the camera.
-
Page 13: Battery (Slb-1137D)
a C onnecting to a Power Source How to charge the rechargeable battery (SLB-1137D) Charging with the camera Charging LED Charging LED of the AC Adapter Charging LED Being Charged Red LED is on Charging is complete Green LED is on Charging error Red LED is off or blinking Being discharged... -
Page 14: Inserting The Memory Card
Repeated use of the memory card will eventually reduce its performance. Should this be the case, you will need to purchase a new memory card. Wear and tear on the memory card is not covered by the Samsung warranty. The memory card is an electronic precision device. - Page 15 - If the power is switched off or the memory card is removed while recording, deleting (formatting) or reading. Samsung cannot be held responsible for lost data. It is advisable to copy important data onto other media as back-up e.g. floppy disks, hard disks, CD etc.
-
Page 16: Time : Smart Button
When Using the Camera for the First Time : Smart button This button is used for shifting the menu cursor to select or for confirming the selected menu. SIZE [Selecting the main menu : Touching the button] [Confirming the sub menu : Pressing the button] To select a sub menu, in some menus, touch the button and slide your finger to the left / right. -
Page 17: Language
When Using the Camera for the First Time : Setting up the Date / Time and Language When the camera is turned on for the first time, a menu will be displayed in the LCD monitor to set date, time and language. This menu will not be displayed again after setting up the date, time and language. -
Page 18: Lcd Monitor Indicator
LCD monitor indicator The LCD monitor displays information about the shooting functions and selections. [Image & Full Status] Description Recording mode Date / Time 12:00 AM 2007.02.01 Number of available shots remaining Remaining time (Movie clip/ Voice recording) 00:01:00/01:00:00 Optical / Digital Zoom bar / Image quality / Frame rate Voice Recording / Without Sound Icons... -
Page 19: Starting The Recording Mode
Starting the recording mode How to use the AUTO mode ( Please select this mode for quick and easy picture taking with minimal user interaction. 1. Insert the battery (p.13) taking note of the correct polarity (+ / -). 2. Insert the memory card (p.13). As this camera has a 20MB internal memory, it is not essential to insert the memory card. -
Page 20: How To Use The Aperture
Starting the recording mode How to use the APERTURE PRIORITY mode ( This mode will set the aperture value for automatic exposure depends on the brightness of the object by automatic shutter speed setting in the camera. 1. Select the ASM mode by rotating the mode dial. 2. -
Page 21: How To Use The Asr
Starting the recording mode How to use the ASR (Advanced Shake Reduction) mode ( This mode will reduce the effect of camera shake and help you get a well-exposed image in dim conditions. Things to watch out for using the ASR mode 1. -
Page 22: How To Use The Movie Clip Mode
Starting the recording mode How to use the MOVIE CLIP mode ( A movie clip can be recorded for as long as the available recording time of the memory capacity allows. 1. Select the MOVIE CLIP mode by rotating the mode dial. -
Page 23: Taking Pictures
Things to Watch Out for When Taking Pictures Pressing the shutter button down half way. Lightly press the shutter button to confirm focus and flash battery charge. Press the shutter button all way down to take the picture. [Lightly press the shutter button] The available recording time may vary depending on shooting conditions and camera settings. -
Page 24: Using The Camera Buttons To Set The Camera
Using the camera buttons to set the camera The recording mode function can be set up by using the camera buttons. POWER button Used for turning the camera’s power on / off. If there is no operation during the specified time, the camera's power will be turned off automatically to save battery life. -
Page 25: Zoom W / T Button
ZOOM W / T button If the menu is not displayed, this button works as the OPTICAL ZOOM or DIGITAL ZOOM button. This camera has a 5X optical zoom and a 5X digital zoom function. Using both will offer a total zoom ratio of 25X. TELE Zoom Optical zoom TELE : Pressing the ZOOM T button will zoom into the subject i.e. -
Page 26: Face Recognition(Fr) Button
ZOOM W / T button INFORMATION Images taken using the digital zoom may take a little longer for the camera to process. Allow time for this to take place. If the Zoom buttons are being pressed during the Movie clip shots, the voice will not recorded. -
Page 27: Camera
Face recognition(FR) button INFORMATION This function can detect up to 8 persons. When the camera recognises many people at the same time, it will focus on the nearest person. When the camera detect a target face, the white colour focus frame will display over the target face and the gray colour focus frame will display over the rest faces(up to 7). -
Page 28: Color Tone
Using the LCD monitor to set the camera MENU VOICE MULTI METERING SPOT CENTER SHARPNESS PHOTO FRAME M.GIF COMPOSITE NORMAL B&W SEPIA EFFECT NEGATIVE CUSTOM Menus are subject to change without prior notice. The selectable menus may vary in each scene modes. It is not selectable in the MANUAL mode. -
Page 29: Brightness
Brightness You can change the brightness of the image. Changing the brightness To select the brightness, touch the button and slide your finger to the left or right. [Dark] Selecting focus type You can select the focus type in accordance with the subject distance. - Page 30 Selecting focus type Types of focus modes and focus ranges (W : Wide, T : Tele) Focus Type Wide(W) Normal 80cm-Infinity Macro 10cm~80cm Auto Macro 10cm-Infinity Super Macro 1~10cm (Wide only) Manual Focus 1cm-Infinity INFORMATION When the macro mode is selected, it is possible that camera shake will occur.
-
Page 31: Flash
Flash You can select the flash type in accordance with the subject distance. The distance ranges are show below. When using the ASR, Continuous shot, High Speed Continuous shot, Motion Capture, AEB, Movie clip mode and Still image mode (except the NIGHT, PORTRAIT, CHILDREN, BACKLIGHT and BEACH &... -
Page 32: Size
Flash Flash mode indicator Menu tab Flash mode The flash does not fire. Select this mode when capturing images in a place or situation where flash photography Flash off is prohibited. When you capture an image in a poorly lit condition, the camera shake warning indicator ( will display on the LCD monitor. -
Page 33: Continuous Shot
Continuous shot You can select the type of shooting and the number of continuous shots. - SINGLE : Take one picture only - CONTINUOUS : Images will be taken continuously until the shutter button is released. The shooting capacity depends on the memory. -
Page 34: Sharpness
Sharpness You can adjust the sharpness of the picture you want to take. You cannot check the sharpness effect on the LCD monitor before you take a picture, because this function is applied only when the captured image is stored on the memory. Sub menu Icon Description... -
Page 35: Quality / Frame Rate
Quality / Frame rate You can select the compression ratio appropriate for your application of the captured images. The higher the compression ratio, the lower the picture quality. Still image mode Mode Icon Sub menu Super Fine Fine Normal File Type jpeg jpeg jpeg... -
Page 36: Voice Recording / Voice Memo
Self-timer / Remote control Remote control range When you take a picture by using the remote control, refer to the illustrations shown alongside about the remote control range. [Shutter button on the remote control] Replacing battery for the remote control Make sure the + (positive) polarity is toward the top and the - (negative) polarity is toward the bottom while installing battery for the remote control. -
Page 37: Exposure Compensation
Voice recording / Voice memo INFORMATION A distance of 40cm between you and the camera (microphone) is the best distance to record sound. Exposure compensation This camera automatically adjusts the exposure according to the ambient lighting conditions. You can also select the exposure value in the compensating exposure menu. -
Page 38: White Balance
White balance The white balance control allows you to adjust the colours to appear more natural. When a menu except the AWB (Auto White Balance) is selected, you can only select the negative color effect. White Balance menu is available in the Program, ASM and Movie clip mode. AUTO : The camera automatically selects the appropriate... -
Page 39: Scene Menu
Scene menu Use the menu to easily configure optimal settings for a variety of shooting situations. The scene modes are listed below. [NIGHT] ) : Use this for shooting still images at night or in other dark conditions. [PORTRAIT] ) : To take a picture of a person. -
Page 40: Special Effect : Motion Gif
Special Effect : Motion GIF You can make Motion GIF with captured images. Motion GIF : Taking images continuously and save them in a file. This file supports animation. How to make the Motion GIF 1. Select the Special Effect mode by rotating the mode dial. -
Page 41: Shutter Speed
Special Effect : Composite shooting Changing a part of composite shot before taking the last shot Before taking the last composite shot, you can change a part of composite shot. 1. During the composite shots, press the BACK button. 2. A previous image will be deleted and new frame will display. If there is an image taken before, press the BACK button again and a previous image will be deleted again. -
Page 42: Aperture Value
Aperture Value This mode will set the aperture value for automatic exposure. Smaller Aperture values make the object sharp but blur the background. Larger Aperture values make both the object and background sharp. [APERTURE PRIORITY mode] Setting up the Aperture value To select the Aperture Value, touch the button and slide your finger to the left or right. - Page 43 Photo Gallery mode Album mode : Images play back by album. If a memory card is not inserted, Personal / Family / Friend / Event albums can be selected. All of images saved in the internal memory play back. Selecting an album You can select an album by using the smart button.
- Page 44 Photo Gallery mode Playing back an album Press the slide show menu button. : Starting the slide show : Selecting an effect of the slide show : Setting play interval : Selecting a B.G.M A B.G.M can be played back with images. Only a saved music can be selected.
-
Page 45: Starting Play Mode
Starting play mode Turn the camera on and select Play mode by pressing the play mode button ). The camera can now play back the images stored in the memory. You can set up the PLAY mode function by using the camera buttons and LCD monitor. -
Page 46: Movie Clip Capture Function
Starting play mode Movie clip capture function : capture still images from the movie clip. 1. Press the II menu button while playing back a movie file. 2. Press the Capture menu button. The captured image is saved under a new file name. On camera movie trimming : You can extract desired frames of movie clip during the movie clip play back. -
Page 47: Voice Memo
Starting play mode Playing back a recorded voice memo 1. Select the still image that includes the voice memo by using the smart button. 2. Press the [Edit] button and menus will display. 3. Press the ( ) icon to play back a voice memo. - To pause a voice file while playing it back, press the II button. -
Page 48: The Camera
Using the camera buttons to adjust the camera In Play mode, you can use the buttons on the camera to conveniently set up the Play mode functions. Play mode button If you have turned on the camera by pressing the POWER button, you can press the PLAY MODE button once to switch to Play mode and press it again to switch to Recording mode. -
Page 49: Starting The Slide Show
Thumbnail ( ) / Enlargement ( Image enlargement 1. Select an image that you want to enlarge and press the enlargement button. 2. Different parts of the image can be viewed by using the smart button. 3. Pressing the thumbnail button will zoom back to the original full sized image. -
Page 50: Protecting Images
Starting the slide show Setting play interval : Set the slide show play interval to the number of seconds preferred. Repeat Option : Selecting the repeat option for the slide show. [ONE PLAY] : The slide show is closed after one cycle. -
Page 51: Deleting Images
Deleting images This is used to delete the displayed image. YES : deletes displayed or checked ( ) image. NO : cancels deleting displayed image or checked ) image. - The protected images can’t be deleted. - If you wish to delete multi-image, check to delete the image by using the ( ) button and the smart button (horizontal) and then press the [Yes] menu. -
Page 52: Dpof : Standard
DPOF : STANDARD This function allows you to embed print quantity information on a stored image. 1. Select the DPOF menu by pressing the smart button. 2. Select a desired sub menu by pressing the smart button. [ONE PIC] : Select a number of prints of displayed image. -
Page 53: Dpof : Index
DPOF : Index Images (except for movie clips and voice file) are printed as index type. 1. Select the [INDEX] menu by pressing the smart button. 2. Select a desired sub menu by pressing the smart button. If [NO] is selected : Cancel the index print setting. If [YES] is selected : The image will be printed in index format. -
Page 54: Resize
Resize Change the resolution (size) of pictures taken. Select [User image] to save an image to be the start-up image. The resized image will have a new file name. 1. Press the smart button (horizontal). 2. Press the [RESIZE] menu button. 3. -
Page 55: Trimming
Trimming You can extract part of the image that you want and save it separately. 1. Select an image that you want to enlarge. 2. Press the [Edit] button. 3. Press the [Trim] menu button. 4. Enlarge the image by using the Zoom button. To move the image, use the Smart button. -
Page 56: Motion Gif
Motion GIF You can make Motion GIF with captured images. Motion GIF : Taking images continuously and save them in a file. This file supports animation. How to make the Motion GIF 1. Press the [Edit] button. 2. Press the Motion GIF menu button. 100-0001 ISO : 80 Av : F3.5... -
Page 57: Pictbridge
PictBridge You can use the USB cable to connect this camera to a printer that supports PictBridge (sold separately) and print the stored images directly. Movie clips and voice files cannot be printed. Setting up the camera for connection to a printer 1. - Page 58 PictBridge Custom Set : You can select the Paper Size, Print Format, Paper Type, Print Quality, Date Print, and File Name Print menus for printed pictures. 100-0001 Icon Description Selecting images for printing Setting the size of the printing paper Setting the number of pictures to be printed on a sheet of paper Setting the quality of the...
-
Page 59: Setup Menu
PictBridge Reset : Initialises user-changed configurations. - In custom printing mode, press the Reset menu button. Setup menu In this mode, you can set up basic settings. You can use the setup menu in all camera modes, except Voice Recording mode. The items indicated by are default settings. - Page 60 Setup menu Menu tab Main menu Sub menu Start Image User image Sound Volume Medium Beep Sound Sound2 Start Sound Sound2 Shutter Sound Sound2 Format Delete All Copy to Card Video Out NTSC Reset Menus are subject to change without prior notice. How to select the setup menu Secondary menu Page...
-
Page 61: Osd Set
Setup menu [OSD set] You can check shooting (Recording mode) and displayed image (Play back mode) information. OSD Set Full OSD Set Basic File Hide Language LCD Save Date&Time Exit:BACK [Recording mode menu] [Full] : When the smart button is touched, the icons will be enlarged and OSD will be displayed. -
Page 62: Language
Setup menu [ Language ] There is a choice of languages that can be displayed on the LCD monitor. Even if the battery and AC charger are removed and inserted again, the language setting will be preserved. LANGUAGE sub menu : English, Korean, French, German, Spanish, Italian, S.Chinese, T.Chinese, Japanese, Russian, Portuguese, Dutch, Danish, Swedish, Finnish, Thai,... -
Page 63: Auto Focus Lamp
Setup menu [ Auto Focus lamp ] You can turn the Auto Focus lamp on and off. Sub menus [Off] : The AF lamp will not light up in a low light condition. [On] : The AF lamp will light up in a low light condition. -
Page 64: Sound Volume
Setup menu [ Sound Volume ] You can select the sound volume levels of start sound, operation sound and shutter sound. [Sound Volume] sub menus : [Off], [Low], [Medium], [High] [ Operation Sound ] If you set sound to ON, various sounds will be activated for camera startup, when buttons are pressed, so that you can be aware of the camera operation status. -
Page 65: Delete All
Setup menu [ Delete All ] Of all the files stored in the memory card, the unprotected files in the DCIM subfolder will be deleted. [No] : Cancel the "Delete All". [Yes] : A confirmation window will display. Select the [Yes] menu by pressing the smart button. -
Page 66: Selecting Video Out Type
Setup menu [ Selecting Video out type ] The Movie output signal from the camera can be NTSC or PAL. Your choice of output will be governed by the type of device (monitor or TV, etc.) to which the camera is connected. PAL mode can support only BDGHI. Connecting to an external monitor In RECORDING/ PLAY mode, you can view the stored still images or movie clips by connecting the... -
Page 67: Important Notes
- Avoid getting fingerprints or foreign substances on the surface of the lens. If the digital camera is not used for a long period, an electric discharge can occur. It is a good idea to remove the battery and the memory card if you do not intend using the camera for an extended period of time. -
Page 68: Warning Indicator
- Take a picture to check that the camera is working correctly and ensure you have a fully charged spare battery. - Samsung cannot be held responsible for camera malfunctions. Warning indicator There are several warnings that may appear on the LCD display... -
Page 69: Before Contacting A Service Centre
Warning indicator Low Battery! There is low battery capacity Insert a fully charged battery. Low Light! When taking pictures in dark places Take pictures in Flash Photography mode. DCF Full Error Violation of DCF format Copy the images to a PC and format the memory. Before contacting a service centre Please check the following The camera doesn’t switch on... - Page 70 Before contacting a service centre The images are unclear A picture was taken the subject without setting an appropriate macro mode Select an appropriate macro mode to take a clear image. Taking a picture beyond the flash range Take a picture within the flash range The lens is smudged or dirty Clean the lens The flash does not fire...
-
Page 71: Specifications
Specifications Image Sensor - Type : 1/1.8 CCD - Effective Pixel : Approx. 10.1 Mega-pixel - Total Pixel : Approx. 10.3 Mega-pixel Lens - Focal Length : Schneider Lens f = 7.8 ~ 39mm (35mm film equivalent : 38~190mm) - F No. : F2.8 - F4.4 - Digital Zoom : ·... -
Page 72: Software
7M W Super Fine Fine Normal * These figures are measured under Samsung’s standard conditions and may vary depending on shooting conditions and camera settings. Image Play - Type : Single image, Thumbnails, Slide show, Movie Clip - Editing : Trimming, Resizing, Rotate, Color Effect, GIF Animation, Red-eye Interface - Digital output connector : USB 2.0... -
Page 73: Software Notes
Using a Hand-made (self assembled) PC or a PC and OS that has not been guaranteed by the manufacturer is not covered by the Samsung warranty. Before using this manual, you should have a basic knowledge of computers and O/S (Operating Systems). -
Page 74: Setting Up The Application Software
After this has been done, the stored images in the camera can be moved to the PC and can be edited by an image editing program. You can visit the Samsung web-site through the internet. http://www.samsungcamera.com : English http://www.samsungcamera.co.kr : Korean 1. - Page 75 Setting up the application software 3. To play back a movie clip recorded with this camera on the computer, install 4. Install the Digimax Master in the order shown. the XviD codec. The XviD codec is distributed according to and under the terms and conditions of the GNU General Public License and anyone can copy, modifiy and distribute this codec freely, but WITHOUT ANY WARRANTY, IMPLIED OR EXPRESSED, OF MERCHANTABILITY OR FITNESS FOR A PARTICULAR...
-
Page 76: Starting Pc Mode
Setting up the application software 5. After restarting the computer, connect the PC to the camera with the USB cable. 6. Turn on the camera power. The [Found New Hardware Wizard] will open and the computer will recognise the camera. If your OS is Windows XP, an image viewer program will open. - Page 77 Starting PC mode Connecting the camera to a PC If you selected [Printer] in Step 2, when you connect the camera to your printer, the [Connecting Printer] message will display and the connection will not be established. In this case, disconnect the USB cable, and then follow the procedure from Step 1 and onward.
-
Page 78: Removing The Removable Disk
Starting PC mode 6. Press the right mouse button and a pop-up menu will open. Click [Paste]. 7. An image file is transferred from the camera to your PC. - By using [Digimax Master], you can see the stored images in the memory directly on the PC monitor and you can copy or move the image files. -
Page 79: Setting Up The Usb Driver For Mac
2. Check whether the Removable Disk is on the [My Computer]. 3. Remove the [Samsung Digital Camera] on the Device manager. 4. Disconnect the USB cable. 5. Remove the [Samsung USB Driver] on the Add / Remove Programs Properties. 6. Uninstallation is complete. -
Page 80: Digimax Master
4. Select a destination and make a folder to save downloaded images and folders. - Folder names can be made in order of date Samsung Digimax Master and images will be downloaded. - Folder name will be made as you want and images will be downloaded. - Page 81 Digimax Master Image viewer : You can view the stored images. - Image viewer functions are listed below. Menu bar : You can select menus. File, Edit, View, Tools, Change functions, Auto download, help, etc. Image selection window : You can select the desired images in this window. Media type selection menu : You can select image viewer, image edit and movie edit functions in this menu.
-
Page 82: Digimax Biz Reader
Digimax Biz Reader recognizes English and Korean business namecard only. Auto recognizing when camera connected with computer(BizChecker) After installing <Biz Reader>, if you connect the SAMSUNG digital camera with your computer, namecard images are recognized automatically. <BizChecker> is auto-installing program when <BizReader> installing. - Page 83 Digimax Biz Reader Recognizing the namecard image file Downloading camera's namecard images to computer 1. Connect the camera to your PC with the USB cable. 2. On your computer's desktop display, select [My computer] and double click [Removable Disk DCIM 100SSCAM].
- Page 84 Digimax Biz Reader Partial recognizing : Partial recognition function can be used when mis- recognition. 1. Select the namecard to partial editing. 2. Drag the area to partial editing in namecard image window, choose the proper field in pop-up window, and then the recognized result is entered to the field automatically.
-
Page 85: Faq
Please check the following if the USB connection malfunctions. Case 1 USB cable is not connected or it is not the supplied USB cable. Connect the supplied USB cable. Case 2 The camera is not recognised by your PC. Sometimes, the camera may appear under [Unknown Devices] in Device Manager. - Page 86 When a codec for playing back the movie clip isn't installed, or isn't compatible Install the codec as listed below. [ Installing codec for Windows ] 1) Insert the CD provided with the camera. 2) Run the Windows Explorer and select [CD-ROM drive:\XviD] folder and click the XviD-1.1.0-30122005.exe file.
-
Page 87: Correct Disposal Of This Product
This product should not be mixed with other commercial wastes for disposal. Samsung Techwin cares for the environment at all product manufacturing stages to preserve the environment, and is taking a number of steps to provide customers with more environment-friendly products. - Page 88 MEMO MEMO...
- Page 89 MEMO MEMO...
- Page 90 TEL : 49 ( 0 ) 6196 66 53 03 FAX : 49 ( 0 ) 6196 66 53 66 www.samsungcamera.de TIANJIN SAMSUNG OPTO-ELECTRONICS CO., LTD No.9 zhangheng Street. Micro-Electronic Industrial Park Jingang Road Tianjin China. POST CODE : 300385...