Samsung NV100HD User Manual
Samsung digital camera user manual
Hide thumbs
Also See for NV100HD:
- Service manual (127 pages) ,
- Quick start manual (91 pages) ,
- Quick start manual (28 pages)
Table of Contents
Advertisement
Quick Links
Advertisement
Table of Contents

Related Manuals for Samsung NV100HD


Summary of Contents for Samsung NV100HD
- Page 1 NV100HD This user manual includes detailed usage instructions for your camera. Please read this manual thoroughly. Click a button below for more information. Quick search Contents 1 Basic functions 2 Extended functions 3 Shooting options 4 Playback/Editing 5 Appendix Index...
-
Page 2: Health And Safety Information
Health and Safety Information Always comply with the following precautions and usage tips to avoid dangerous situations and ensure peak performance of your camera: Warning—situations that could cause injury to yourself or others Caution—situations that could cause damage to your camera or other equipment Note—notes, usage tips, or additional information Safety Warnings... - Page 3 Health and Safety Information Handle and dispose of batteries and chargers with care • Use only Samsung-approved batteries and chargers. Incompatible batteries and chargers can cause serious injuries or damage to your camera. • Never dispose of batteries in a fire. Follow all local regulations when disposing of used batteries.
- Page 4 Reformat the memory card with your camera. • Never use a damaged charger, battery, or memory card. Use only Samsung-approved accessories Using incompatible accessories may damage your camera, cause injury, or void your warranty. Protect your camera’s lens •...
-
Page 5: Extended Functions
©2008 SAMSUNG DIGITAL IMAGING CO., LTD. The specifications of the camera or contents of this manual may be changed without prior notice due to upgrade of camera functions. Copyright information • Microsoft Windows and the Windows logo are registered trademarks of the Microsoft Corporation. - Page 6 Indications used in this manual Shooting mode Indication AUTO PROGRAM MANUAL DUAL IS NIGHT BEAUTY SHOT SCENE MOVIE Shooting mode icons next to a title These icons indicate that a function is available in the corresponding modes. The 4 mode may not support functions for all scenes.
- Page 7 Expressions used in this manual Pressing the shutter • Half-press [Shutter]: press and hold the shutter halfway down • Press [Shutter]: press the shutter all the way down Press [Shutter] Press [Shutter] Half-press [Shutter] Half-press [Shutter] Subject, background, and composition •...
- Page 8 Quick search Taking photos of people 4 mode > PORTRAIT, • CHILDREN, SELF SHOT 5 mode • • Red Eye, Red Eye Fix (to prevent or correct red-eye) • Face Detection, Self Portrait, Smile Shot, Blink Detection Taking photos at night or in the dark 6 mode •...
-
Page 9: Table Of Contents
Contents 1. Basic functions ... 10 Camera layout ... 11 Icons ... 13 Turning your camera on or off ... 14 Using the touch screen ... 15 Setting the display ... 16 Taking photos ... 17 Zooming ... 17 Reducing camera shake (OIS) 2. - Page 10 Contents 4. Playback/Editing ... 47 Playing back ... 48 Starting Playback mode ... 48 Viewing photos ... 51 Playing a video ... 53 Playing voice memos ... 54 Editing a photo ... 55 Rotating a photo ... 55 Resizing photos ... 55 Editing colour ...
-
Page 11: Basic Functions
1. Basic functions 1. Basic functions Learn about your camera’s layout, icons, and basic functions for shooting. Camera layout ... 11 Icons ... 13 Turning your camera on or off ... 14 Using the touch screen ... 15 Setting the display ... 16 Taking photos ... -
Page 12: Camera Layout
Camera layout POWER button Shutter button Mode dial See below Remote control sensor Lens Icon Mode Description Take a photo quickly and easily with minimal AUTO settings Take a photo by setting options (except for PROGRAM shutter speed and aperture value) MANUAL Take a photo by setting options manually Take a photo with options suitable for... - Page 13 Camera layout Speaker Touch screen MENU button Access the camera settings menu Playback button Battery chamber cover Insert a memory card and battery Status lamp • Blinking: When saving a photo or video, recording a voice memo, being read by a computer or printer, or out of focus •...
-
Page 14: Icons
Icons The icons displayed will change according to the selected mode or options you set. A. Main display Icon Description Selected shooting mode : Fully charged : Partially charged : Charging needed Internal memory Memory card inserted Available number of photos Available recording time Optical Image Stabilisation (OIS) Current date and time... -
Page 15: Turning Your Camera On Or Off
Turning your camera on or off Press [POWER] to turn your camera on or off. In Playback mode Press [Playback] to view stored files. Press and hold [Playback] to mute camera sounds. Basic functions... -
Page 16: Using The Touch Screen
Using the touch screen Learn basic actions to use the touch screen. The touch screen works best when touched with the soft part of your finger. Do not use any sharp objects to touch the screen. Doing so may damage the screen. Touching Touch an icon to open a menu or set an option. -
Page 17: Setting The Display
Using the touch screen Setting the display Selecting a display type Select a style of display for Shooting or Playback mode. Touch Touch Touch Touch Option Available mode Description Display the name of an option Shooting, Full Playback when you touch an icon. Hide icons on the screen if you perform no operations for 3 Shooting,... -
Page 18: Taking Photos
Taking photos Rotate the mode dial to 2. Align your subject in the frame. Half-press [Shutter] to focus. • • Green: In focus Green: In focus • • Red: Out of focus Red: Out of focus Press [Shutter] to take a photo. Zooming You can shoot close-up photos by adjusting the zoom. -
Page 19: Reducing Camera Shake (Ois) Ois
Taking photos Digital zoom If the zoom indicator is in the digital range, your camera is using the digital zoom. The picture quality may deteriorate when you use the digital zoom. Optical range Optical range Zoom indicator Zoom indicator Digital range Digital range The digital zoom is not available when using 7, 6, 5, •... -
Page 20: Extended Functions
2. Extended functions 2. Extended functions Learn how to take a photo by selecting a mode and how to record a video or voice memo. Shooting modes ... 20 2 Using the Auto mode ... 20 6 Using the Night mode ... 20 4 Using the Scene mode ... -
Page 21: Shooting Modes
Shooting modes Take photos or record videos by selecting the best shooting mode for the conditions. 2 Using the Auto mode Select 2 to take a photo quickly and easily with minimal settings. Rotate the mode dial to 2. Align your subject in the frame and half-press [Shutter] to focus. -
Page 22: Using The Dual Is Mode
Shooting modes 7 Using the Dual IS mode Reduce camera shake and prevent blurred photos with Optical and Digital Image Stabilisation functions. Before correction After correction Rotate the mode dial to 7. Align your subject in the frame and half-press [Shutter] to focus. -
Page 23: Using The Program Mode
Shooting modes Align your subject in the frame and half-press [Shutter] to focus. Press [Shutter] to take the photo. 1 Using the Program mode Set various options (except for shutter speed and aperture value) in the Program mode. Rotate the mode dial to 1. Set options. - Page 24 Shooting modes Aperture value As the aperture value is increased, your camera lets less light in, which makes the photo darker. Alternatively, as the aperture value is reduced, your camera lets more light in, which makes the photo brighter. Big aperture value Big aperture value Small aperture value Small aperture value...
-
Page 25: Recording A Video
Shooting modes 3 Recording a video Record videos of up to 20 minutes in length in high definition (1280 X 720 resolution). The recorded video is saved as an H.264 (MPEG4.AVC) file. • H.264 (MPEG4 part10/AVC) is a high-compression video format established by international standard organisations ISO/IEC and ITU-T. - Page 26 Shooting modes Set other options as desired. (For options, refer to Chapter 3 ‘Shooting options.’) Press [Shutter]. Press [Shutter] again to stop recording. To pause while recording a video The camera allows you to pause temporarily while recording a video. With this function, you can record your favourite scenes as a single video.
-
Page 27: Tips For Getting A Clearer Photo
Shooting modes Tips for getting a clearer photo Holding your camera correctly Make sure nothing is Make sure nothing is blocking the lens. blocking the lens. Half-pressing the shutter button Half-press [Shutter] and adjust the Half-press [Shutter] and adjust the focal point. - Page 28 Shooting modes Preventing your subject from being out of focus • It is hard to get your subject in focus when: there is little contrast between the subject and background (When your subject is wearing a colour of clothing that is similar to the background) the light source behind the subject is too bright your subject is shiny your subject includes horizontal patterns, such as blinds...
-
Page 29: Recording Voice Memos
Recording voice memos Record a voice memo that you can play back at any time or add a voice memo to a photo as a short reminder of shooting conditions. You will get the best sound quality when recording 40 cm away from the camera. Recording a voice memo In Shooting mode (except 3), touch . -
Page 30: Shooting Options
3. Shooting options 3. Shooting options Learn about the options you can set in shooting mode. Selecting a resolution and quality ... 30 Selecting a resolution ... 30 Selecting a quality ... 31 Using the timer and remote control ... 32 Shooting in the dark ... -
Page 31: Selecting A Resolution And Quality
Selecting a resolution and quality Selecting a resolution 2 1 8 7 6 5 4 3 As you increase the resolution, your photo or video has more pixels in it, so it can be printed on larger paper or displayed on a larger screen. -
Page 32: Selecting A Quality
Selecting a resolution and quality Selecting a quality 2 1 8 7 6 5 4 Photos you take are compressed and saved in a JPG format. The higher quality you select, the better photos you will get, but the file size will also increase. -
Page 33: Using The Timer And Remote Control
Using the timer and remote control In Shooting mode, touch Select a timer option. Option Description The timer is not active. 10 Sec Take a photo in 10 seconds. 2 Sec Take a photo in 2 seconds. Take a photo in 10 seconds and take another Double in 2 seconds. -
Page 34: Shooting In The Dark
Shooting in the dark Preventing red-eye 2 1 6 5 4 If the flash fires when you take a photo of a person in the dark, a red glow may appear in the eyes. To prevent this, select Red Eye or Red Eye Fix. Using the flash 2 1 8 6 5 4 Use the flash when taking photos in the dark. -
Page 35: Flash Options
Shooting in the dark Option Description • The flash fires and the shutter stays open longer. Slow • Select this in the evening or in the dark. Sync • It is a good idea to use a tripod to prevent your photos from blurring. -
Page 36: Adjusting The Iso Speed
Shooting in the dark Adjusting the ISO speed ISO speed is the measure of a film’s sensitivity to light as defined by the International Organisation for Standardisation (ISO). The higher ISO speed you select, the more sensitive to light your camera becomes. -
Page 37: Changing The Camera's Focus
Changing the camera’s focus Using macro 2 1 8 7 3 Select Macro or Auto Macro to take close-up photos of subjects, such as flowers or insects. • Try to hold the camera very still to prevent blurry photos. • Turn the flash off if the distance to the subject is less than 40cm. -
Page 38: Using Touch Focus
Changing the camera’s focus Using touch focus 1 8 7 You can focus on a particular part of your scene. Touch where you want to focus. Set the focus area to Touch AF. The frame will move to the The frame will move to the location that you touch on location that you touch on the screen. -
Page 39: Using Face Detection
Using face detection If you use face detection options, your camera can automatically detect a human face. When you focus on a human face, the camera adjusts the exposure automatically. Take photos quickly and easily by using Blink Detection to detect closed eyes or Smile Shot to capture a smiling face. - Page 40 Using face detection Option Description Take photos of yourself. The focus distance will be set to close-up and your camera will emit a beep. Self Portrait When your hear a quick beep, press [Shutter]. To turn the beep on or off, select Self Portrait in the sound settings.
-
Page 41: Adjusting Brightness And Colour
Adjusting brightness and colour Adjusting the exposure manually Depending on the intensity of the ambient light, your photos may be too bright or dark. In these cases, you can adjust the exposure to get a better photo. Darker (-) Darker (-) Neutral Neutral Brighter (+) -
Page 42: Compensating For Backlighting Acb
Adjusting brightness and colour Compensating for backlighting When the light source is behind your subject or there is high contrast between your subject and the background, your subject is likely to appear dark in the photo. In this case, set the Auto Contrast Balance (ACB) option. -
Page 43: Changing The Metering Option
Adjusting brightness and colour Changing the metering option The metering mode refers to the way in which a camera measures the quantity of light. The brightness and lighting of your photos will vary depending on the metering mode you select. In Shooting mode, touch (In the 3 mode, touch Select a metering option. - Page 44 Adjusting brightness and colour In Shooting mode, touch Select a white balance option. • Drag left or right to preview. Icon Description Use automatic settings depending on the Auto WB lighting conditions. Select when taking outdoor photos on a Daylight sunny day.
-
Page 45: Memory Card
Using burst modes 1 8 4 It can be difficult to take photos of fast-moving subjects or capture natural facial expressions and gestures of your subjects in photos. In these cases, select one of the burst modes. In Shooting mode, touch Select a burst option. -
Page 46: Improving Your Photos
Improving your photos Applying photo styles 2 1 8 7 Apply different style to your photos, such as Soft, Vivid, or Forest. Soft Soft Vivid Vivid Forest Forest In Shooting mode, touch Select a photo style. • Drag left or right to preview. When you select a photo style, the white balance will be set to Auto WB. -
Page 47: Adjusting Your Photos
Improving your photos Adjusting your photos Adjust the sharpness, saturation, and contrast of your photos. In Shooting mode, touch twice. Select an adjustment option. • : Sharpness • : Contrast • : Saturation Select an option (e.g. Sharpness). Sharpness option Description Sharpen the edges to improve the clarity Vivid+/... -
Page 48: Playback/Editing
4. Playback/Editing 4. Playback/Editing Learn how to play back photos, videos, or voice memos and edit photos or videos. You will also learn how to connect your camera to your computer, photo printer, TV, or HDTV. Playing back ... 48 Starting Playback mode ... -
Page 49: Playing Back
Playing back Starting Playback mode View photos or play videos and voice memos stored in your camera. Press [Playback]. • The most recent file you have taken or recorded will be displayed. • If the camera is off, it will turn on. Drag your finger left or right to scroll through files. - Page 50 Playing back Viewing files by date View files by the date they were saved. In Playback mode, press [MENU]. Touch View Date. • Touch All to view all files. Select the date the file was saved. Drag your finger left or right to scroll through files. •...
- Page 51 Playing back Protecting files Protect your files from accidential deletion. In Playback mode, press [MENU]. Touch Protect. Touch Select or All. • If you touch All, skip to step 5. Select a file. Selected Selected Protected Protected Touch Lock. • To unlock the file, touch Unlock.
-
Page 52: Viewing Photos
Playing back Restoring photos from the recycle bin If you activate the recycle bin, files you delete will be sent to the recycle bin instead of being deleted permanently (p. 70). This applies to single files or selected files only-if you choose to delete all files, those files will not be sent to the recycle bin. - Page 53 Playing back Enlarging a photo In Playback mode, press [T] to enlarge a photo In Playback mode, press [T] to enlarge a photo (press [W] to reduce a photo). (press [W] to reduce a photo). Enlarged area Enlarged area Zoom ratio (The maximum zoom Zoom ratio (The maximum zoom ratio may vary depending on the ratio may vary depending on the...
-
Page 54: Playing A Video
Playing back Playing a video You can play a video, capture an image from a video, or crop a video. In Playback mode, select a video and touch Use the following icons to control playback. Elapsed time Elapsed time Icon Description •... -
Page 55: Playing Voice Memos
Playing back Playing voice memos Playing a voice memo In Playback mode, select a voice memo and touch Use the following icons to control playback. Icon Description • Skip backward. • Touch and hold to scan backward. Pause or resume playback. Stop playback. -
Page 56: Editing A Photo
Editing a photo Perform photo editing tasks such as rotating, resizing, eliminating red eyes, and adjusting brightness, contrast, or saturation. Rotating a photo In Playback mode, select a photo and touch Rotate the photo. Touch to save the change. Resizing photos You can reduce the size of a photo and save it as a new file. -
Page 57: Editing Colour
Editing a photo Editing colour Apply a different colour tone to the photo, such as B & W, Sepia, or Blue and save it as a new file. B & W B & W Sepia Sepia Blue Blue In Playback mode, select a photo and touch Select a colour tone. -
Page 58: Correcting Exposure Problems
Editing a photo Correcting exposure problems Adjust ACB (Auto Contrast Balance), brightness, contrast, or saturation; remove red eyes; or hide facial imperfections. Edited photos will be saved as new files. Adjusting ACB (Auto Contrast Balace) In Playback mode, select a photo and touch Touch Touch to save the change. -
Page 59: Creating A Print Order Dpof
Editing a photo Creating a print order Define which photos are to be printed and information about the number of copies or paper size. • The memory card can be taken to a print shop that supports DPOF (Digital Print Order Format) or you can print out photos directly through a DPOF-compatible printer at home. -
Page 60: Viewing Files On A Tv Or Hdtv
Viewing files on a TV or HDTV Play back photos or videos by connecting your camera to a TV using the provided A/ V cable. Select a video signal output according to your country or region. (p. 71) Turn off your camera and TV. Connect your camera to your TV using the A/V cable. - Page 61 HDTV. If your HDTV supports the Anynet+(CEC) profile, turn the Anynet+ on in the settings menu (p. 71) to control all connected Samsung A/V devices with the TV remote control. For details, see the ‘HDMI cradle manual’.
-
Page 62: Transferring Files To Your Computer
For 64bit Edition of Windows XP and Vista, the programs may not work properly. Programs contained on the CD Item Requirements Samsung Master Edit photos and videos. QuickTime Player 7.4 View videos (MPEG-4 AVC/H.264 files) on a PC. Adobe Reader View the user manual. - Page 63 Transferring files to your computer Insert the installation CD in a CD-ROM drive. When the setup screen is displayed, click Samsung Digital Camera Installer to start installation. Select programs to install and follow the onscreen instructions. Click OK to complete the installation.
- Page 64 PC. For details, see Help in the program. This program does not support editing of video files (H.264 (MPEG4. AVC)) on the camera. Downloading files using Samsung Master A window for downloading files automatically appears when the camera is connected. Select the files you want to download.
-
Page 65: For Mac Users
Transferring files to your computer Using the Samsung Master Interface View mode Click to see details Click to see details about the program about the program Toolbar Toolbar Menus Menus Double-click Double-click to switch to full- to switch to full-... -
Page 66: Printing Photos With A Photo Printer
Printing photos with a photo printer Print photos with a PictBridge-compatible printer by connecting your camera directly to the printer. With the printer on, connect your camera with the USB cable. Press [POWER] or [Playback] to turn on your camera. Touch Printer. - Page 67 Printing photos with a photo printer Printing with custom settings Set printing options. Reset Reset Option Description Select whether to print the current photo or Images all photos. Size Specify the size of the print. Layout Create thumbnail prints. Type Select the type of paper.
-
Page 68: Appendix
5. Appendix 5. Appendix Refer to settings, error messages, specifications, and maintenance tips. Camera settings menu ... 68 Accessing the settings menu ... 68 Sound setting ... 69 Display setting ... 69 Camera setting ... 70 Connection setting ... 71 Error messages ... -
Page 69: Camera Settings Menu
Camera settings menu Accessing the settings menu In Shooting or Playback mode, press [MENU]. Select a menu. Touch a menu you want Touch a menu you want Medium Medium Volume Volume Sound1 Sound1 Beep Sound Beep Sound Sound1 Sound1 Shutter Sound Shutter Sound Start Sound Start Sound... -
Page 70: Sound Setting
Camera settings menu Sound setting Item Description Adjust the volume of any sound. Volume (Off, Low, Medium*, High) Select a sound to be emitted when touching the Beep Sound screen or switching modes. (Off, Sound1*, Sound2, Sound3) Select a sound to be emitted when pressing the Shutter Sound shutter button. -
Page 71: Camera Setting
Camera settings menu Camera setting Item Description Format the internal memory and the memory card (all files-including the protected files-will be deleted). (No*, Yes) Format When you use a memory card use with cameras from different manufacturers or a memory card reader, or one formatted on a computer, your camera may read the card incorrectly. -
Page 72: Connection Setting
Set an assistant light to help you focus in the dark. AF Lamp (Off, On*) Connection setting * Default Item Description Set to control the camera connected to a Samsung HDTV that supports Anynet+(CEC) with the TV remote control. Anynet+ • Off: View files without using an HDTV remote control. -
Page 73: Error Messages
Error messages When the following error messages appear, try these remedies. Error message Suggested remedies • Turn off your camera and turn it on again. • Remove your memory card and insert it Card Error! again. • Format your memory card. (p. 70) Insert a charged battery or recharge the Low Battery! battery. -
Page 74: Camera Maintenance
Camera maintenance Cleaning your camera Camera lens and touch screen Use a blower brush to remove dust and wipe the lens gently with a soft cloth. If any dust remains, apply lens cleaning liquid to a piece of cleaning paper and wipe gently. Camera body Wipe gently with a soft, dry cloth. -
Page 75: About Memory Cards
Camera maintenance About memory cards Memory cards you can use You can use SD (Secure Digital), SDHC (Secure Digital High Capacity), or MMC (MultiMedia Card) memory cards. Terminal Terminal Write-protect switch Write-protect switch Label (front) Label (front) You can prevent files from being deleted by using a write-protect switch on the SD or SDHC card. -
Page 76: About The Battery
Record videos at 640x480 resolution Videos Approx. 90min and 30fps. • The figures above are measured by Samsung’s standards and may differ depending on usage. • Several videos were recorded in succession to determine the total recording time. Notes about charging the battery •... -
Page 77: Before Contacting A Service Centre
Before contacting a service centre If you are having trouble with your camera, try these troubleshooting procedures before contacting a service centre. If you have attempted the troubleshooting solution and are still having problems with your device, contact your local dealer or service centre. Situation Suggested remedies •... - Page 78 Before contacting a service centre Situation Suggested remedies Set the date and time in the display settings The date and time are incorrect menu. The touch screen or Remove the battery and insert it again. buttons do not work The memory card has not been reset. The memory card has an error Format the card.
- Page 79 Before contacting a service centre Situation Suggested remedies The codec installed in your computer may not be compatible with the video files you want to play. Use QuickTime install Codec Pack Full. • Using QuickTime 1. Install QuickTime supports MP4 (H.264 (MPEG.AVC)). 2.
-
Page 80: Camera Specifications
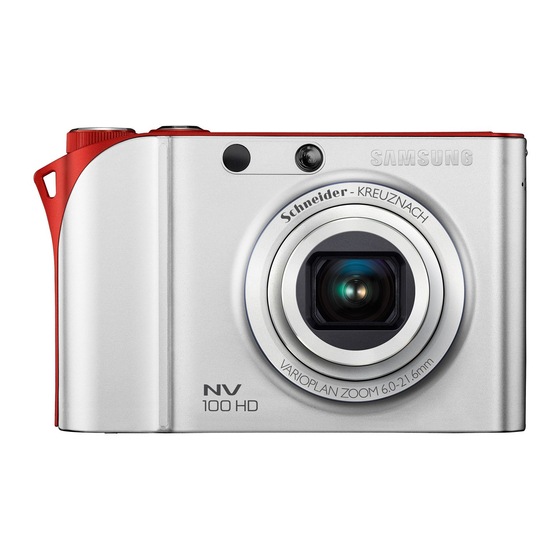
Camera specifications Type 1/1.72" (1.49 cm) CCD Image Effective pixels Approx. 14.7 mega-pixels sensor Total pixels Approx. 15.0 mega-pixels Focal length Schneider - KREUZNACH lens f = 6.0 - 21.6 mm (35 mm film equivalent: 28 - 102 mm) F-stop range F2.8 (W) - F5.9 (T) Lens Digital zoom... -
Page 81: Continuous, High Speed, M. Capture
4384x3288 4384x2920 4384x2464 3264x2448 2592x1944 1920x1080 1374 1794 1024x768 1655 2438 2894 These figures are measured under Samsung’s standard conditions and may vary depending on shooting conditions and camera settings. Single image, Thumbnails, Advanced slide show (with effect and music) - Page 82 Dimensions (W x H x D) (without projection part) Weight 138g (without battery and memory card) Operating temperature 0 - 40˚C 5 - 85% Operating humidity Samsung Master, QuickTime Software Adobe Reader Specifications are subject to change without prior notice. ® Player 7.4, Appendix...
-
Page 83: Correct Disposal Of This Product
This product should not be mixed with other commercial wastes for disposal. Samsung Eco-mark It is Samsung’s own symbol mark is used to effectively communicate Samsung’s environmental friendly product activities to the consumers. The mark represents Samsung’s continuous effort on development of environmental conscious products. -
Page 84: Index
Index ACB 41, 57 Battery Charging 75 Adjusting Life 75 Brightness 57 Specifications 75 Contrast in Playback mode 57 Beauty Shot mode 21 in Shooting mode 46 Blink Detection 39 Saturation in Playback mode 57 Burst in Shooting mode 46 Auto Exposure Bracket Sharpness 46 (AEB) 44... - Page 85 Index Format 70 Memory card Capacity 74 Frame rate 24 MMC 74 SD 74 SDHC 74 HDTV 59 Menu button 12 Metering Center 42 Multi 42 Icons 13 Spot 42 Image Restoration 70 Mode dial 11 Imprint 71 Muting ISO speed 35 Camera 14 Video 24 Light source...
- Page 86 Index Transferring files for Mac 64 Samsung Master for Windows 61 Installing 61 Tripod mount 12 Using 63 Scene mode 20 Self Portrait 39 USB and A/V port 12 Service centre 76 Shutter button 11 Shutter speed 22 Video Slide show 52...
- Page 87 Please refer to the warranty that came with your product or go to our website http://www.samsungcamera.com/ for after-sales service or inquiries. The CE Mark is a Directive conformity mark of the European Community (EC)