Table of Contents
Advertisement
Advertisement
Table of Contents

Related Manuals for Samsung VERIZON SCHU460


Summary of Contents for Samsung VERIZON SCHU460
- Page 2 P O R T A B L E A L L D I G I T A L M O B I L E P H O N E User Manual Please read this manual before operating your phone, and keep it for future reference.
-
Page 3: Intellectual Property
(and will not attempt to) modify, prepare derivative works of, reverse engineer, decompile, disassemble, or otherwise attempt to create source code from the software. No title to or ownership in the Intellectual Property is transferred to you. All applicable rights of the Intellectual Property shall remain with SAMSUNG and its suppliers. - Page 4 Some software components of this product incorporate source code covered under GNU General Public License (GPL), GNU Lesser General Public License (LGPL), OpenSSL License, BSD License and other open source licenses. To obtain the source code covered under the open source licenses, please visit: http://opensource.samsungmobile.com/index.jsp.
- Page 5 MANUAL SHALL BE CONSTRUED TO CREATE AN EXPRESS OR IMPLIED WARRANTY OF ANY KIND WHATSOEVER WITH RESPECT TO THE PRODUCT. IN ADDITION, SAMSUNG SHALL NOT BE LIABLE FOR ANY DAMAGES OF ANY KIND RESULTING FROM THE PURCHASE OR USE OF THE PRODUCT OR ARISING FROM THE BREACH OF THE EXPRESS WARRANTY, INCLUDING INCIDENTAL, SPECIAL OR CONSEQUENTIAL DAMAGES, OR LOSS OF ANTICIPATED PROFITS OR BENEFITS.
-
Page 6: Table Of Contents
Memory Card ........13... - Page 7 Music & Tones ........80...
- Page 8 Call Settings ........133...
-
Page 9: Section 1: Getting Started
Unless otherwise specified, all instructions in this manual assume that you are starting from the Home screen, and using the external keys. To get to the Home screen, you may need to unlock the phone or keypad. For more information, see Locking and Unlocking see “Locking and unlocking the phone”... -
Page 10: Activating Your Phone
TXT Message. If you purchased your phone at a Verizon Wireless store, it is activated and ready to use. If you received a new phone by mail, it may need to be activated before you can use it. To activate your phone, choose from the following: Visit a Verizon Wireless store. -
Page 11: Battery
The battery is under a removable cover on the back of the phone. Removing the battery cover Press down on the top of the cover and on the arrow at the bottom of the cover, while sliding the cover off in the direction of the arrow. - Page 12 Remove the battery cover. For more information, see “Removing the battery cover” on page 6. Insert the top end of the battery into the phone housing, aligning the gold contacts on the battery with the gold contacts in the phone. Push down on the bottom of the battery down until it snaps into place.
- Page 13 Your phone comes with a USB cable and charging head to rapidly charge your phone from any 120/220 VAC outlet. Note: The battery comes partially charged. You must fully charge the battery before using your phone for the first time. A fully discharged battery requires up to 4 hours of charge time.
-
Page 14: Turning Your Phone On And Off
Samsung charging accessories, such as the charging head and cigarette lighter adapter, will only charge Samsung-approved batteries. Note: When using a non-supported battery, the phone can only be used for the duration of the life of the battery and cannot be recharged. Press and hold the End/Power key to turn the phone on or off. -
Page 15: Set-Up Wizard
• Clock Format: Select a format for the Home screen clock. While setting preferences: • Press SET to make a selection and go to the next setting. • Press Preview or Play for an example of the highlighted selection. • Press Skip to move to the next setting without making a selection. -
Page 16: Locking And Unlocking
Tip: You may choose to have the phone lock automatically when you power it on. For more information, see “Phone Lock Setting” on page 130. Tip: The default lock code is the last four digits of your phone number, or you Unlocking the phone... -
Page 17: Tty Mode
Home screen appears. Your phone is fully TTY-compatible, allowing you to connect a TTY device to the phone’s headset jack. Before you can use your phone with a TTY device, you’ll need to enable TTY Mode. For more information about TTY settings, see “TTY Mode” on page 134. -
Page 18: Voicemail
16GB capacity (not included). You can store music, pictures, and other files on a memory card. Note: You can only store music files that you own on a memory card. Installing a Memory Card , then press... - Page 19 Pull the memory card cover out and turn it to expose the memory card in the card slot. Press on the memory card to release the lock, then remove the card. Formatting Formatting erases all content from the memory card and prepares it for use with your phone.
-
Page 20: Section 2: Understanding Your Phone
“Bluetooth Menu” on page 112. ® Warning!: If your handset has a touch screen display, please note that a touch screen responds best to a light touch from the pad of your finger or a non-metallic stylus. Using excessive force or a metallic object when pressing on the touch screen may damage the tempered glass surface and void the warranty. -
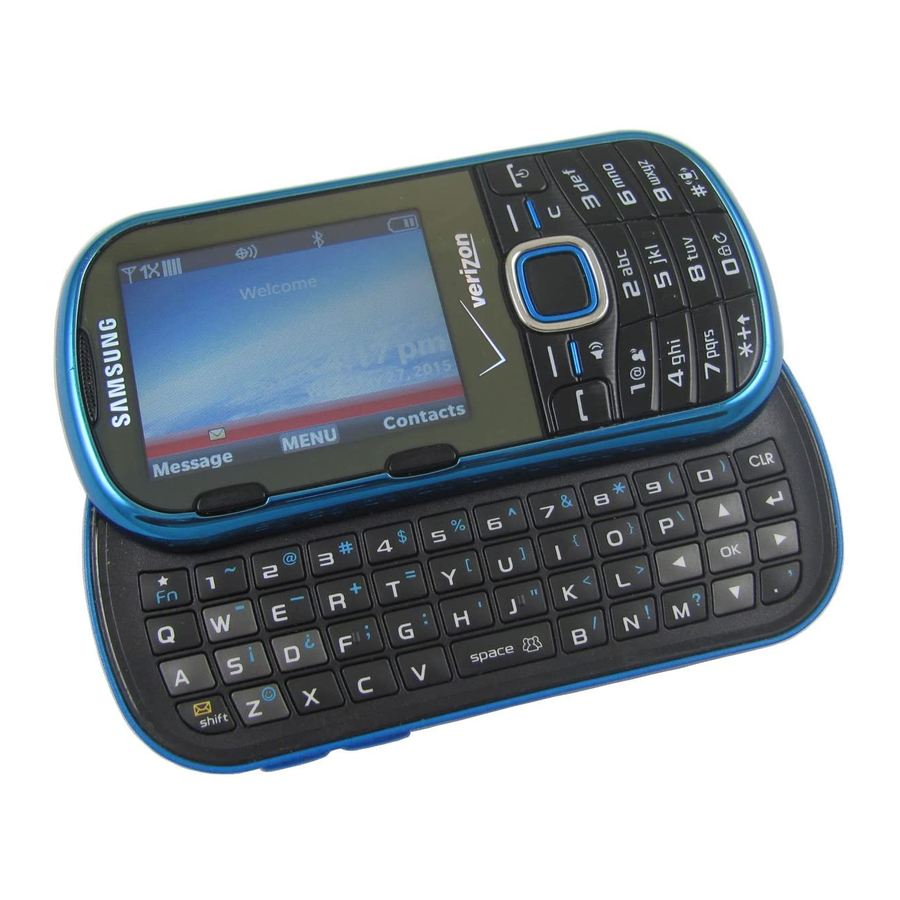
Page 21: Front View
Left Soft Key: Press to select a menu, item or command displayed at the left of the bottom line of the display. Send Key: Press to place or receive a call. From the Home screen, press to access the All Calls log. -
Page 22: Side Views
Strap attachment: Attach a strap (not included). Volume Key: From the Home screen, press to adjust Master Volume, or press and hold to activate Sounds Off/Normal mode. Press to adjust voice volume during calls, adjust audio volume, or mute an incoming call ringtone. -
Page 23: Open View
Directional Keys: Press Up, Down, Left or Right to scroll through menus, or to move the insertion point. OK Key: Press to select an item, or the command at the center of the bottom line of the display. Enter Key: Press to move the insertion point to the next line in a message. -
Page 24: Back View
Soft key functions are defined by what appears above them, in the bottom line of the display. There are three soft keys: the Left Soft Key, the Right Soft Key, and the Center Select Key or OK Key. Your phone has two options for soft keys. - Page 25 From the Home screen, press the Left Soft Key Message to open the • Messaging menu. When the Left Soft Key function is Edit, press to edit the item or field. • Right Soft Key Some functions of the Right Soft Key are: From the Home screen, press the Right Soft Key Contacts to open your •...
-
Page 26: Function Keys
• Enter a number and press the Send Key to make a call. • Press the Send Key from the Home screen to display a list of all calls • to and from your phone. Press and hold the Send Key from the Home screen to call the most •... -
Page 27: Favorites Key
Vibrate Mode Key Use the Vibrate Mode Key to control Vibrate Only mode: From the Home screen, press and hold the Vibrate Mode Key to set • your phone to Vibrate Only mode. Press and hold the Vibrate Mode Key to return to the previous sound •... -
Page 28: Understanding The Home Screen
The Home screen is the starting point for using your phone. Note: Unless stated otherwise, instructions in this User Manual start with the phone unlocked, at the Home screen. Features Annunciator Line: Presents icons to show network status, battery power, and connection details. For a list of icons, see “Annunciator Line Icons”... - Page 29 “Display Themes” on page 121. Home screen Icons Annunciator Line Icons These icons appear in the Annunciator Line on the Home screen. Digital Signal Strength: The number of bars show signal strength. More bars indicate stronger signal. 1X CDMA Signal Strength: The number of bars show signal strength.
- Page 30 “Adding a New Device” on page 114. Bluetooth Active: The phone is exchanging information with another Bluetooth device. Music Only: The phone is in Music Only mode, and all wireless communications are disabled. For more information, see “Music Only Mode” on page 94.
-
Page 31: Understanding The Menu
These icons appear in the Event Status line on the Home screen. All Sounds Off: Master Volume is set to All Sounds Off. No sounds are played for calls, messages or alerts. Alarm Only: Master Volume is set to Alarm Only. The only sounds played will be for alarms. - Page 32 For more information, see “Position Menu Items (List Menu Layout only)” on page 122. Menu Fonts Choose the font and size for Menu screens. For more information, see “Menu Fonts” on page 123. Menu Items These items appear on the Menu by default.
-
Page 33: Menu Outline
Each menu item has a number assigned to it, and you can access menu items using these menu numbers. For example, launch My Pictures using standard navigation: From the Home screen, press the Center Select Key to select MENU. Media Center menu is highlighted. Press the Center Select Key OK to select it. - Page 34 3: Backup Assistant 4: Groups 1: Business 2: Colleague 3: Family 4: Friends 5: Speed Dials 6: In Case of Emergency 7: My Name Card Media Center 1: Search 2: Music & Tones 1: Get New Ringtones 1: Get New Applications...
- Page 35 5: Volume 6: Currency 3: Calendar 4: Alarm Clock 5: Stop Watch 6: World Clock 7: Notepad 8: USB Mass Storage 4: Bluetooth Menu 1: Add New Device 5: Keyguard Settings 1: Auto Lock 2: Unlock Options 6: Sounds Settings...
- Page 36 2: Lock Screen 5: Display Themes 6: Main Menu Settings 1: Menu Layout 2: Replace Menu Items (List Menu Layout) 3: Position Menu Items (List Menu Layout) 4: Reset Menu Settings 1: Menu Layout 2: Menu Items (List Menu Layout)
- Page 37 1: Style 2: Size 3: Messaging Font Size 8: Clock Format 9: Home Screen Font Color 1: Personal Banner 2: ERI Banner 3: Clock 8: Phone Settings 1: Airplane Mode 2: Set Shortcuts 1: Set My Shortcuts 1: Shortcut 1...
- Page 38 1: Phone Memory Usage 2: My Pictures 3: My Ringtones 4: My Music 5: My Sounds 6: My Contacts 7: Move All To Card 3: Card Memory 1: Card Memory Usage 2: My Pictures 3: My Ringtones 4: My Music...
-
Page 39: Section 3: Call Functions
Use one of these methods to ignoring an incoming call and send it directly to voicemail: Press the Right Soft Key • To ignore the call and send a text message to the caller, press the • Center Select Key response, then press the Center Select Key... -
Page 40: Call In-Progress Options
To control whether the other caller can hear you, press the Left Soft • Mute/Unmute. When you place, miss, or receive a call, a record of the call is saved in Recent Calls. These types of calls are: • Missed: Calls you did not answer. -
Page 41: Making Calls Using Recent Calls
• Press the Center Select Key • Press the Right Soft Key Options for these options: – Save to Contacts: Save the caller’s phone number as a new contact, or to update an existing contact. – Erase: Delete the highlighted call record. -
Page 42: Voice Commands
From the Home screen, press the Directional Key Commands key. Note: At each step, Voice Commands displays a list of available commands. If Voice Commands does not recognize your command, it will prompt you to confirm. Tip: Press the Left Soft Key Send. - Page 43 The following is a list of functions that you can perform with Voice Commands: Call <Name or #>: Place a call to a saved contact, to a telephone • number, or to voicemail. Send <Msg Type>: Create a text, picture, or voice message to a •...
- Page 44 Commands key. The audio prompt “Please say a command.”sounds and the Voice Commands display. Say “Go to”, followed by the name of a menu item, for example, “Contacts”, “Recent Calls“, “Messaging“, “Media Center“, “Calendar”, “Settings & Tools“, “Mobile Web“, or “My Music“.
- Page 45 Commands key. The audio prompt “Please say a command.”sounds and the Voice Commands display. Say “Play”, followed by: • “Play All” to play all tracks stored in your Music Library. • “<Playlist Name>” to play songs in a saved playlist. My Verizon Check your Verizon Wireless account status by voice command.
-
Page 46: Voice Commands Settings
Voice Command Settings. Select a setting for customization: • TXT Msg Readout: Choose On to have the phone reads the text in a TXT message, or Off for no readout. • Confirm Choices: Choose whether the phone prompts you with a list of potential matches to your voice command. -
Page 47: Section 4: Understanding Your Contacts
Section 4: Understanding Your Contacts This section allows you to manage your daily contacts by saving information in Contacts. Contacts provides access to powerful features such as Groups, creating and sending vCards, and viewing the phone number assigned to your phone by Verizon Wireless. -
Page 48: Adding A New Contact
Note: This procedure uses the QWERTY keyboard and command keys. Rotate the phone and slide it open to access the QWERTY keyboard. From the Home screen, press the Right Soft Key Contacts. Press the Right Soft Key Use the QWERTY... - Page 49 Birthday: Enter the contact’s date of birth. Notes: Enter Notes about the contact. Enter a telephone number with the external keypad, then save it. Note: This procedure uses the external phone keypad and command keys. From the Home screen, use the external keypad to enter the telephone number.
-
Page 50: Erasing Contacts
Note: This procedure uses the QWERTY keyboard and command keys. Rotate the phone and slide it open to access the QWERTY keyboard. Save a telephone number from a recent call record as a contact. From the Home screen, press Use the Directional Keys to highlight a call record. -
Page 51: Editing A Contact
Make changes to an existing contact. Note: This procedure uses the QWERTY keyboard and command keys. Rotate the phone and slide it open to access the QWERTY keyboard. From the Home screen, press the Right Soft Key Contacts. Use the... -
Page 52: Managing Contacts
• Lock: Mark multiple contact(s) to lock. Locked contacts cannot be deleted. • Unlock: Mark multiple contact(s) to unlock. • Copy to Card: Mark contact(s) to copy to an optional installed memory card. Use the Directional Keys to highlight contacts, then... -
Page 53: Adding Pauses Or Waits
Note: Multiple pauses extend the length of a pause, and each pause counts as a digit toward the 48-digit maximum. For example, 2 consecutive Add Pauses create a total pause of four seconds, and count as 2 digits. Note: This procedure uses the QWERTY keyboard and command keys. Rotate Options: SAVE. -
Page 54: Groups
Note: The Quick Search setting must be enabled to perform this procedure. For more information, see “Quick Search” on page 132. Using the QWERTY Keyboard Open the phone, then use the QWERTY keyboard to enter the first few letters of the contact name. - Page 55 Groups. Press the Left Soft Key New. At the NEW GROUP screen, enter a name of up to 25 characters for the new group in the “Enter Name:” field. For more information, see “Entering Text” on page 59. When finished, press the OK Key to select SAVE.
-
Page 56: Speed Dials
Use Send Message in the Group feature to send a message to as many as 10 members of a group at once. Note: Messaging availability varies when roaming outside the Verizon Wireless Network. Note: This procedure uses the QWERTY keyboard and command keys. Rotate the phone and slide it open to access the QWERTY keyboard. -
Page 57: Favorites
OK Key Favorites Directional Favorites are up to 10 contacts or groups that you assign. You can use Favorites to view messages sent to and from favorite contacts, and quickly call or send a message to favorites. To access Favorites: to select Remove. - Page 58 Note: This procedure uses the QWERTY keyboard and command keys. Rotate the phone and slide it open to access the QWERTY keyboard. From the Home screen, press the the QWERTY keyboard. The first time you launch Favorites, read the description, then press the OK Key...
-
Page 59: In Case Of Emergency
OK Key VIEW, or just press the number of the Favorite. Use In Case of Emergency to set up to 3 emergency contacts, plus enter personal information that may be helpful to others using your phone in an emergency. - Page 60 Note: This procedure uses the QWERTY keyboard and command keys. Rotate the phone and slide it open to access the QWERTY keyboard. From the Home screen, press the OK Key ➔ ➔ MENU Contacts In Case of Emergency. Use the Directional Keys to highlight a contact.
-
Page 61: My Name Card
MENU Press the Left Soft Key option and press the OK Key • Send via TXT Message: Creates a new text message, with My Name Card as an attachment. • Send via Picture Message: Creates a new picture message, with to select My Name Card as an attachment. - Page 62 You can send individual contacts, or your entire contact list, to Bluetooth devices that support vCards. Important!: Not all Bluetooth devices will accept a name card, and not all to select Note: This procedure uses the QWERTY keyboard and command keys. Rotate...
-
Page 63: Backup Assistant
Directional Backup Assistant is a wireless service that saves a copy of your Contacts List to a secure web site. If your phone is lost, stolen or damaged, Backup Assistant can restore your saved contacts to a new phone, wirelessly. Schedule daily backups to save your information manually or automatically. -
Page 64: Section 5: Entering Text
(upper case), and abc (lower case) modes. Press twice quickly to lock ABC mode, then press again to unlock. Space: Press to insert a space. Entering Numbers Enter numbers by pressing the number keys on the top row of the QWERTY keyboard. Entering Text... -
Page 65: Entering Text Using The External Keypad
While entering text, you can change the text entry mode to your preference. Tip: You can set a default Text Entry Mode. For more information, see “Messaging Settings” on page 78. While entering text, press the Left Soft Key Mode. - Page 66 Palabra requires only one key press per letter of the word, and is much faster than traditional text entry. To switch to Palabra mode, press the Left Soft Key ➔...
-
Page 67: Entering Symbols
To switch to Abc mode, press the Left Soft Key ➔ Entry Mode Abc. While entering text: Press the appropriate key once for the first letter on the key, twice for • the second letter, three times for the third letter, and four times for the fourth letter. •... - Page 68 OK to insert it into your text. Press the Left Soft Prev to move to the previous page. Press the Right Soft Key Next to move to the next page. Tip: You can also press the key for the number corresponding to a Smiley. Entering Text...
-
Page 69: Section 6: Messaging
Contacts, My Pictures or My Sounds. For more information, see “New Message Key” on page 22. Quick Reply While viewing a message, you can just begin typing to reply with a quick TXT message reply. QWERTY Action... -
Page 70: Creating And Sending Text Messages
Options for these options: • Insert Quick Text: Choose from 16 pre-loaded phrases. • Save As Draft: Save a copy of the message in the Drafts folder. • Add: Add a Graphic, Animation or Sound from media pre-loaded on your phone, a contact’s Name Card, or Contact Number/Email. -
Page 71: Creating And Sending Picture Messages
From the Home screen, press the Left Soft Key ➔ Message, New Message Tip: Sliding the phone open immediately after taking a picture opens a New Picture Message. At the NEW PICTURE MESSAGE screen, enter recipients: • Press the Right Soft Key Send to send the •... - Page 72 • Preview: View the message before sending. • Save As Draft: Save a copy of the message in the Drafts folder. • Add Quick Text: Choose from 16 pre-loaded phrases. • Priority Level: Set the urgency of the message, to High or Normal.
-
Page 73: Creating And Sending Voice Messages
While entering text, press the Right Soft Key • Review: Listen to the message before sending. • Save As Draft: Save a copy of the message in the Drafts folder. Add to select recipients: – From Contacts: Choose contacts from the Contacts List. -
Page 74: Receiving Messages
• Add Quick Text: Choose from 16 pre-loaded phrases. • Priority Level: Set the urgency of the message, to High or Normal. • Cancel Message: Cancel the message, with the option to save it in the Drafts folder. Use the Directional Keys to move to the Subject: field to enter a subject for the message, if desired. - Page 75 • Save Quick Text: Save the message text to the Quick Text list. • Lock/Unlock: Lock or unlock the message to prevent deletion. • Add To Contacts: Save the number of the sender to Contacts as a new entry or update to an existing entry.
-
Page 76: Message Folders
Contacts. • Lock/Unlock: Lock or unlock the message to prevent deletion. • Add To Contacts: Save the number of the sender to Contacts as a new entry or additional to an existing entry. • Extract Addresses: Display all Contact Numbers, Email Addresses, and URLs extracted from the message, to call, send an email, or open the web page. - Page 77 Inbox message folder by date and time. Options for these options: Note: The Inbox folder is only present when the Inbox View setting is set to • Manage Messages: Perform an action on multiple message(s). Choose from Erase, Lock, Unlock, Mark as Read, or Mark as Unread.
-
Page 78: Sent Folder
When the Inbox View setting is set to Time, outgoing messages are stored in the Sent message folder by date and time. Note: The Sent folder is only present when the Inbox View setting is set to Time. For more information, see “Messaging Settings” on page 78. - Page 79 • Add To Contacts: Save the number of the sender to Contacts as a new entry or additional to an existing entry. • Message Info: Display details about the message. • Manage Sent: Manage messages with the Erase, Lock, or Unlock commands.
-
Page 80: Voicemail
Note: For more information about setting up and checking voicemail, see “Voicemail” on page 13. Email Send and receive Email using Mobile Email or Mobile Web Mail. Tip: In Messaging Settings, you can set a default Email client to launch when ➔ ➔ you select MENU Messaging Email. -
Page 81: Social Beat
Mobile IM allows you to send and receive instant messages from your phone. ➔ ➔ Email Mobile Web Note: You’ll need to create the Instant Message account using a PC before accessing it on your phone. From the Home screen, press the Center Select Key ➔ ➔ to select MENU Messaging Mobile IM. -
Page 82: Social Networks
Use Social Networks to access Facebook, MySpace, and Twitter feeds, right from your phone. Note: You must register your phone with your social network site before using the phone to access the networks. Facebook Want to set up Facebook on your phone? From your Facebook account, go to Account Settings and follow the “Activate a Phone”... -
Page 83: Messaging Settings
To modify a phrase, highlight the phrase, then press EDIT. • Voicemail #: Enter a new Voicemail speed dial. The default is *86. • Callback #: Choose On to add a callback phone number to your messages, and set the phone number. Choose Off to omit a callback number (you can manually add a callback number to individual messages). - Page 84 • Preferred Email: Set your preferred Email client to Mobile Email or Mobile Web Email, or select Let Me Choose to have the phone prompt you each time you launch Email. • Social Networks: Set your preferred social network to Facebook, Myspace or Twitter, or select Let Me Choose to have the phone prompt you each time you launch Social Networks.
-
Page 85: Section 7: Media Center
Note: Before downloading multimedia content, check available memory. For more information, see “Memory” on page 136. Search Bing Search is a powerful search tool for locating web content via your phone, tailored for your current location. For more information, see “Bing Search” on page 86. - Page 86 • Press the Left Soft Key Set As to assign the ringtone as the default Ringtone, as a ringtone for a Contact ID, or as Alert Sounds for All Messages, TXT Message, Multimedia Message, or Voicemail.
- Page 87 ➔ ➔ Music & Tones • Limit for Send: Set the time limit for the new sound to 1 minute, suitable for sending in a Voice or Picture Message. • For Save: Set the new sound for no time limit.
-
Page 88: Pictures
At the prompt on the PC, select a sync method: • Open device to view files using Windows Explorer: Drag and drop files from the PC to your phone’s memory. • Sync digital media files using Windows Media Player: Use Windows Media Player on the PC to manage your phone’s music. -
Page 89: Games
Store pictures from your phone in your Verizon Wireless Online Album. Note: Before using Online Album, set up your account by visiting the Verizon Wireless website at www.verizonwireless.com From the Home screen, press the Center Select Key ➔ to select MENU Media Center Album. -
Page 90: Browse & Download
. Since these are default applications on your phone, you can download them from Browse & Download, or you’ll be prompted to download the first time you select the application’s icon in the Menu. Extras offers the ability to browse and download extra items to your phone. -
Page 91: Section 8: Web And Social Networking
Mobile Web The Mobile Web browser allows you to browse the web from your phone. Note: This feature is only available in the United States, in the Verizon Wireless Enhanced Services Area. Any time the Data Call icon appears in the Annunciator Line, you are connected to the Internet and billed accordingly. - Page 92 You can use Mobile Web with your phone closed or open. When you slide the phone open, the screen orientation automatically changes to landscape mode. Navigating Mobile Web Navigate web pages in Mobile Web using your phone’s command keys. When you use Mobile Web, some keys operate differently.
- Page 93 Enter a URL, or web address, to go to the web page or create a Favorite bookmark. Note: This procedure uses the QWERTY keyboard and command keys. Rotate the phone and slide it open to access the QWERTY keyboard. From the Home screen, press the Mobile Web launches to display the VZW Today home page.
- Page 94 FAVORITES link, then press the Left Soft Key the OK Key On the Add Link page, use the move the cursor to the Name of this link: field, then enter a name for the Favorite. Use the Directional Keys to move the cursor to the Address (URL): field, then enter the URL for the web page.
-
Page 95: Mobile Web Menu
“Adding Favorites” on page 89. • Search: Enter keywords to search the web. • Go to URL: Enter a URL address to go directly to a page. • Show URL: Display the URL for the current page. - Page 96 Home screen, or press the to the web page in Mobile Web. Tip: If you make or answer a call while using Mobile Web, the web session is suspended during the call. When the call ends, your Mobile Web session resumes at the last web page.
-
Page 97: Social Beat
You can save your usernames (but not passwords) to allow faster sign-in. Note: This procedure uses the QWERTY keyboard and command keys. Rotate the phone and slide it open to access the QWERTY keyboard. From the Home screen, press the Center Select Key ➔... -
Page 98: Section 9: Music
This section describes how to use the music features of your phone. My Music Use My Music to play music files that you transfer from your PC, or from an optional installed memory card. My Music supports the following music file formats: MP3 with the file extension .mp3... -
Page 99: Creating A Playlist
Stop playback. Play modes: • Add to Playlist: Adds the current song to a playlist. (A playlist must • Music Only Mode: Select On to have your phone act as a music • Song Info: View details about the song title, artist and album. - Page 100 • Reorder: Change the order of songs in the playlist. Press the Center Select Key Mark All. then use the Directional Key to move the song to a new position in the playlist. Press • Remove Songs: Delete songs from the playlist. Highlight a song and press the Center Select Key deletion.
-
Page 101: Cast Music With Rhapsody
® Rhapsody subscription): – Review subscription offerings. – Drag and drop tracks to My Library, or click the Add button next to the song. Import Songs from an Audio CD Import CDs into V CAST Music with Rhapsody, so that you can transfer them to your phone. - Page 102 Use V CAST Music with Rhapsody to transfer music from your PC to your Phone. Plug a USB cable into your phone and connect it to a USB port on your PC. On your phone, at the prompt “SELECT USB MODE”, highlight Sync Music to Phone to transfer music to your phone’s memory, or Sync Music to Card to transfer music to...
-
Page 103: Section 10: Pictures
Camera Key or the Center Select Key TAKE to take the picture. Tip: Open the phone immediately after taking a photo to resize the photo and create a new picture message with the new photo attached. After taking a photo, use the soft keys for these options: •... - Page 104 – Series Shot: Takes a series of of pictures. For Number of Pictures, choose 3 or 5 to enable a series, or Off to disable. For Auto/Manual, choose Auto to take a series of pictures with one Camera Key press , or Manual to press the Camera Key to take each shot.
-
Page 105: My Pictures
– Erase: Mark pictures for deletion. Use the Directional Key to highlight – Lock: Protect the highlighted picture from changes or deletion. – Unlock: Remove protection from the highlighted picture. – Move to Phone: If an optional memory card is installed, move pictures ➔ ➔... - Page 106 Add to add a Fun Frame, MERGE to combine the – Copy & Paste: Copy a specific part of another picture as a shape, and paste it onto the selected picture. – Resize: Change the size of the selected picture. Options are: 1024x768, 800x600, 640x480 and 320x240.
-
Page 107: Section 11: Tools & Applications
The features covered in this section allow you to schedule appointments, view the calendar, set an alarm, view time zones, take notes, and perform simple math calculations. Note: Unless otherwise noted, instructions in this section use the external keypad. Voice Commands... - Page 108 • Press the Right Soft Key and Right [ ) ]Parentheses or raise a number by a Power. • Press after a number to change the sign. • Press to enter a decimal point. Calculate the tip and how much each person should pay.
-
Page 109: Calendar
• Erase All Old: Delete all past events. • Search: Enter criteria to find an event. after a • Eco Day List: View a list of Eco dates, such as Earth Day. Directional Key to highlight the To units Directional Key Left or Right to ➔... -
Page 110: Viewing An Event
From the Home screen, press the Center Select Key ➔ to select MENU Settings & Tools Calendar. From the Calendar screen, find an event using one of these methods: • Use the Directional Key to highlight a date on the calendar, then press the Center Select Key day’s events. -
Page 111: Alarm Clock
“Bluetooth Menu” on page 112. Alarm Clock Set up to three alarms, to go off once, or recur periodically at a specific time. Once set, alarms are easy to change or turn off. Note: Alarms scheduled within the next 24 hours will cause the Alarm icon to appear in the Event Status line on the Home screen. -
Page 112: Stop Watch
Press the Left Soft Key Lap to record lap times. Press the Center Select Key Press the Right Soft Key times. World Clock View the local time, and the time in 45 cities around the world. ➔ ➔ Tools Alarm ➔... -
Page 113: Notepad
Install an optional memory card into your phone. For more information, see “Installing a Memory Card” on page 13. Plug a USB Cable into your phone, and connect it to a USB port on your PC. From the Home screen, press the Center Select Key ➔... -
Page 114: Vz Navigator
The first time you launch VZ Navigator, you’ll be prompted to download and install the application, and to agree to the terms of service. Tip: To use VZ Navigator, you must enable the Location On setting. For more information, see “Location” on page 127. Tools & Applications... -
Page 115: Section 12: Settings
• Vibrate Only: No sounds play, but the phone vibrates for incoming calls and messages, alarms and other alerts. • Alarm Only: Sounds play for alarms, but not for calls or other alerts. • All Sounds Off: No sounds play. - Page 116 Watch. World Clock Using World Clock, view the current time in your location, plus any other time zone in the world. For more information, refer to “World Clock” on page 107. From the Home screen, press the Center Select Key ➔...
-
Page 117: Bluetooth Menu
Voice Commands tool. Bluetooth profiles are specifications for services supported by individual devices. Profiles improve the ability of different devices to work together. Tip: You can find a list of supported profiles on your phone. Select MENU Settings & Tools ➔ ➔... - Page 118 Bluetooth options allow you to view and change your phone’s name, display supported profiles, and set visibility and pairing. Note: After selecting On, your phone will be discoverable for one minute, then ➔ Bluetooth Turn Off.
- Page 119 Add a new device to search for a Bluetooth device and pair with it, to exchange information between your phone and the device. From the Home screen, press the Center Select Key ➔ to select MENU Settings & Tools Menu.
-
Page 120: Keyguard Setting
• On: Enables Keyguard. The keypad will lock when the backlight goes out. • Off: Disables keyguard. The keypad never locks automatically. Tip: You can always lock or unlock the keypad manually by pressing and holding You can customize the keypress sequence to unlock your phone’s keypad. -
Page 121: Alert Sounds
Settings & Tools Sounds ➔ Alert Sounds. : Plays the Emergency Dialing tone, except when the master : Vibrates only and does not play the Emergency Dialing tone. : The phone will not play the Emergency Dialing tone, or vibrate. -
Page 122: Service Alerts
SET. to select MENU Settings Choose On or Off for these Service Alerts: • ERI: Your phone plays a tone when you enter and exit network coverage areas. ➔ Sounds • Minute Beep: While on a call, your phone beeps at every minute. -
Page 123: Display Settings
MENU Settings & Tools ➔ Settings Power On/Off. Choose On or Off to control the sounds played at Power On and Power Off. Display Settings Use Display Settings to customize the appearance of your phone’s screens. From the Home screen, press the Center Select Key ➔... - Page 124 Enter up to 18 characters, then press the Center Select Key SET to save the banner. Note: When you create a Personal Banner, it automatically appears on the Home screen. ERI banner Enable or disable an ERI banner to indicate network status.
- Page 125 Select a background image for the Lock Screen and Home screen, from pre-loaded images, or your own pictures. Home Screen From the Home screen, press the Center Select Key ➔ to select MENU Settings & Tools ➔ Settings Wallpaper. Use the...
-
Page 126: Main Menu Settings
➔ Settings Main Menu Settings. Choose from 3 preset main menu layouts for the Menu display. Note: The default menu layout is Grid. Examples in this user manual use the ➔ Display Grid layout. From the Home screen, press the Center Select Key to select MENU SET. - Page 127 When you have the Menu Layout set to List, you can customize the Menu by replacing some icons with your favorite applications or tools. Note: Some Menu items, such as Settings & Tools and Contacts, cannot be replaced. From the Home screen, press the Center Select Key ➔...
-
Page 128: Dial Fonts
• Menu Layout: When Menu Layout is set to List or Tab, resets the Menu Layout to the default layout, Grid. • Menu Items: When Menu Layout is set to List, resets the list of menu items to the default list. - Page 129 Large, then press the Center Select Key Tip: Press the Left Soft Key Preview to scroll through examples of the font attributes, then make your selection by pressing the Center Select SET. Select the format for the clock displayed on the Home screen.
-
Page 130: Phone Settings
MENU Settings & Tools When Airplane Mode is set to On, all wireless functions of your phone are disabled, and you cannot send or receive calls or messages. While in Airplane Mode, you can use other features of ➔... - Page 131 Settings & Tools ➔ ➔ Set Shortcuts Set My Shortcuts. Tip: You can also set shortcuts from My Shortcuts. From the Home screen, press the Directional Key Right to launch My Shortcuts, then press the Left Soft Key Settings. Use the...
- Page 132 Location Choose whether your phone’s GPS (Global Positioning System) location is available to the network at all times, or only when you’ve dialed an Emergency Number, such as 911. Note: Location service is required by some applications on your phone, and is only available on the Verizon Wireless network.
-
Page 133: Current Country
Edit Codes. Choose Edit Codes, then use the highlight a code and press the Center Select Key • Phone Only: Enter a new lock code at the prompt, then enter the new code again to confirm the change. ➔ Phone Settings ➔... - Page 134 • Calls & Services: Enter a new lock code at the prompt, then enter the new code again to confirm the change. Restrictions Set restrictions for receiving calls or messages. From the Home screen, press the Center Select Key ➔...
- Page 135 • Unlocked: The phone is unlocked at all times. • On Power Up: The phone is automatically locked when you power it on. You can make phone calls, but must enter the lock code to access other features. You can manually lock your phone, to prevent access until you unlock it with the Phone Only Lock Code.
- Page 136 Settings & Tools ➔ Security. Enter the Phone Only Lock Code at the prompt. The default lock code is the last four digits of your phone number, or you can set a custom lock code under Phone Settings ➔ Security Edit Codes.
- Page 137 • Auto NAM Select: Choose Enable to set automatic NAM selection, or Disable to use the NAM Select setting. Quick Search allows easy searching for contacts and menus from the Home screen, by pressing keys on the external keypad or the QWERTY keyboard. ➔...
-
Page 138: Call Settings
Note: The Quick Search setting must be set to On to use Quick Search. With the phone closed, press the keypad keys corresponding to the first three characters of the name of the item. Example: For example, to search for “Inbox”, press... - Page 139 SET. TTY Mode Your phone is fully TTY-compatible, allowing you to connect a TTY device to the phone’s headset jack. Before you can use your phone with a TTY device, you’ll need to enable TTY Mode. Enabling TTY Mode From the Home screen, press the Center Select Key ➔...
- Page 140 Directional Key to highlight On to enable Voice Privacy, or Off to disable, then press the Center Select Key SET. Select a port for connecting the phone to a PC, and set connection speed. From the Home screen, press the Center Select Key to select MENU Data Settings.
-
Page 141: Memory
Country Code, IDD Prefix, NDD Prefix, Area/City Code, and National Number Length. Press the Center Select Key Note: When Assisted Dialing is On, the Home screen displays “Assisted On” when dialing an international number. Manage memory settings for saving pictures, videos, music, sounds and ringtones to your phone’s memory and optional... - Page 142 • My Contacts: Contacts entries save on your phone. • Move All To Card: If an optional memory card is installed, move all movable files from the phone’s memory to the memory card. View usage statistics for an optional installed microSD memory card.
-
Page 143: Phone Info
• Call Sounds: Choose how your phone alerts you to incoming calls. • Display Themes: Select a theme for your phone’s displays. • Menu Layout: Choose a layout for the Main menu. • Clock Format: Select a format for the clock displayed on the Home screen. Press the Center Select Key SET to make a selection and move to the next setting. -
Page 144: Section 13: Health And Safety Information
This is because the phone is designed to operate at multiple power levels so as to use only the power required to reach the network. In general, the closer you are to a wireless base station antenna, the lower the power output. -
Page 145: Please Note The Following Information When Using Your Handset
Sometimes it may be necessary to remove the battery pack to find the number. Once you have the FCC ID number for a particular phone, follow the instructions on the website and it should provide values for typical or maximum SAR for a particular phone. -
Page 146: Ul Certified Travel Adapter
FDA and other federal health and safety agencies. When the phone is located at greater distances from the user, the exposure to RF is drastically lower because a person's RF exposure decreases rapidly with increasing distance from the source. - Page 147 However, the agency has authority to take action if wireless phones are shown to emit radio frequency energy (RF) at a level that is hazardous to the user. In such a case, FDA could require the manufacturers of wireless phones to notify users of the health hazard and to repair, replace or recall the phones so that the hazard no longer exists.
- Page 148 RF exposure. Other studies exposed the animals to RF for up to 22 hours per day. These conditions are not similar to the conditions under which people use wireless phones, so we don't know with certainty what the results of such studies mean for human health.
- Page 149 What steps can I take to reduce my exposure to radio frequency energy from my wireless phone? If there is a risk from these products - and at this point we do not know that there is - it is probably very small. But if you are...
- Page 150 RF emissions, will not be placed against the head. On the other hand, if the phone is mounted against the waist or other part of the body during use, then that part of the body will absorb more RF energy. Wireless phones marketed in the U.S.
-
Page 151: Medical Equipment
Studies have shown that these products generally do not work as advertised. Unlike "hand-free" kits, these so-called "shields" may interfere with proper operation of the phone. The phone may be forced to boost its power to compensate, leading to an increase in RF absorption. -
Page 152: Road Safety
Using a mobile phone while driving can be dangerous. When driving a car, driving is your first responsibility. When using your wireless phone behind the wheel of a car, practice good... -
Page 153: Responsible Listening
Dial sensibly and assess the traffic; if possible, place calls when you are not moving or before pulling into traffic. Try to plan calls when your car will be stationary. If you need to make a call, dial only a few numbers, check the road and your mirrors, then continue. - Page 154 As a result, there is no single volume setting that is appropriate for everyone or for every combination of sound, settings and equipment.
-
Page 155: Operating Environment
Remember to follow any special regulations in force in any area and always switch your phone off whenever it is forbidden to use it, or when it may cause interference or danger. When connecting the phone or any accessory to another device, read its user's guide for detailed safety instructions. -
Page 156: Fcc Hearing-Aid Compatibility (Hac) Regulations For Wireless Devices
Persons who have such devices: Should ALWAYS keep the phone more than six (6) inches from their • implantable medical device when the phone is turned ON; Should not carry the phone in a breast pocket; • Should use the ear opposite the implantable medical device to •... - Page 157 The hearing aid and wireless phone rating values are then added together. A sum of 5 is considered acceptable for normal use. A sum of 6 is considered for best use. In the above example, if a hearing aid meets the M2 level rating and the wireless phone meets the M3 level rating, the sum of the two values equal M5.
-
Page 158: Potentially Explosive Environments
Switch your phone off when in any area with a potentially explosive atmosphere and obey all signs and instructions. Sparks in such areas could cause an explosion or fire resulting in bodily injury or even death. Users are advised to switch the phone off while at a refueling point (service station). -
Page 159: Fcc Notice And Cautions
Restricting Children's access to your Phone Your phone is not a toy. Do not allow children to play with it because they could hurt themselves and others, damage the phone or make calls that increase your phone bill. -
Page 160: Other Important Safety Information
• inflates with great force. Do not place objects, including both installed or portable wireless equipment near or in the area over the air bag or in the air bag deployment area. If wireless equipment is improperly installed and the air bag inflates, serious injury could result. -
Page 161: Availability Of Various Features/Ring Tones
• Speak directly into the phone's receiver. If your phone has a SIM or memory card: (i) handle the SIM or memory • card with care, (ii) do not remove a card while the phone is transferring... - Page 162 • it may require cooling or warming first. Do not leave the battery in hot or cold places, (below 0 °C (32 °F) or • over 45 °C (113 °F) such as in a car in summer or winter conditions, as you will reduce the charging capacity and lifetime of the battery.
-
Page 163: Care And Maintenance
Short-circuiting the terminals may damage the battery or the object causing the short-circuiting. Do not permit a battery out of the phone to come in contact with metal • objects, such as coins, keys or jewelry. - Page 164 Do not put the phone in or on heating devices, such as a microwave • oven, a stove or a radiator. The phone may explode when overheated. If your phone is equipped with an external antenna, use only the •...
-
Page 165: Section 14: Warranty Information
SAMSUNG; (b) defects or damage resulting from excessive force or use of a metallic object when pressing on a touch screen; (c) equipment that has the serial number or the enhancement data code removed, defaced, damaged, altered or made illegible;... - Page 166 (ii) any of the seals on the battery are broken or show evidence of tampering, or (iii) the battery has been used in equipment other than the SAMSUNG phone for which it is specified. What are SAMSUNG's Obligations? During the applicable warranty...
- Page 167 PARTIAL ILLEGALITY OR UNENFORCEABILITY SHALL NOT AFFECT THE ENFORCEABILITY FOR THE REMAINDER OF THIS LIMITED WARRANTY WHICH PURCHASER ACKNOWLEDGES IS AND WILL ALWAYS BE CONSTRUED TO BE LIMITED BY ITS TERMS OR AS LIMITED AS THE LAW PERMITS. THE PARTIES UNDERSTAND THAT THE PURCHASER MAY USE THIRD- PARTY SOFTWARE OR EQUIPMENT IN CONJUNCTION WITH THE PRODUCT.
-
Page 168: End User License Agreement For Software
Software on the local hard disk(s) or other permanent storage media of one computer and use the Software on a single computer or a mobile device at a time, and you may not make the Software available over a network where it could be used by multiple computers at the same time. - Page 169 EULA. Upon termination of this EULA, you shall cease all use of the Software and destroy all copies, full or partial, of the Software. 9. DISCLAIMER OF WARRANTIES. You expressly acknowledge and agree that use of the Software is at your sole risk and that...
- Page 170 TO THE MAXIMUM EXTENT PERMITTED BY APPLICABLE LAW, THE SOFTWARE IS PROVIDED "AS IS" AND WITH ALL FAULTS AND WITHOUT WARRANTY OF ANY KIND, AND SAMSUNG AND ITS LICENSORS (COLLECTIVELY REFERRED TO AS "SAMSUNG"...
- Page 171 Software up to the amount actually paid by you for the Software or US$5.00. The foregoing limitations, exclusions and disclaimers (including...
-
Page 172: Open Source Announcement
Berkeley, And portions of this software are copyright Type Project. And this software is based in part on the work of the Independent JPEG Group. And this product includes software developed by the OpenSSL Project for use in the OpenSSL Toolkit. (http://www.openssl.org/). - Page 173 A. Any addition to or deletion from the contents of a file containing Original Code or previous Modifications. B. Any new file that contains any part of the Original Code or previous Modifications. 1.10. "Original Code" means Source Code of computer software...
- Page 174 1.12. "You" means an individual or a legal entity exercising rights under, and complying with all of the terms of, this License or a future version of this License issued under Section 6.1. For legal entities, "You" includes any entity which controls, is controlled by, or is under common control with You.
- Page 175 Covered Code. If You created one or more Modification(s), You may add your name as a Contributor to the notice described in Exhibit A. If it is not possible to put such notice in a particular Source Code file due to its structure, then...
- Page 176 License are fulfilled for the Covered Code. 4. Inability to Comply Due to Statute or Regulation. If it is impossible for You to comply with any of the terms of this License with respect to some or all of the Covered Code due to statute or regulation then You must: (a) comply with the terms of this License to the maximum extent possible;...
- Page 177 Covered Code created under this License. 6.3. Derivative Works. If you create or use a modified version of this License (which you may only do in order to apply it to code which is not already Covered Code governed by this License), you must (a) rename Your license so that the phrases "Mozilla",...
- Page 178 With respect to disputes in which at least one party is a citizen of, or an entity chartered or registered to do business in, the United States of America: (a) unless otherwise...
- Page 179 EXHIBIT A. "The contents of this file are subject to the Mozilla Public License Version 1.0 (the "License"); you may not use this file except in compliance with the License. You may obtain a copy of the License at http://www.mozilla.org/MPL/...
- Page 180 It is provided "as is" without express or implied warranty of any kind. These notices must be retained in any copies of any part of this documentation and/or software MD5 Message-Digest Algorithm Copyright (C) 1991-2, RSA Data Security, Inc.
- Page 181 It is provided "as is" without express or implied warranty of any kind. These notices must be retained in any copies of any part of this documentation and/or software. Copyright (c) 1989 Regents of the University of California.
- Page 182 The following conditions apply to all code found in this distribution, be it the RC4, RSA, lhash, DES, etc., code; not just the SSL code. The SSL documentation included with this distribution is covered by the...
- Page 183 Tim Hudson (tjh@cryptsoft.com). Copyright remains Eric Young's, and as such any Copyright notices in the code are not to be removed. If this package is used in a product, Eric Young should be given attribution as the author of the parts of the library used.
- Page 184 Permission is granted by University of New South Wales, free of charge, to any person obtaining a copy of this software and any associated documentation files (the "Software") to deal with the Software without restriction, including (without limitation) the...
- Page 185 goods;...
- Page 186 PROFITS; OR BUSINESS INTERRUPTION) HOWEVER CAUSED AND ON ANY THEORY OF LIABILITY, WHETHER IN CONTRACT, STRICT LIABILITY, OR TORT (INCLUDING NEGLIGENCE OR OTHERWISE) ARISING IN ANY WAY OUT OF THE USE OF THIS SOFTWARE, EVEN IF ADVISED OF THE POSSIBILITY OF SUCH DAMAGE. Mach Operating System Copyright (c) 1993 Carnegie Mellon University All Rights Reserved.
- Page 187 Samsung Telecommunications America, LLC: 1301 East Lookout Drive Richardson, Texas 75082 Phone: 1-800-SAMSUNG (726-7864) Important!: If you are using a handset other than a standard numeric keypad, dial the numbers listed in brackets. Phone: 1-888-987-HELP (4357) © 2010 Samsung Telecommunications America. All rights reserved.
-
Page 188: Index
Index Adding a New Contact Alarm Clock disabling an alarm erasing an alarm setting an alarm Answer Options Answering a Call Assisted Dialing Auto Retry Backup Assistant Banners personal Battery charging indicator installing non-supported batteries removing Bluetooth menu options sending My Name Card... - Page 189 Emergency Contacts adding re-assigning or unassigning End/Power key Entering Text changing text entry mode entering numbers entering smileys entering symbols entering upper and lower case using Palabra mode using T9 Word ERI Banner Favorites assigning removing using Fonts dial...
- Page 190 Event Status Home screen In Case of Emergency assigning entering personal info removing emergency contacts Keypad lock settings Language setting Left soft key Lock edit codes setting Locking and Unlocking locking the keypad locking the phone unlocking the keypad unlocking the phone...
- Page 191 My Ringtones My Sounds Navigation Keys directional keys soft keys New Message Key Notepad Pauses adding to phone numbers Personal Banner Personal Information Phone Info Phone Safety Phone Settings airplane mode current country language restoring default settings...
- Page 192 Stop Watch Tip calculator USB Mass Storage Voice Commands World Clock T-Ratings TTY Mode enabling Turning Your Phone On and Off UL Certification Understanding the Menu Understanding Your Contacts Understanding Your Phone features of your phone Home screen Menu USB Mass Storage...
- Page 193 Volume keypad master Waits adding to phone numbers Wallpaper Warranty Information World Clock...