
Related Manuals for Samsung SCH-u410 Series


Summary of Contents for Samsung SCH-u410 Series
- Page 1 SCH-u410 Series P O R T A B L E A l l D i g i t a l M o b i l e P h o n e User Manual Please read this manual before operating your...
-
Page 2: Intellectual Property
(patentable or unpatentable), patents, trade secrets, copyrights, software, computer programs, and related documentation and other works of authorship. You may not infringe or otherwise violate the rights secured by the Intellectual Property. Moreover, you agree that you will not (and will not attempt to) modify, prepare derivative works of, reverse engineer, decompile, disassemble, or otherwise attempt to create source code from the software. - Page 3 Licensed by Qualcomm Incorporated under one or more of the following patents: U.S. Patent No. 4, 901, 307; 5, 056, 109; 5, 099, 204; 5, 101, 501; 5, 103, 459; 5, 107, 225; 5, 109, 390. Printed in Korea ACCESS and NetFront are trademarks or registered trademarks of ACCESS CO., LTD.
-
Page 4: Table Of Contents
Entering Text ...42 Changing the Text Entry Mode ...42 Entering Text Using Word Mode ...43 Entering Characters in Abc Mode ...44 Switching to Upper and Lower Case ... 44 Entering Symbols ...44 Entering Numbers ...45 Understanding Your Contacts ...46 Opening Contacts Menu ...46 Contacts Icons ...47... - Page 5 Emergency Contacts and Your In Case of Emergency List ...57 My Name Card ...58 Messaging ... 60 Types of Messages ...60 Retrieving New Messages ...60 Creating and Sending TXT Messages ...64 Creating and Sending Picture Messages ...65 Message Folders ...67 Changing Message Settings ...72...
- Page 6 Responsible Listening ...122 Operating Environment ...124 Using Your Phone Near Other Electronic Devices ...124 Potentially Explosive Environments ...125 Emergency Calls ...125 FCC Notice and Cautions ...126 Other Important Safety Information ...127 Product Performance ... 127 Availability of Various Features/Ring Tones ...128 Battery Standby and Talk Time ...128...
-
Page 7: Getting Started
Open the flip, then press Note: As with any other radio-transmitting device, do not touch the internal antenna as it affects call quality and may cause the phone to operate at a higher power level than is necessary. The internal antenna is located along the top on the back side of your phone. -
Page 8: Understanding This User Manual
Follow the recorded prompts to listen to messages, change administrative options, and so on. *Airtime and long distance charges apply, IN Calling minutes do not apply to Voicemail setup or retrievals. Understanding this User Manual The chapters of this manual generally follow the same order as the menus and sub- menus in your phone. -
Page 9: Understanding Your Phone
** The SCH-u410 supports the following Bluetooth profiles: Mono headset (HSP), hands-free (HFK), serial port (SPP), dial-up networking (DUN), object push for vCard (OBEX OPP), and phone book access (PBAP). The SCH-u410 does not support all Bluetooth OBEX profiles. Go to www.verizonwireless.com/bluetoothchart to check car kit and accessory compatibility. -
Page 10: Views Of Your Phone
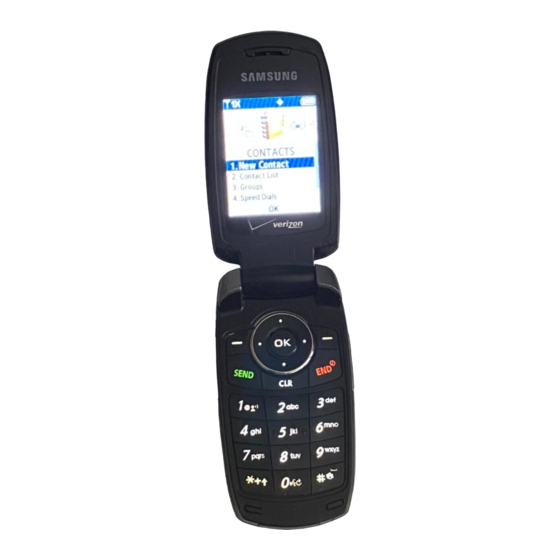
Views of Your Phone The following illustrations show the main elements of your phone: Open View 1. Internal LCD 2. Center/OK Key 3. Left Soft Key 4. Send Key 5. Clear Key 6. Voicemail Key 7. Left Special Function Key 8. - Page 11 Also press to enter special characters and perform various functions. End Key: Ends a call. If you press and hold the END key, the power goes On or Off. When you receive an incoming call, mute the ringer and redirect the call to voicemail.
-
Page 12: Closed View
Headset Jack: Allows you to plug in an optional headset for safe, convenient conversations. Volume Key: Allows you to adjust the master volume (with the flip open) or adjust the voice volume during a call. To mute the ringer during an incoming call, press the volume key up or down. -
Page 13: Command Keys
To return to the main screen, press and hold • End Key The End key ( ) is used to end a call, to turn your phone on/off, to return to the main screen from any menu or cancel the last input. Press and hold •... -
Page 14: Send Key
). To end the call press and hold the Speakerphone key ( Note: With the flip open or closed, after a call has ended the speakerphone function turns off automatically. Note: For safety information related to speakerphone use, see "Responsible Listening" on page 122. -
Page 15: Understanding The Display Screen
More bars indicate a stronger signal. Standalone Mode on, all RF functions for your phone are disabled, and you cannot use your phone to place or receive calls. Roaming Indicator: Your phone is outside your home area. - Page 16 No service: Your phone cannot find a signal because you’re outside a service area. You cannot make or receive calls. Wait for a signal or move to an open area to find a signal. This indicator always appears when you first turn on your phone and disappears once service is located.
- Page 17 Missed Calls: Your phone displays this icon when calls are missed. New Msgs: You’ve received a new text, or page. You’re also notified of a new message by animations and sound. You have one or more unread voicemail messages in your voicemail box.
-
Page 18: Battery
Note: This phone comes packaged with a partially charged, rechargeable standard Li-Ion battery, and travel charger. Important!: Although the phone can be used while the battery is charging, the battery must be fully charged before first use, otherwise you could damage the battery. -
Page 19: Install The Battery
Samsung charging accessories (i.e. travel adapter, and vehicle power adapter) will only charge a Samsung approved battery. To continue use of your handset press Note: When using a non-supported battery the handset can only be used for the duration of the life of the battery and cannot be recharged. - Page 20 Insert the top end of the battery in the direction of the arrow printed on the battery into the phone housing. The gold contacts on the top of the battery should match up with those on the phone. Push the bottom end of the battery down until it snaps into place.
-
Page 21: Remove The Battery
Remove the Battery Slide the battery cover down and lift up to remove it. Use your finger to lift the battery (bottom end first) up and away from the phone. Understanding Your Phone Battery... -
Page 22: Charge The Battery
Insert the smaller end of the travel charger into the charger/ accessory connector at the bottom end of the phone. Note: You can use your phone while charging, however, the battery charges faster if the phone is turned off. -
Page 23: Phone Memory
Phone Memory The following file types can be saved to the phone memory: Note: 21MB of memory is available for storing the file types listed below and downloaded applications. My Pictures: Pictures you have saved from a Picture message, downloaded via •... -
Page 24: Call Functions
Press the navigation up and down keys until the contact that you want to call is highlighted. Tip: Use the GoTo field to quickly access a contacts name. Simply, press the keys associated with contacts name and the name(s) associated with keys pressed will appear in the display. -
Page 25: Answering A Call
Call In-progress Options Access numerous menus and features while in a call. Note: If the call is disconnected while accessing the Call In-progress Option, the Options menu disappears from the display and the phone eventually returns to the main screen. -
Page 26: Recent Calls
• Call Type: The title bar displays if the call is a missed, dialed, or received. • Name: If the caller is in your Contacts list, their name is listed here as well as the appropriate icon to indicate mobile, work, or home number. This information only appears if the caller is in your Contacts list. -
Page 27: Call History Icons
Press the down navigation key to highlight an option. Press the highlighted option’s sub-menu. Call History Icons When you view Recent Calls, an icon to the left of the number indicates the type of call. Indicates a Missed call Indicates a Dialed call... - Page 28 Contact to the speed dial location. Note: Voicemail is assigned to Speed Dial location 1. You can assign a speed dial location to each phone number associated with the contact (Home, Work, Mobile 1, Mobile 2, and Fax.). When you’re finished entering information for the entry, press The entry is saved to your Contacts.
-
Page 29: Roaming
(At least one of these options may appear in the display) Note: Contact your service provider for information regarding preferred systems. Automatic settings are determined by the home location of the phone and the users price plan. To change your Roaming option, follow these steps:... -
Page 30: Tty
Your phone is fully TTY compatible. Connect the TTY equipment to the headset jack, located on the left side of the phone. Before you can use your phone with a TTY device, you’ll need to enable TTY functions in the phone. - Page 31 • Choice Lists: If VoiceSignal is not absolutely confident that it has correctly identified a name or number, it can display a choice list of up to three possibilities, and prompt you to confirm the correct one. You can control when choice lists appear by changing the Choice Lists setting to the following: •...
- Page 32 You should adapt Digit Dial only if the system is frequently unable to recognize your speech. After you adapt Digit Dial, your phone is customized to your voice, and your voice only. Others will not be able to use it unless they reset the phone to factory defaults.
- Page 33 Voice Settings, then Highlight screen displays requesting confirmation of reset. Note: If you have not performed the Adapt Digits function, the Reset Digits option will not be accessible. Press to proceed. Digit Adaptation Reset is completed. MENU. Use the right navigation key to SETTINGS &...
- Page 34 The following is a list of functions that you can perform using VoiceSignal speech recognition on your phone. Call <Name or #>: Dial by saying a Name in your Contacts List or a Name and a • Location (home, work, mobile).
-
Page 35: Opening Menus
The NEW TXT MSG screen or NEW PICTURE MSG screen will appear in the display with the To field filled in with the contact name or number that you specified. To complete the message,refer to Step 5 in "Creating and Sending TXT on page 64 Messages"... -
Page 36: Checking Phone Status
Using VoiceSignal, you can check your Verizon Wireless account status by voice command. Note: This features launches the browser which requires a data plan and is subject to Verizon Wireless data coverage. From the main screen, press the Voice Commands key ( A list of commands appears in the display and the audio prompt “Please... - Page 37 Say "My Account" at a distance of 3-12 inches from the phone in a natural voice. The Verizon Wireless Web Browser will open and redirect to your wireless phone account page (if your account is set up). Help Guide Provides helpful information on how to use VoiceSignal.
-
Page 38: Menu Navigation
• Menu Navigation • Navigation Key Shortcuts • Menu Outline This section explains the menu navigation for your phone. It also includes an outline of all the available menus associated with your phone. Menu Navigation Access menus using the navigation keys, two soft keys shortcut. -
Page 39: Navigation Key Shortcuts
Navigation Key Shortcuts Press a navigation key (as illustrated below) to launch its corresponding application. PICTURES Each navigation key may be customized to select other functions. For more information, refer to "Set Shortcut Key" on page 84. From the main screen press... - Page 40 2: My Picture 3: Take Picture 4: PIX Place 3: Games 1: Get New Applications 4: News & Info 5: Tools on the Go 1: Get New Applications 6: Extras 1: Get New Applications MESSAGING 1: New Message 1: TXT Message...
- Page 41 4: Speed Dials 5: In Case of Emergency 6: My Name Card RECENT CALLS 1: Missed 2: Received 3: Dialed 4: All 5: View Timers SETTINGS & TOOLS 1: My Account 2: Tools 1: Voice Commands 1: Voice Dial 2: Voice Settings...
- Page 42 2: Call Vibrate 2: Alert Sounds 1: TXT Message 1: Tone 1: Get New Ringtones 2: Vibrate 3: Reminder 2: Picture Message 1: Tone 1: Get New Ringtones 2: Vibrate 3: Reminder 3: Voicemail 1: Tone 1: Get New Ringtones...
- Page 43 1: Style 2: Size 7: Clock Format 1: Main Clock 2: Front Clock 6: Phone Settings 1: Standalone Mode 2: Set Shortcut Keys 3: Language 4: Location 5: Security 1: Edit Codes 1: Phone Only 2: Calls & Services 2: Restrictions...
- Page 44 7: Call Settings 1: Answer Options 2: Auto Retry 3: TTY Mode 4: One Touch Dial 5: Voice Privacy 6: Data Settings 7: DTMF Tones 8: Memory 1: Memory Usage 2: My Pictures 3: My Ringtones 4: My Sounds 9: Phone Info...
-
Page 45: Entering Text
• Shortcuts** • Quick Text* Note: The Shortcuts option is only available when the To field is highlighted. Use the Shortcuts option to quickly enter @, .com, .net, or .edu to an Email address.** The Quick Text option is only available when the Text field is highlighted. Use this option to quickly enter common phrases*. -
Page 46: Entering Text Using Word Mode
Word recognizes the most commonly used word for any sequence of key presses and inserts that word into your message. It’s much faster than the traditional method of text entry (Abc) and requires only one key press per letter of the word that you’re spelling. -
Page 47: Entering Characters In Abc Mode
• Word mode, briefly press Entering Symbols Symbol mode enables you to enter symbols such as @ or % into a text message. From the main screen, press the left soft key New Message, Enter the phone number or email address of the recipient, then press the... -
Page 48: Entering Numbers
Abc is highlighted by default. Use the up/down navigation keys to highlight 123, then press Enter the key that corresponds with the number that you wish to enter. For example, press When you are finished adding numbers, press the left soft key to select a different method of text entry or press message. -
Page 49: Understanding Your Contacts
• In Case of Emergency: Designate up to 3 contacts as those who should be called in case of emergency. Also enter any important emergency information (for example, medical history or severe allergies). • My Name Card: Create a business card, which can be sent to others as an attachment. Opening Contacts Menu MENU, CONTACTS is highlighted. -
Page 50: Contacts Icons
Use the navigation key to highlight the choice, then press Contacts Icons You can assign multiple entries to a contact. The icons in the following table represent all available entry types. Mobile 1: Enter a mobile number for the entry in this field. -
Page 51: Adding A Contact
Adding a Contact When you add information to your Contacts, you can add it as a new entry or as an existing entry. Creating a new Contact from the main screen From the main screen, press Press New Contact to enter the contact information. - Page 52 Contact to the speed dial location. Note: Voicemail is assigned to Speed Dial location 1 and cannot be changed by the user. You can assign a speed dial location to each number associated with the contact (Mobile 1, Mobile 2, Home, Work, and Fax).
-
Page 53: Storing Numbers After A Call
Once you’ve finished a call, you can store the number of the caller to your Contact List. Note: If the call was incoming and Caller ID information was unavailable, then the store option is also unavailable. After a call ends, the screen will briefly display "Save" in the lower right corner. -
Page 54: Adding Pauses
Contact to the speed dial location. Note: Voicemail is assigned to Speed Dial location 1 and cannot be changed by the user. Note: You can assign a speed dial location to each number associated with the contact (Mobile 1, Mobile 2, Home, Work, and Fax). -
Page 55: Contact Groups
You can place Contact entries into categories, called “Groups.” Groups allow you to search your Contacts faster, quickly send messages to one or more group members, and more. Note: By default, new entries to your Contacts are placed into the No Group unless another group is specified. View Groups... -
Page 56: Create A New Group
TXT message. Press the left soft key Note: You can mark up to 10 members of a group for message distribution. If you try and mark an 11th member, you’ll be notified that “MAXIMUM RECIPIENTS IS 10”. -
Page 57: Finding A Contacts Entry
Contacts is a quick way of viewing entries you’ve stored in the Contacts list. From the main screen, press the right soft key Contact List displays. In the Go To field, enter the first few letters of the name you wish to find until it is highlighted. MENU, CONTACTS is highlighted. -
Page 58: Editing An Existing Contact Entry
Highlight Yes or No, then press Speed Dialing Note: 1-Touch, 2-Touch, and 3-Touch dialing allows you to call numbers stored in your Contact List quicker. Speed dialing allows you to press and hold a key (or keys) to dial the number associated with those key(s). -
Page 59: Touch Dialing
1-touch dialing Call phone numbers assigned to memory locations 002 - 009 by pressing and holding the any of the 2 - 9 keys. For example, to speed dial the number assigned to location 2, press and hold the number is dialed. -
Page 60: Emergency Contacts And Your In Case Of Emergency List
If you call 911 an audible tone is heard and an emergency prompt appears in the display for the duration of the call. Important!: DO NOT depend on this phone as a primary method of calling 911 or for any other essential or emergency communications. -
Page 61: My Name Card
When finished, press left soft key Note: If you are not already paired to the destination device, please see Step 3 of Search on page 72. Highlight the destination device an press Highlight Yes to connect to the other device and press The other device will ask to connect. - Page 62 “CONNECTING” appears in the display. When the information is exchanged, a message will appear that the transfer is complete. Note: **All information in the contact entry can be transferred except for assigned group or ringtones.
-
Page 63: Messaging
Your phone is capable of sending Email, text, picture and voicemail messages. Send Email, text, and picture messages by simply entering the Email address or the phone number of the recipient in the To: <...> or Send To field when creating a new message. - Page 64 When you receive a message on the main screen, the message ringer sounds, (unless turned off), and NEW TXT MESSAGE appears in the display with the prompt to View Now or View Later. The date and time of the message also appear in the display.
-
Page 65: Receiving Picture Messages
When you receive a new Picture Message, NEW PICTURE MSG appears in the display along with the options View Now, or View Later. Note: For the option Reject to appear in the display when you receive a Picture Msg, Auto Receive mode must be set to Off in the Message Settings menu. -
Page 66: Receive Messages While In A Call
View Later and press Note: If you receive a Picture message while on a call, a pop-up box will display with a New Picture message and message information. You cannot choose to view now or view later. You can only press key to clear the pop-up box from the screen. -
Page 67: Creating And Sending Txt Messages
ABC, 123, Symbols or Shortcuts modes of text entry. • Press the right soft key or Groups. If you have entered a new phone number in the To field, you will also see an option to save it To Contacts. -
Page 68: Creating And Sending Picture Messages
• Add Name Card: Allows you to attach your name card to the message. • Edit Text Format: Allows you to edit the text size, alignment, style, color, and background color. • Priority Level: Save the message with a High or Normal priority. - Page 69 Options to display additional options. Tip: For more information on entering text and text entry modes see "Entering Text" on page 42. • Press the left soft key Abc, ABC,123, Symbols or Quick Text modes of text entry.
-
Page 70: Message Folders
Your phone provides default message folders for your Text and Picture messages. Note: To quickly view all messages in the Inbox, or Sent folders, open one message and then press the right navigation key to view the next message or press the left navigation key to view the previous message. - Page 71 REPLY to return a message to the sender. Note: When Auto Erase is turned on, the oldest read TXT message is replaced by an incoming TXT message when 90 TXT messages are stored in the Inbox, and the oldest read Picture message is replaced by an incoming Picture message when 50 Picture messages are stored in the Inbox.
- Page 72 • Lock/Unlock: Locks or unlocks the entry to prevent accidental deletion. • Save Quick Text: Saves the text sent in the message to the Quick Text list. • Add To Contacts: Adds the sender’s information to your contact list.
- Page 73 Drafts Draft messages are those that have been composed but never sent. You can return to the Drafts folder at any time to view, edit, or send a draft message. Create a Draft Text Message From the main screen, press the left soft key New Message.
-
Page 74: Erase Options
• Deferred Delivery: Save the message to be delivered at the assigned delivery date and time. • Cancel Message: Cancels the message and allows you to save it in the Drafts folder. Use the navigation key to highlight the desired option. Press perform the function for the highlighted option. -
Page 75: Changing Message Settings
Pic Auto Receive : Automatically receives a Picture message into your Inbox. Choose from On or Off. Quick Text : Displays the Quick Text list, and allows you to erase or add a new phrase. Voicemail # : Displays the speed dial entry set for your voicemail, , and allows you to change it. -
Page 76: Mobile Im
• Yahoo! Messenger Note: You can set up your Mobile IM account from your home computer. After setting up your Mobile IM account you can log in through your handset. You cannot use your handset to set up a new IM account. -
Page 77: Chat
Use the on-screen application specific functions and options to use the Email applications. Chat You have the ability to join wireless chat rooms from your phone. Send messages including text and icons to many chat room participants or launch one-on-one (private) chat rooms. -
Page 78: Changing Your Settings
This section explains the sound and phone settings for your phone. It includes display settings, security settings, and extra settings associated with your phone. My Account The My Account menu connects to the Verizon Wireless Mobile Web. You can setup Favorites or choose from the available applications. Tools The Tools menu provides the ability to access the following menus: Voice Commands: For more information, refer to "VoiceSignal®"... -
Page 79: Bluetooth Menu
A typical configuration is an automobile using a mobile phone for a gateway device. In the car, the stereo is used for the phone audio and a microphone is installed in the car for sending outgoing audio of the conversation. - Page 80 • This profile allows exchange of Phone Book Objects between devices. It is likely to be used between a car kit and a mobile phone to allow the car kit to display the name of the incoming caller. * For vehicle/accessory compatibility, go to www.verizonwireless.com/bluetooth chart.
-
Page 81: Bluetooth Settings
• Discovery Mode: Allows other users to see your accessibility. Select On for other devices to see your device, or Off for no visibility. Note: After selecting On, users have one minute to see your accessibility. After which Discovery Mode will automatically default back to off. -
Page 82: Sounds Settings
• Picture Message: Allow you to set a notification for Picture message. • Voicemail: Allow you to set a notification for Voicemail Message. • Device Connect: Allow you to set a notification when you connect to a device. to view a description. -
Page 83: Keypad Volume
• ERI: Sounds an alert when you go into and out of your coverage areas. • Minute Beep: While on a call your phone beeps after every minute of usage. • Call Connect: Sounds an alert when a call is connected and when a call has ended. -
Page 84: Display Settings
Personal Banner to create a customized banner for your handset. Note: Press and hold Enter a word or short phrase (18 characters or less) to appear in the main screen and press To turn on an ERI banner: From the main screen, press... - Page 85 Backlight Set the backlight for the display or keypad to remain on for a specified period of time or to remain on as long as the flip is open. Note: Prolonged backlight use drains your battery faster. From the main screen, press...
-
Page 86: Display Themes
• Main Screen: Choose My Picture (allows you to select an image from the My Picture folder.) • Front Screen: Choose My Pictures (allows you to select an image from the My Picture folder.) Use the navigation key to highlight your selection, the press the wallpaper that will appear in the main or front LCD display. -
Page 87: Phone Settings
Standalone Mode. Use the navigation key to select On or Off and press Set Shortcut Key Shortcut Key allows you to select from up to 20 applications that appear in the display when you press the left/right/up/down directional keys on the navigation key from the main screen. - Page 88 Note: This feature is only available on the Verizon Wireless network. The Location (GPS) setting identifies your location to the network. You can fully enable this setting or set GPS to work only in the case that you dial 911 from your phone.
-
Page 89: Lock Phone
Enter the Phone Lock Code (default code is your last 4 digits of your phone number) and press • Edit Codes: Allows you to change the Lock Code for Phone Only or for Calls & Services. • Restrictions: Allows you to restrict the Location Setting (Lock/Unlock Setting), Calls (Outgoing or Incoming calls), Messages (Outgoing or Incoming messages). -
Page 90: Lock Phone Now
Restrict Access to Location Menu With the Location "Lock Setting" enabled, the Calls & Services Code is required to access the Phone Settings Location menu. This prevents anyone else from changing the Location setting on the Phone Settings menu. -
Page 91: Restrict Calls
• Incoming Calls: Select from Allow All, Contacts Only, or Block All. • Outgoing Calls: Select from Allow All, Contacts Only, or Block All. Note: If Contacts Only is selected, the Contacts list cannot be modified until this setting is changed to Allow All. - Page 92 Note: Your phone does not allow you to view the lock code for obvious security reasons. If you change the lock code, be sure to write down or memorize the new code.
-
Page 93: Resetting Your Phone
Security list Call Emergency Numbers in Lock Mode In Phone Lock Mode, you can dial 911 or the contacts listed in your In Case of Emergency list to place an emergency call. (For more information, refer to "Emergency Contacts and Your In Case of Emergency List"... -
Page 94: Nam Selection
• NAM Selection: Choose either NAM1 or NAM2. • Auto NAM Selection: Choose either Enable or Disable. Make your selection and press Quick Search Quick Search is an easy way to locate contacts in your Address Book and Menu items. From the main screen, press highlight Press Phone Settings. -
Page 95: Call Settings
Menu item name. For example, to search for “Inbox” you would enter Press the down navigation key to search for Menu items. If a match is found, the menu item(s) appear in the display. Press the... -
Page 96: Auto Retry
Use the navigation key to select an option and press TTY Mode Before you can use your phone with a TTY device, you’ll need to enable TTY functions in the phone. For more information, refer to "TTY" on page 27. -
Page 97: Memory
Data Settings. The following options appear in the display: • Data Off: Phone operates in normal voice call mode. • Data For Next Call: Data call is enabled for next call only. Phone will reset to Data Off mode after call. -
Page 98: Phone Info
Phone Info The Phone Info menu allows you to view the software and hardware information, your assigned number, and an icon glossary for your phone. From the main screen, press highlight Press Phone Info. My Number is highlighted. Press Device and Identification numbers. -
Page 99: Multimedia
The Get It Now menu provides sub-menus to Tunes & Tones, Pictures, Games, News & Info, Tools on the Go and Extras. You can also view memory info to see how much space you’ve used (and have left) for stored media. Use the following steps for each GET IT NOW sub-menu. -
Page 100: Tunes & Tones
Press the Tunes & Tones This menu allows you to get new tunes and tones, record new sounds, and set tunes and tones as your ringtone. It also allows you to access your music files. Get New Ringtones You can use this option to download new ringtones from the Internet. -
Page 101: Pictures
STOP to stop and save the message automatically to My Sounds. Pictures This menu allows you to get new Pictures via the Get It Now store or take new Pictures using your phone’s camera. You can also view the saved pictures. Get New Pictures From the main screen, press the right navigation key to access the GET IT NOW menu. -
Page 102: Take Pictures
Sunny, Cloudy, Tungsten, or Fluorescent. • Quality: Economy, Normal, Fine • Shutter Sound : Use the up or down navigation key to select a Shutter Sound. Select Shutter, Okay, Chime or No Sound. • Color Effects : Normal, Black&White, Sepia, Negative, Emboss, Green, or Aqua. -
Page 103: Games
The picture is automatically saved to My Pictures folder. PIX Place Sends pictures to your online album. Note: You must first setup your account on the Verizon Wireless website: www.verizonwireless.com before establishing a connection. From the main screen, press the right navigation key to access the GET IT NOW menu. -
Page 104: News & Info
At the “App installed successfully. Would you like to run it?” prompt, press Yes to launch application, or No to return to category list. Note: The Tools on the Go menu will display all downloaded applications, with the most current download first. -
Page 105: Extras
Highlight the application you wish to download and press Follow on screen subscription prompts and press process begins. At the “App installed successfully. Would you like to run it?” prompt, press Yes to launch application, or No to return to category list. Extras . -
Page 106: Tools
• Alarm Clock • Stop Watch • World Clock • Notepad The topics covered in this section allow you to schedule appointments, view the calendar, set an alarm, view time zones, take notes, and perform simple math calculations Voice Commands For more information, refer to "VoiceSignal®"... - Page 107 Tools, Scroll to the conversion feature you wish to use and press the Use the Left or Right navigation keys to select the From units of money or measure for the quantity you want converted. Enter the quantity you want converted in the text box.
-
Page 108: Calendar
Note: Press the key to enter a decimal point. Press Use the left or right navigation keys to select the To units of money or measure for the quantity you want converted. Calendar Schedule up to eight events for any day by indicating each event’s start and end time. -
Page 109: View An Event
Tools, the current date highlighted. Note: From the main screen, press the down navigation key to access the Calendar. The calendar appears in the display with the current date highlighted. If you change the shortcut to another function, then proceed with the first two steps. -
Page 110: Alarm Clock
Alarm Clock Your phone has an alarm clock that can be set to go off once, or recur daily at a specific time. Once set, the alarm clock is easy to change or turn off. Set An Alarm From the main screen, press key to Settings &... -
Page 111: Stop Watch
Snooze When an alarm sounds, a menu screen displays that allows you to either turn the alarm off or to have the alarm ring again after 5 minutes. This is called Snooze. To use this feature follow these steps: Set one of your phone’s 3 alarms. For more information, refer to "Set An Alarm"... -
Page 112: World Clock
World Clock World Clock allows you to view the time of day or night in any part of the world. From the main screen, press key to Settings & Tools. Press Tools, Use the left soft key to see that city's current time. - Page 113 With a note highlighted, press the right soft key pop-up menu with the options listed in the following table appears in the display: • Edit: Edit the note currently highlighted or appearing in the display.
-
Page 114: Health And Safety Information
• Availability of Various Features/Ring Tones • Battery Standby and Talk Time • Battery Precautions • Care and Maintenance This section outlines the safety precautions associated with using your phone. These safety precautions should be followed to safely use your phone. -
Page 115: Health And Safety Information
This is because the phone is designed to operate at multiple power levels so as to use only the power required to reach the network. In general, the closer you are to a wireless base station antenna, the lower the power output. -
Page 116: Ul Certified Travel Adapter
Before a new model phone is available for sale to the public, it must be tested and certified to the FCC that it does not exceed the exposure limit established by the FCC. Tests for each model phone are performed in positions and locations (e.g. at the ear and worn on the body) as required by the FCC. -
Page 117: Consumer Information On Wireless Phones
FDA and other federal health and safety agencies. When the phone is located at greater distances from the user, the exposure to RF is drastically lower because a person's RF exposure decreases rapidly with increasing distance from the source. - Page 118 Under the law, FDA does not review the safety of radiation-emitting consumer products such as wireless phones before they can be sold, as it does with new drugs or medical devices. However, the agency has authority to take action if wireless phones are shown to emit radio frequency energy (RF) at a level that is hazardous to the user.
- Page 119 RF exposure. Other studies exposed the animals to RF for up to 22 hours per day. These conditions are not similar to the conditions under which people use wireless phones, so we don't know with certainty what the results of such studies mean for human health.
- Page 120 If there is a risk from these products - and at this point we do not know that there is - it is probably very small. But if you are concerned about avoiding even potential risks, you can take a few simple steps to minimize your exposure to radio frequency energy (RF).
- Page 121 RF energy in the head because the phone, which is the source of the RF emissions, will not be placed against the head. On the other hand, if the phone is mounted against the waist or other part of the body during use, then that part of the body will absorb more RF energy.
-
Page 122: Medical Equipment
Since there are no known risks from exposure to RF emissions from wireless phones, there is no reason to believe that accessories that claim to shield the head from those emissions reduce risks. Some products that claim to shield the user from RF absorption use special phone cases, while others involve nothing more than a metallic accessory attached to the phone. -
Page 123: Road Safety
When driving a car, driving is your first responsibility. When using your wireless phone behind the wheel of a car, practice good common sense and remember the following tips: Get to know your wireless phone and its features, such as speed dial and redial. - Page 124 Dial sensibly and assess the traffic; if possible, place calls when you are not moving or before pulling into traffic. Try to plan calls when your car will be stationary. If you need to make a call while moving, dial only a few numbers, check the road and your mirrors, then continue.
-
Page 125: Responsible Listening
When using headphones, turn the volume down if you cannot hear the people • speaking near you or if the person sitting next to you can hear what you are listening to. Do not turn the volume up to block out noisy surroundings. If you choose to listen •... - Page 126 Do not listen at any volume that causes you discomfort. If you experience ringing in • your ears, hear muffled speech or experience any temporary hearing difficulty after listening to your portable audio device, discontinue use and consult your doctor.
-
Page 127: Operating Environment
Remember to follow any special regulations in force in any area and always switch your phone off whenever it is forbidden to use it, or when it may cause interference or danger. When connecting the phone or any accessory to another device, read its user's manual for detailed safety instructions. -
Page 128: Potentially Explosive Environments
Therefore, you should never rely solely on any wireless phone for essential communications (medical emergencies, for example). Remember, to make or receive any calls the phone must be switched on and in a service area with adequate signal strength. Emergency calls may not be possible on... -
Page 129: Fcc Notice And Cautions
Restricting Children's access to your Phone Your phone is not a toy. Children should not be allowed to play with it because they could hurt themselves and others, damage the phone or make calls that increase your phone bill. -
Page 130: Other Important Safety Information
If you're inside a building, being near a window may give you better reception. Understanding the Power Save Feature If your phone is unable to find a signal after 15 minutes of searching, a Power Save feature is automatically activated. If your phone is active, it periodically rechecks service availability or you can check it yourself by pressing any key. -
Page 131: Availability Of Various Features/Ring Tones
Avoid exposing your phone and accessories to rain or liquid spills. If your phone • does get wet, immediately turn the power off and remove the battery. If it is inoperable, call Customer Care for service. Availability of Various Features/Ring Tones Many services and features are network dependent and may require additional subscription and/or usage charges. -
Page 132: Battery Precautions
• require cooling or warming first. Do not leave the battery in hot or cold places, such as in a car in summer or winter • conditions, as you will reduce the capacity and lifetime of the battery. Always try to keep the battery at room temperature. -
Page 133: Care And Maintenance
Do not permit a battery out of the phone to come in contact with metal objects, • such as coins, keys or jewelry. Do not crush, puncture or put a high degree of pressure on the battery as this can • cause an internal short-circuit, resulting in overheating. - Page 134 Do not put the phone in or on heating devices, such as a microwave oven, a stove • or a radiator. The phone may explode when overheated. If your phone is equipped with an external antenna, use only the supplied or an •...
-
Page 135: Warranty Information
Canada. This Limited Warranty covers batteries only if battery capacity falls below 80% of rated capacity or the battery leaks, and this Limited Warranty does not cover any battery if (i) the battery has been charged by a battery charger not specified or 1 Year... - Page 136 SAMSUNG for charging the battery, (ii) any of the seals on the battery are broken or show evidence of tampering, or (iii) the battery has been used in equipment other than the SAMSUNG phone for which it is specified.
- Page 137 ILLEGALITY OR UNENFORCEABILITY SHALL NOT AFFECT THE ENFORCEABILITY FOR THE REMAINDER OF THIS LIMITED WARRANTY WHICH PURCHASER ACKNOWLEDGES IS AND WILL ALWAYS BE CONSTRUED TO BE LIMITED BY ITS TERMS OR AS LIMITED AS THE LAW PERMITS. THE PARTIES UNDERSTAND THAT THE PURCHASER MAY USE THIRD-PARTY SOFTWARE OR EQUIPMENT IN CONJUNCTION WITH THE PRODUCT.
- Page 138 SAMSUNG are not authorized to make modifications to this Limited Warranty, or make additional warranties binding on SAMSUNG. Accordingly, additional statements such as dealer advertising or presentation, whether oral or written, do not constitute warranties by SAMSUNG and should not be relied upon. Samsung Telecommunications America, LLC...
-
Page 139: Index
Index Numerics 1-touch dialing 2-touch dialing 3-touch dialing 911, notes about Adding a New Contact Entry Alarm clock icon snooze turn off the alarm Answer options Auto answer icon Auto retry Backup to last menu Battery charging indicator installing removing... - Page 140 Display Theme Draft messages Drafts folder Email End key Entering Text changing text entry mode entering numbers entering symbols using Word Mode Finding a Contacts Entry Folder drafts inbox sent Getting Started understanding this user...
- Page 141 Removing battery Reset phone Return to last menu Reviewing sent Right soft key Roaming definition options Roaming indicator Safe Use of your phone Security Security settings Send key Sent, reviewing messages Set an alarm Settings Shortcut to menus Signal strength icon...
- Page 142 Travel Charger TTY Mode Turning Your Phone On and Off Two-touch dialing Understanding Your Contacts Understanding Your Phone display screen features of your phone Vibrate mode icon View an event, calendar...