Table of Contents
Advertisement
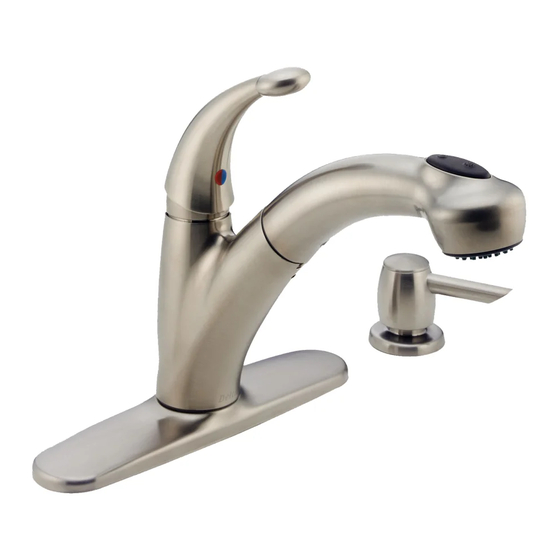
ASME A112.18.1 / CSA B125.1
Models/Modelos/Modèles
468-SD-DST, 16926-SD-DST,
16927-SD-DST, 16929-SD-DST &
16997-SD-DST
Series/Series/Seria
Write purchased model number here.
Escriba aquí el número del modelo comprado.
Inscrivez le numéro de modèle ici.
WARNING: THIS FAUCET IS NOT TO BE USED WITH PORTABLE
D I S H WA S H E R S ! / A DV E RT E N C I A : ¡ S E S TA L L AV E N O S E
DEBE UTILIZAR CON MAQUINAS LAVAPLATOS PORTATILES! /
AVERTISSEMENT: ON NE DOIT PAS BRANCHER UN LAVE-VAISSELE
PORTATIF SUR CE ROBINET!
MEETS OR EXCEEDS — ASME A112.18.1 / CSA B125.1
ALCANZA O EXCEDE LAS SIGIENTES NORMAS —
ASME A112.18.1 / CSA B125.1
LE ROBINET EST CONFORME OU SUPèRIEUR AUX EXIGENCES DES
NORMES SUIVANTES: ASME A112.18.1 / CSA B125.1
For easy installation of your Delta
faucet you will need:
• To READ ALL the instructions completely
before beginning.
• To READ ALL warnings, care, and maintenance
information.
Para instalación fácil de su llave Delta
usted necesitará:
• LEER TODAS las instrucciones completamente
antes de empezar.
• LEER TODOS los avisos, cuidados, e
información de mantenimiento.
Pour installer votre robinet Delta
facilement, vous devez:
• LIRE TOUTES les instructions avant de débuter;
• LIRE TOUS les avertissements ainsi que toutes
les instructions de nettoyage et d'entretien.
www.deltafauet.com
SINGLE HANDLE PULLOUT TALBOTT
85215
LEWISTON
LLAVES EXTRAÍBLES DE AGUA PARA COCINAS
TALBOTT
ROBINETS À UNE MANETTE À BEC-DOUCHETTE
RÉTRACTABLE TALBOTT
ET CICERO
85215
1
AND CICERO
KITCHEN FAUCETS
®
®
, DEBONAIR
, LEWISTON
™
®
, DEBONAIR
™
POUR ÉVIERS DE CUISINE
®
You may need/Usted puede necesitar/
Articles dont vous pouvez avoir besoin:
T E FLO N
, DEBONAIR
™
Y CICERO
®
®
, LEWISTON
®
1/8" (3.17mm)
10/15/13 Rev. A
,
®
®
Advertisement
Table of Contents

Related Manuals for Delta 468-SD-DST series


Summary of Contents for Delta 468-SD-DST series
- Page 1 1/8" (3.17mm) For easy installation of your Delta faucet you will need: • To READ ALL the instructions completely before beginning. • To READ ALL warnings, care, and maintenance information. Para instalación fácil de su llave Delta usted necesitará: • LEER TODAS las instrucciones completamente antes de empezar. • LEER TODOS los avisos, cuidados, e información de mantenimiento. Pour installer votre robinet Delta facilement, vous devez: • LIRE TOUTES les instructions avant de débuter;...
- Page 2 January 1, 1995 and installed in the United States of America, Canada and Mexico. any part or finish that proves defective in material and/or workmanship under normal installation, use and service. If repair or replacement is not practical, Delta Faucet Company may elect to DELTA FAUCET COMPANY SHALL NOT BE LIABLE FOR ANY SPECIAL, INCIDENTAL OR refund the purchase price in exchange for the return of the product. These are your exclusive CONSEQUENTIAL DAMAGES (INCLUDING LABOR CHARGES) FOR BREACH OF ANY remedies.
- Page 3 Faucet Installation Faucet Installation DECK MOUNT STYLE CENTER MOUNT STYLE Install round escutcheon (1) Secure to sink with mounting Place baseplate shanks (1) through Secure faucet to sink with mounting onto faucet (2). Insert faucet nut and washer (1). Tighten mounting holes in deck. Option: If sink is nut and washer (1). Tighten securely through gasket (3) and securely by hand. Using a uneven, use silicone sealant under by hand. Using a Phillips screwdriver, mounting hole in sink. Phillips screwdriver, tighten the baseplate. tighten locking screws (2). Install locking screws (2). locknuts (3) and hand-tighten. Place escutcheon (1) over baseplate. Insert faucet (2) down into escutcheon assembly. Instalación de la Llave de Agua Instalación de la Llave de Agua INSTALACIÓN CON UNA CHAPA INSTALACIÓN DE CENTRO Fije la llave de agua en el fregadero...
- Page 4 Side View Vista Lateral Vue de Côté Hose Installation Feed hose assembly (1) through hub (2). Slide hose Push hose end (1) onto faucet outlet (2). Attach clip (3) over hose and outlet as shown. Pull down weight (3) over end of hose assembly (1). moderately to ensure connection has been made. Instalación de la Manguera esliceel ensamble de la manguera (1) por el Deje pasar el extremo de la manguera (1) por la salida de la llave de agua / grifo (2). Fije el gancho (3) surtidor (2). Deslice la pesa de la manguera (3) sobre la manguera y la salida como se muestra. Moderadamente hale hacia abajo para asegurarse sobre la boquilla de la manguera (1). que la conexión se ha hecho. Installation du flexible Poussez l’extrémité du tuyau souple (1) sur la sortie du robinet (2). Fixez l’agrafe (3) sur le tuyau souple Insérez le tuyau souple (1) dans le bec (2). et la sortie comme le montre la figure. Tirez modérément pour vérifier la solidité du branchement. Faites glisser la masselotte (3) sur l’extrémité du tuyau (1). 85215 Rev. A...
- Page 5 Faucet fittings (1) are 3/8" compression, with ends to do so in a way that allows a leak-free joint to be not to cut the tube too short. colored red for hot and blue for cold. Loop tubing (2) if it created. Delta is not responsible for tubing that is • is too long. Note: Recommended tubing minimum Tubing is cut too short: buy a coupling union and cut too short or cut in a way that will not allow for a bend diameter is 8".
- Page 6 Correct method Incorrect Installation Instalación Incorrecta Método Correcto Installation Incorrecte Bonne méthode Do not install sleeve Ensure cut is straight. upside down. No instale la manga Asegúrese que el corte Custom Fit Connections - Plastic Sleeve Installation Instructions boca abajo. esté recto. 1. Identify desired length of tube (1). Leave 1" - 2" of extra length to allow for easier installation and cut tube. Ensure cut is straight and burr free. N’installez pas le Assurez-vous que 2. Slide nut (2) and plastic sleeve (3) onto cut tube. Ensure sleeve is oriented as shown. manchon à l’envers. la coupe est droite. 3. Insert tube into outlet fitting (4). Tube should touch bottom of hole inside fitting. 4. Slide plastic sleeve down tube until it engages top of fitting. NOTICE: Failure to use plastic sleeve in the correct orientation will result in disconnection and possible water damage.
- Page 7 Because your sprayer has been factory Check all connections at arrows for Soap Dispenser Installation assembled to the hose, we do not recommend leaks. Refer back to the appropriate Remove nut (1). Separate head (2) from body (3). Insert body (3) removing to flush the lines. Instead, if possible, installation instructions and retighten and gasket (4) through selected hole in sink. Make sure gasket we recommend placing a bucket below the if necessary. If assembled correctly, (4) is properly seated in the base. Secure body to sink with outlet fitting and one of two options: check for damage to seals and order nut (1). From under the sink screw the bottle (5) onto the body appropriate replacements. 1. With the valve in mix open position (1), assembly shank. Insert pump (6) into head (2), then drop into slowly open and close the supply stops (2). body (3). NOTE: To fill, lift the head and pump assembly out of 2. With the supply stops open (2), slowly open the bottle and pour not more than 8 oz. into bottle. DO NOT and close the handle in the mix position (1).
- Page 8 Setting The Handle Limit Stop (Optional) because it limits the amount of hot water in the mix; however, this handle limit stop This faucet includes an integrated handle limit stop that has two positions. Position will not always prevent scalding because it does not compensate for incoming 1, to the left, allows full handle motion (the full range between “all cold” to “all hot”). The faucet is set in position 1 in the factory. Position 2, to the right, allows half of the pressure or sudden water temperature changes. normal handle motion (“all cold” to “mixed hot/cold”). To change positions of the handle limit stop: remove the handle; move the valve stem to the all cold position so the water is on; change the position of the The handle limit stop can be adjusted by the homeowner once the faucet is handle limit stop; turn off the water; reinstall the handle. installed. Setting the handle limit stop in position 2 may help to prevent scalding Fijando la parada de límite de la manija (opcional) Esta llave de agua incluye una manija integrada, que tiene dos posiciones, escaldaduras porque limita la cantidad de agua caliente en la mezcla; sin embargo, para limitar la temperatura. La posición 1, a la izquierda, permite el movimiento esta manija que limita la temperatura del agua no siempre prevendrá escaldaduras completo de la manija (el alcance completo entre el agua “totalmente fría” hasta porque no compensa la presión del agua de entrada o cambios repentinos de la “totalmente caliente”). La fábrica preselecciona la llave de agua (grifo) a la posición temperatura del agua.
- Page 9 Backflow Protection System 1/8" (3.17mm) Your Delta Faucet pull-out spout incorporates a backflow protection system that has been tested to be in compliance with ASME A112.18.3 and ASME A112.18.1 / CSA B125.1. It incorporates two certified check valves in series, which operate independently and are integral, non-serviceable parts of the wand assembly. Sistema de protección contra el contraflujo Su llave de agua tipo deslizable Delta tiene un sistema de protección contra el contraflujo, incor- porado, que ha sido probado para cumplir con los requisitos de ASME A112.18.3 y ASME A112.18.1 / CSA B125.1. Este incorpora en la pieza de mano dos válvulas de retención o checadoras certificadas en una serie, las cuales operan independiente- mente y son piezas integrantes que no requieren servicio. Dispositif anti-siphonnage Maintenance Le bec rétractable de votre robinet Delta comporte un dispositif anti-siphonnage qui a été éprouvé et If faucet leaks from under handle: Note: A small amount of water may run out the qui est conforme aux normes ASME A112.18.3 et Remove handle and unthread trim cap (1). Using a spout or drip for a very short period after the faucet ASME A112.18.1 / CSA B125.1. Ce dispositif se...
- Page 10 85215 Rev. A...
- Page 11 85215 Rev. A...
- Page 12 85215 Rev. A www.deltafaucet.com...