Table of Contents
Advertisement
OWNER'S MANUAL
AIR CONDITIONER
Please read this manual carefully before operating
your set and retain it for future reference.
TYPE : 4-Way Ceiling Cassette
MODELS
Indoor Unit
AMNC12GTRA2
AMNC18GTQA2
AMNC24GTPA2
Outdoor Unit
A2UQ18GFA0
A3UQ26GFA0
A4UQ30GFA0
A5UQ36GFA0
A5UQ48GFA0
P/NO : MFL67888801
A7UQ40GFA0
A8UQ48GFA0
A8UQ54GFA0
www.lg.com
Advertisement
Table of Contents

Related Manuals for LG AMNC12GTRA2


Summary of Contents for LG AMNC12GTRA2
-
Page 1: Air Conditioner
OWNER’S MANUAL AIR CONDITIONER Please read this manual carefully before operating your set and retain it for future reference. TYPE : 4-Way Ceiling Cassette MODELS Indoor Unit AMNC12GTRA2 AMNC18GTQA2 AMNC24GTPA2 Outdoor Unit A2UQ18GFA0 A7UQ40GFA0 A3UQ26GFA0 A8UQ48GFA0 A4UQ30GFA0 A8UQ54GFA0 A5UQ36GFA0 A5UQ48GFA0 www.lg.com... -
Page 2: Energy
TIPS FOR SAVING ENERGY TIPS FOR SAVING ENERGY Here are some tips that will help you minimize the power consumption when you use the air conditioner. You can use your air conditioner more efficiently by referring to the instructions below: •... -
Page 3: Important Safety Instructions
IMPORTANT SAFETY INSTRUCTIONS IMPORTANT SAFETY INSTRUCTIONS READ ALL INSTRUCTIONS BEFORE USING THE APPLIANCE. Always comply with the following precautions to avoid dangerous situations and ensure peak performance of your product WARNING It can result in serious injury or death when the directions are ignored CAUTION It can result in minor injury or product damage when the directions are ignored WARNING... - Page 4 IMPORTANT SAFETY INSTRUCTIONS Operation • Take care to ensure that power cable could not be pulled out or damaged during operation. There is risk of fire or electric shock. • Do not place anything on the power cable. There is risk of fire or electric shock. •...
- Page 5 IMPORTANT SAFETY INSTRUCTIONS CAUTION Installation • Always check for gas (refrigerant) leakage after installation or repair of product. Low refrigerant lev- els may cause failure of product. • Install the drain hose to ensure that water is drained away properly. A bad connection may cause water leakage.
-
Page 6: Table Of Contents
TABLE OF CONTENTS TABLE OF CONTENTS TIPS FOR SAVING MAINTENANCE AND ENERGY SERVICE Indoor Unit IMPORTANT SAFETY Purifying filter(Optional) INSTRUCTIONS Operation Tips! BEFORE USE When the air conditioner is not going..Preparing for operation Troubleshooting Tips! Save time and Usage money! Cleaning and maintenance Call the service immediately in the fol-... -
Page 7: Before Use
BEFORE USE BEFORE USE Preparing for operation • Contact an installation specialist for installation. • Use a dedicated circuit. Usage • Being exposed to direct airflow for an extended period of time could be hazardous to your health. Do not expose occupants, pets, or plants to direct airflow for extended periods of time. •... -
Page 8: Product Introduction
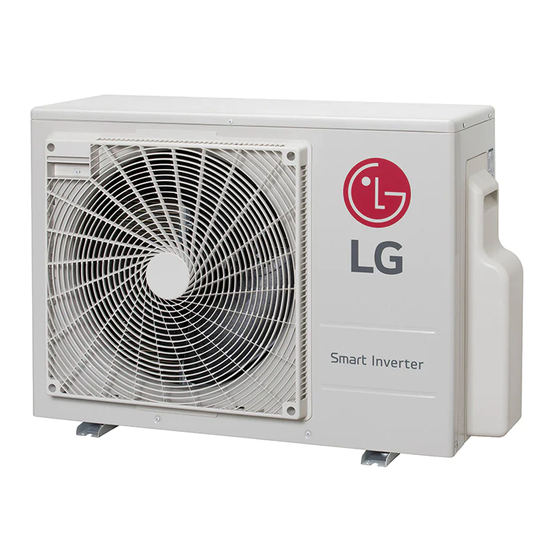
PRODUCT INTRODUCTION PRODUCT INTRODUCTION Name and function of parts Indoor unit Outdoor unit Remote controller Inlet air Discharge air Refrigerant piping, connection electric wire Drain pipe Ground wire Wire to ground outdoor unit to prevent electrical shocks. Operation Indication Lamps Forced operation : Operation procedures when remote control can’t be used. -
Page 9: Using The Remote Control
PRODUCT INTRODUCTION Using the remote control Wired remote control (Accessory) Display screen Control panel Control Display screen Description panel Temperature adjustment button: Adjusts the room tempera- ture when cooling and heating. Indoor fan speed button: Adjusts the fan speed. On/Off button: Turns the power on/off. Operation mode selection button*: Selects the operation mode. -
Page 10: Wireless Remote Controller
PRODUCT INTRODUCTION Wireless Remote Controller This air-conditioner is equipped with wireless remote controller basically. But if you want to be available with wired remote controller, you pay for it. VANE ANGLE Button PLASMA Button (OPTIONAL) Used to set each vane angle. Used to start or stop the plasma-pu- rification function. -
Page 11: Owner'sinstruction
OWNER'S INSTRUCTION OWNER'S INSTRUCTION Cooling Mode Auto Operation Mode - Standard Operation . Press the ON/OFF button. The unit will respond with beep sound. . Press the ON/OFF button. . Press MODE button to select Auto Opera- The unit will respond with beep sound. tion Mode. -
Page 12: Dehumidification Mode
OWNER'S INSTRUCTION Dehumidification Mode During Fan Mode . Press the ON/OFF button. • The outdoor compressor doesn't work. The unit will respond with beep sound. Have a function to circulate the indoor . Press MODE button to select Dehumidifica- as it sends out the air that doesn't have tion Mode. -
Page 13: Airflow Setting
OWNER'S INSTRUCTION Airflow Setting Up/Down Airflow Direction Control (Optional) The up/down airflow (Vertical Airflow) can be adjusted by using the remote controller. . Press the ON/OFF button to start the unit. . Press up/down airflow button and the louvers will swing up and down. Press the up/down airflow button again to set the vertical louver at the desired airflow direc- tion. -
Page 14: Plasma Purification(Optional)
• Plasma filter is a technology developed by tion will start when the button is pressed LG to get rid of microscopic contaminants in and stop when the button is pressed again. the intake air generating a plasma of high charge electrons. -
Page 15: Individual Vane Angle Control(Optional)
OWNER'S INSTRUCTION Individual vane angle control(Optional) It is the function that can control 4 vane an- gles individually in the ceiling type 4Way cas- • There may be differences between sette product group. wireless remote controller up/down/left/right buttons and the wind discharge port directions. -
Page 16: Timer
OWNER'S INSTRUCTION Timer Setting the Current Time 1. Press the SET/CLEAR button for 3 seconds. 2. Press TIME SETTING buttons until the desired time is set. 3. Press the SET / CLEAR button. NOTE Check the indicator for A.M. and P.M. Timer Setting 1. -
Page 17: Maintenance And Service
MAINTENANCE AND SERVICE MAINTENANCE AND SERVICE Indoor Unit - Never use any of the followings: Water hotter than 40°C. Grille, Case and Remote Control Could cause deformation and/or discol- - Turn the system off before cleanining, To oration. clean, wipe with a soft, dry cloth. Do not use Volatile substances. -
Page 18: Purifying Filter(Optional)
MAINTENANCE AND SERVICE Purifying filter(Optional) Open front panel and remove air filter. Cleaning The PLASMA filter behind the air filters should be checked and cleaned once every 3 months or more often if necessary. Remove air purifying filter. Insert new air purifying filter. After removing the air filters, pull slightly for- ward to remove the PLASMA filter. -
Page 19: Operation Tips
MAINTENANCE AND SERVICE Operation Tips! Do not overcool the room. Keep blinds or curtains closed. Keep the room temperature uniform. This is not good for the health Do not let direct sunshine and wastes electricity. enter the room when the air Adjust the vertical and hori- conditioner is in operation. -
Page 20: Troubleshooting Tips! Save Time And Money
MAINTENANCE AND SERVICE Troubleshooting Tips! Save time and money! Check the following points before requesting repairs or service..If the malfunction persist, please contact your dealer. The air conditioner The room has a pecu- It seems that conden- Air conditioner does does not operate. - Page 21 Specifications. Model Voltage / Hz Current AMNC12GTRA2 220 V~ 50/60 Hz 0,35 A AMNC18GTQA2 220 V~ 50/60 Hz 0,43 A AMNC24GTPA2 220 V~ 50/60 Hz 0,60 A A2UQ18GFA0 220 V~ 50/60 Hz 6,6 A A3UQ26GFA0 220 V~ 50/60 Hz 9,4 A...
- Page 23 Indoor Unit AMNC12GTRA2, AMNC18GTQA2, AMNC24GTPA2 Outdoor Unit A2UQ18GFA0, A3UQ26GFA0, A4UQ30GFA0, A5UQ36GFA0 A5UQ48GFA0, A7UQ40GFA0, A8UQ48GFA0, A8UQ54GFA0 LG Electronics México, S.A. de C.V Sor Juana Inés de la Cruz No. 555 Col. San Lorenzo Industrial Tlalnepantla de Baz, Estado de México C.P. 54033 TEL.