Table of Contents
Advertisement
Available languages
Available languages
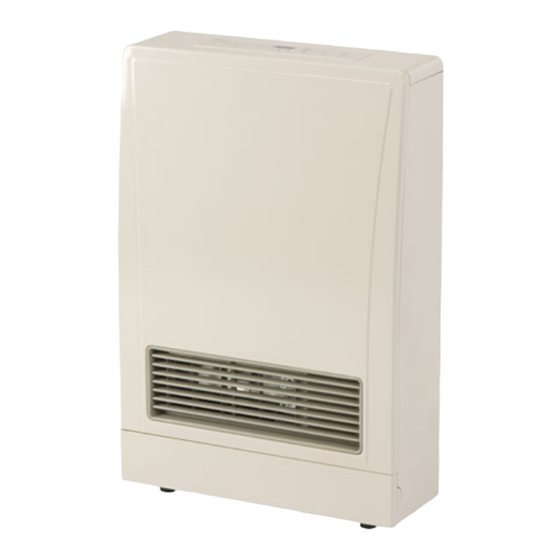
Owner's Operation and Installation Manual for the
EX08C (RHFE-202FTA)
EX11C (RHFE-265FTA)
Gas Direct Vent Wall Furnace
WARNING: If the information in these instructions is not
followed exactly, a fire or explosion may result causing
property damage, personal injury or loss of life.
- Do not store or use gasoline or other flammable vapors and
liquids in the vicinity of this or any other appliance.
- WHAT TO DO IF YOU SMELL GAS
•
Do not try to light any appliance.
•
Do not touch any electrical switch; do not use any phone in
your building.
•
Immediately call your gas supplier from a neighbor's phone.
Follow the gas supplier's instructions.
•
If you cannot reach your gas supplier, call the fire
department.
- Installation and service must be performed by a qualified
installer, service agency or the gas supplier.
INSTALLER: Leave this manual with the appliance.
CONSUMER: Retain this manual for future reference.
Register your product at www.rinnairegistration.com
or call 1-866-RINNAI1 (746-6241)
Energysaver
®
Table of Contents ........................... 2
Consumer Safety Information ........ 3
Specifications ................................. 4
Operating Instructions .................... 6
Installation Instructions ................ 15
Adjust Gas Pressure Settings ...... 27
Consumer Support ....................... 42
French Version ............................. 44
Advertisement
Chapters
Table of Contents

Related Manuals for Rinnai EX08C (RHFE-202FTA)


Summary of Contents for Rinnai EX08C (RHFE-202FTA)
-
Page 1: Table Of Contents
Owner’s Operation and Installation Manual for the EX08C (RHFE-202FTA) EX11C (RHFE-265FTA) Energysaver Gas Direct Vent Wall Furnace WARNING: If the information in these instructions is not followed exactly, a fire or explosion may result causing property damage, personal injury or loss of life. —... -
Page 2: Table Of Contents
Operating Instructions ... 29 Cut-Away Diagram ... 30 Wiring Diagram ... 31 Ladder Diagram ... 32 Parts List ... 33-41 Consumer Support Warranty Information ... 42 Limited Warranty ... 42, 43 French Version ... 44-77 Rinnai Corporation EX08C, EX11C Manual... -
Page 3: Consumer Safety Information
• Do not sit on the heater. • Do not place containers of liquid on top of the heater. Water spillage can cause extensive damage to the appliance and may result in electric shock. Rinnai Corporation EX08C, EX11C Manual... -
Page 4: Specifications
AFUE Rating Natural Gas: 81% Propane: 82% Rinnai is continually updating and improving products. Therefore, specifications are subject to change without prior notice. The efficiency rating of this appliance is a product thermal efficiency rating determined under continuous operating conditions and was determined independently of any installed system. -
Page 5: Features
9 1/2 - 15 3/4 in (240 - 400mm) FOT-153 15 3/4 - 23 5/8 in (400 - 600 mm) FOT-154 23 5/8 - 31 1/2 in (600 - 800 mm) Rinnai Corporation EX08C, EX11C Manual EX11C Natural Gas Propane Gas 3.5 in 8.0 in... -
Page 6: Operating Instructions
GAS CONNECTION 1/2” MALE NPT POWER CORD PLUG 120V AC, 60 Hz Operating Instructions ROOM TEMPERATURE SENSOR/THERMISTOR Rinnai Corporation EX08C, EX11C Manual CONTROL PANEL RATING PLATE MODEL NUMBER, SERIAL NUMBER, GAS TYPE, ETC. ENGLISH IS ON THE RIGHT; FRENCH IS... -
Page 7: Control Panel
Deactivating the lock releases the control buttons. comfortable heating effect and to reach the temperature setting quickly. Occasionally, the room temperature may briefly exceed the temperature setting due to the layout of the room or heating area. Rinnai Corporation EX08C, EX11C Manual... -
Page 8: Setting The Clock
Timer button. The heater will operate from the start to end times you have entered for that Timer. It will operate at the temperature setting that has been set for the heater. The timer can be set while the heater is operating. Rinnai Corporation EX08C, EX11C Manual... -
Page 9: Override Function
2 ºF, effectively saving energy. The room temperature setting will drop up to a total of 4 ºF. The Economy Mode will not operate if the heater is under capacity for the room size. Rinnai Corporation EX08C, EX11C Manual 2°F reduction 2°F reduction 30 min... -
Page 10: Set Back
Do not bend repeatedly (no more than 5 times) or else the louver will break. The horizontal louvers (which determines the vertical air flow direction) are fixed and cannot be adjusted. Rinnai Corporation EX08C, EX11C Manual Do not adjust the air flow louvers while warm air is flowing. -
Page 11: Care And Maintenance Maintenance
Maintenance All maintenance and service are to be performed by a qualified service technician, preferably one who has attended Rinnai service training classes on the Direct Vent products. The appliance should be inspected annually by a qualified service technician. More frequent cleaning may be required due to excessive lint from carpeting, bedding material, etc. -
Page 12: Before Making A Service Call
This is to remove the residual heat from the heat exchanger. The fan will stop when the heater cools down. High efficiency appliances tend to discharge water vapor on cold days. This is normal. Check whether filters are blocked. Dirty filters will cause the heater to overheat. Rinnai Corporation EX08C, EX11C Manual... -
Page 13: Fault Codes
You may be able to clear the fault code by turning the heater off and then on again. If the fault code remains or returns on the next operation, contact Rinnai or your nearest service agent and arrange for a service call. -
Page 14: Troubleshooting
If the flame is extinguished (burner combustion failure) while the temperature control logic is operating the appliance, then the appliance will immediately attempt ignition. No fault code will appear. Rinnai Corporation EX08C, EX11C Manual Remedy Plug In Push On/Off button to attempt restart after power is restored. -
Page 15: Installation Instructions
• Rinnai suggests that a dedicated electrical circuit with a 120V AC, 60 Hz, 10 amp power source be used. -
Page 16: Gas Connection
Do not conceal manual cut-off valve behind back spacer. 2 in (50 mm) 40 in (1 m) Rinnai Corporation EX08C, EX11C Manual Manual gas shut-off valve Zero - See Notice Zero 2 in... -
Page 17: Drilling Flue Hole
NOTICE cardboard packaging. DO NOT DISCARD until installation is completed. Flue Hole NOTICE • • Rinnai Corporation EX08C, EX11C Manual Use a template (included) to determine allowable location of the flue hole. 10.1 in 257 mm 6.8 in 3.3 in... -
Page 18: Flue Terminal Clearances
Flue Terminal Clearances Rinnai Corporation EX08C, EX11C Manual... - Page 19 7 feet (2.13 m) 1 12 inches (30 cm) to non- flammables 2 24 inches (60 cm) to flammables 2 Rinnai Corporation EX08C, EX11C Manual US Installations 12 inches (30 cm) 6 inches (15 cm) for appliances < 10,000 BTUh;...
-
Page 20: Installation Parts
Plastic tie for air inlet Clamp * Screw (M4) Wood Screw (M4.8× 32) Spacer Bracket * These clamps should be located here Rinnai Corporation EX08C, EX11C Manual (‘A’ Flue units only) (For weatherboard installations) For Flue Manifold Wall Bracket Screws... -
Page 21: Flue Manifold Installation
• This appliance can only be used with one of the five types of Rinnai flue kits. The flue kits and their dimensions are listed in the Specifications section. • Refer to the Flue Terminal Clearances section. - Page 22 Attach the inside connection with 3 screws. The inner connection can still be turned to install the screws. Terminal seal Locking tie Locking ties 3 screws Rinnai Corporation EX08C, EX11C Manual Terminal Sleeve...
- Page 23 Extension to the right (facing appliance) EXHAUST PIPE PIPE STOPPER A EXHAUST PIPE PIPE CLAMP PIPE PIPE CLAMP STOPPER A EXHAUST ELBOW CLAMP Rinnai Corporation EX08C, EX11C Manual EXHAUST PIPE PIPE STOPPER A CLAMP LONG BENT ELBOW EXHAUST ELBOW INTAKE HOSE...
-
Page 24: Extension Kit Installation
The hose can be cut to the required length. Deburr all rough edges. Do not cut the hose attached to the appliance. Support the air intake hose with pipe clamps. Rinnai Corporation EX08C, EX11C Manual Exhaust pipe Exhaust pipe Air intake hose... - Page 25 Screw A Screw B EXHAUST PIPE (NON ADJUSTABLE) HOSE JOINT FOT-201 FOT-155 FOT-156 FOT-157 FOT-158 FOT-190 2 sets Rinnai Corporation EX08C, EX11C Manual AIR INTAKE HOSE PIPE STOPPER A PIPE STOPPER B SCREW B SCREW A 3 sets 4 sets...
-
Page 26: Connecting The Appliance
2 screws. Spacer Top Spacer Wall Bracket Bracket Flue Manifold Pipe stopper Elbow 2 screws Rinnai Corporation EX08C, EX11C Manual Hook Manifold Pipe stopper Fit Clip Slide Sock Top Spacer Spacer Bracket Wall... -
Page 27: Adjust Gas Pressure Settings
(19 mm) (20 mm) 1.7 in 1.6 in (44 mm) (40 mm) Use A5, A6, A7, or A8 for venting exceeding 7 feet (2.1 m) with one elbow. Rinnai Corporation EX08C, EX11C Manual PC Board Pressure Point Pressure Point Propane Gas... -
Page 28: Normal Operating Sequence
Yellow flames or orange color Final Assembly 1. Install the front panel and bottom cover. 2. If doing a gas type conversion, place the new conversion plate (label) on the front cover. Rinnai Corporation EX08C, EX11C Manual Flame Rod Flame Rod... -
Page 29: Operating Instructions
NOTE: The fan will continue to operate until the to the full Rinnai Corporation EX08C, EX11C Manual appliance is cool. Do not turn the appliance off by unplugging it from the wall. Keep burner and control compartment clean. -
Page 30: Cut-Away Diagram
Cut-Away Diagram Rinnai Corporation EX08C, EX11C Manual... -
Page 31: Wiring Diagram
OVER HEAT THERMISTOR OHS1, 2 OVER HEAT SWITCH 1, 2 CONVECTION FAN MOTOR SPARKER SV1, 2 MAIN SOLENOID VALVE 1, 2 COMBUSTION FAN MOTOR PRESSURE SENSOR Rinnai Corporation EX08C, EX11C Manual CODE COLOR black blue green gr/y green/yellow white yellow... -
Page 32: Ladder Diagram
Ladder Diagram MARK R, TH Rinnai Corporation EX08C, EX11C Manual CODE COLOR black green gr/y green/yellow white yellow orange brown light blue PARTS NAME MARK PARTS NAME Main switch Over heat thermistor Thermistor OHS1, Over heat switch Thermal fuse Convection fan... -
Page 33: Parts List
Parts List For replacement parts call Rinnai at 1-800-621-9419. Rinnai Corporation EX08C, EX11C Manual... - Page 34 Parts List Rinnai Corporation EX08C, EX11C Manual...
- Page 35 Parts List Rinnai Corporation EX08C, EX11C Manual...
- Page 36 Parts List Rinnai Corporation EX08C, EX11C Manual...
- Page 37 Parts List Rinnai Corporation EX08C, EX11C Manual...
- Page 38 - électrode de détection de flamme fixation de chambre de combustion plaque de fixation garniture de plaque d’étanchéité plaque d’étanchéité B panneau de bride Rinnai Corporation EX08C, EX11C Manual Part Number (Numéro de la EX08C EX11C Pièce) 209000053 209000054...
- Page 39 E Clip J arrivée d’air A garniture d’arrivée d’air Rinnai Corporation EX08C, EX11C Manual Part Number (Numéro EX08C EX11C de la Pièce) 206000030 B3A2-4 556F-225-2 556F-211...
- Page 40 - TF toron d’allumeur cordon d’alimentation liaison FR détecteur de pression assy de fil de sonde Rinnai Corporation EX08C, EX11C Manual Part Number (Numéro EX08C EX11C de la Pièce) RHF300-51-8 RHF300-52 208000035 RHF300-200-E...
- Page 41 étiquette de corde d'alimentation d'énergie étiquette d'attention étiquette d'attention manuel For converting to NG For converting to LPG (Pour la conversion LPG) 204000033 204000034 Rinnai Corporation EX08C, EX11C Manual Part Number (Numéro EX08C EX11C de la Pièce) 550F-1418 431F-1860 431F-1860 1001F-1654 RHF559-1240...
-
Page 42: Consumer Support
What will Rinnai do? Rinnai will repair or replace the covered product or any part or component that is defective in materials or workmanship as set forth. Rinnai will pay reasonable labor charges associated with the repair or replacement of any such part or component. - Page 43 Rinnai will replace the product with a comparable product at Rinnai’s discretion. If a component or product returned to Rinnai is found to be free of defects in material or workmanship, or damaged by improper installation or damaged during return shipping, the warranty claim for product, parts and labor may be denied.
-
Page 44: French Version
éviter tout dommage matériel, toute blessure ou la mort. Rinnai Corporation EX08C, EX11C Manual ® Table des matières ... 45 Sécurité du consommateur ..46 Spécifications ... - Page 45 Instructions de mise en œuvre ... 72 Schéma en coupe ... 73 Schéma de câblage ... 74 Diagramme logique ... 75 Liste de pièces ... 33-41 Service à la clientèle Informations de garantie ... 76 Garantie limitée ... 76, 77 Rinnai Corporation EX08C, EX11C Manual...
-
Page 46: Sécurité Du Consommateur
• Ne pas s'asseoir sur le chauffage. • Ne placez pas de conteneurs de liquide sur le dessus du chauffage. Déversement d'eau peut causer des dommages considérables à l'appliance et peut entraîner des chocs électriques. Rinnai Corporation EX08C, EX11C Manual... -
Page 47: Spécifications
Rendement Propane: 82% Rinnai poursuit constamment la mise à niveau et l’amélioration de ses produits. De ce fait ces spécifications sont sujet- tes à changement sans préavis. Le rendement énergétique de cet appareil mesure l’efficacité thermique du produit en utilisation continue, il a été... -
Page 48: Caractéristiques
9 1/2 - 15 3/4 in (240 - 400mm) FOT-153 15 3/4 - 23 5/8 in (400 - 600 mm) FOT-154 23 5/8 - 31 1/2 in (600 - 800 mm) Rinnai Corporation EX08C, EX11C Manual EX11C Gaz naturel Gaz propane 3.5 in 8.0 in... -
Page 49: Instructions D'utilisation
CÔTÉS ET TIRER VERS VOUS CONNEXIONS DE GAZ 1/2 mâle NPT FICHE PLUG 120V AC, 60 Hz Instructions d’utilisation THERMISTANCE Rinnai Corporation EX08C, EX11C Manual AFFICHAGE PLAQUE SIGNALÉTIQUE RÉFÉRENCE DE MODÈLE, N° DE SÉRIE, TYPE DE GAZ, ETC. FILTRE À AIR... -
Page 50: Panneau De Commandes
• La désactivation du verrouillage libère les boutons de commande. De temps en temps la température ambiante peut dépasser brièvement la consigne du fait de la disposition de la pièce ou de la zone chauffée. Rinnai Corporation EX08C, EX11C Manual... -
Page 51: Mise À L'heure
Timer choisi. Le chauffage va fonctionner entre l'heure de départ et l'heure de fin que vous avez déterminées pour cette minuterie. Il chauffera à la température de consigne qui a été définie pour l'appareil. Rinnai Corporation EX08C, EX11C Manual... -
Page 52: Fonction De Surpassement
Le réglage de la température de la pièce sera au goutte-à- goutte u p pour un total de 4 ºF. Ce mode ne peut pas être activé si le chauffage est sous- dimensionné par rapport à la taille de la pièce. Rinnai Corporation EX08C, EX11C Manual... -
Page 53: Programmation De Température Minimale
Le registre horizontal (qui détermine la direction en hauteur du flux d'air) est fixe et ne peut pas se régler Rinnai Corporation EX08C, EX11C Manual N'ajustez pas les registres de flux d'air pendant que de l'air chaud est envoyé. -
Page 54: Soins Et Entretien
Entretien Toute intervention d’entretien et dépannage doit être effectuée par un technicien de service qualifié, qui de préférence a suivi des cours de service chez Rinnai sur ses produits à ventilation directe. L’appareil doit être inspecté annuellement par un technicien de service qualifié. -
Page 55: Avant D'appeler Pour De L'aide
High efficiency appliances tend to discharge water vapor on cold days. This C’est un phénomène normal. is normal. Regardez si les filtres sont saturés. Cela peut causer une surchauffe de l’appareil. Check whether filters are blocked. Dirty filters will cause the heater to overheat. Rinnai Corporation EX08C, EX11C Manual... -
Page 56: Codes De Défauts
Si le code de défaut est resté présent ou revient à la remise en route, contactez Rinnai ou votre agent de service le plus proche pour planifier une intervention. DÉFAUT Panne d’allumage... -
Page 57: Fonction De Redémarrage
● ● ● ● ● ● ● ● ● ● ● Rinnai Corporation EX08C, EX11C Manual Remède Brancher l’appareil Mettre à l’arrêt et remettre en marche au retour du sec- teur Purger l’air (installateur) ● Demande d’intervention Demande d’intervention ●... -
Page 58: Instructions D'installation
Cet appareil ne doit pas être relié à une cheminée d’évacuation de fumées desservant aussi un autre appareil de chauffage à combustion. • Rinnai suggère d’utiliser comme source d’alimentation secteur un circuit dédié à l’appareil (120 V CA, 60 Hz, 10 A). •... -
Page 59: Connexion Du Gaz
Ne la placez pas dans l’intervalle derrière l’appareil. 2 in (50 mm) 40 in (1 m) Rinnai Corporation EX08C, EX11C Manual Manuel de gaz robinet d'arrêt. zéro - voir la notification zéro 2 in... -
Page 60: Dégagements En Sortie De Cheminée
Dégagements en sortie de cheminée Rinnai Corporation EX08C, EX11C Manual... - Page 61 7 pi (2,13 m) 1 12 po (30 cm) jusqu’aux matériaux non-inflammables 2 24 po (61 cm) jusqu’aux matériaux inflammables 2 Rinnai Corporation EX08C, EX11C Manual Installations USA 12 po (30 cm) 6 po (15 cm) pour des appareils < 10 000 BTU/h 9 po (23 cm) pour des appareils >...
-
Page 62: Percez Le Trou De Conduit
NE JETEZ pas jusqu'à ce que l'installa- tion est terminée. Flue Hole Trou de cheminée AVIS • • Rinnai Corporation EX08C, EX11C Manual Utiliser un modèle (inclus) pour déterminer l'emplacement autorisé du trou carneau. 10.1 in 257 mm 6.8 in 3.3 in... -
Page 63: Pièces D'installation
Support Spacer Bracket espaceur * Ces pinces devraient être situés ici Rinnai Corporation EX08C, EX11C Manual Joint caoutchouc de rechange (‘A’ Flue units only) (appareils à ventilation « A » uniquement) (For weatherboard installations) (pour installations avec parement bois) (pour collecteur de fumée) -
Page 64: Installation Du Collecteur De Fumée
La bride est décalée de 2º pour permettre le drainage du condensat vers l’extérieur. • L’appareil ne peut être utilisé qu’avec l’un des cinq types de kits de collecteurs de fumée de Rinnai. Ces kits et leurs dimensions sont listés dans la section des spécifi- cations. •... - Page 65 Fixez la connexion intérieure avec trois vis. Elle peut toujours être tournée pour placer ces vis. Joint de terminaison Attache de blocage Attaches de blocage 3 vis Rinnai Corporation EX08C, EX11C Manual Terminaison Manchon...
-
Page 66: Installation Du Kit D'extension (Ex11C Seulement)
(6) Les extensions de ventilation ne doivent pas être dissimulées selon la norme NFPA 54 et doivent rester accessibles pour permettre leur inspection et réparation. Des caches décoratifs sont disponibles chez Rinnai. Ces illustrations montrent 3 façons possibles d’orienter l’extension de la conduite d’évacuation et du tuyau d’admission d’air en partant du collecteur de fumée. - Page 67 être coupés à la longueur voulue. Ébarbez les bords de coupe bruts. Ne coupez pas le tube relié à l’appareil. Supportez le tuyau d’admission d’air à l’aide de colliers de soutien. Rinnai Corporation EX08C, EX11C Manual 1 pouce (25,4 mm) zéro Conduite d’évacuation Exhaust pipe Air intake hose Tuyau d’admission d’air...
- Page 68 TUYAU D’EXTENSION (NON RÉGLABLE) HOSE JOINT JOINT DE TUYAUX ÉCROU FOT-201 FOT-155 FOT-156 FOT-157 FOT-158 FOT-190 2 sets Rinnai Corporation EX08C, EX11C Manual AIR INTAKE HOSE TUYAU D’ADMISSION D’AIR PIPE STOPPER A PIPE STOPPER B ARRÊT DE ARRÊT DE TUYAU A...
-
Page 69: Branchement De L'appareil
Espaceur supérieur Patte d’espaceur Support mural Collecteur de fumée Flue Manifold Pipe stopper Arrêt de tuyau Elbow Coude 2 vis Rinnai Corporation EX08C, EX11C Manual Crochet Hook Manifold Collecteur Pipe stopper Arrêt de tuyau Fit Clip Positionner l’agrafe Glisser Slide... -
Page 70: Ajustage Et Reglage De La Presion De Gas
(103 mm) (82 mm) 0.72 in 0.80 in (19 mm) (20 mm) 1.7 in 1.6 in (44 mm) (40 mm) Rinnai Corporation EX08C, EX11C Manual Commuta- PC Board Point de vérification du gaz Collêcteur Point de vérification du gaz Gaz Propane... - Page 71 Assemblée finale 1. Installer le panneau de devant et la couverture de fond. 2. Si vous faites une conversion de type de gaz, placer la nouvelle plaque de conversion (étiquette) sur le capot avant. Rinnai Corporation EX08C, EX11C Manual...
-
Page 72: Instructions De Mise En Œuvre
Consultez le manuel pour plus d'informations. REMARQUE : Le ventilateur va continuer de tourner jusqu’au Rinnai Corporation EX08C, EX11C Manual refroidissement de l’appareil. Ne coupez pas l’appareil en débranchant la fiche de la prise secteur. -
Page 73: Schéma En Coupe
INTERRUPTEUR DE SUR- CHAUFFE N° 2 CAPOT INFÉRIEUR FILTRE À AIR INTERRUPTEUR DE MARCHE CORDON D’ALIMENTATION INJECTEUR SECTEUR Rinnai Corporation EX08C, EX11C Manual CIRCUIT IMPRIMÉ D’OPÉRATION DÉTECTEUR DE PRESSION MOTEUR DE COMBUSTION VENTILATEUR DE COMBUSTION PASSAGE CARTE PRINCIPALE DE CIRCUIT MPRIMÉ... -
Page 74: Schéma De Câblage
ÉCLATEUR SV1, 2 ÉLECTROVANNE 1,2 MOTEUR DE VENTILATEUR DE COMBUSTION DÉTECTEUR DE PRESSION Rinnai Corporation EX08C, EX11C Manual Si des fils d’origine livrés avec l’appareil ont besoin d’être remplacés, choisissez un fil de calibre 18 AWG ou équivalent. CODE COLOR... -
Page 75: Diagramme Logique
Diagramme logique Rinnai Corporation EX08C, EX11C Manual CODE COLOR noir bleu vert gr/y Vert/jaune rouge blanc jaune gris orange brun... -
Page 76: Service À La Clientèle
Rinnai paiera dans les limites du raisonnable le coût de main-d’œuvre associé à la réparation ou au remplace- ment de toute partie ou composant. Toutes les pièces à réparer doivent être des pièces Rinnai d’origine. Toutes les ré- parations et tous les replacements doivent être effectués par un dépanneur individuel ou une société de dépannage ayant reçu l’autorisation de Rinnai. -
Page 77: Garantie Limitée
Garantie limitée (Suite) Le remplacement du produit ne peut être autorisé que par Rinnai. La société Rinnai ne permet à aucune personne ou société d’assumer pour elle toute obligation ou responsabilité relative au remplacement d’un produit. Si Rinnai détermine que la réparation d’un produit n’est pas possible, Rinnai le remplacera avec un produit comparable, à... - Page 78 Notes Rinnai Corporation EX08C, EX11C Manual...
- Page 79 Notes Rinnai Corporation EX08C, EX11C Manual...
- Page 80 RHF265-1091X01(00) Printed in Japan 2010.06...