Advertisement
Available languages
Available languages
Quick Links
3
CAUTION
Failure to properly dispose of spent cartridges, fi lters, or respirators contaminated by hazardous materials can result in
personal exposures as well as environmental harm. Handling, transportation and disposal of spent cartridges, fi lters,
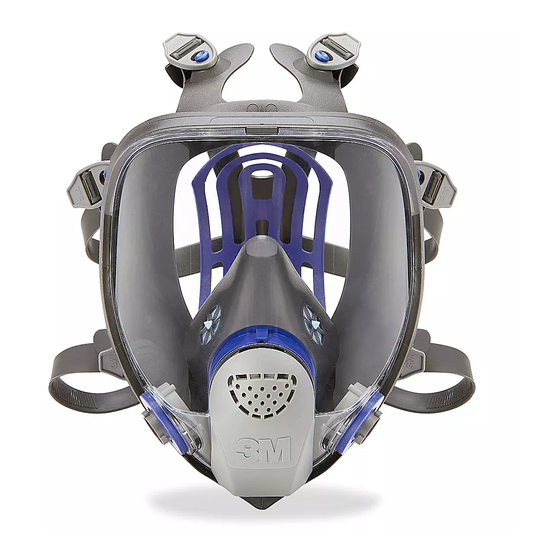
Ultimate FX Full Facepiece Reusable Respirator
or respirators must comply with all applicable federal, state, provincial, and local laws and regulations.
User Instructions for 3M™ Ultimate FX Full Facepiece FF-401, Small, 3M™ Ultimate FX Full Facepiece FF-402, Medium,
NIOSH Cautions and Limitations for Negative Pressure Usage
3M™ Ultimate FX Full Facepiece FF-403, Large
The following restrictions may apply. See NIOSH Approval Label. If you are using the FF-400 series facepiece as part
IMPORTANT: Before use, the wearer must read and understand these User Instructions. Keep these instructions for
of a Supplied Air Respirator confi guration, refer to the User Instructions that accompanies your air control device for
reference.
information on NIOSH Cautions and Limitations.
A - Not for use in atmospheres containing less than 19.5 percent oxygen.
This respirator has dual approval as a United States (US) National Institute for Occupational Safety and Health
B - Not for use in atmospheres immediately dangerous to life or health.
(NIOSH) full facepiece respirator and as Brazil Ministry of Labor full face piece respirator.
C - Do not exceed maximum use concentrations established by regulatory standards.
Standard specifi c information is provided where applicable. All other information is common to both standards.
H - Follow established cartridge and canister change schedules or observe ESLI to ensure that cartridges and canisters
are replaced before breakthrough occurs.
Respirateur à masque complet réutilisable ultra FX
J - Failure to properly use and maintain this product could result in injury or death.
L - Follow the manufacturer's User's Instructions for changing cartridges, canister and/or fi lters.
Directives d'utilisation pour respirateur à masque complet ultra FX FF-401 3M
MC
, petit, respirateur à masque complet
M - All approved respirators shall be selected, fi tted, used, and maintained in accordance with MSHA, OSHA, and other
ultra FX FF-402 3M
MC
, moyen, respirateur à masque complet ultra FX FF-403 3M
MC
, grand
applicable regulations.
REMARQUE IMPORTANTE : Avant de se servir du produit, l'utilisateur doit lire et comprendre les présentes directives
N - Never substitute, modify, add, or omit parts. Use only exact replacement parts in the confi guration as specifi ed by
d'utilisation. Conserver ces directives à titre de référence.
the manufacturer.
Ce respirateur a une double homologation comme respirateur à masque complet par le National Institute for
O - Refer to User's Instructions, and/or maintenance manuals for information on use and maintenance of these
respirators.
Occupational Safety and Health (NIOSH) des États-Unis et comme respirateur à masque complet par le ministère du
Travail du Brésil.
P - NIOSH does not evaluate respirators for use as surgical masks.
S - Special or critical User's Instructions and/or specifi c use limitations apply. Refer to User's Instructions before donning.
Des renseignements spécifi ques sont fournis le cas échéant. Tous les autres renseignements sont communs aux
deux normes.
S - Special or Critical User's Instructions
3M™ Organic Vapor Service Life Indicator Cartridges (6001i and 60921i) and Mercury Vapor Cartridges (6009S and
Respirador reutilizable de pieza facial de cara completa
60929S) are equipped with a passive 3M™ End of Service Life Indicator (ESLI). The indicator must be readily seen when
wearing the respirator without manipulation. If you cannot readily see the ESLI, use a mirror to observe the ESLI, rely
Ultimate FX
on a co-worker who can see the ESLI, or go to a clean area, remove the respirator and view the ESLI. Do not rely solely
on the organic vapor ESLI unless your employer has determined that it is appropriate for your workplace. See 6001i
Instrucciones para la Pieza facial de cara completa 3M™ Ultimate FX, FF-401, pequeña; Pieza facial de cara completa
or 60921i User Instructions for more information, including Special Instructions regarding the ESLI. The mercury vapor
3M™ Ultimate FX, FF-402, mediana; y Pieza facial de cara completa 3M™ Ultimate FX, FF-403, grande.
cartridges must be discarded when the ESLI changes to the discard color found on the mercury vapor cartridge label;
IMPORTANTE: Antes de usar el producto, el usuario debe leer y entender estas Instrucciones. Conserve estas
or within 30 days of opening packaging; or when ESLI becomes dirty or damaged; or when odors of vapors or gases
become noticeable; or according to chlorine service life; whichever occurs fi rst. Mercury vapor has no odor.
instrucciones para referencia futura.
Respirator Program Management
Este respirador cuenta con una aprobación dual como un respirador de pieza facial de cara completa por el Instituto
Occupational use of respirators must be in compliance with applicable health and safety standards. By law U.S.
Nacional de Seguridad y Salud Ocupacional (NIOSH por sus siglas en inglés) de Estados Unidos y por la Secretaría
employers must establish a written respiratory protection program meeting the requirements of the OSHA Respiratory
del trabajo de Brasil.
Protection Standard 29 CFR 1910.134 and any applicable OSHA substance specifi c standards. In Canada, CSA standard
Si aplica, se proporciona información específi ca. La demás información es común para ambas normas.
Z94.4 requirements must be met and/or requirements of the applicable jurisdiction, as appropriate. In Brazil, follow the
Respiratory Protection Program of the Ministry of Labor.
Respirador Reutilizável Peça Facial Inteira FX
For additional information on this standard contact OSHA at www.OSHA.gov. Consult an industrial hygienist or call 3M
Technical Service with questions concerning applicability of these products to your job requirements.
Instruções de Uso para 3M™ Peça Facial Inteira FF-401 FX, Pequeno, 3M™ Peça Facial Inteira FF-402 FX, Médio, 3M™
Peça Facial Inteira FF-403 FX, Grande
Table 1: Major Sections of OSHA 29 CFR 1910.134
IMPORTANTE: Antes de usar, o usuário deve ler e compreender estas Instruções de Uso. Guarde estas instruções
para consulta.
Section
Description
A
Permissible Practice
Este respirador tem dupla aprovação, como um respirador facial pelo Instituto Nacional para Saúde e Segurança
Ocupacional (NIOSH) dos Estados Unidos (EUA) e como respirador facial pelo Ministério do Trabalho do Brasil.
B
Defi nitions
Informações específi cas são fornecidas quando aplicáveis. Todas as outras informações são comuns a ambas as normas.
C
Respiratory Protection Devices
98-0060-0135-2_5
34-8717-7428-6
D
Selection of Respirators
E
Medical Evaluations
F
Fit Testing
W WARNING
G
Use of Respirators
This respirator helps protect against certain airborne contaminants. Misuse may result in
sickness or death. For proper use, see your supervisor, or User Instructions or call 3M in U.S.A.
H
Maintenance and Care of Respirators
at 1-800-243-4630. In Canada, call Technical Service at 1-800-267-4414. In Brazil, contact:
I
Breathing Air Quality and Use
0800-0550705.
J
Identifi cation of Cartridges, Filters, and Canisters
FOREWARD
K
Training and Information
These User Instructions provide information about facepiece use only. Important information is provided in the User
L
Program Evaluation
Instructions with each of the air fi ltration systems that are used with 3M™ Full Facepiece FF-401, FF-402 and FF-403.
M
Recordkeeping
Read all User Instructions and warnings before using. Keep these User Instructions for reference. If you have questions
regarding these products contact 3M Technical Service.
Assigned Protection Factors
In United States:
In Canada:
Table 2: Assigned Protection Factors
Internet: www.3M.com/PPESafety
Internet: www.3M.com/CA/OccSafety
Technical Assistance: 1-800-243-4630
Technical Assistance: 1-800-267-4414
Type of Respirator
In Brazil:
Internet: www.3mepi.com.br
Full Facepiece Negative Pressure Air Purifying Respirator
Technical Assistance: 0800-0550705
Full Facepiece Supplied Air Respirator (SAR) Continuous Flow
Intended Use
1
The respirator wearer must be fi t tested using a quantitative fi t test method in order to use an assigned protection
The 3M™ Ultimate FX Full Facepiece FF-400 Series Respirators (FF-401, FF-402 and FF-403) are designed to help
factor greater than 10 when used as a negative pressure air purifying reespirator.
provide respiratory protection against certain airborne contaminants when used in accordance with all use instructions
and limitations and applicable safety and health regulations. All FF-400 series facepieces meet the impact requirements
In Brazil, according to the Respiratory Protection Program of the Ministry of Labor, do not use full face piece respirator
of the ANSI Z87.1-2003 standard, high impact level, for limited face and eye protection.
when concentrations of contaminants are greater than 100 times the permissible exposure limit in air-purifying mode.
W WARNING
OPERATING INSTRUCTIONS
Properly selected, used, and maintained respirators help protect against certain contaminants by
Unpacking
reducing airborne concentrations below the Occupational Exposure Limit (OEL). It is essential to
Inspect the package contents for shipping damage and ensure all components are present (Refer to Fig. 27). The product
follow all instructions and government regulations on the use of this product, including wearing
should be inspected before each use following the procedures in the Inspection section of this User Instruction.
the complete respirator system during all times of exposure in order for the product to help protect
the wearer. Misuse of respirators may result in overexposure to contaminants and lead to
sickness or death. For proper use, see supervisor, refer to the product User Instructions or contact
3M Technical Service.
List of Warnings and Cautions within these User Instructions
W WARNING
Failure to follow these instructions may reduce respirator performance, expose you to contaminants
above the OEL, and may result in sickness or death.
•
To help maintain a good seal between the face and the faceseal, the respirator faceseal must
be clear of obstructions at all times. Do not use with beards or facial hair that prevent direct
contact between the face and the respirator faceseal. Do not use with corrective eyeglasses. If
corrective eyeglasses are required, a 3M™ Spectacle Kit must be used inside the respirator.
•
Do not clean respirator with solvents. Cleaning with solvents may degrade some respirator
components and reduce respirator effectiveness.
•
Inspect all respirator components before each use to ensure proper operating condition.
•
Do not alter, misuse, or abuse this respirator.
Fig. 1
W MISE EN GARDE
Ce respirateur protège contre certains contaminants en suspension dans l'air. Une mauvaise
utilisation peut provoquer des problèmes de santé ou la mort. Pour tout renseignement sur
l'utilisation adéquate de ce produit, consulter son superviseur, lire les directives d'utilisation ou
communiquer avec 3M, aux É.-U., au 1 800 243-4630. Au Canada, appelez le service technique au
1 800 267-4414. Au Brésil, composer le 0800-0550705.
AVANT
Ces directives d'utilisation fournissent uniquement des renseignements relatifs à l'utilisation des masques. Des
Fig. 15
renseignements importants sont inclus dans les directives d'utilisation de chaque système de fi ltration d'air utilisé avec
les masques complets FF-401, FF-402 et FF-403 3M
MC
. Lire toute les directives d'utilisation et les mises en garde avant
d'utiliser ce produit. Conserver ces directives d'utilisation à titre de référence. Pour toute question sur ces produits,
communiquer avec le Service technique de 3M.
Pour tout renseignement supplémentaire sur cette norme, communiquer avec l'OSHA à l'adresse www.OSHA.gov.
Consulter un hygiéniste industriel ou appeler le Service technique de 3M pour toute question concernant l'application de
Aux États-Unis :
Au Canada :
ces produits aux exigences de votre travail.
Consulter le site Internet : www.3M.com/PPESafety
Consulter le site Internet : www.3M.com/CA/OccSafety
Tableau 1 : Sections principales de la norme 29 CFR 1910.134 de l'OSHA
Soutien technique : 1 800 243-4630
Soutien technique : 1 800 267-4414
Au Brésil :
Section
Description
Consulter le site Internet : www.3mepi.com.br
Soutien technique : 0800-0550705
A
Pratique admissible
B
Défi nitions
Utilisation prévue
C
Appareils de protection respiratoire
Les respirateurs à masque complet réutilisables ultra FX 3M
MC
de série FF-400 (FF-401, FF-402 et FF-403) sont conçus
D
Sélection des respirateurs
pour fournir une protection contre certains contaminants en suspension dans l'air lorsqu'on les utilise conformément
aux directives et restrictions d'utilisation et aux règlements sur la santé et la sécurité en vigueur. Tous les masques
E
Évaluations médicales
de série FF-400 sont conformes à la norme Z87.1-2003 de l'ANSI en matière de protection oculaire et faciale limitée
F
Essai d'ajustement
exigeant une résistance élevée aux chocs.
G
Utilisation des respirateurs
W MISE EN GARDE
H
Maintenance et entretien des respirateurs
Les respirateurs qui sont bien choisis, utilisés et entretenus aident à protéger contre certains
I
Qualité de l'air respirable et utilisation
contaminants en réduisant les concentrations de contaminants en suspension dans l'air sous
la limite d'exposition permise en milieu de travail. Il est essentiel de suivre toutes les directives
J
Identifi cation des cartouches,
d'utilisation et les réglementations gouvernementales portant sur l'utilisation de ce produit, ce qui
comprend le port du système de protection respiratoire complet pendant tout le temps d'exposition
afi n que le produit puisse aider à protéger l'utilisateur. Une mauvaise utilisation des respirateurs
peut résulter en une surexposition de l'utilisateur aux contaminants et causer des problèmes
de santé ou la mort. Pour tout renseignement sur l'utilisation adéquate, consulter son superviseur,
lire les directives d'utilisation ou communiquer avec le Service technique de 3M.
Liste des mises en garde et des avertissements énoncés dans les présentes
directives d'utilisation
W MISE EN GARDE
Tout manquement à ces directives peut réduire le rendement du respirateur, vous surexposer à des
contaminants au-dessus de la limite d'exposition permise en milieu de travail et peut causer des
problèmes de santé ou la mort.
•
Pour aider à maintenir une bonne étanchéité entre le visage et la membrane d'étanchéité
faciale, la membrane d'étanchéité faciale doit être exempte de toute obstruction en tout
temps. Ne pas utiliser si l'on porte la barbe ou des poils susceptibles d'empêcher un contact
direct entre le visage et la membrane d'étanchéité faciale. Ne pas utiliser avec des lunettes
de correction de la vue. Si l'on doit porter des lunettes, utiliser la trousse pour lunettes 3M
MC
à
l'intérieur du respirateur.
•
Ne pas nettoyer le respirateur à l'aide de solvants. Le nettoyage du respirateur avec des
solvants peut endommager certains de ses composants et en réduire l'effi cacité.
•
Inspecter tous les composants du respirateur avant chaque utilisation afi n de s'assurer qu'il est
en bon état de fonctionnement.
•
Ne pas modifi er ni utiliser le respirateur de façon abusive ou incorrecte.
AVERTISSEMENT
Le fait de ne pas mettre convenablement au rebut les cartouches, les fi ltres et les respirateurs usés et contaminés
par des substances dangereuses peut entraîner une exposition personnelle et des dommages environnementaux.
La manipulation, le transport et la mise au rebut des cartouches, des fi ltres et des respirateurs usés doivent être
conformes aux lois fédérales, provinciales et municipales applicables.
Avertissements et restrictions du NIOSH pour une utilisation par pression négative
Les restrictions suivantes peuvent s'appliquer. Consulter l'étiquette d'homologation du NIOSH. Lorsqu'on utilise le
masque FF-400 comme composante d'une confi guration de respirateur à adduction d'air, consulter les directives
d'utilisation qui accompagnent le dispositif de fi ltration d'air pour obtenir des renseignements sur les avertissements et
les restrictions du NIOSH.
A - Ne pas utiliser lorsque la concentration ambiante en oxygène est inférieure à 19,5%.
B - Ne pas utiliser si l'atmosphère présente un danger immédiat pour la vie ou la santé.
C - Ne pas utiliser en présence de concentrations supérieures au taux établi par la réglementation.
H - Se conformer aux horaires de changement établis des cartouches et boîtiers fi ltrants ou tenir compte de l'indicateur
de fi n de durée utile (IFDU) pour s'assurer de remplacer la cartouche et les boîtiers fi ltrants avant la fi n de leur
durée de protection.
J - L'utilisation et l'entretien inadéquats de ce produit peuvent provoquer des blessures ou la mort.
L - Pour le changement des cartouches, des boîtiers fi ltrants et/ou des fi ltres, suivre les directives d'utilisation du
fabricant.
M - Tous les respirateurs homologués doivent être sélectionnés, ajustés, portés et entretenus conformément aux
règlements de la MSHA, de l'OSHA et à tout autre règlement en vigueur.
N - Ne jamais substituer ou modifi er ce produit ni lui ajouter ou lui enlever des pièces. N'utiliser que les pièces de
rechange exactes indiquées par le fabricant.
O - Consulter les directives d'utilisation et/ou les manuels d'entretien pour obtenir des renseignements sur l'utilisation
et l'entretien de ces respirateurs.
P - Le NIOSH n'évalue pas les respirateurs comme masques chirurgicaux.
S - Des directives d'utilisation spéciales ou d'importance capitale et/ou des restrictions d'utilisation spécifi ques
s'appliquent. Consulter les directives d'utilisation avant de porter ce produit.
S - Directives d'utilisation spéciales ou d'importance capitale
Les cartouches contre les vapeurs organiques (6001i et 60921i) et les cartouches contre les vapeurs de mercure (6009S
et 60929S) 3M
MC
sont dotées d'un indicateur de fi n de durée utile 3M
MC
(IFDU) passif. L'indicateur doit être facilement
visible par celui qui porte le respirateur, sans aucune manipulation. Si on ne peut pas voir facilement l'IFDU, utiliser
un miroir pour l'observer ou se fi er à un collègue qui peut le voir, ou aller dans un endroit propre, retirer le respirateur
et observer l'IFDU. Ne pas se fi er uniquement à l'IFDU pour les vapeurs organiques à moins que son employeur aie
déterminé que cela est approprié pour son lieu de travail. Consulter les directives d'utilisation des cartouches 6001i
ou 60921i pour obtenir de plus amples renseignements, y compris des directives spéciales concernant l'IFDU. Mettre
les cartouches contre les vapeurs de mercure au rebut lorsque l'IFDU prend la couleur de produit périmé indiquée
sur l'étiquette des cartouches, 30 jours après l'ouverture de l'emballage, lorsque l'IFDU devient sale ou endommagé,
lorsqu'on commence à percevoir l'odeur des vapeurs ou des gaz ou conformément à la durée utile du chlore, selon la
première éventualité Les vapeurs de mercure sont inodores.
Programme de gestion du respirateur
L'utilisation professionnelle des respirateurs doit être conforme avec les normes de santé et de sécurité applicables.
Selon la loi, les employeurs américains doivent établir un programme de protection respiratoire écrit qui satisfaits aux
exigences de la norme de protection respiratoire 29 CFR 1910.134 de l'OSHA et toute norme de l'OSHA applicable
à une substance spécifi que. Au Canada, se conformer à la norme Z94.4 de la CSA et/ou aux exigences de l'autorité
compétente, tel qu'approprié. Au Brésil, suivre le programme de protection respiratoire du ministère du Travail.
Assembly
These instructions MUST be followed each time respirator is worn.
3M™ Cartridge 6000 Series, Filter 7093, and Cartridge/Filter 7093C Assembly (Fig. 1, 2)
Donning Respirator
1. Align the cartridge or fi lter notch with the small solid bayonet lug on facepiece and push together.
NOTE: Two key factors in effective donning are placing the nose in the nose cup initially to center the respirator
2. Turn cartridge or fi lter clockwise until it is fi rmly seated and cannot be further turned (about 1/4 turn).
on the face and to tighten the straps twice following steps 4, 5, 6, fi rst to snug the respirator then repeating
steps 4, 5, 6 a second time to secure the facepiece seal. Care must be taken to not over tighten bottom straps
3. Repeat with second cartridge or fi lter.
on the fi rst turn.
3M™ Filter 2000 Series (Fig. 3)
1. Fully loosen all six headstraps.
1. Align opening of fi lter with fi lter attachment on facepiece and push together.
2. Hold the front of the facepiece with one hand and the straps/comfort cradle away from the facepiece with the other
2. Turn fi lter clockwise until it is fi rmly seated and cannot be further turned.
hand, creating an opening for the head. Pull the respirator assembly down over the head and face through the
3. Repeat for second fi lter.
opening. Place the nose in the nose cup and chin in the chin cup area then press the facepiece fi rmly and evenly
against the face (Fig. 13).
Filter Assembly (for 3M™ Filters 5N11 and 5P71)
3. Pull head harness to back of head (Fig. 13).
1. Place fi lter into 3M™ Retainer 501 so printed side of fi lter faces the cartridge.
2. Press cartridge into fi lter retainer. It should snap securely into fi lter retainer. When correctly installed, fi lter should
NOTE: Repeat the sequence of steps 4-6 twice, once to snug the straps and take up slack and a second time to secure
completely cover face of cartridge (Fig. 4).
and seal the respirator facepiece to the face.
3. To replace fi lter, remove retainer by lifting on tab.
4. Tighten the bottom straps one at a time. Be careful to tighten both sides equally (Fig. 14).
In Brazil, the 3M™ Filter 5935BR can be used with the 3M™ Filter Retainer 501 on the 3M™ Full Facepiece FF-400
5. Tighten the middle straps one at a time. Be careful to tighten both sides equally.
Series.
6. Tighten the top straps one at a time. Be careful to tighten both sides equally.
7. Recheck all straps to ensure that they are tight and evenly tensioned so that the head harness is centered on the
3M™ Adapter Assembly 502
back of your head. Ensure that the straps and tabs lay fl at against your head.
1. Align adapter over cartridge. Engage front snap by squeezing front of cartridge and adapter together, placing
If possible, have a partner verify that you have donned your respirator properly. Perform a user seal check as described
thumbs of both hands over top of adapter and fi ngers along bottom sides of cartridge (Fig. 5).
below.
2. Engage back snap by squeezing back side of cartridge and adapter together using the same hand positions. An
audible click should be heard as each snap is engaged (Fig. 6).
Initial Selection of Small, Medium or Large Facepieces
3. Place fi lter onto the fi lter holder so that fi lter comes into even contact with gasket. Twist clockwise a quarter turn
More than one facepiece size may need to be donned before you determine the best size for your face.
until it is fi rmly seated and fi lter cannot be turned further. Repeat for second fi lter.
After donning verify the following.
IMPORTANT: The 3M™ Adapter Assembly 502, once installed on a 3M™ Cartridge 6000 Series, is not to be
1. Nothing (e.g. hair, jewelry, etc.) comes between the face and the sealing surface of the respirator. Facial hair or
removed or reused. Removal or reuse may result in leakage, overexposure, sickness or death.
sideburns may have to be trimmed.
2. Bottom straps and middle straps do not cut into ears.
3M™ Filter Adapter 603 Assembly and Filter Attachment (for 3M™ Filters 5N11 and
3. Eyes are looking between center and top 1/3 of the lens.
5P71)
4. Respirator does not press so tightly against face that eyes are partly closed.
1. Align notch on edge of 603 adapter with facepiece mark as shown (Fig. 7).
5. Bottom of the mask assembly does not cut into throat.
2. Turn adapter 1/4 turn clockwise to stop. To remove adapter, turn 1/4 turn counterclockwise (Fig. 8).
6. No visible gaps between the face seal and the face.
3. Place fi lter into 501 retainer with fi lter printing facing towards the 603 adapter. Snap together and ensure the fi lter
7. Skin in front of ear is not wrinkled.
seal is free from creases or gaps (Fig. 9).
8. Nosecup does not obscure vision.
In Brazil, the 3M™ Filter 5935BR can be used with the Filter Adaptor 603 and the Filter Retainer 501 on the 3M™ Full
9. Ensure that other safety equipment does not interfere with buckles or fi t of respirator.
Facepiece, FF-400 Series.
If any of these criteria are not met, it is possible that the respirator may not fi t you adequately. Selecting a different
size facepiece may provide you with a more adequate fi t. More than one facepiece size may need to be donned before
3M™ Dual Airline Respirator Assembly
you determine the best size for your face. A fi t test can confi rm adequate fi t. If you have further questions, see your
User must follow Dual Airline Supplied Air Respirator User Instructions provided with the 3M™ Dual Airline Supplied Air
supervisor.
Respirators.
User Seal Checks
Assembly of Dual Airline Breathing Tubes
Always check the seal of the respirator on your face before entering a contaminated area according to the
1. Hold the facepiece in front of you so that the 3M logo is facing you. Align the two branches of the breathing tube
instructions provided below for your specifi c respirator confi guration. The positive pressure seal check is the primary
over the two bayonet mounts on facepiece (Fig. 10). For 3M™ Breathing Tubes SA-1500 or SA-1600, make sure
and preferred method for verifi cation of a good seal for all cartridge and fi lter confi gurations. The positive pressure seal
that 3M logo on breathing tube and on facepiece are both facing towards you. For 3M™ Breathing Tubes SA-2500
check is the only method for this respirator with Filters 2000 Series. The negative pressure user seal check can also be
or SA-2600, make sure that the 3M logo on breathing tube is facing in opposite direction to 3M logo on facepiece.
done for additional verifi cation of a good seal for this respirator with Cartridges 6000 Series and Filters 7093/7093C. Be
2. Twist each branch of breathing tube clockwise a quarter turn until it is fi rmly seated in the bayonet and cannot
careful not to disturb the respirator seal by pressing too forcefully during negative pressure seal checks.
be turned further (Fig. 11 and 12). Do not forcibly overturn as the bayonet could be damaged. SA-1500/SA-2500
shown.
IMPORTANT: If you cannot achieve a proper seal, DO NOT enter the contaminated area. See your supervisor.
3. Attach airline to approved air regulators per pressure schedules in dual airline, supplied air respirators User
Before assigning any respirator to be worn in a contaminated area, a qualitative or quantitative fi t test MUST
Instructions.
be performed per OSHA Standard 1910.134, CSA Standard Z94.4 or Brazil Respiratory Protection Program of the
Ministry of Labor.
Assembly of 3M™ Combination Dual Airline Breathing Tubes with Cartridges and/or
Positive Pressure User Seal Check for all approved confi gurations and required for
Filters
Filters 2000 Series
The SA-1600 (front-mounted) and SA-2600 (back-mounted) versions of the 3M™ Dual Airline Breathing Tubes allow
use of selected, NIOSH-approved 3M™ Cartridge 6000 Series and 3M™ Filter 2000 Series. For the listing of approved
1. Remove the exhalation valve cover by depressing bottom of cover with thumb and sliding cover up, parallel with
cartridges and fi lters, reference the NIOSH approval label included with 3M™ Dual Airline Adapter kits.
lens.
1. Attach SA-1600 or SA-2600 breathing tubes to facepiece per the procedures outlined previously. The procedure is
2. Place the palm of your hand over the exhalation valve and exhale gently (Fig. 15). Care must be taken to ensure a
identical to the SA-1500 and SA-2500 models.
good seal of the exhalation valve. To do this, cover the entire face of the blue valve with the base of the palm.
2. Make a selection of cartridges and/or fi lters that meets your respiratory protection requirements, and attach to the
3. If the facepiece bulges slightly and no air leaks are detected between the face and the facepiece, a proper seal has
outer bayonets of SA-1600 or SA-2600 breathing tubes.
been obtained.
4. If faceseal air leakage is detected, reposition the respirator on your face and/or readjust the tension of the straps to
3. Don facepiece per procedures outlined in Donning Respirator section of instructions.
4. After being properly fi t tested, perform a positive and negative pressure user seal check each time the respirator is
eliminate leakage and recheck seal.
donned per procedures outlined in User Seal Check section of instructions.
5. Replace exhalation valve cover by placing open end at top of exhalation valve assembly, guide tabs underneath
valve cover assembly and slide downward until the valve cover snaps in place.
If you cannot achieve a proper fi t, DO NOT enter contaminated area. See your supervisor.
If faceseal air leakage is detected, reposition the respirator on your face and/or readjust the tension of the straps to
To assemble 3M™ Dual Airline Combination Breathing Tubes with 3M™ Cartridges/Filters, the facepiece inhalation
eliminate the leakage and recheck seal. Care must be taken when performing the positive pressure seal check not to
valves must be removed.
exhale too hard. The aim is to check the seal, not disturb the seal between the mask and the face.
APF
IMPORTANT: If the facepiece is to be used in air-purifying mode (without using the SA-1600 or SA-2600 breathing
Negative Pressure User Seal Check with Cartridges 6000 Series
10/50
1
tubes), the inhalation valves must be replaced in the facepiece before use.
1. Place palms of hands to cover face of cartridge or open area of 3M™ Filter Retainer 501and inhale gently. If you
feel the facepiece collapse slightly and pull closer to your face with no leaks between the face and facepiece, a
Using the 3M™ Combination Dual Airline Breathing Tubes without Cartridges
1000
proper seal has been obtained (Fig. 16).
and/or Filters
2. If faceseal air leakage is detected, reposition the respirator on your face and/or readjust the tension of the straps to
To use the 3M™ Combination Dual Airline Breathing Tubes (SA-1600 and SA-2600) without cartridges or fi lters, attach a
eliminate leakage and recheck seal.
3M™ Bayonet Cap 6880 to each outer bayonet mount on the dual airline breathing tube. When used as a straight, Type
C, continuous fl ow supplied air respirator, the Assigned Protection Factor is 1000 times the PEL, OEL or TLV guidelines
Be careful not to disturb the respirator seal by pressing too forcefully during negative pressure seal checks.
for full facepiece respirators.
NOTE: Use of fi lter retainer 501 may aid respirator wearer in conducting a negative pressure user seal check.
FITTING INSTRUCTIONS
Negative Pressure User Seal Check with Filters 7093/7093C
1. Using hands squeeze or press fi lter covers toward facepiece and inhale gently. If you feel the facepiece collapse
W WARNING
slightly and pull closer to your face with no leaks between the face and facepiece a proper seal has been obtained
Failure to follow these instructions may reduce respirator performance, expose you to contaminants
(Fig. 17).
above the OEL, and may result in sickness or death.
2. If faceseal air leakage is detected, reposition the respirator on your face and/or readjust the tension of the straps to
•
To help maintain a good seal between the face and the faceseal, the respirator faceseal must
eliminate the leakage and recheck seal.
be clear of obstructions at all times. Do not use with beards or facial hair that prevent direct
contact between the face and the respirator faceseal. Do not use with corrective eyeglasses. If
Be careful not to disturb the respirator seal by pressing too forcefully during negative pressure seal checks.
corrective eyeglasses are required, a 3M™ Spectacle Kit must be used inside the respirator.
Fig. 2
Fig. 3
Fig. 4
Fig. 16
Fig. 17
Fig. 18
W
Negative Pressure User Seal Check with Dual Airline
1. Disconnect airline hose from air control valve.
2. With breathing tube still connected to the air control valve inhale gently. If you feel facepiece collapse slightly and
pull closer to your face with no leaks between the face and facepiece, a proper seal has been obtained.
3. For combination dual airline where cartridges or fi lters are attached perform user seal check as described above
under the appropriate cartridge or fi lter that is being used.
4. If faceseal air leakage is detected, reposition the respirator on your face and/or readjust the tension of the straps to
eliminate the leakage and recheck seal.
IMPORTANT: If you cannot achieve a proper seal, DO NOT enter the contaminated area. See your supervisor.
Before assigning any respirator to be worn in a contaminated area, a qualitative or quantitative fi t test MUST be
performed per OSHA Standard 1910.134, or CSA Standard Z94.4.
RESPIRATOR REMOVAL
1. Fully loosen all six head straps by lifting up on buckles.
2. Remove respirator by pulling straps over head.
FIT TESTING
The effectiveness of a respirator will be reduced if it is not fi tted properly. Therefore, either qualitative or quantitative
fi t testing must be conducted prior to the respirator being used. Fit testing is a U.S. Occupational Safety and Health
Administration (OSHA), a Canadian CSA and a Brazilian BMOL requirement. Fit testing should be conducted
using the heaviest cartridge, canister, fi lter or combination that each wearer will use in their work environment.
Respirators should also be fi t tested while wearing any personal protective equipment (PPE) the wearer may use in their
work environment that may affect the fi t of the respirator (e.g. hoods, hardhats, hearing protectors, etc.). For further
information concerning fi t testing, contact 3M PSD Technical Service.
Quantitative Fit Testing
Quantitative Fit Testing (QNFT) can be conducted using a 3M™ Fit Test Adapter 601 and P100 fi lters such as the 3M™
Particulate Filters 2091 or 7093.
Qualitative Fit Testing
Qualitative Fit Testing (QLFT) with the 3M™ Qualitative Fit Test Apparatus FT-10 or FT-30 can be conducted using any of
the NIOSH approved particulate fi lters.
Entering and Exiting a Contaminated Area
•
Airborne contaminants which can be dangerous to your health include those that are so small you may not be able
to see or smell them.
•
Always conduct a user seal check before entering a contaminated area.
•
Leave the contaminated area immediately if any of the following conditions occur:
• Any part of the respirator becomes damaged.
• Breathing becomes diffi cult.
• Your feel dizzy or your vision is impaired.
• You taste or smell contaminants.
• Your face, eyes, nose or mouth become(s) irritated.
• You suspect that the concentrations of contaminants may have reached levels at which this respirator may no
longer provide adequate protection.
•
Do not wear this respirator in areas where:
• Atmospheres are oxygen defi cient.
• Contaminant concentrations are unknown.
• Contaminant concentrations are Immediately Dangerous to Life or Health (IDLH).
• Contaminant concentrations exceed the Maximum Use Concentration (MUC) determined using the Assigned
Protection Factor (APF) for the specifi c respirator system or the APF mandated by specifi c government standards,
whichever is lower.
INSPECTION, CLEANING, AND STORAGE
W WARNING
Failure to follow these instructions may reduce respirator performance, expose you to contaminants
above the OEL, and may result in sickness or death.
•
Do not clean respirator with solvents. Cleaning with solvents may degrade some respirator
components and reduce respirator effectiveness.
•
Inspect all respirator components before each use to ensure proper operating condition.
Inspection Procedure
This respirator must be inspected before each use to ensure that it is in good operating condition. Any damaged or
defective parts must be replaced before use. Do not enter a contaminated area with damaged or defective parts. The
following inspection procedure is recommended.
1. Check facepiece for cracks, tears and dirt. Be certain facepiece, especially faceseal area, is not distorted.
2. Examine inhalation valves for signs of distortion, cracking or tearing.
3. Make sure that head straps are intact and have good elasticity.
4. Examine all plastic parts for signs of cracking or fatiguing. Ensure bayonet gaskets are in good condition.
5. Remove exhalation valve cover and examine exhalation valve and valve seat for signs of dirt, distortion, cracking or
tearing. Replace exhalation valve cover.
6. Inspect lens for any damage that may impair respirator performance or vision.
Cleaning and Storage
Cleaning is recommended after each use.
1. Remove cartridges, fi lters and/or breathing tubes, and nose cup. The exhalation valve cover, exhalation valve
assembly, speaking diaphragm, bayonet assembly, lens and faceseal can also be disassembled if necessary.
2. Clean facepiece (excluding fi lters and cartridges), by immersing in warm cleaning solution, water temperature not to
exceed 120°F (49°C), and scrub with soft brush until clean. Add neutral detergent if necessary. Do not use cleaners
containing lanolin or other oils.
3. Disinfect facepiece by soaking in a solution of quaternary ammonia disinfectant or sodium hypochloride (1oz. [30
mL] household bleach in 2 gallons [7.5 L] of water), or other disinfectant.
4. Rinse in fresh, warm water and air dry in non-contaminated atmosphere. Do not replace nose cup until facepiece is
completely dry.
5. Respirator components must be inspected prior to each use. A respirator with any damaged or deteriorated
components should be repaired or discarded.
6. The cleaned respirator should be stored away from contaminated areas when not in use.
1
2
Fig. 5
Fig. 6
Fig. 7
Fig. 8
Fig. 19
Fig. 20
Fig. 21
Fig. 22
W
SPECIFICATIONS
Particulate fi lters must be replaced if they become damaged, soiled or if increased breathing resistance occurs. N-series
fi lters should not be used in environments containing oils. R-series fi lters may be limited to 8 hours of continuous
Contact 3M Technical Service for technical specifi cations (e.g. weight, materials of construction, etc). This product
or intermittent use if oil aerosols are present. In environments containing only oil aerosols, P-series fi lters should be
contains no components made from natural rubber latex.
replaced after 40 hours of use or 30 days, whichever is fi rst.
Cartridge and Filter Selection and Approvals
REPLACEMENT PARTS INSTRUCTIONS
Before using any of these products, the user must read the specifi c Use For, Use Limitations and Warning information
in the User Instructions and product documentation or call 3M PSD Technical Service. Do not exceed maximum use
3M™ Ultimate FX Full Facepiece Assembly FF-400
concentrations established by local regulatory agencies.
The facepiece assembly consists of the head harness assembly, nose cup assembly, speaking diaphragm assembly,
exhalation valve assembly, lens assembly, faceseal (small, medium or large), frame assembly (frame, nut and screw),
bayonet assemblies and exhalation valve cover. To disassemble lens assembly from faceseal, remove the Phillips screw
3M™ 6000 Series Cartridges
from frame, pull the frame away from the faceseal and remove faceseal from lens assembly.
Valve Cover Replacement
1. Remove valve cover by depressing bottom of cover with thumb and sliding cover up, parallel with lens (Fig. 18).
NIOSH Approvals
2. Replace valve cover by placing open end at top of exhalation valve assembly, guide tabs underneath valve cover
Certain Organic Vapors
X
X
X
X
X
X
X
X
X
X
X
X
assembly and slide downward until the valve cover snaps in place.
Chlorine
X
X
X
X
X
X
X
X
Exhalation Valve Assembly Replacement
Hydrogen Chloride
X
X
X
X
X
X
X
1. Remove valve cover by depressing bottom of cover with thumb and sliding cover up, parallel with lens (Fig. 18).
2. Remove exhalation valve assembly by turning counter clockwise 1/4 turn (Fig. 19).
Sulfur Dioxide
X
X
X
X
X
X
X
X
X
3. Replace exhalation valve assembly by aligning lugs with exhalation valve assembly opening in lens and turning
Chlorine Dioxide
X
X
X
X
clockwise 1/4 turn until fi rm stop.
4. Replace valve cover assembly.
Hydrogen Sulfi de
X
X
X
X
X
X
X
Exhalation Valve Replacement
Hydrogen Fluoride
X
X
X
X
X
1. Remove valve cover by depressing bottom of cover with thumb and sliding cover up, parallel with lens (Fig. 18).
Formaldehyde
X
X
X
X
2. Remove exhalation valve assembly by turning counter clockwise 1/4 turn (Fig. 19).
Ammonia
X
X
X
X
3. Grasp valve and pull each valve stem out from valve seat.
Methylamine
X
X
X
X
4. Inspect valve seat making certain it is clean and in good condition.
5. Place new exhalation valve replacement over the exhalation port by inserting stems and pulling through from the
Mercury Vapor
X
X
opposite side until they are both snapped in place.
P100 Particulate Filter
X
X
X
X
X
X
X
X
X
6. Replace exhalation valve assembly.
7. Replace valve cover.
** 3M Recommended for use against methylbromide or radioiodine up to 5ppm with daily cartridge replacement.
NOTE: Conduct a negative pressure user seal check to ensure exhalation valve is functioning properly.
NOTE: Not NIOSH approved for use against methylbromide or radioiodine.
Nose Cup Assembly Replacement
The nose cup assembly consists of a nose cup and inhalation valves. It is designed to install directly to the lens and
3M™ Filters
comfortably fi t over the respirator wearer's mouth and nose to aid in purging exhaled breath and prevent lens fogging.
1. Remove the nose cup assembly by grasping the nose cup below the inhalation valve and gently pulling up and away
from lens assembly (Fig. 20).
NIOSH Approvals
2. To replace, position nose cup assembly onto lens assembly by aligning hard plastic ring on nose cup with lens
assembly and pressing fi rmly on center tabs until bottom nose cup tabs snap in place (Fig. 21).
P100
X
X
X
X
X
X
X
X
3. Press down on top of nose cup ring until tabs snap in place.
P95
X
X
X
X
Speaking Diaphragm Assembly Replacement
N95
X
X
1. Remove the nose cup assembly by grasping the nose cup below the inhalation valve and gently pulling up and away
from lens assembly (Fig. 20).
HF
X
X
2. Remove valve cover by depressing bottom of cover with thumb and sliding cover up, parallel with lens (Fig. 18).
3. Remove exhalation valve assembly by turning counter clockwise 1/4 turn.
4. Remove speaking diaphragm assembly by turning counter clockwise 1/4 turn (Fig. 22).
Nuisance level relief*
5. Replace speaking diaphragm assembly by aligning speaking diaphragm lugs with speaking diaphragm opening in
Acid gases
X
X
X
X
X
lens assembly.
Organic Vapors
X
X
X
X
6. Turn clockwise 1/4 turn until fi rm stop.
7. Replace exhalation valve assembly.
* 3M recommended for relief against nuisance levels of acid gas or organic vapors. Nuisance level refers to
8. Replace valve cover assembly.
concentrations not exceeding OSHA PEL or applicable exposure limits, whichever is lower. Do not use for respiratory
9. Replace nose cup assembly (Fig. 21).
protection against acid gas/organic vapors.
** 3M recommended for ozone protection up to 10 times the OSHA PEL or applicable government occupational exposure
Bayonet Assembly Replacement
limits, whichever is lower.
The bayonet assembly consists of the bayonet ring, bayonet, and inhalation gasket.
1. Remove the nose cup assembly by grasping the nose cup below the inhalation valve and gently pulling up and away
NOTE: Not NIOSH approved for use against ozone.
from lens assembly (Fig. 20).
2. Remove bayonet ring by rotating counter clockwise 1/4 turn (Fig. 23).
In Brazil, the 5935BR fi lter is approved as a NIOSH N95 fi lter and a BMOL P3 fi lter.
3. Remove bayonet from lens assembly (Fig. 24).
4. Align key on new bayonet with slot on lens assembly and hold fi rmly in place.
3M™ Filter Adapters and Retainers
5. Align lugs on ring with slots on bayonets and rotate clockwise 1/4 turn until fi rm stop.
6. Replace nose cup assembly (Fig. 21).
Number
Description
Inhalation Valve Replacement
501
Filter Retainer for use with Cartridge 6000 Series and Filters 5N11 and 5P71
Inhalation valves are located on bayonet assemblies at the facepiece inhalation ports and inside the nose cup inhalation
502
Filter Adapter for use with Cartridge 6000 Series and Filters 2000 and 7093/7093C
ports. These valves should be inspected before each respirator use and replaced whenever valves become damaged or
lost.
603
Filter Adapter for use with Filters 5N11 and 5P71
1. Remove existing valve(s) by grasping valve and pulling valve stem out from valve seat.
2. Install new valve(s) onto valve seat(s) by pushing through valve stem seat(s). Be certain valve stem(s) is fully
In Brazil, the 3M™ Filter 5935BR can be used with the Filter Adaptor 603 and the Filter Retainer 501 on the 3M™ Full
engaged through valve seat(s), lays fl at, and moves freely (spins).
Facepiece, FF-400 Series.
Head Harness Assembly Replacement
1. Remove existing head harness by unsnapping each buckle from the buttons (Fig. 25).
Service Life of Chemical Cartridges and Particulate Filters
2. Pull the end tabs of the head harness, at an angle, out through the buckles. Note the orientation of the head harness
tabs and buckles for re-assembly.
CAUTION
3. Place the head harness down on a fl at surface with the 3M logo facing up (Fig. 26).
Failure to properly dispose of spent cartridges, fi lters, or respirators contaminated by hazardous materials
4. Thread the end tabs of the head harness through the buckles and pull each through until the end tab is
can result in personal exposures as well as environmental harm. Handling, transportation and disposal of spent
completely through the buckle.
cartridges, fi lters, or respirators must comply with all applicable federal, state, provincial, and local laws and
5. Place the facepiece lens down on a fl at surface and lay the new head harness and buckle assembly over the
regulations.
facepiece. The head harness should be assembled with the 3M logo facing up.
6. Snap each buckle into corresponding button, ensuring that straps are not twisted.
3M™ Chemical Cartridges 6000 Series must be used before the expiration date on cartridge packaging. The useful
Lens Frame Assembly Replacement
service life of these cartridges will depend upon activity of wearer (breathing rate), specifi c type, volatility and
The lens frame assembly consists of a lens frame, nut, and screw.
concentration of contaminants and environmental conditions such as humidity, pressure, and temperature. Cartridges
must be replaced in accordance with an end of service life indicator (ESLI), established change schedule, regulations or
1. Remove the Phillips screw from frame. Pull the frame away from the faceseal (Fig. 27).
earlier if smell, taste or irritation from contaminants is detected.
2. Position new frame, aligning marks top and bottom. Install and securely tighten screw. Make certain alignment
marks are properly aligned top and bottom with all components (Fig. 28).
Fig. 9
Fig. 10
Fig. 11
Fig. 12
Fig. 23
Fig. 24
Fig. 25
Fig. 26
Lens Assembly Replacement
The lens assembly consists of a hard-coated polycarbonate lens.
1. Remove the nose cup assembly by grasping the nose cup below the inhalation valve and gently pulling up and away
from lens assembly (Fig. 20).
2. Remove the valve cover by depressing bottom of cover with thumb and sliding cover up, parallel with lens (Fig. 18).
3. Remove exhalation valve assembly by turning counter-clockwise 1/4 turn and withdrawing from lens center port
(Fig. 19).
4. Remove speaking diaphragm by turning counter clockwise 1/4 turn (Fig. 22).
5. Remove bayonet assemblies by rotating bayonet rings counter clockwise 1/4 turn (Fig. 23) and removing bayonets
from the lens assembly (Fig. 24).
6. Remove the Phillips screw from frame. Pull the frame away from the faceseal (Fig. 27).
7. Remove faceseal from lens.
8. Place new lens and faceseal together aligning marks at top and bottom. Position frame, again aligning marks top and
bottom. Install and securely tighten screw. Make certain alignment marks are properly aligned top and bottom with all
components (Fig. 28).
9. Install speaking diaphragm.
10. Install exhalation valve assembly.
11. Replace exhalation valve cover.
12. Replace bayonet assemblies.
13. Replace nose cup assembly (Fig. 21).
3M™ Ultimate FX Full Facepiece FF-400 Replacement Parts and Accessories
Number
Description
FF-401
Small
FF-402
Medium
FF-403
Large
Number
Description
FF-400-01
Head Harness Buckle
FF-400-04
FF-400-02
Head Harness Button
FF-400-06
FF-400-03
Lens Assembly
FF-400-01
FF-400-04
Head Harness
FF-400-05
FF-400-05
Frame Assembly w/ Screw
FF-400-11
FF-400-06
Comfort Cradle
FF-400-02
FF-400-07
Exhalation Valve Assembly
FF-400-03
FF-400-08
Bayonet Assembly Inhalation Valve
7582
FF-400-09
Exhalation Valve Cover (Standard)
FF-400-10
Exhalation Valve Cover (Solid)
FF-400-08
7583
FF-400-11
Nose Cup Assembly
FF-400-13
Speaking Diaphragm Assembly
FF-400-20
Spectacle Kit
FF-400-09
FF-400-07
FF-400-13
FF-400-10
7582
Inhalation Valve
7583
3M™ Cool Flow™ Exhalation Valve
Number
Description
FF-400-15
Lens Cover
FF-400-17
Semi-Permanent Lens Cover
504
Respirator Cleaning Wipes
601
Quantitative Fit Test Adapter
For Compliance in Brazil NOTE:
1. In Brazil, according to the Respiratory Protection Program of the Ministry of Labor, do not use when
concentrations of contaminants are greater than 100 times the permissible exposure limit in air-purifying mode.
2. Do not use in defi cient or enriched oxygen atmospheres.
3. Storage, Transportation and Care: store in a clean and dry place and away from contaminants and extreme
temperature and humidity.
4. The components of this respirator are made of materials which are not expected to cause adverse health effects.
5. It is necessary to have special care to use this product in explosives atmospheres.
6. In Brazil do not use powered air-purifying respirators if airfl ow is less than 120 lpm for tight fi tting facepieces or
170 lpm for hoods and/or helmets.
Product Manufacturing Date
The parts of the product show markings that bring information of manufacturing date, and its reading is described as
in the example below:
Date Code = 12th month 1999 (12/99)
12
11
1
10
2
9
9
9
3
8
4
7
5
6
F
. 13
Fig. 14
IG
Fig. 27
Fig. 28
Advertisement

Related Manuals for 3M FF-403


Summary of Contents for 3M FF-403
- Page 1 FF-400-10 Exhalation Valve Cover (Solid) 1. Hold the facepiece in front of you so that the 3M logo is facing you. Align the two branches of the breathing tube from lens assembly (Fig. 20). Table 1: Major Sections of OSHA 29 CFR 1910.134 instructions provided below for your specifi c respirator confi guration.
- Page 2 4. Que el respirador no presione demasiado la cara de modo que los ojos queden parcialmente cerrados. En Brasil, el Filtro 5935BR 3M™ puede usarse con Adaptador de fi ltro 603 y Soporte de fi ltro 501 en la Pieza facial de 3.