Casio CFX-9850G PLUS Service Manual & Parts Manual
Hide thumbs
Also See for CFX-9850G PLUS:
- User manual (85 pages) ,
- Calculations manual (72 pages) ,
- Programming manual (48 pages)
Table of Contents
Advertisement
Advertisement
Table of Contents

Related Manuals for Casio CFX-9850G PLUS


Summary of Contents for Casio CFX-9850G PLUS
- Page 1 (without price) CFX-9850G PLUS (ZX-935A) MAY. 1997 CFX-9850G PLUS...
-
Page 2: Table Of Contents
CONTENTS SPECIFICATIONS ................... 3 GENERAL GUIDE 2-1. Modes ....................... 4 2-2. Color Contrast Adjustment ..............5 2-3. Power Supply ..................6 RESET OPERATION ..................9 DATA COMMUNICATIONS 4-1. Connecting Two Units ................10 4-2. Before Starting Data Communications ..........10 4-3. -
Page 3: Specifications
1. SPECIFICATIONS Variables: 28 Text display: ±1 × 10 to ±9.999999999 × 10 –99 and 0. Internal operations use 15-digit mantissa. Exponential display range: Norm1: –2 > [x], [x] > 10 Norm2: –9 > [x], [x] > 10 Program capacity: 28 kbytes (max.) Power supply: Main: Four AAA-size batteries (LR03(AM4) or R03 (UM-4)) -
Page 4: General Guide
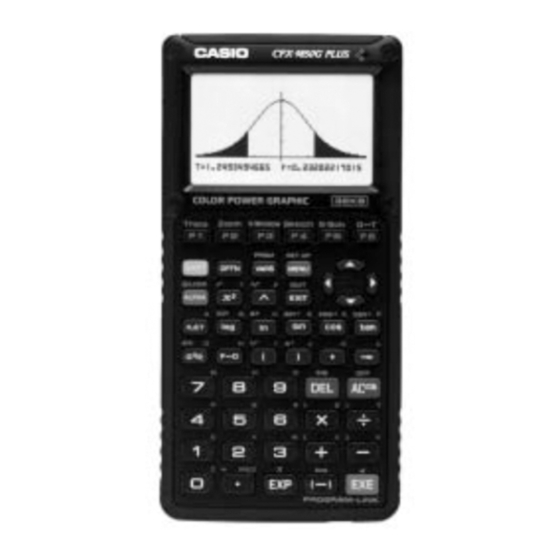
2. GENERAL GUIDE 2-1. Modes • To select an icon 1. Press to display the Main Menu. MENU MENU Currently selected icon 2. Use the cursor keys ( ) to move the highlighting to the icon you want. 3. Press to display the initial screen of the mode whose icon you selected. -
Page 5: Color Contrast Adjustment
Icon Mode Name Description TABLE Use this mode to store functions, to generate a numeric table of different solutions as the values assigned to variables in a function change, and to draw graphs. RECURsion Use this mode to store recursion formulas, to generate a numeric table of different solutions as the values assigned to variables in a function change, and to draw graphs. -
Page 6: Power Supply
• To adjust the color contrast 1. Use the cursor keys to move the pointer so it is next to CONTRAST. 2. Press the cursor key to make the display darker and the cursor key to make it lighter. Holding down either key changes the setting at high speed. - Page 7 • Be sure that the positive + and negative - poles of each battery are facing in the proper directions. • Never mix batteries of different types. • Never mix old batteries and new ones. • Never leave dead batteries in the battery compartment. •...
- Page 8 • Power supplied by memory back up battery while the main power supply batteries are removed for replacement retains memory contents. • Do not leave the unit without main power supply batteries loaded for long periods. Doing so can cause deletion of data stored in memory.
-
Page 9: Reset Operation
3. RESET OPERATION Warning! The procedure described here clears all memory contents. Never perform this operation unless you want to totally clear the memory of the calculator. If you need the data currently stored in memory, be sure to write it down somewhere before performing the RESET operation. -
Page 10: Data Communications
4. DATA COMMUNICATIONS 4-1. Connecting Two Units The following procedure describes how to connect two units with an optional SB-62 connecting cable for transfer of programs between them. To connect two units 1. Check to make sure that the power of both units is off. 2. -
Page 11: Performing Data Transfer Operation
4-3. Performing Data Transfer Operation Connect the two units and then perform the following procedures. Receiving unit To set up the calculator to receive data, press (RECV) while the data communication Main Menu is displayed. The calculator enters a data receive standby mode and waits for data to arrive. Actual data receive starts as soon as data is sent from the sending unit. - Page 12 Overwrite Password Data Item Contents Check* Check* Program Program contents Mat n Matrix memory (A to Z) contents List n List memory (1 to 6) contents File n List file memory (1 to 6) contents Y=Data Graph expressions, graph write/non-write status, View Window contents, zoom factors G-Mem n Graph memory (1 to 6) contents...
- Page 13 • To execute a send operation After selecting the data items to send, press (TRAN). A message appears to confirm that you want to execute the send operation. • {YES}..{sends data} • {NO}..{returns to data selection screen} Press (YES) to send the data. •...
-
Page 14: To Send The Screen
• Selecting “Monochrome” for Image Set allows data to be sent to any CASIO Label Printer equipped with data communications capabilities. Selecting “Color” allows data to be sent to Color Label Printer models only. -
Page 15: Data Communication Precautions
4-5. Data Communication Precautions Note the following precautions whenever you perform data communications. • An error occurs whenever you try to send data to a receiving unit that is not yet standing by to receive data. When this happens, press to clear the error and try again,after setting up the receiving unit to receive data. -
Page 16: Operation Check
5. OPERATION CHECK Performing this operation check, the data stored in this calculator deleted. If you want not to delete these data, save these data to another CFX-9850G PLUS. STEP OPERATION DISPLAY NOTE Press button on the back of Reset... - Page 17 STEP OPERATION DISPLAY NOTE Press button. Check four colors. If the colors do not appear accurately, perform the adjust- ment mentioned in page 5. Check four colors Press button. Blue No color Orange Green ZX935 Ver.X TEST MODE Press button. TEST mode menu 1.
- Page 18 STEP OPERATION DISPLAY NOTE Press button. Reset MEMORY CLEARED! PRESS [MENU] KEY OFF (No display) Press SHIFT , then AC/ON button. — 18 —...
-
Page 19: Data Transfer Check
6. DATA TRANSFER CHECK Turn off both units (A and B unit), then connect them using the cable SB-60 or SB-62. Perform STEP 1 ~ 4 described in 5. OPERATION CHECK before this check. A unit B unit STEP NOTE OPERATION DISPLAY OPERATION... -
Page 20: Pin Function
7. PIN FUNCTION CPU HCD62121A03 (HC-3017) : COB NOTE: The CPU is bonding on the PCB. If the CPU is defective, replace the PCB ass'y because the CPU cannot be replaced. Pin No. Pin Name Input/Output Function 1 ~ 14 KO14 ~ KO1 Key common signal 15 ~ 22... -
Page 21: Troubleshooting
8. TROUBLESHOOTING SYMPTOM CAUSE SOLUTION Clean or adjust pressure of Intermittent display Dirt or poor contact on battery contact Clean or replace power Poor contact on power switch switch Poor connection on PC joiner Resolder or replace Resolder Poor soldering on LSI, capacitor, or resistor Replace battery No display at all Weak battery... -
Page 22: Operation Problems
9. OPERATION PROBLEMS If you keep having problems when you are trying to perform operations, try the following before assuming that there is something wrong with the calculator. • Get the Calculator Back to its Original Mode Settings 1. In the Main Menu, select the RUN icon and press 2. -
Page 23: Error Message
10. ERROR MESSAGE Message Meaning Countermeasure 1 Calculation formula contains an error. 1 Use Syn ERROR to display the point where the error was generated and cor- rect it. 2 Formula in a program contains an error. 2 Use to display the point where the error was generated and then correct the program. - Page 24 Message Meaning Countermeasure Mem ERROR • Not enough memory to input a function • Keep the number of variables you use for into function memory. the operation within the number of vari- • Not enough memory to create a matrix ables currently available.
-
Page 25: Schematic Diagrams
11. SCHEMATIC DIAGRAMS Main Block 1 — 25 —... - Page 26 Main Block 2 — 26 —...
- Page 27 Key Block — 27 —...
-
Page 28: Parts List
12. PARTS LIST Item Code No. Parts Name Specification ZX933-1 ASS'Y LSI3 2012 3192 LSI TC55257DFL-7085V LSI4 2012 3185 LSI LC3564SM-70 LSI2 2012 5645 LSI MBM29LV800B-Z935 2250 1281 Chip transistor 2SA1179M5, M6, M7-TB 2114 4683 CMOS-IC TC74HC4066AFS(EL) 2105 2737 CMOS-IC RH5RL50AA-T1 2105 2968 CMOS-IC RH5RE43AA-T1... -
Page 29: Exploded View
13. EXPLODED VIEW (1/2) DISASSEMBLY 1. Remove the hard case C. 2. Remove the battery cover R. 3. Remove the battery holder D, then loosen the screw 4. Remove the lithium battery 5. Remove four main batteries 6. Loosen four screws 7. - Page 30 13. EXPLODED VIEW (2/2) LSI5 LSI6 — 30 —...
- Page 31 MA0500671A...