
Related Manuals for ResMed VPAP VPAP Adapt SV System


Summary of Contents for ResMed VPAP VPAP Adapt SV System
- Page 1 Front Cover - User.qxp 05/04/2006 4:31 PM Page 1 VPAP ™ Adapt SV User Guide English...
-
Page 2: Vpap Adapt Sv
Front Cover - User.qxp 05/04/2006 4:31 PM Page 2 Bleed this panel onto spine (if applicable) but NOT onto Front Cover 26869/2 06 04 VPAP Adapt SV User USA ENG Global leaders in sleep and respiratory medicine www.myresmed.com... - Page 3 ™ VPAP Adapt SV User Guide English Reorder number: 26869/2 06 04...
- Page 4 Activa, HumidAire, Mirage, ResControl, ResLink, ResScan, Smart Data, SmartStart, Ultra Mirage, Vista, VPAP and VPAP Adapt SV are trademarks of ResMed Ltd. Activa, Humidaire, Mirage, SmartStart, Vista and VPAP are registered in U.S. Patent and Trademark Office. SmartMedia is a trademark of Toshiba.
-
Page 5: Table Of Contents
Contents ..........1 Introduction VPAP™... - Page 6 Cleaning and Maintenance Daily Weekly Periodically Air Filter Hypoallergenic Air Filter Servicing ......... . 35 Troubleshooting .
-
Page 7: Introduction
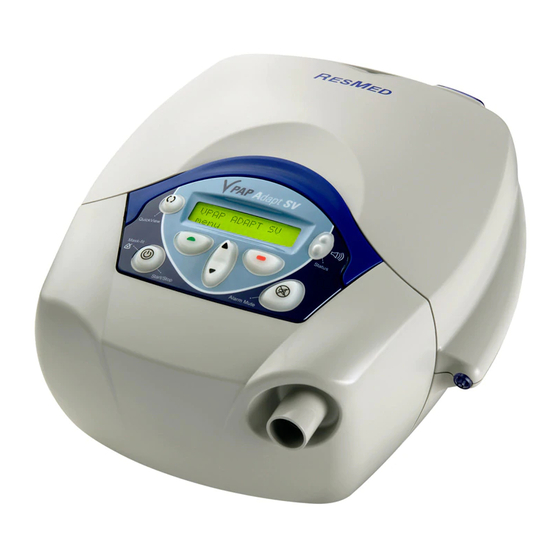
Introduction VPAP™ Adapt SV The VPAP™ Adapt SV flow generator has been designed to be reliable, comfortable and easy to use. You can observe your treatment and make adjustments to settings using a keypad and LCD screen. CAUTION USA federal law restricts this device to sale by or on the order of a physician. -
Page 8: Warnings
The VPAP Adapt SV should be used with masks and accessories • recommended by ResMed or the prescribing physician. Use of incorrect masks and accessories may adversely affect the function of the VPAP Adapt SV. The VPAP Adapt SV is designed for use with masks that allow exhaled gases •... - Page 9 The following side effects may arise during a course of therapy with the VPAP Adapt SV: • drying of the nose, mouth, or throat • bloating • ear or sinus discomfort • eye irritation • skin rashes • chest discomfort. Introduction...
-
Page 11: Quick Setup Guide
Quick Setup Guide Attach the air tubing and pressure sensor tube to the VPAP Adapt SV and mask (page 9). Attach a humidifier if required (page 11). Switch on the VPAP Adapt SV. Make sure the mask is unblocked. Select the mask setting (page 22). Perform the Air Circuit Learn function (page 22) at first-time use, or if you are adding or removing a component of the system (eg, a humidifier or anti-bacterial filter). -
Page 13: Vpap Adapt Sv System
VPAP Adapt SV System VPAP Adapt SV Components The VPAP Adapt SV flow generator is supplied with air tubing and a power cord. Masks are supplied separately, as you and your clinician have to decide which mask is best for you. Masks that can be used with VPAP Adapt SV are listed on page 8. -
Page 14: Masks
Luer connectors together at the Proximal cuff. Make sure the pressure sensor tube is not kinked, obstructed or twisted. Note: ResMed recommends the following tubing products for use with the VPAP Adapt SV: replacement air hose (only) PN14968; replacement air delivery system (hose, sensor line, clips, proximal cuff) PN26923. -
Page 15: Assembling The Vpap Adapt Sv System
There are two sockets at the rear of the flow generator—the top one for an AC (standard mains electricity) and the lower one for a DC power cord (see “Using DC Power to Run the VPAP Adapt SV” on page 16). ResMed recommends using the AC power cord supplied with the unit. - Page 16 Connect air tubing Connect the air tube firmly onto the air outlet at the front of the unit. Figure 4: Front view of VPAP Adapt SV To attach the pressure sensor tube to the unit, screw the Luer connector onto the socket on the side of the unit.
-
Page 17: Humidifiers
Humidifiers A humidifier may be required if you are experiencing dryness of the nose, throat, or mouth. The following ResMed humidifiers are compatible with the VPAP Adapt SV: HumidAire™ HumidAire 2i™ heated humidifier heated humidifier Humidifier accessory (HumidAire only) Medium air tubing 21"... -
Page 18: Humidaire 2I
HumidAire 2i™ The HumidAire 2i provides heated humidification for the VPAP Adapt SV. To attach the HumidAire 2i, remove the VPAP Adapt SV front cover and attach the humidifier docking station and water chamber. No other accessories are required for use. Please refer to the HumidAire 2i User’s Manual for details. Once you have performed the Air Circuit Learn function the VPAP Adapt SV is ready for use. -
Page 19: Humidaire
HumidAire™ You will need a medium size 21" (52 cm) air tube to connect the VPAP Adapt SV unit to the HumidAire™ (see Figure 7). Make sure both the HumidAire and the VPAP Adapt SV are turned off. Fill the HumidAire with water as described in the humidifier manual. Place the filled water chamber inside the HumidAire. - Page 20 Connect the mask system to the free end of the long air tubing. The final assembly should look like this: Switch on the HumidAire and the VPAP Adapt SV. WARNING Make sure that the power cords and plugs are in good condition and the equipment is not damaged.
-
Page 21: Reslink
ResLink™ The ResLink is a device that records data onto a SmartMedia™ card during your therapy. The card can be returned to your clinician so that they can observe your progress and adjust flow generator parameters if necessary. The ResLink connects to the back of VPAP Adapt SV as shown. -
Page 22: Using Dc Power To Run The Vpap Adapt Sv
Using DC Power to Run the VPAP Adapt SV The VPAP Adapt SV can be run on DC in case of power failure. ResMed supplies separately a converter that allows a 12 V or 24 V battery to be connected to the DC input of the VPAP Adapt SV. -
Page 23: Using The Vpap Adapt Sv
Using the VPAP Adapt SV WARNING Before starting therapy with a new mask select the correct mask type in the Settings menu (page 22). When adding or removing a new component such as a mask, humidifier, or anti-bacterial filter, perform the Air Circuit Learn function (page 22). -
Page 24: Control Panel Functions
Control Panel Functions The control panel of the VPAP Adapt SV has a keypad that allows you to: • start or stop treatment • adjust settings on the flow generator • mute or stop alarms • view treatment data. QuickView key Start/Stop Figure 13: The VPAP Adapt SV control panel LCD screen... -
Page 25: Adjusting Settings
Left key (green) • Enters a menu. • Confirms and applies settings. • Performs the function indicated by the text above it in the LCD (eg, ’enter’, ’change’). Right key (red) • Performs the function indicated by the text above it in the LCD (eg, ’exit’). •... - Page 26 To change a setting, press the Up/Down key until you arrive at the menu you require. • Press the Left key to enter the menu, then use the Up/Down key again to scroll through the options. • Once you find the option you require press the Left key to select the function that is displayed in the bottom left of the screen (eg, ’change’, ’yes’).
-
Page 27: Menus
Menus The options available in the Settings menu will depend on the therapy you are receiving (either ASV or CPAP mode), as set by your clinician. VPAP Adapt SV Figure 15: Navigating the Patient menu ASV MODE SOUND LEVEL:LOW SOUND LEVEL:LOW These menus appear only if at least one AVG PRESS: 10.4... -
Page 28: Settings Menu
Settings Menu You will only see the options relevant to your therapy. In CPAP (Continuous Positive Airway Pressure) mode, the clinician sets a pressure that will be constant throughout treatment. In ASV mode, the VPAP Adapt SV continually measures your breathing and regulates the air pressure accordingly. Mask Select the type of mask that you will be using (you will only need to adjust this if you have more than one mask). -
Page 29: Results Menu
7 . When the function is complete, a screen will appear saying that the circuit has been learned successfully. The next menu item is then displayed. Commence treatment as described in “Starting Treatment” on page 17. If there is a problem with the circuit a screen saying ’Invalid circuit’ will be displayed instead of the progress screen. -
Page 30: Options Menu
Mask-fit Gives a rating of how well the mask was fitting during your last session on the VPAP Adapt SV. The stars indicate how good the fit was (more stars = better fit). Star rating ***** ****- ***-- **--- *---- HIGH LEAK Average Pressure Provides information on the average air pressure during your most recent... -
Page 31: Servicing Menu
Servicing Menu This menu displays the following information: • SN—the flow generator’s serial number • PCB—the flow generator’s PCB number (PCB—printed circuit board) • SW—the version of software currently installed on the flow generator. Treatment Screens There are three Treatment screens displayed in the VPAP Adapt SV LCD. The LCD will display the Treatment screens when treatment commences, and during treatment if no key is pressed for 20 minutes. -
Page 33: Alarms
1. Check that the air tube and sensor tube are connected properly. 2. Turn the VPAP Adapt SV off and on again at the power switch. If the alarm persists, return the unit to ResMed for servicing. Action Check tube connections. -
Page 34: Power Fail Alarm
6. Try using the flow generator one more time. 7 . If the high pressure alarm activates repeatedly, discontinue use and return to ResMed for servicing. If the alarm does not recur, then continue to use as normal. Note: The alarm system is designed to ignore coughing. However, if a cough is especially intense and prolonged, it may trigger the high pressure alarm. -
Page 35: Insufficient Pressure Support Alarm
4. Remove blockage. 5. Turn power back on. 6. If the flow blocked alarm activates repeatedly, discontinue use and return to ResMed for servicing. If the alarm does not recur, then continue to use as normal. Will stop when: •... -
Page 37: Cleaning And Maintenance
Cleaning and Maintenance You should regularly carry out the cleaning and maintenance described in this manual. CAUTION Do not wash the pressure sensor tube. If fluid enters the pressure sensor tube allow it to dry completely by hanging it in a clean place out of direct sunlight. -
Page 38: Periodically
Air tubing Remove the pressure sensor tube from air tubing Figure 19: Air tubing assembly removed for cleaning CAUTION Do not use bleach, chlorine-, alcohol-, or aromatic-based solutions • (including all scented oils), moisturising or antibacterial soaps to clean the cushion, mask, air tubing, or the VPAP Adapt SV. These solutions may cause hardening and reduce the life of the product. -
Page 39: Air Filter
ResMed. Applicable ResMed warranty details are provided with the device at the time of original supply. Of course, as with all electrical devices, if any irregularity becomes... - Page 40 ResMed service center. If you feel the unit is not performing properly, see “Troubleshooting” on page 35. CAUTION Inspection and repair should only be performed by an authorized service agent.
-
Page 41: Troubleshooting
Troubleshooting If there is a problem, try the following suggestions. If the problem cannot be solved, contact your equipment supplier or ResMed. Do not attempt to open the flow generator. Problem Possible cause Insufficient air delivered Air filter is dirty. -
Page 43: Glossary
Glossary Alarms When more than one alarm is activated at the one time, the highest priority alarm will be displayed. Backlight The backlight turns off if no button has been pressed for two minutes. It can also be kept permanently on by selecting Auto in the Backlight screen of the Options menu. -
Page 45: Technical Specifications
Technical Specifications Dimensions (H x W x D) 5.6" x 9.8" x 11.5" (142 mm x 248 mm x 293 mm) Weight Flow generator with cover: 8.14 lb (3.7 kg) Flow generator with Humidaire 2i (empty): 9.24 lb (4.2 kg) Environmental conditions Operating temperature: 41 Storage and transport temperature: -4... - Page 46 • Insufficient pressure support alarm Is triggered if for 3 breaths in a row the maximum mask pressure achieved at inspiratory to expiratory transition is either <87 .5% of the absolute mask pressure targetted at that point, or < absolute mask pressure targeted minus 1 cm H O, whichever is the lower.
- Page 47 Table 4: Maximum low impedance flow at stated pressures Pressure (cm H Flow (L/min) 13.0 Technical Specifications...
- Page 48 Mask setting: flow/pressure characteristics Glossary of symbols Read the operating manual before using Type CF equipment AC switch Class II equipment Pressure (cm H Full Face Activa Ultra Vista...
- Page 49 Guidance and Manufacturer’s Declaration — Electromagnetic Emissions and Immunity Guidance and manufacturer’s declaration – electromagnetic emissions The VPAP Adapt SV is intended for use in the electromagnetic environment specified below. The customer or the user of the VPAP Adapt SV should assure that it is used in such an environment. Emissions test Compliance RF emissions CISPR11...
- Page 50 Guidance and manufacturer’s declaration – electromagnetic immunity The VPAP Adapt SV is intended for use in the electromagnetic environment specified below. The customer or the user of the VPAP Adapt SV should assure that it is used in such an environment. Immunity test Electrostatic discharge (ESD)
- Page 51 Guidance and manufacturer’s declaration – electromagnetic immunity (continued) The VPAP Adapt SV is intended for use in the electromagnetic environment specified below. The customer or the user of the VPAP Adapt SV should assure that it is used in such an environment. Immunity IEC60601-1-2 test...
- Page 52 Recommended separation distances between portable and mobile RF communications equipment and the VPAP Adapt SV The VPAP Adapt SV is intended for use in an environment in which radiated RF disturbances are controlled. The customer or the user of the VPAP Adapt SV can help prevent electromagnetic interference by maintaining a minimum distance between portable and mobile RF communications equipment (transmitters) and the VPAP Adapt SV as recommended below, according to the maximum output power of the communications equipment.
-
Page 53: Limited Warranty
ResMed shall not be responsible for any incidental or consequential damages claimed to have occurred as a result of the sale, installation or use of any ResMed product. Some regions or states do not allow the exclusion or limitation of incidental or consequential damages, so the above limitation may not apply to you. -
Page 55: Index
Index Air Circuit Learn function 22 air filter 33 hypo-allergenic 33 air pressure monitoring 24 air tubing attaching to mask 10 cleaning 31 connecting 10 air tubing system 7 alarm flow blocked 29 high leak 28 high pressure 28 low mask pressure 27 power fail 28 alarm LED 19 anti-bacterial filter 15... - Page 56 System Error 7 message 35 treatment screens 25 user/owner responsibility 1 VPAP Adapt SV 7 usage 24...