Advertisement
Quick Links
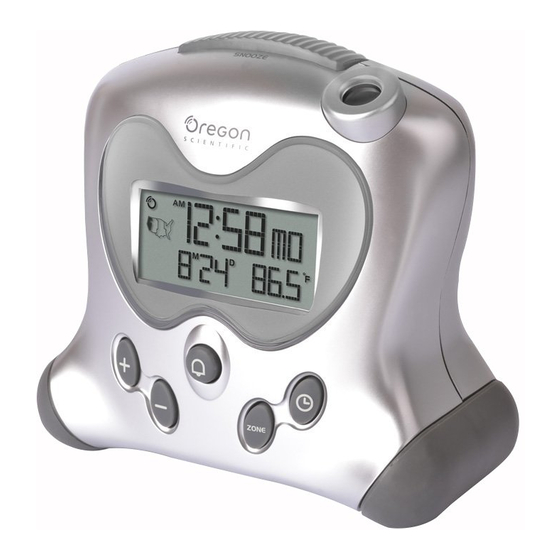
PROJECTION ALARM CLOCK
TM
WITH
BACKLIGHT
Model : RM313PNA
User Manual
FEATURES
•
Time display with Hour, Minutes,
Seconds, Day and Date
•
Day of Week displayed in English,
French or Spanish
TM
•
Blue
backlight
•
Alarm with 8-minute snooze
•
Crescendo Alarm increases in
volume and intensity
•
Adjustable U.S. time zone
•
One-touch time projection onto the
ceiling for continuous night-time
display
•
Low battery indicator
PRODUCT OVERVIEW
Figure A
A1
A6
A2
A4
Figure B
Figure C
RM313PNA r9 OP
Black
BUTTON DESCRIPTIONS
(FIGURES A.1 - A.6)
SNOOZE (A.1)
Press SNOOZE to illuminate the backlight
for 5 seconds, view the projected time for
5 seconds, or snooze the alarm for
8 minutes.
NOTE
The backlight and projector work
together. Both light up at the same time.
ARROW (A.2)
Press to increase a value, or press and
hold to turn on RF clock signal reception
from the U.S. Atomic Clock in Boulder,
Colorado. Refer to the Set Time and Date
and Set Alarm sections for more
instructions.
ARROW (A.2)
Press to decrease a value.
ZONE (A.3)
Press to select the U.S. Time Zone. Once
the desired zone is highlighted, the clock
will automatically adjust the time.
Press and hold for 2 seconds to turn off
the RF clock signal reception from the U.S.
Atomic Clock in Boulder, Colorado.
ALARM (A.4)
Press to turn the alarm on or off. Refer to
the Set Alarm section for set-up
instructions.
NOTE
The alarm is activated whenever
the
icon shows on the display.
MODE / SET (A.5)
Press to view day of week or seconds, or
press and hold for 3 seconds to set the
time, date, and display language. Refer to
the Set Time and Date section for
instructions.
PROJECTION ON (A.6)
Slide to enable or disable continuous time
projection.
A5
NOTE
The AC power adaptor must be
A3
plugged in for this feature to work.
LCD DESCRIPTIONS
TIME
The top line of the display shows the hours,
minutes, and time zone.
RADIO FREQUENCY SIGNAL
The RF signal indicates the strength of
U.S. Atomic Clock signals reception. To
disable the signal (for example, if you wish
to manually set the time), press and hold
ZONE for 2 seconds.
ALARM ON
When
is shown, the alarm is activated.
Press
to turn the alarm on or off.
(( • )) ALARM MODE
When (( • )) is shown, the clock is
displaying the alarm time. Alarm time is
displayed in hours and minutes (AM/PM)
1
MONTH / DATE
The second line of the display shows the
month and date. Press MODE/SET to
switch views.
US MAP
The U.S. Map indicates which Time Zone
is selected. Press ZONE to switch between
Pacific, Mountain, Central, or Eastern
Time.
LOW BATTERY
Replace the batteries whenever
shown.
TEMPERATURE
The indoor temperature is shown in the
lower right corner of the LCD display.
Temperature is measured in °F only.
CLOCK
This product has two displays: Clock with
day of week in English, French or Spanish,
and Calendar display with month and date.
The time is automatically updated by the
U.S. Atomic Clock in Boulder, Colorado
unless you disable this feature. Signals are
collected by the main unit when it is within
932 miles (1500 km) of a signal.
Initial reception takes 2 - 10 minutes, and
is initiated when you first setup the unit,
and whenever you press RESET. Once
complete, the reception icon will stop
blinking. The icon is shown in the Clock
Area.
To force a manual search for Atomic Clock
signals, press and hold UP for 2 seconds.
If no signal is found, check the batteries.
NOTE
If the Atomic Clock signal is
received and the hour is incorrect, use the
ZONE button to adjust to the correct
timezone (refer to the U.S. map icon).
PROJECTOR / BACKLIGHT
Press SNOOZE to activate the projector
and backlight for 5 seconds.
To use the continuous projection feature,
connect the AC power adaptor to a wall
outlet (Figure C), and slide the
PROJECTION ON switch (A.6) to the "On"
position. Then, press SNOOZE to activate
continuous projection.
To deactivate continuous projection, slide
the PROJECTION ON switch to the "Off"
position.
BATTERIES (FIGURE B)
This product operates on 2 AA-size
batteries. To activate the unit, open the
battery compartment and replace the
batteries whenever
display. Always match the correct polarity,
as shown in the battery compartment.
12/20/04, 5:04 PM
is
shows on the
Advertisement

Related Manuals for Oregon Scientific RM313PNA


Summary of Contents for Oregon Scientific RM313PNA
- Page 1 5 seconds, or snooze the alarm for WITH BACKLIGHT Pacific, Mountain, Central, or Eastern 8 minutes. Time. Model : RM313PNA NOTE The backlight and projector work LOW BATTERY User Manual together. Both light up at the same time. Replace the batteries whenever shown.
- Page 2 Remove the batteries if storing this product for a long period of time. For international enquiries, please visit: • Do not scratch the LCD display. www2.oregonscientific.com/about/ © 2005 Oregon Scientific. All rights reserved. international/default.asp 086-003323-021 RM313PNA r9 OP 12/20/04, 5:04 PM Black...