
Related Manuals for Datavideo TLM-170G


Summary of Contents for Datavideo TLM-170G
-
Page 1: Instruction Manual
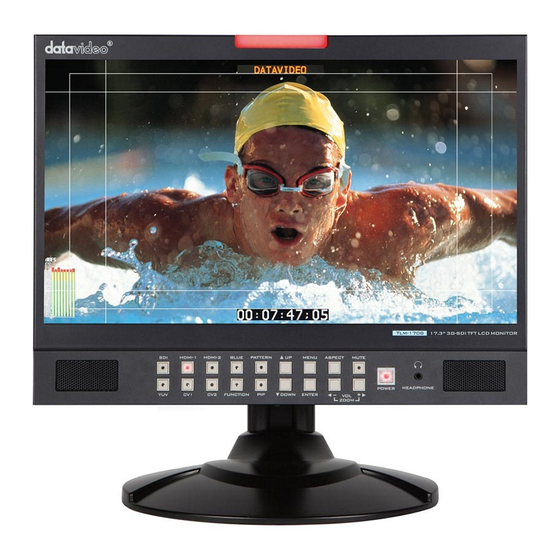
TLM-170G 17.3” 3G-SDI TFT LCD MONITOR HDMI-1 HDMI-2 BLUE PATTERN MENU ASPECT MUTE POWER HEADPHONE DOWN ENTER 17.3” 3G-SDI TFT LCD MONITOR TLM-170G/TLM-170GM /TLM-170GR Instruction manual... -
Page 2: Table Of Contents
Datavideo Technologies will try to give correct, complete and suitable information. However, Datavideo Technologies cannot exclude that some information in this manual, from time to time, may not be correct or may be incomplete. This manual may contain typing errors, omissions or incorrect information. -
Page 3: Fcc Compliance Statement
AC adapter. If you are not sure of the type of power available, consult your Datavideo dealer or your local power company. 8. Do not allow anything to rest on the power cord. Do not locate this unit where the power cord will be walked on, rolled over, or otherwise stressed. -
Page 4: Warranty
Solid State Drive, SD Card, USB Thumb Drive, Lighting, Camera module, PCIe Card are covered for 1 year. • The three-year warranty must be registered on Datavideo's official website or with your local Datavideo office or one of its authorized distributors within 30 days of purchase. -
Page 5: Tlm-170G Model Types
TLM-170G Model Types Model TLM-170G TLM-170GR TLM-170GM Image 1U Mobile Tray Rack System Desktop 7U Rack Mount Mount Front Panel Name Descriptions Bi-Colour Tally Light To indicate Live (Red) or Cued (Amber) source. Select SDI, HDMI, YUV or CV; the active input will be indicated by a Source Select Buttons red LED on the Source Button. -
Page 6: Pixel Zoom
3.5mm headphone socket; internal speaker circuit will automatically Headphone Socket mute when headphones are connected. N.B. Main Power On/Off switch is located on the rear of the TLM-170G. Pixel ZOOM This function magnifies the incoming source to fill the screen. This is strictly a ZOOM function and does not alter the native aspect ratio of the source to fill the screen. -
Page 7: Rear Panel
Through HDMI Input Video and Audio input from HDMI device. Tally light information can be supplied to the TLM-170G from the 3.5mm Tally Light Input Datavideo RMC-140, TB-5 or TB-10 via this socket. Mono audio inputs to correspond to the analog video inputs (CV 1 Analog Audio Inputs &... -
Page 8: Menu Options
Menu Options • The TLM-170G is set up via on-screen menus. To display the on-screen menu, press the MENU button. • The menus are navigated using the Up / Down buttons. • Press Enter button to enter or exit the setting mode. - Page 9 SWAP EXIT LANGUAGE English Español Deutsch Español Italiano Dutch Português Russian EXIT SETUP MENU OSD TIMEOUT 5~120 sec EXIT SPECIAL FUNCTION I FRAME RATIO 80 / 90 / 0FF 4:3 MARK LINE ON / OFF CENTRAL MARK ON / OFF CINEMA ZONE MARK ON / OFF MARK TYPE...
- Page 10 • SanDisk 8G (Cruzer Glide USB flash drive) • Transcend (Jet Flash 16G) • Kingston (DT101 G2 8GB) FACTORY RESET Once in this option, press ENTER button to reset the TLM-170G to factory default settings. AUDIO CONTROL INTERNAL AUDIO ON / MUTE CONTROL / OFF...
-
Page 11: Firmware Update Procedure
A working TLM-170G requires the following: • The latest firmware file for the TLM-170G monitor. This can be obtained from your local Datavideo office or dealer. • A USB 2.0 pen drive (128MB or larger) with a USB A connector. -
Page 12: Remote Setup Using An Existing Dhcp Network
Remote Setup using an existing DHCP Network The TLM-170G can be remotely set up using a computer web browser and the existing DHCP LAN. In this way a gallery of TLM-170G monitors can be set up from one computer if enough network connections exist. -
Page 13: Remote Setup Using A Direction Computer Connection
Remote Setup using a direction computer connection The TLM-170G can be remotely set up using a computer web browser and an Ethernet crossover cable. No existing computer network is used. The Ethernet crossover cable is connected to the TLM-170G monitor and the computer/laptop being used. -
Page 14: Dimensions
Dimensions All measurements in millimetres (mm) -
Page 15: Specifications
Specifications Panel Size: 17.3'' Contrast: 650 Resolution: 1600 x 900 White Luminance: 220cd View Angle: Top: 20 Bottom: 45 Left: 45 Right: 45 HDMI x 2 (Ver 1.3) HD/SD SDI x 1 Video Input Component x 1 (3 BNC) Composite x 2 SDI Loop Thru x 1 Video Loop Thru Out Composite x 1... -
Page 16: Service & Support
Service & Support It is our goal to make owning and using Datavideo products a satisfying experience. Our support staff is available to assist you to set up and operate your system. Contact your local office for specific support requests. Plus, DATAVIDEO WORLDWIDE OFFICES please visit www.datavideo.com to access our FAQ section.