
Related Manuals for Singer 5400 Series


Summary of Contents for Singer 5400 Series
-
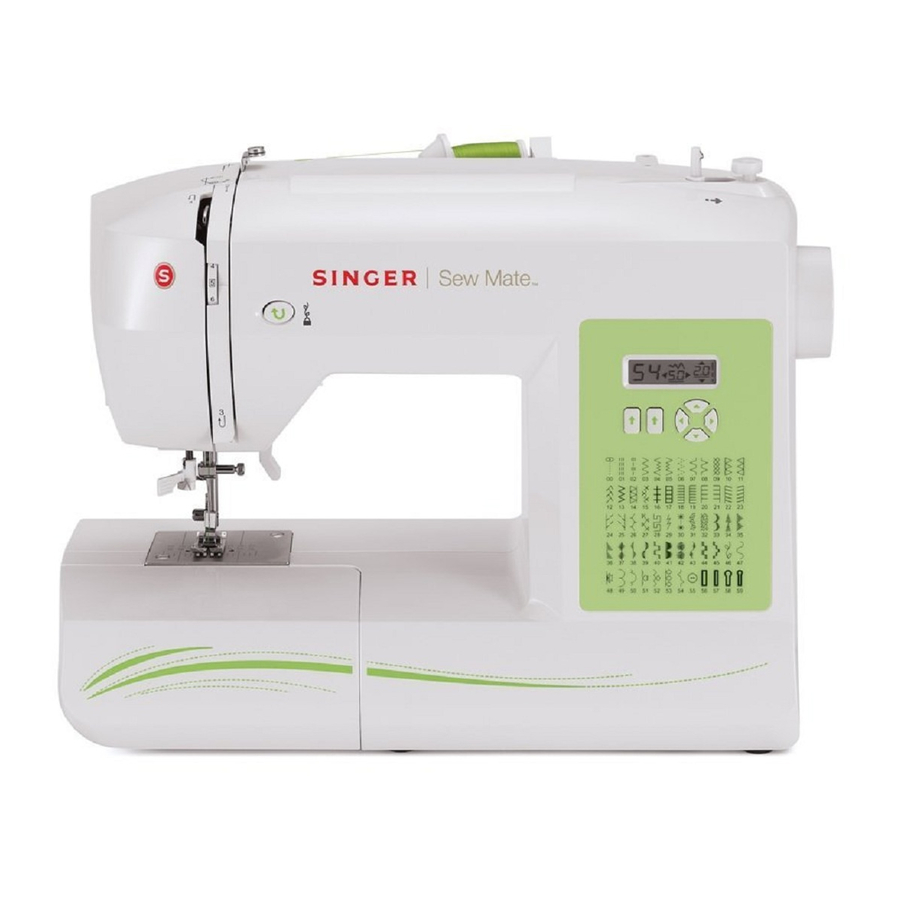
Page 1: Sewing Machine
Service Manual Sewing Machine 5400 Series 5400 Series THE SINGER COMPANY 2000 SINGER DO BRASIL ALL RIGHTS RESERVED Registered Trademark “THE SINGER COMPANY LTD.” Printed In Brazil 357773-002 MAY/00... - Page 2 Service Manual 5400 Series - REVISION RECORD Approval Description Rev. and date Rev. n . P/N 357773-002 MAY/00...
- Page 3 This manual is designed for use by trained and qualified service persons. THE SINGER COMPANY will not be responsible for any parts requiring replacement owing to natural wear or to abuse or negligence of the use or in the event the machine is serviced by other than a trained and qualified service person, or if parts are substituted which do not meet applicable specifications.
-
Page 4: General Information
This service manual describes all of the servicing procedures,including all adjustments and parts removal and replacement for the series 5400 machines. Supplementary information covering any production changes, improvements or changes to parts will be made by issuing Singer service/parts bulletins. Machine Description Tubular bed Lightweight "Duratec"... -
Page 5: Table Of Contents
Service Manual Table of contents Section I Parts removals and replacements..................07-08 Face plate......................... 07-08 Light bulb replacement....................09-10 Bottom bed cover......................11-12 Rear cover........................13-14 Front cover........................15-16 Needle bar........................17-18 Head end assembly......... - Page 6 Service Manual Section II Sequential order of adjustment procedures..............54-55 Vertical shaft end play....................... 56-57 Bevel gear mesh and arm shaft end play................58-59 Disc and disc follower end play..................58-59 Camstack radial play......................60-61 Take-up lever and needle bar connecting link lost motion..
-
Page 7: Section I
Service Manual Section I Parts removal and replacement Rev. n . P/N 357773-002 MAY/00... - Page 8 Service Manual Rev. n . P/N 357773-002 MAY/00...
-
Page 9: Face Plate
Service Manual Face Plate Removal: - Raise presser foot. 2- Remove face plate screw (A). 3- Remove face plate (B) by grasping it around the bottom edge and pulling toward the left, then down and away from the machine. Replacement: Replacement is the same as removal in reverse order. - Page 10 Service Manual Rev. n . P/N 357773-002 MAY/00...
-
Page 11: Bottom Bed Cover
Service Manual Bottom Bed Cover Removal: Remove three bottom bed cover screws (A). 2 Remove 8 mm hex nut (B). 3 Remove bottom bed cover (C). Replacement: Replacement is the same as removal in reverse order. Rev. n . P/N 357773-002 MAY/00... - Page 12 Service Manual Rev. n . P/N 357773-002 MAY/00...
-
Page 13: Rear Cover
Service Manual Rear Cover Removal: Raise carrying handle and remove the free-arm extension table. 2- Remove the bottom bed cover located under the machine. 3- Loose screws (A) and screw ( C ) by turning them twice. 4- Remove the 6 screws (B) 5- Turn on the machine 6- Remove the cover from needle plate area first, for there are tips in this area connecting the front cover. - Page 14 Service Manual Rev. n . P/N 357773-002 MAY/00...
-
Page 15: Front Cover
Service Manual Front Cover Removal: Remove the free-arm extension table, face plate, bottom bed cover and rear cover. 2- Position the tension assembly dial (A) to "0" and remove it by pulling straight frontwards. Use same procedure to remove the two seletor knobs (B). 3- Loose the two screws (C ) and screw (D). - Page 16 Service Manual Rev. n . P/N 357773-002 MAY/00...
-
Page 17: Needle Bar
Service Manual Needle Bar Removal: Remove tension assembly dial, the knobs of the zig-zag and needle position levers and all covers (face plate, rear, bottom bed and front) 2- Remove needle by loosing the screw (B) with thread guide, and needle bar gib (C). 3- Loosen needle bar clamping screw (D). - Page 18 Service Manual Rev. n . P/N 357773-002 MAY/00...
-
Page 19: Head End Assembly
Service Manual Head End Assembly Removal: - Remove the free arm extension table, tension assembly dial, the knobs of the zig-zag and needle position levers, all covers (face plate, rear, bottom bed and front) and needle. 2- Loosen screw (A). 3- Remove presser foot (D) and presser foot screw (E). - Page 20 Service Manual Rev. n . P/N 357773-002 MAY/00...
-
Page 21: Take-Up Lever Assembly And Needle Bar Connecting Link
Service Manual Take-up Lever Assembly and Needle Bar Connecting Link Removal: Remove the free arm extension table, tension assembly dial, the knobs of the zig-zag and needle position levers, all covers (face plate, rear, bottom bed and front) and head end assembly. - Page 22 Service Manual Rev. n . P/N 357773-002 MAY/00...
-
Page 23: Hand Wheel
Service Manual Hand Wheel Removal: Remove the free arm extension table, tension assembly dial, the knobs of the zig-zag and needle position levers and all covers (face plate, rear, bottom bed and front) 2- Rotate hand wheel (D) to locate the hand wheel bushing set screw (B). 3- Loosen screw (B) sufficiently to clear the recess in the arm shaft (A). - Page 24 Service Manual (5430 MODEL) ( 5417 MODEL) Rev. n . P/N 357773-002 MAY/00...
-
Page 25: Camstack
Service Manual Camstack Removal: Remove the free arm extension table, tension assembly dial, the knobs of the zig-zag and needle position levers and all covers (face plate, rear, bottom bed and front) 2- Remove three screws (A). 3- Set stitch length control dial to "5" and move the zig-zag lever to left (Straight stitch position) 4- Remove camstack assembly (B). - Page 26 Service Manual Rev. n . P/N 357773-002 MAY/00...
-
Page 27: Arm Shaft And Horizontal Bevel Gear
Service Manual Arm shaft and horizontal bevel gear Removal: Remove the free arm extension table, tension assembly dial, the knobs of the zig-zag and needle position levers, all covers (face plate, rear, bottom bed and front), head end assembly, take-up lever assembly, camstack and hand wheel. - Page 28 Service Manual Rev. n . P/N 357773-002 MAY/00...
-
Page 29: Tension Assembly
Service Manual Tension assembly Removal: Remove the free arm extension table, tension assembly dial, the knobs of the zig-zag and needle position levers and all covers (face plate, rear, bottom bed and front) 2- Force in the direction shown by arrows in the illustration, the two retainers (B), and pull out the tension assembly. - Page 30 Service Manual Rev. n . P/N 357773-002 MAY/00...
-
Page 31: Needle Bar Driving Arm - Needle Bar Driving Arm Tension Spring
Service Manual Needle bar driving arm - needle bar driving arm tension spring Removal: Remove the free arm extension table, tension assembly dial, the knobs of the zig-zag and needle position levers, all covers (face plate, rear, bottom bed and front) and the left carrying handle support. - Page 32 Service Manual Rev. n . P/N 357773-002 MAY/00...
-
Page 33: Cam Controlled Feed Mechanism
Service Manual Cam controlled feed mechanism (only for model 5430) Removal: Remove the free arm extension table, tension assembly dial, the knobs of the zig-zag and needle position levers, all covers (face plate, rear, bottom bed and front) and the right carrying handle support. - Page 34 Service Manual Rev. n . P/N 357773-002 MAY/00...
-
Page 35: Motor And Motor Belt
Service Manual Motor and motor belt Attention: Make sure the machine is turned off and remove plug from outlet socket before disassemblying Removal: Remove the free arm extension table, tension assembly dial, the knobs of the zig-zag and needle position levers and all covers (face plate, rear, bottom bed and front) 2- Loose the two motor adjustment screws (A) 3- Carefully lift the motor and slip the motor belt (D) off the motor pulley (E) and hand wheel. - Page 36 Service Manual Rev. n . P/N 357773-002 MAY/00...
-
Page 37: Hook
Service Manual Hook Removal: Remove the free arm extension table, face plate, rear and bottom bed covers, needle plate and bobbin case. 2- Remove feed dog screws (F) and feed dog (E). 3- Remove position plate screws ( I ) and (K). 4- Remove position plate ( J ). - Page 38 Service Manual Rev. n . P/N 357773-002 MAY/00...
-
Page 39: Feed Lifting Lever Assembly
Service Manual Feed lifting lever assembly Removal: Set machine to number "5" stitch length (maximum). 2- Turn hand whell toward the front of the machine to locate the feed dog at its furthest rear position. 3- Remove the free arm extension table, face plate, rear and bottom bed covers. 4- Remove screws (G) to swing bracket (F) clear of eccentric stud (D). - Page 40 Service Manual Rev. n . P/N 357773-002 MAY/00...
-
Page 41: Feed Rock Shaft Assembly
Service Manual Feed rock shaft assembly Removal: Remove the free arm extension table, tension assembly dial, the knobs of the zig-zag and needle position levers, all covers (face plate, rear, bottom bed and front), needle plate, feed dog, feed lifting lever assembly (N), pulley (K), and belt (M) 2- Remove 0 mm eccentric hinge screw nut (H) and eccentric hinge screw (1). - Page 42 Service Manual Rev. n . P/N 357773-002 MAY/00...
-
Page 43: Feed Forked Connection
Service Manual Feed forked connection Removal: Remove the free arm extension table, tension assembly dial, the knobs of the zig-zag and needle position levers, all covers (face plate, rear, bottom bed and front), the buttonhole assembly (see pages 5 -52) and the hand wheel. 2- Remove screw nut ( I ) and the eccentric screw (H). - Page 44 Service Manual Rev. n . P/N 357773-002 MAY/00...
-
Page 45: Vertical Shaft Bevel Gear
Service Manual Vertical shaft bevel gear Removal: Remove the free arm extension table, tension assembly dial, the knobs of the zig-zag and needle position levers, all covers (face plate, rear, bottom bed and front), the front head end assembly, the buttonhole assembly, the take-up lever assembly, camstack and hand wheel. - Page 46 Service Manual Rev. n . P/N 357773-002 MAY/00...
-
Page 47: Vertical Shaft
Service Manual Vertical shaft Removal: Remove the free arm extension table, tension assembly dial, the knobs of the zig-zag and needle position levers, all covers (face plate, rear, bottom bed and front), the head end assembly, the buttonhole assembly, the take-up lever assembly, camstack, hand wheel, horizontal shaft and vertical shaft bevel gear. - Page 48 Service Manual Rev. n . P/N 357773-002 MAY/00...
-
Page 49: Pattern Selector Mechanism
Service Manual Pattern selector mechanism Removal: Remove the free arm extension table, tension assembly dial, the knobs of the zig-zag and needle position levers, and all covers (face plate, rear, bottom bed and front). 2- Remove screws (A) (Only for model 54 7) 3- Remove camstack (C). - Page 50 Service Manual Rev. n . P/N 357773-002 MAY/00...
-
Page 51: Needle Position Lever
Service Manual Needle position selector lever Removal: Remove the free arm extension table, tension assembly dial, the knobs of the zig-zag and needle position levers and all covers (face plate, rear, bottom bed and front). 2- Remove retaining ring (S), the cam controlled feed follower (O) and the retaining ring located under it. - Page 52 Service Manual Rev. n . P/N 357773-002 MAY/00...
-
Page 53: Stitch Lenght And Buttonhole Control Assembly
Service Manual Stitch length and buttonhole control assembly Removal: Remove the free arm extension table, tension assembly dial, the knobs of the zig-zag and needle position levers and all covers (face plate, rear, bottom bed and front) 3- Set stitch length and buttonhole control dial to "buttonhole step ". 4- Remove retaining rings (A) and (B) 5- By means of a broad bladed screw driver press the pin (D) forward from inside of the machine. - Page 54 Service Manual Section II Sequential order of adjustment procedures Rev. n . P/N 357773-002 MAY/00...
-
Page 55: Sequential Order Of Adjustment Procedures
Service Manual 0,000mm - 0,025mm (.000’’ - .001’’) Rev. n . P/N 357773-002 MAY/00... -
Page 56: Vertical Shaft End Play
Service Manual Vertical shaft end play The vertical shaft must be set to have 0.000 mm - 0.025 mm (.000" - .00 ") end play before setting the arm shaft bevel gear and vertical shaft gear mesh. If incorrectly set, noise may be generated. Check: Remove the tension assembly dial, the knobs of the zig-zag and needle position levers and all covers (face plate, rear, bottom bed and front). - Page 57 Service Manual 0,000mm - 0,230mm(.009”) Rev. n . P/N 357773-002 MAY/00...
-
Page 58: Bevel Gear Mesh And Arm Shaft End Play
Service Manual Bevel gear mesh and arm shaft end play The arm shaft should not have any perceptible shake or end play when assembled in the machine and should rotate freely without binds. Check: Remove the free arm extension table, tension assembly dial, the knobs of the zig-zag and needle position levers and all covers (face plate, rear, bottom bed and front) 2- Check for arm shaft end play by pushing it left to right and adjust if necessary. - Page 59 Service Manual 0,2mm - 0,3mm Rev. n . P/N 357773-002 MAY/00...
-
Page 60: Disc And Disc Follower End Play
Service Manual Disc and disc follower play The disc follower should be adjusted so that a 0,2 - 0,3 mm. (.007" - .0 ") play is obtained between its contact point and the top of the disc tooth. Check: Remove the free arm extension table, tension assembly dial, the knobs of the zig-zag and needle position levers and all covers (face plate, rear, bottom bed and front). - Page 61 Service Manual Rev. n . P/N 357773-002 MAY/00...
-
Page 62: Take-Up Lever And Needle Bar Connecting Link Lost Motion
Service Manual Take-up lever and needle bar connecting link lost motion Looseness in either or the take-up lever and needle bar connecting link will cause the machine to run noisy and may cause irregular stitching. Check: Remove needle and presser foot. 2- Run machine at high speed and check for rapping noise in head end. - Page 63 Service Manual Rev. n . P/N 357773-002 MAY/00...
-
Page 64: Needle Bar Bearings
Service Manual Needle bar bearings Looseness of the needle bar bearings will cause irregular stitching and may cause needle breakage. Check: Turn hand wheel toward front of the machine to bring needle bar to its lowest position. 2- Grasp needle clamp and check for excessive front-to-back play.- 3- Place needle bar in right needle position. - Page 65 Service Manual 0,40mm - 0,80mm 1/64” - 1/32” Rev. n . P/N 357773-002 MAY/00...
-
Page 66: Needle Bar Height
Service Manual Needle bar height Three rings are cut into the upper end of the needle bar. The distance between the center and lower ring represents the rise required to form a thread loop at the eye of the needle required for hook point seizure. - Page 67 Service Manual 5,5 mm - 7,5 mm .220” - .300” Rev. n . P/N 357773-002 MAY/00...
-
Page 68: Needle Bar Pendulum Timing (Timing The Camstack)
Service Manual Needle bar pendulum timing Check: Set the machine for zig-zag, maximum width. 2- Remove the presser foot. 3- With the presser bar in a raised position, hold a piece of paper in place over the needle plate, so needle penetration may be observed. - Page 69 Service Manual ILLUSTRATION F Rev. n . P/N 357773-002 MAY/00...
-
Page 70: Zig-Zag Centralizing Procedure
Service Manual Zig-zag centralizing procedure Check: Set the machine for zig-zag, maximum width. 2- Remove the presser foot. 3- Rotate hand wheel to make the needle penetrate the needle plate slot left-to-right. 4- As the needle penetrates the slot left-to-right an equal lateral play should be maintained, according to illustration "F". - Page 71 Service Manual Rev. n . P/N 357773-002 MAY/00...
-
Page 72: Centralizing Left-Center-Right Needle Position
Service Manual Centralizing left-center-right needle position The left and right zig-zag needle penetrations, at maximum width, must coincide with the left and right needle position when the machine is set for straight stitching. Check: Set the machine for zig-zag, maximum width. 2- With the presser foot in a raised position, hold a piece of paper in place over the needle plate so needle penetrations may be observed. - Page 73 Service Manual ILLUSTRATION "A" Rev. n . P/N 357773-002 MAY/00...
-
Page 74: Needle Location In The Needle Place Slot
Service Manual Needle location in the needle plate slot When a size 4 needle penetrates the needle plate slot, it must remain in the center of that opening. Adjustment: Remove the free arm extension table, tension assembly dial, the knobs of the zig-zag and needle position levers, all covers (face plate, rear, bottom bed and front) and presser foot 2- Rotate hand wheel toward the front of the machine until a needle... - Page 75 Service Manual 0,10mm INTERFERENCE 0,05mm CLEARANCE .004” INTERFERENCE .002” CLEARANCE ILLUSTRATION "A" Rev. n . P/N 357773-002 MAY/00...
-
Page 76: Needle To Hook Relationship
Service Manual Needle to hook relationship Proper needle to hook relationship is required to prevent skipping of stitches on various fabrics and to prevent hook and needle damage. If the needle is too far from the hook, the hook point will be unable to pick up the needle thread loop and skipping of stitches will occur. -
Page 77: Feed Rock Shaft End Play
Service Manual Feed rock shaft end play There must be no end play or binds in feed rock shaft (C). Check: Remove the free arm extension table, tension assembly dial, the knobs of the zig-zag and needle position levers and all covers (face plate, rear, bottom bed and front) 2- Move feed rock shaft (C) left to right to check for end play. -
Page 78: Zig-Zag Bight Stop In The Straight Stitch Position
Service Manual 1,00mm 1,20mm .040’’ .047’’ Rev. n . P/N 357773-002 MAY/00... -
Page 79: Feed Dog Centralization
Service Manual Feed dog centralization Check: Set the machine to straight stitch, maximum stitch length. 2- Turn the hand wheel toward the front of the machine to bring feed dog (A) to its highest point. 3- Feed dog (A) must be parallel to and centrally located in the needle plate slots. Adjustment: Remove presser foot and needle plate. -
Page 80: Maximum Width Zig-Zag Bight Stop
Service Manual 0,38mm 0,50mm .015” .020” Rev. n . P/N 357773-002 MAY/00... -
Page 81: Feed Dog Throw
Service Manual Feed dog throw Check: Set the machine to maximum stitch length. 2- Turn hand wheel toward the front of the machine until feed dog (A) is in its most forward position. 3- There should be a clearance of 0,38 mm - 0,50 mm (.0 5" -.020") between the center bar of feed dog (A) and the edge of the center slot of the needle plate. -
Page 82: Needle Bar Safety Bight Stop
Service Manual Rev. n . P/N 357773-002 MAY/00... - Page 83 Service Manual Stitch length regulator spring tension The reverse button must operate smoothly with the stitch length set at maximum stitch. Adjustment; 1- Remove the free arm extension table, tension assembly dial, the knobs of the zig-zag and needle position levers, all covers (face plate, rear, bottom bed and front), motor belt and hand wheel.
-
Page 84: Alignment Of Knobs With Panel Graphics
Service Manual Rev. n . P/N 357773-002 MAY/00... -
Page 85: Motor Belt Tension
Service Manual Motor belt tension Too tight a motor belt tension can cause the machine to run slow and will overload the motor. Too loose a motor belt tension will create belt noise and may cause jumping of the belt teeth on cogged motor pulley. -
Page 86: Presser Bar Height And Alignment
Service Manual Rev. n . P/N 357773-002 MAY/00... - Page 87 Service Manual Rev. n . P/N 357773-002 MAY/00...
-
Page 88: Hook Drive Belt Tension And Hook Brive Belt Retainer Bracket
Service Manual Rev. n . P/N 357773-002 MAY/00... - Page 89 108 109 110 indicated on pages Only Singer oil and Singer grease must be used. Use of parafin based oil, or non-silicon type grease, will create a build up of residue on the bearing surfaces. The self-lubricating qualities of the bearings will be defeated by clogging of the pores in the bearing if such oil or grease are used.
-
Page 90: Hook Timing (Hook And Needle Synchronism)
Service Manual Rev. n . P/N 357773-002 MAY/00... -
Page 91: Machine Settings
Service Manual Flexi stitch zeroing Machine settings: Stitch selection: straight stretch stitch. 2- Stitch width: straight stitch. 3- Stitch length:Turn dial to left until the indicator mark printed on it ( ) is aligned with the dot in the front cover ( ). 4- Balance control: neutral (center). -
Page 92: Bobbin Case Position Finger
Service Manual Rev. n . P/N 357773-002 MAY/00... - Page 93 Service Manual Zero feed Check: Remove needle. 2- Place a 2-plies of light-weight fabric over the needle plate. 3- Set stitch length control dial (B) to "O" (zero). 4- Set reverse button with indicator mark (C) in line with reference mark (A) on the front cover. 5- Lower presser foot on fabric and run machine at full speed.
-
Page 94: Bobbin Case Clearance
Service Manual 0,50mm 1,00mm .020” .040” 0,50mm 1,00mm .020” .040” ILLUSTRATION D Rev. n . P/N 357773-002 MAY/00... - Page 95 Service Manual Buttonhole cutting space To allow sufficient space for cutting without damaging the thread, the buttonhole cutting space must be approximately 0,50 mm - ,00 mm ( .020" - .040") . Check: Remove presser foot. 2- Insert a number 9 needle to provide better visibility and accuracy when checking buttonhole cutting space.
-
Page 96: Needle Thread Tension
Service Manual Rev. n . P/N 357773-002 MAY/00... - Page 97 Service Manual Rev. n . P/N 357773-002 MAY/00...
-
Page 98: Bobbin Winder
Service Manual Rev. n . P/N 357773-002 MAY/00...