RCA L26WD26D User Manual
Rca lcd tv user's guide
Hide thumbs
Also See for L26WD26D:
- Manual de l'utilisateur (44 pages) ,
- Guía del usuario (44 pages) ,
- Quick start manual (2 pages)

Related Manuals for RCA L26WD26D


Summary of Contents for RCA L26WD26D
-
Page 1: Table Of Contents
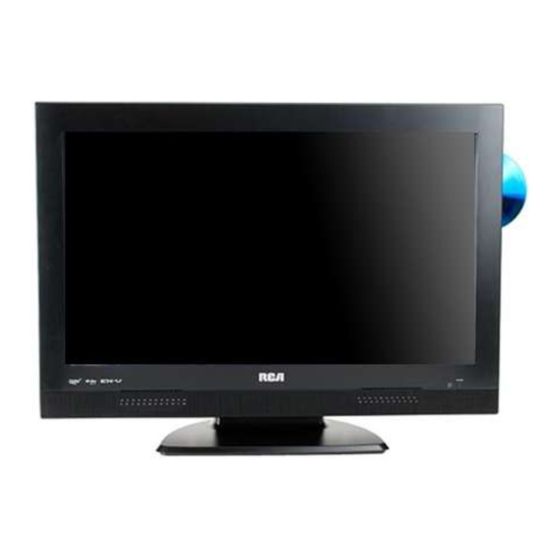
LCD Users Guide Connections page 7 Menus page 29 reality: reproduced. reality: reproduced. Remote page 17 FAQs page 36 (Model L26WD26D shown) Playing Discs page 19 Warranty page 42... -
Page 2: Important Information
Safety Instructions on the next page. Product Registration Please fi ll out the product registration card (packed separately) and return it immediately. For US customers: Your RCA Consumer Electronics product may also be registered at www.rca.com/television. Registering this product allows us to contact you if needed. -
Page 3: Important Safety Instructions
Important Safety Instructions Important Safety Instructions 1. Read these instructions. 2. Keep these instructions. 3. Heed all warnings. 4. Follow all instructions. 5. Do not use this apparatus near water. 6. Clean only with dry cloth. 7. Do not block any ventilation openings. Install in accordance with the manufacturer’s instructions. 8. - Page 4 Table of Contents Important Safety Instructions ... i Chapter 1: Connections & Setup Things to Consider Before You Connect ... 5 Protect Against Power Surges ... 5 Protect Components from Overheating ... 5 Position Cables Properly to Avoid Audio Interference ... 5 Important Stand and Base Safety Information ...
-
Page 5: Chapter 1: Connections & Setup
Things to Consider Before You Connect Protect Against Power Surges • Connect all components before you plug any of their power cords into the wall outlet. • Turn off the TV/DVD and/or component before you connect or disconnect any cables. •... -
Page 6: Get The Picture
Connections & Setup Coaxial cable Outdoor or Indoor antenna Get the Picture The fi rst part of connecting your TV is to get the picture, also known as the signal. The back panel of your TV allows you to receive analog and/or digital channels by using the ANT Input. -
Page 7: Connections
Choose Your Connection For additional assistance while using your RCA product, please visit www.rca.com/customersupport. There are several ways to connect your TV. Please use the following chart to determine which connection is best for you. Proceed to the appropriate page and connect your TV. -
Page 8: Video (Basic) Connection
Connections & Setup Video (Basic) Connection This is an example of a connection using the Video jack. Go to the top of page 9 for specifi c instructions. Don't forget: If necessary, connect antenna or cable to get a picture. Go to page 6 for instructions. - Page 9 Connecting the Device with Video (Basic) This connection allows you to connect a device that has a Video Out jack, for example, a Yellow satellite receiver. White Note: If the device you're connecting also has Component Video jacks and you have component video cables, we recommend you use the Component Video (Advanced) Connection instead.
-
Page 10: Hdmi Connection
Connections & Setup HDMI Connection This is an example of a connection using the HDMI jack. *Don't forget: If necessary, connect antenna or cable to get a picture. Go to page 6 for instructions. Device with HDMI Audio Out Video Out PC/HDMI AUDIO HDMI... - Page 11 Connecting the Device High-Defi nition Multimedia Interface (HDMI) technology is an uncompressed digital connection that carries both video and audio data by way of an integrated mini-plug cable. Since HDMI technology is based on Digital Visual Interface (DVI), the jack on the back of your TV/DVD is also compatible with devices that have a DVI output jack.
-
Page 12: Pc Connection
Connections & Setup PC Connection This is an example of a connection using the PC jacks. Don't forget: If necessary, connect antenna or cable to get a picture. Go to page 6 for instructions. Connecting the Device This connection allows you to connect to a personal computer. 1. -
Page 13: Remote
Plug in the TV/DVD Plug the end of the power cord into the back of the TV/DVD. Plug the other end into a grounded wall outlet. Insert the plug completely into the outlet. Do not plug into an outlet controlled by a light switch. Put Batteries in the Remote •... -
Page 14: Complete The Initial Setup
Connections & Setup SETUP LANGUAGE ENGLISH ENGLISH/FRANÇAIS/ESPAÑOL TV/CABLE CABLE AUTO CH MEMORY ADD/DELETE :SELECT :ADJUST SETUP LANGUAGE ENGLISH TV/CABLE CABLE AUTO CH MEMORY ADD/DELETE :SELECT :ADJUST Complete the Initial Setup The menu system in your TV allows the TV’s features to work properly. -
Page 15: Explanation Of Jacks (In Alphabetical Order)
Explanation of Jacks (in alphabetical order) This section describes the jacks on the back panel of your TV. There are several ways to connect devices. VIDEO AUDIO (MONO) AUDIO (MONO) COMPONENT PC/HDMI AUDIO HDMI MONITOR PC/HDMI AUDIO S-VIDEO L AUDIO (MONO) Chapter 1 Connections &... -
Page 16: The Top Of Your Tv/Dvd
Connections & Setup The Top of Your TV/DVD If you cannot locate your remote, you can use the top panel buttons of your TV/DVD to operate many of the TV/DVD’s features. PLAY Begins disc play. STOP Stops disc play. SKIP Skips a disc forward or backward. EJECT Removes the disc. -
Page 17: The Buttons On The Remote Control
POWER TV/DVD DISPLAY MUTE SLEEP SETUP/ TV MENU MENU ENTER EXIT/ TOP MENU CANCEL SEARCH PLAY SEARCH SKIP STOP SKIP SUBTITLE SLOW PAUSE/STILL PLAY MODE SLOW RETURN REPEAT A-B ANGLE AUDIO QUICK VIEW/ JUMP SCREEN SIZE MARKER ZOOM INPUT SELECT Chapter 1 Connections &... - Page 18 Connections & Setup SLEEP Sets the TV to turn off after a set time. The time increases in 10 minute increments and goes up to 2 hours. SLOW In DVD mode, plays a disc in forward or backward slow motion. STOP In DVD mode, stops a disc.
-
Page 19: Playing Discs
Regional Coding Both the TV/DVD unit and the discs are coded by region. These regional codes must match in order for the disc to play. If the codes don’t match, the disc won’t play. This unit’s code is region 1. Using Different Menus Each disc is programmed with different features. -
Page 20: Using A Disc Menu
Playing Discs Using a Disc Menu A disc is capable of having an on-screen menu that is separate from the DVD’s menu system. The disc menu might only contain a list of the titles and chapters, or it may allow you to change features such as language and playback settings. -
Page 21: Disc Features
Disc Features To see the Info Display, press the DISPLAY button on the remote while a disc is playing. The Info Display appears across the top of the screen. To make the Info Display disappear from the screen, press DISPLAY on the remote. DVD Disc Info Display Disc Operation Title... -
Page 22: Changing The Audio Language
Playing Discs Changing the Audio Language If the disc was created with different language tracks (recorded in different languages), you can temporarily change the DVD’s Audio Language setting. 1. While a disc is playing, press the AUDIO button on the remote. 2. -
Page 23: Changing The Camera Angle
Changing the Camera Angle Some discs contain multiple angles of a particular scene or sequence. If the disc only has one angle, this feature won’t work. To change the camera angle: 1. While a disc is playing, press the ANGLE button on the remote. The number of angles available are displayed. -
Page 24: Playing Other Music And Jpeg Files
Playing Discs Playing Other Music and JPEG Files The TV/DVD can play mp3 fi les, Windows Media-formatted content and JPEG fi les. 1/15 00:00:00 /MP3-5.MP3 MP3-5 Select Files MP3-6 Repeat :Off WMA-11 Mode :Off WMA-12 Picture-1 Picture-2 Music Playing Picture-3 Picture-4 /Picture-01.JPG Picture-01... -
Page 25: Chapter 3: Using The Tv's Features
Chapter 3: Using the TV's Features Channel Banner There are several indicators that might appear when you press the DISPLAY button on the remote. This display is called the Channel Banner. The following list describes the items on the Channel Banner screen (left to right and top to bottom). 100-15 BEV DIGITAL TV-14 D CABLE... -
Page 26: How V-Chip Works
Using the TV’s Features LOCKS NEW PASSWO RD [0-9] : SELECT ENTER : SET EXIT : END Hierarchy of Age-Based Ratings TV-MA Mature Audience Only TV-14 Parents Strongly Cautioned TV-PG Parental Guidance Suggested TV-G General Audience TV-Y7 Directed to Children 7 years and older TV-Y All Children V- C H I P S E T... -
Page 27: V-Chip Movie Rating Limit
Blocking Specifi c Content Themes You can block programs based on their content, for example, violence. When you block a content theme for a particular rating, you automatically block that content theme for higher rated programs as well. To block program content: 1. -
Page 28: Additional Features
There are additional features available unrelated to Parental Controls. Picture Processing With a focus on exceptional picture performance, all RCA models feature Enhanced Natural Vision (EN-V). EN-V picture processing is designed to provide enhanced color and contrast giving you a bright, crisp picture. -
Page 29: Chapter 4: Using The Tv's Menu System
Chapter 4: Using the TV's Menu System SETUP LANGUAGE ENGLISH ENGLISH/FRANÇAIS/ESPAÑOL TV/CABLE CABLE AUTO CH MEMORY ADD/DELETE :SELECT :ADJUST PICTURE PICTURE PREFERENCE SPORTS SPORTS/STANDARD/MOVIE/MEMORY BRIGHTNESS CONTRAST COLOR TINT SHARPNESS :SELECT :ADJUST Chapter 4 Graphics contained within this publication are for representation only. Using the Menu System This section explores the menus of your TV. -
Page 30: Additional Options In Pc Mode
Using the TV's Menu System PICTURE BRIGHTNESS CONTRAST HOR POSITION VER POSITION PHASE CLOCK :SELECT :ADJUST A U D I O / SAP / MONO T R E B L E B A L A N C E S U R R O U N D O F F : S E L E C T : A D J U S T... -
Page 31: Setup Menu
SETUP LANGUAGE ENGLISH TV/CABLE CABLE AUTO CH MEMORY ADD/DELETE :SELECT :ADJUST CC ADVANCED T E X T S I Z E T E X T T Y P E T E X T C O L O R T E X T E D G E B A C K G R O U N D C O L O R TEXT OPACITY BACKGROUND OPACITY... -
Page 32: Option Menu
Using the TV's Menu System SETUP PICTURE SIZE PICTURE SCROLL CINEMA MODE F I L M ASPECT O FF SIGNAL METER AUTO SHUT OFF O FF :SELECT :ADJUST OPTION CH LABEL VIDEO LABEL :SELECT :ADJUST Picture Size Allows you to change the format of the screen. If there are bars on-screen try a different format, if available, that may eliminate the bars. -
Page 33: Menus
Chapter 5: Using the DVD's Menu System Menu : English Subtitle : English Audio : English TV Screen : 4:3 Display : On Picture Mode : Auto JPEG Interval : Off Chapter 5 Graphics contained within this publication are for representation only. The DVD’s Menu System The DVD’s menu system is not the same as the disc menu or the Info Display. -
Page 34: The Sound Menu
Using the DVD's Menu System Night Mode Digital Out Parental Password PG-13 NC 17 Display The default is to show all on-screen displays. To turn the option off, press the down arrow to highlight Display, then press ENTER. Press the up or down arrow to highlight Off and press ENTER. Picture Mode There are two types of picture content recorded on DVD discs- Film (pictures recorded from fi... -
Page 35: The Language Code List
The Language Code List Enter the appropriate code number for the Menu, Subtitle, and Audio DVD language menu options. Language Name Code Language Name Code Language N ame C ode Language Name Code Abkhazian 1112 Afar 1111 Afrikaans 1116 Albanian 2927 Amharic 1123... -
Page 36: Faqs
Chapter 6: Other Information Frequently Asked Questions (FAQs) What’s the quickest way to view High Defi nition (HD) content? Connect an off-air antenna to the ANT Input to view free local digital channels where available. You might need to purchase an antenna. Go to page 6 for more information. Visit www.antennaweb.org to get help deciding what type of antenna to use to receive the local digital channels avail- able to you. -
Page 37: Other Information
Note for U.S. customers: If you prefer, we can provide you with the name of an Authorized Service Representative who will visit your home for a fee to install your electronic entertainment system and to instruct you in its operation. For details about this service, call 1-888-206-3359. For additional assistance while using your RCA product, please visit www.rca.com/customersupport. - Page 38 Other Information The menu is displayed in a foreign language • The Menu Language preference is set to that language. From the DVD’s main menu, select the Languages option (fi rst item option in the DVD menu). From the Languages menu, select the Menu option (fi rst item in the menu). Highlight the language you prefer and press OK.
- Page 39 Keep your TV unplugged for about 5 minutes. Then plug the TV back in, turn on the TV, and see if the problem is fi xed. If the problem remains, then please visit www.rca.com/television for updated FAQs or contact RCA Customer Support at the support number provided in your Warranty under How To Get Service.
-
Page 40: Mounting Your Tv To The Wall
To mount your TV to the wall you need to purchase a VESA wall mount. For model L26WD26D, purchase a VESA 100 x 100, M4; and for model L32WD26D, purchase a VESA 200 x 200, M6 (100 x 100, for example, means the mounting measurements are 100mm horizontally and 100mm vertically;... -
Page 41: V-Chip Rating Explanations
Cleaning Discs • Dirty discs can cause reduced video and audio performance. Always keep discs clean by wiping them gently with a soft cloth from the inner edge toward the outer perimeter. • If a disc becomes very dirty, wet a soft cloth in water, wring it out well. Wipe the dirt away gently, and remove any water drops with a dry cloth. -
Page 42: Warranty
90 days from date of purchase for labor charges for screen sizes 32” and smaller. One year from date of purchase for labor charges for screen sizes larger than 32”. At our option, we will either pay an Authorized RCA Service Center the labor to repair your television or replace your television with a new or refurbished unit. - Page 43 • REPAIR OR REPLACEMENT AS PROVIDED UNDER THIS WARRANTY IS THE EXCLUSIVE REMEDY OF THE CONSUMER. TTE TECHNOLOGY, INC. SHALL NOT BE LIABLE FOR SPECIAL, INCIDENTAL OR CONSEQUENTIAL DAMAGES RESULTING FROM THE USE OF THIS PRODUCT OR ARISING OUT OF ANY BREACH OF ANY EXPRESS OR IMPLIED WARRANTY ON THIS PRODUCT. THIS DISCLAIMER OF WARRANTIES AND LIMITED WARRANTY ARE GOVERNED BY THE LAWS OF THE STATE OF INDIANA.
-
Page 44: Fcc Information
Please do not send any products to the Indianapolis address listed in this manual or on the carton. This will only add delays in service for your product. TTE Technology, Inc. 101 West 103rd Street Indianapolis, IN 46290 ©2007 TTE Technology Inc. RCA and associated marks are trademarks of THOMSON S.A. used under license to TTE Corporation. Printed in China...