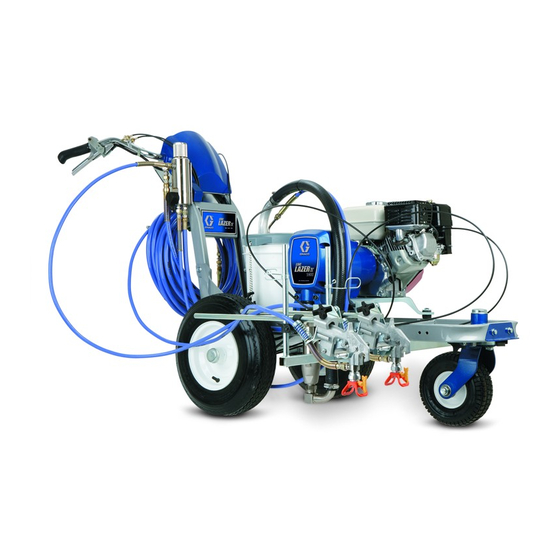
Graco LineLazer IV 3900 Operation
Auto-layout system airless line stripers
Hide thumbs
Also See for LineLazer IV 3900:
- Repair and parts manual (38 pages) ,
- Repair parts list manual (38 pages) ,
- Important safety instructions manual (36 pages)
Table of Contents
Advertisement
Operation / Fonctionnement / Funcionamiento /
Bediening / Betrieb
™
LineLazer
IV 3900, 5900, 200HS Auto-Layout
Traceurs de lignes Airless LineLazer
™
Auto-Layout
/ Sistema trazalíneas sin aire LineLazer
™
Auto-Layout
/ LineLazer
airless belijningsapparaten / Airless-Markiergeräte LineLazer
™
200HS Auto-Layout
- For the application of line striping materials -
- Pour le tracement de lignes à la peinture -
- Para la aplicación de materiales trazalíneas -
- Voor het aanbrengen van belijningsmaterialen -
- Zur Applikation von Linienmarkierungsmaterialien -
3300 psi (22.8 MPa, 228 bar) Maximum Working Pressure / Pression maximale de service 3300 psi (22,8 MPa, 228 bars) /
Presión máxima de trabajo de 3300 psi (22,8 MPa, 228 bar) / Maximum werkdruk 3300 psi (22,8 MPa, 228 bar) /
Zulässiger Betriebsüberdruck 3300 psi (22,8 MPa, 228 bar)
Important Safety Instructions
Read all warnings and instructions in this manual. Save these instructions.
Instructions de sécurité importantes
Lire toutes les mises en garde et instructions de ce manuel. Sauvegarder ces instructions.
Instrucciones importantes de seguridad
Lea todas las advertencias e instrucciones de este manual. Guarde las instrucciones.
Belangrijke veiligheidsinstructies
Lees alle waarschuwingen en instructies in deze handleiding. Bewaar deze instructies.
Wichtige Sicherheitshinweise
Diese Betriebsanleitung aufmerksam lesen und zum späteren Nachschlagen aufbewahren.
Related Manuals /
Manuels afférents /
Manuales
relacionados /
Bijbehorende
handleidingen /
Verwandte
Betriebsanleitungen
312195
310643
309741
309055
312220
312307
Graco Inc. P.O. Box 1441 Minneapolis, MN 55440-1441
Copyright 2007, Graco Inc. is registered to I.S. EN ISO 9001
™
IV 3900, 5900, 200HS avec le dispositif
™
IV 3900, 5900, 200HS Auto-Layout
-System
™
System Airless Line Stripers /
™
IV 3900, 5900, 200HS
™
-systeem voor
™
IV 3900, 5900,
312190B
ti10233a
Advertisement
Table of Contents

Related Manuals for Graco LineLazer IV 3900


Summary of Contents for Graco LineLazer IV 3900
- Page 1 Related Manuals / Manuels afférents / Manuales relacionados / Bijbehorende handleidingen / Verwandte Betriebsanleitungen 312195 310643 309741 309055 312220 312307 ti10233a Graco Inc. P.O. Box 1441 Minneapolis, MN 55440-1441 Copyright 2007, Graco Inc. is registered to I.S. EN ISO 9001...
-
Page 2: Table Of Contents
Contents Inhoudsopgave Warnings ........4 Waarschuwingen . - Page 3 Models Covered / Modèles concernés / Modelos / Modellen in deze handleiding / Behandelte Modelle ti6394a 3900 ✔ ✔ 253920 ✔ ✔ 253953 ✔ ✔ 255151 ✔ ✔ 255152 ti6394a 5900 ✔ ✔ 253921 ✔ ✔ 253954 ✔ ✔ 255153 ✔...
-
Page 4: Warnings
Warnings Warnings The following are general warnings related to the safe setup, use, grounding, maintenance and repair of this equipment. In the text of this manual, the exclamation point symbol alerts you to a warning and the hazard symbol refers to specific risks. Refer back to these General Warnings pages. - Page 5 Check equipment daily. Repair or replace worn or damaged parts immediately. • Do not alter or modify equipment. • Use equipment only for its intended purpose. Call your Graco distributor for information. • Route hoses and cables away from traffic areas, sharp edges, moving parts, and hot surfaces. •...
-
Page 6: Mises En Garde
Mises en garde Mises en garde Les mises en garde suivantes sont des mises en garde de sécurité générales relatives à la configuration, utilisation, maintenance et réparation de ce matériel. Dans ce manuel, le point d’exclamation est une mise en garde et le symbole de danger fait référence à des risques spécifiques. - Page 7 Ne pas modifier cet équipement. • N’utiliser ce matériel que pour l’usage auquel il est destiné. Pour plus de renseignements appelez votre distributeur Graco. • Écarter les flexibles et câbles électriques des zones de circulation, des bords coupants, des pièces en mouvement et des surfaces chaudes.
-
Page 8: Advertencias
Advertencias Advertencias A continuación se ofrecen advertencias en general relacionadas con la seguridad de la puesta en marcha, utilización, conexión a tierra, mantenimiento y reparación de este equipo. En el texto de este manual, el símbolo acompañado de una exclamación le indica que se trata de una advertencia y el símbolo de peligro se refiere a un riesgo específico. - Page 9 • Utilice el equipo únicamente para el fin para el que ha sido destinado. Si desea información, póngase en contacto con su distribuidor Graco. • Desvíe las mangueras de zonas de tráfico intenso, de curvas pronunciadas, de piezas movibles y superficies calientes.
-
Page 10: Waarschuwingen
Waarschuwingen Waarschuwingen Hieronder staan algemene waarschuwingen die te maken hebben met de veilig(e) installatie, gebruik, aarding, onderhoud en reparatie van deze apparatuur. Het symbool met het uitroepteken in the tekst van deze handleiding verwijst naar een waarschuwing en het gevarensymbool verwijst naar specifieke risico’s. Zie de pagina’s met de algemene waarschuwingen. Daarnaast zijn er procedurespecifieke waarschuwingen te vinden in de tekst, waar van toepassing. - Page 11 • Geen veranderingen of wijzigingen in de apparatuur aanbrengen. • De apparatuur alleen voor het beoogde doel gebruiken. Neem contact op met uw Graco-leverancier voor meer informatie. • Houd slangen en kabels uit de buurt van plaatsen waar gereden wordt, scherpe randen, bewegende onderdelen en hete oppervlakken.
-
Page 12: Warnhinweise
Warnhinweise Warnhinweise Die folgenden Warnhinweise beziehen sich auf sichere Systemvorbereitung, Einsatz, Erdung, Wartung und Reparatur dieses Geräts. Im Text dieser Anleitung steht das Symbol mit dem Ausrufezeichen bei Warnhinweisen, und das Gefahrensymbol weist auf spezielle Risiken hin. Diese Seiten mit allgemeinen Warnhinweisen sollten regelmäßig konsultiert werden. Weitere verfahrensspezifische Warnhinweise sind an entsprechenden Stellen zu finden. - Page 13 • Gerät nicht verändern oder modifizieren. • Das Gerät nur für den vorgesehenen Zweck verwenden. Bei Fragen dazu den Graco-Händler kontaktieren. • Die Schläuche und Kabel nicht in der Nähe von belebten Bereichen, scharfen Kanten, beweglichen Teilen oder heißen Flächen verlegen.
-
Page 14: Tip Selection
Tip Selection / Sélection des buses / Selección de la boquilla / Tipkeuze / Düsenauswahl Tip Selection / Sélection des buses / Selección de la boquilla / Tipkeuze / Düsenauswahl (cm) (cm) (cm) (cm) ✔ LL5213* 2 (5) ✔ LL5215* 2 (5) ✔... -
Page 15: Component Identification
3900/5900 Component Identification / Identification des composants des modèles 3900/5900 / 3900/5900 Identificación de los componentes / De onderdelen, 3900/5900 / 3900/5900, Komponenten 3900/5900 Component Identification / Identification des composants des modèles 3900/5900 / 3900/5900 Identificación de los componentes / De onderdelen, 3900/5900 / 3900/5900, Komponenten SETUP MODE... - Page 16 200HS Component Identification / Identification des composants du 200HS / 200HS Identificación de los componentes / De onderdelen, 200HS / 200HS, Komponenten 200HS Component Identification / Identification des composants du 200HS / 200HS Identificación de los componentes / De onderdelen, 200HS / 200HS, Komponenten SETUP MODE ti10017a...
-
Page 17: Setup
Setup / Configuration / Configuración / Opstellen / Systemvorbereitung Setup / Configuration / Configuración / Opstellen / Systemvorbereitung Approximate Fill Level ti3308a ti3307a ti3309a ti3306a English Ground striper with Each time your spray and Check engine oil level. Fill fuel tank. grounding clamp during store, fill throat packing Add SAE 10W-30... - Page 18 Setup / Configuration / Configuración / Opstellen / Systemvorbereitung ti6473a ti6477a ti6594a ti3441a ti6470a ti3430a English Set pump switch OFF. If removed, install Turn prime valve down. Turn pressure control strainer. counterclockwise to lowest pressure. Français Mettre l’interrupteur de la Remettre la crépine Abaisser la vanne d’amorçage.
- Page 19 Check hydraulic oil level. Add allowable for proper with flushing fluid. Attach ground wire to pail and to true Graco hydraulic oil, Grade46, striper operation is earth ground. Do 1. - 5. of Startup to flush out storage oil 169236 (5 gallon/ 18.9 liter) 3/8 in.
- Page 20 Adjust can actuator bolt to position. 2) until can actuator is desired tension. approximately 1 inch or Note: This is set at Graco factory. more above ground. Français Retirer la goupille Basculer le bras vers le bas Régler la vis de réglage Régler le boulon du...
- Page 21 Verify can is seated properly. tension. tip in place. Point can away Tighten. Note: This is set at Graco factory. from you. Push tip down tight on can. Failure to do this may result in tip falling off during use.
-
Page 22: Startup
Startup / Mise en service / Puesta en marcha / Opstarten / Inbetriebnahme Startup / Mise en service / Puesta en marcha / Opstarten / Inbetriebnahme ti3312a ti3313a ti6480a ti3315a English Start engine. Move fuel valve to open. Move choke to closed. Set throttle to fast. - Page 23 Startup / Mise en service / Puesta en marcha / Opstarten / Inbetriebnahme ti3317a ti6482a ti3316a English Pull starter cord. After engine starts, move Set throttle to desired Digital display is choke to open. setting. functional after engine starts. Français Tirer sur le cordon du Dès que le moteur tourne, Régler l’accélérateur...
- Page 24 Startup / Mise en service / Puesta en marcha / Opstarten / Inbetriebnahme ti6594a 15 SEC. ti3441a ti3322a ti6476a FLUSH / ti6472a RINCER / ti6471a ti6596a LAVAR / ti6596a SPOELEN / SPÜLEN 3304c ti3442a English Set pump switch ON. Turn pressure down, turn prime Hold gun against grounded metal Inspect fittings for leaks.
- Page 25 Startup / Mise en service / Puesta en marcha / Opstarten / Inbetriebnahme ti3325a ti3324a PAINT ti3316a ti3322a FLUSH / RINCER / LAVAR / ti6638a SPOELEN / SPÜLEN ti3327a English SwitchTip and Guard Assembly Place siphon tube in paint Trigger gun again into Engage trigger safety.
-
Page 26: Gun Placement
Gun Placement / Mise en place du pistolet / Colocación de la pistola / Het pistool positioneren / Pistolenbefestigung Gun Placement / Mise en place du pistolet / Colocación de la pistola / Het pistool positioneren / Pistolenbefestigung ti3331a ti6550a ti3332a ti3330a ti6549a... - Page 27 Gun Placement / Mise en place du pistolet / Colocación de la pistola / Het pistool positioneren / Pistolenbefestigung TI3710b English Français Español Nederlands Deutsch One line. Une ligne. Una línea. Eén leiding. Eine Linie One line up to 24 in. Une ligne jusqu’à...
- Page 28 Gun Placement / Mise en place du pistolet / Colocación de la pistola / Het pistool positioneren / Pistolenbefestigung Trigger Sensor Adjustment / Réglage de sensibilité de la gâchette / Ajuste del sensor de disparo / De trekkersensor afstellen / Einstellung des Abzugsensors ti3691b ti3691c...
- Page 29 Gun Placement / Mise en place du pistolet / Colocación de la pistola / Het pistool positioneren / Pistolenbefestigung Clearing Tip Clogs / Déboucher la buse / Despeje de las obstrucciones de la boquilla / Verstoppingen in de tip verwijderen / Reinigung verstopfter Düsen ti3355a ti3347a...
-
Page 30: Auto-Layout System
Auto-Layout System / Dispositif Auto-Layout (« Disposition automatique ») / Sistema de Trazado Automático / Auto-Layout-systeem / Auto-Layout-System Auto-Layout System / Dispositif Auto-Layout (« Disposition automatique ») / Sistema de Trazado Automático / Auto-Layout-systeem / Auto-Layout-System 312190B... - Page 31 MEASURE MODE SETUP MODE to start measuring CLEAR ALL English Start engine. The Graco logo This display appears on all new Pressure displays. Pressure varies Press SETUP to move vertically. Press momentarily displays. Striper stripers. (0000 - 3300 psi). MODE to move horizontally.
- Page 32 30 cm (1 pie); los puntos se marcarán hasta que suelte el botón Remoto. Nederlands Start de motor. Het Graco-logo Deze gegevens verschijnen op alle De druk is te zien op het scherm. Druk op SETUP om verticaal te bewegen.
- Page 33 Auto-Layout System / Dispositif Auto-Layout (« Disposition automatique ») / Sistema de Trazado Automático / Auto-Layout-systeem / Auto-Layout-System Calibration / Étalonnage / Calibración / Kalibreren / Kalibrierung Begin Calibration / Commencer l’étalonnage / Comenzar calibración / Begin met kalibreren / Beginn der Kalibrierung ti10014a ti10015a...
- Page 34 Auto-Layout System / Dispositif Auto-Layout (« Disposition automatique ») / Sistema de Trazado Automático / Auto-Layout-systeem / Auto-Layout-System Calibration (cont’d) / Étalonnage (suite) / Calibración (cont.) / Kalibreren (vervolg) / Kalibrierung (Forts.) ti10011a ti10020a ti10013a English Insert calibration bar face down. Tighten knob.
- Page 35 Auto-Layout System / Dispositif Auto-Layout (« Disposition automatique ») / Sistema de Trazado Automático / Auto-Layout-systeem / Auto-Layout-System Calibration (cont’d) / Étalonnage (suite) / Calibración (cont.) / Kalibreren (vervolg) / Kalibrierung (Forts.) 1 FT 26 FT ti10021a ti10017a ti10016a ti10022a English Align calibration bar rear edge Push Remote button to start...
- Page 36 Auto-Layout System / Dispositif Auto-Layout (« Disposition automatique ») / Sistema de Trazado Automático / Auto-Layout-systeem / Auto-Layout-System Calibration (cont’d) / Étalonnage (suite) / Calibración (cont.) / Kalibreren (vervolg) / Kalibrierung (Forts.) End Calibration / Verify Calibration / Fin de l’étalonnage / Vérification de l’étalonnage / Finalizar calibración / Verificar Calibración /...
- Page 37 Auto-Layout System / Dispositif Auto-Layout (« Disposition automatique ») / Sistema de Trazado Automático / Auto-Layout-systeem / Auto-Layout-System MEASURE MODE - Measurement / MODE DE MESURAGE - Mesurage / MODO MEDIDA - Medida / MEASURE MODE - Meting / MEASURE-MODE - Messungen ti10275a ti10017a MEASURE MODE...
- Page 38 Auto-Layout System / Dispositif Auto-Layout (« Disposition automatique ») / Sistema de Trazado Automático / Auto-Layout-systeem / Auto-Layout-System MEASURE MODE - Measurement (cont’d) / MEASURE MODE (« Mode de mesurage ») - Mesurage / MODO MEDIDA - Medida (cont.) /MEASURE MODE - Meting (vervolg) / MEASURE-MODE - Messungen (Forts.) PARKING CALC SETUP MODE...
- Page 39 Auto-Layout System / Dispositif Auto-Layout (« Disposition automatique ») / Sistema de Trazado Automático / Auto-Layout-systeem / Auto-Layout-System PARKING MODE - Basic Stalls / MODE POUR EMPLACEMENTS DE PARKINGS - Emplacements de base / MODO ESTACIONAMIENTO - Interrupciones básicas / PARKEERFUNCTIE - Basis contour- aanduidingen / PARKMODUS - Einfache Zwischenräume ti10017a ti10064a...
- Page 40 Auto-Layout System / Dispositif Auto-Layout (« Disposition automatique ») / Sistema de Trazado Automático / Auto-Layout-systeem / Auto-Layout-System PARKING MODE - Basic Stalls (cont’d) / PARKING MODE (« Mode pour emplacements de stationnement ») - Emplacements de base (suite) / MODO ESTACIONAMIENTO - Interrupciones básicas (cont.) / PARKING MODE - Basis contouraanduidingen (vervolg) / ARKMODUS - Einfache Zwischenräume (Forts.) English Press SETUP and move to...
- Page 41 Auto-Layout System / Dispositif Auto-Layout (« Disposition automatique ») / Sistema de Trazado Automático / Auto-Layout-systeem / Auto-Layout-System PARKING MODE - Angle Stalls / PARKING MODE (« Mode pour emplacements de stationnement ») - Emplacements en biais / MODO ESTACIONAMIENTO - Interrupciones en ángulo / PARKING MODE - Contourhoeken / PARKMODUS - Abgewinkelte Zwischenräume ti10017a...
- Page 42 Auto-Layout System / Dispositif Auto-Layout (« Disposition automatique ») / Sistema de Trazado Automático / Auto-Layout-systeem / Auto-Layout-System PARKING MODE - Angle Stalls (cont’d) / PARKING MODE (« Mode pour emplacements de stationnement ») - Emplacements en biais (suite) / MODO ESTACIONAMIENTO – Interrupciones en ángulo (cont.) / PARKING MODE - Contourhoek (vervolg) / PARKMODUS - Abgewinkelte Zwischenräume (Forts.) ti10017a ti10064a...
- Page 43 Auto-Layout System / Dispositif Auto-Layout (« Disposition automatique ») / Sistema de Trazado Automático / Auto-Layout-systeem / Auto-Layout-System Double Mode / Mode double / Modo doble / Double Mode / Doppelter Modus ti10064a ti10017a English Press MODE and move to Press SETUP and move Press Remote button to mark first Press SETUP or MODE to move...
- Page 44 Auto-Layout System / Dispositif Auto-Layout (« Disposition automatique ») / Sistema de Trazado Automático / Auto-Layout-systeem / Auto-Layout-System ROAD MODE / ROAD MODE (« Mode pour routes ») / MODO CARRETERA / ROAD MODE / ROAD MODE (Straßenmodus) ROAD SETUP to listen SETUP MODE...
- Page 45 Auto-Layout System / Dispositif Auto-Layout (« Disposition automatique ») / Sistema de Trazado Automático / Auto-Layout-systeem / Auto-Layout-System ROAD SETUP to listen SETUP MODE VOLUME: DOT SIZE Nederlands Het scherm voor ROAD MODE Met ROAD PRE-SETS kunt Met de omhoog- of omlaag-pijl wijzigt Druk op SETUP om naar het geeft de verfgegevens en de u ook de geselecteerde...
- Page 46 Auto-Layout System / Dispositif Auto-Layout (« Disposition automatique ») / Sistema de Trazado Automático / Auto-Layout-systeem / Auto-Layout-System ROAD MODE (cont’d) / ROAD MODE (« Mode pour routes ») (suite) / MODO CARRETRA (cont.) / ROAD MODE (vervolg) / ROAD MODE (Straßenmodus) (Forts.) ti10354a ti10017a ti10354a...
- Page 47 Auto-Layout System / Dispositif Auto-Layout (« Disposition automatique ») / Sistema de Trazado Automático / Auto-Layout-systeem / Auto-Layout-System Change Units and Other Displays / Modifier les unités et autres écrans / Cambio de unidades y Otras pantallas / Eenheden wijzigen en overige schermen / Änderung der Einheiten und andere Anzeigen English To change display units, move to...
- Page 48 Auto-Layout System / Dispositif Auto-Layout (« Disposition automatique ») / Sistema de Trazado Automático / Auto-Layout-systeem / Auto-Layout-System Other Displays / Autres écrans / Otras visualizaciones / Overige schermen / Andere Anzeigen English This message is displayed if This message is displayed if Displays striper current status.
-
Page 49: Pressure Relief
Pressure Relief / Décompression / Descompresión / De druk ontlasten / Druckentlastung Pressure Relief / Décompression / Descompresión / De druk ontlasten / Druckentlastung ti6477a ti6594a ti3441a ti6473a ti6470a ti3324a ti3305a ti5405a PAINT ti3306a English Ground striper with Set pump switch Turn pressure to lowest setting. -
Page 50: Cleanup
Cleanup / Nettoyage / Limpieza / Reinigen / Reinigung Cleanup / Nettoyage / Limpieza / Reinigen / Reinigung TI3371A TI3375A ti6269a FLUSH English Caution: Perform Pressure Remove guard and Unscrew bowl, remove Clean filter, guard and Relief, page 49. SwitchTip. filter. - Page 51 Cleanup / Nettoyage / Limpieza / Reinigen / Reinigung ti6595a ti3317a ti6472a ti3310a ti3315a PAINT ti6476a ti6470a FLUSH ti3441a English Remove siphon tube set Turn engine ON and Turn prime valve Hold gun against paint pail. from paint and place in start engine.
- Page 52 Cleanup / Nettoyage / Limpieza / Reinigen / Reinigung ti6477a ti6473a PAINT ti6470a FLUSH TI3383A TI3377A FLUSH 1 -2 MIN. 15-30 SEC. ti5405a English Move gun to flushing Turn prime valve down 10 Raise siphon tube above 11 Turn pump switch OFF. pail, hold gun against and allow flushing fluid to flushing fluid and run striper...
- Page 53 Cleanup / Nettoyage / Limpieza / Reinigen / Reinigung TI3388A TI3390A FLUSH Pump Armor ti6271a ti2895a CAUTION If flushing with water, flush again Make sure plastic center Wipe striper, hose and gun Clean tip, guard and gasket with mineral spirits, or Pump tube is tightened securely.
-
Page 54: Warranty
With the exception of any special, extended, or limited warranty published by Graco, Graco will, for a period of twelve months from the date of sale, repair or replace any part of the equipment determined by Graco to be defective. This warranty applies only when the equipment is installed, operated and maintained in accordance with Graco’s written recommendations.