
Related Manuals for Thrustmaster TX racing wheel


Summary of Contents for Thrustmaster TX racing wheel
- Page 1 - USER MANUAL - MANUEL DE L’UTILISATEUR - BENUTZERHANDBUCH - HANDLEIDING - MANUALE D’USO - MANUAL DEL USUARIO - MANUAL DO UTILIZADOR - РУКОВОДСТВО ПОЛЬЗОВАТЕЛЯ - ΕγχΕιριδιο χρήσήσ - KULLANIM KILAvUZU - INSTRUKCjA OBSłUGI...
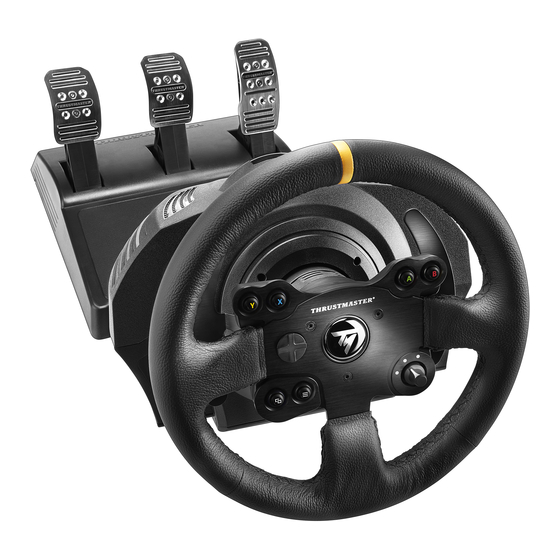
- Page 3 TECHNICAL SPECIFICATIONS Racing wheel base MODE button + Red/Green indicator Racing wheel light 2& Down) sequential gear shift levers (Up Multidirectional D-Pad Xbox Guide button Switch (3 positions) White indicator light Large threaded hole (for attachment system and tightening screw)
- Page 4 Attachment system Metal fastening screw Thrustmaster Quick Release Controller pairing (for Kinect™ detection) Mains supply connector (type A or B) (Varies from one country to another) Racing wheel USB cable and connector Gearbox connector (sold separately, forthcoming release) Pedal set connector...
- Page 5 CONNECTING THE RACING WHEEL TO THE MAINS = PLEASE READ Your racing wheel's power supply varies according to the country where you purchased your device. The mains supply can be: Internal, with: * A power supply unit located directly inside the racing wheel's base, with a type A connector *A 220-240V mains power supply cable = compatible only with a 220-240V electrical supply.
- Page 6 Internal, with: * A power supply unit located directly inside the racing wheel's base, with a type A connector *A 100-125V power supply cable = compatible only Never connect the 100-125V cable to a 220-240V power outlet! Never connect this cable to a mains power adapter! with a 100- 125V...
- Page 7 * Do not let any dust build up on the air vents. For safety reasons, never use the pedal set with bare feet or while wearing only socks on your feet. ® THRUSTMASTER DISCLAIMS ALL RESPONSIBILITY IN THE EVENT OF INJURY RESULTING FROM USE OF THE PEDAL SET WITHOUT SHOES.
- Page 8 Warning – Injuries due to force feedback and repeated movements Playing with a force-feedback steering wheel may cause muscle or joint pain. To avoid any problems: * Avoid lengthy gaming periods. * Take 10 to 15 minute breaks after each hour of play. * If you feel any fatigue or pain in your hands, wrists, arms, feet or legs, stop playing and rest for a few hours before you start playing again.
- Page 10 Warning – Pedal set pinch hazard when playing * Keep the pedal set out of children’s reach. * When playing, never place your fingers on or anywhere near the sides of the pedals. * When playing, never leave your fingers on or anywhere near the pedals' rear base. When playing, never place your fingers on or anywhere near the pedals' front base.
- Page 12 ATTACHING THE RACING WHEEL Attaching the racing wheel to a table or a desktop 1. Place the racing wheel on a table or any other horizontal, flat and stable surface. 2. Insert the fastening screw (11) in the attachment system (10), then tighten the device by turning the screw counterclockwise, so that it feeds into the large threaded hole (9) located beneath the racing wheel, until the device is perfectly stable.
- Page 13 ATTACHMENT / DIRECTION REMOVAL To tighten: Turn the screw counterclockwise...
- Page 14 To release: Turn the screw clockwise Attaching the racing wheel's base to a cockpit 1. Place the racing wheel's base on the cockpit shelf. 2. Drive two M6 screws (not included) through the cockpit shelf, then feed them into the two small threaded holes located beneath the racing wheel.
- Page 15 XBOX ONE MAPPING PC MAPPING UPGRADING YOUR RACING WHEEL'S FIRMWARE The firmware included in your racing wheel's base can be upgraded to a more recent version featuring product enhancements.
- Page 16 To display the firmware version that your racing wheel is currently running and upgrade it if required: on PC, connect to :// ts. Thrustmaster . com. In the Updates and downloads section, click Xbox One / Wheels / TX Racing Wheel, then select Driver / Firmware and follow the instructions describing the download and setup procedure.
- Page 17 WARNING: Never press the pedals during the racing wheel's self-calibration phase or while a game is loading! (This could cause incorrect calibration) If your racing wheel and pedal set do not operate correctly, or if calibration seems incorrect: Turn off your console, disconnect your racing wheel entirely, reconnect all cables (using the mains power supply cable and pedal set), then restart your console and your game.
- Page 18 CONTROLLER PAIRING (13)
- Page 19 Other hints for the MODE button To learn more about MODE button and indicator light, please visit ts.thrustmaster ; in the Updates and downloads section, click Xbox One / Wheels / TX Racing Wheel, then select Manual / Help file.
- Page 20 TECHNICAL FEATURES 1 Metal support for conical stop 4 2.5 mm Allen key (included) (not installed by default) 5 Position adjustment nut for conical stop 2 Conical stop 3 Attachment screw for metal support...
- Page 21 For safety reasons, never use the pedal set with bare feet or while wearing only socks on your feet. THRUSTMASTER® DISCLAIMS ALL RESPONSIBILITY IN THE EVENT OF INJURY RESULTING FROM USE OF THE PEDAL SET WITHOUT SHOES. Warning – Pedal set pinching hazard during gaming sessions...
- Page 22 * During gaming sessions, never place your fingers or thumbs on or near the sides of the pedals. * During gaming sessions, never place your fingers or thumbs on or near the rear base of the pedals. * During gaming sessions, never place your fingers or thumbs on or near the front base of the pedals.
- Page 23 = Always connect the pedal set to the wheel before connecting the wheel to the console or - Once the wheel has self-calibrated and the game has started, the pedals automatically calibrate themselves after being pressed a few times. - Never press on the pedals when the wheel is self-calibrating or when your game is starting up, to avoid calibration problems.
- Page 24 ATTENTION: To avoid any calibration problems, be sure to always disconnect your wheel’s USB cable from the console or PC before making any adjustments to your pedal set. Adjusting the HEIGHT of the accelerator pedal - Using the included 2.5 mm Allen key (4), unscrew the two screws holding the metal head (8) and its support (7) in place.
- Page 26 Installing the conical stop (“CONICAL RUBBER BRAKE” mod) This modification (or “mod”) is not essential, and is not installed by default. This means that the brake pedal functions perfectly even if the mod is not installed. This mod lets you experience a different feeling and resistance when braking.
- Page 27 - Using the included 2.5 mm Allen key (4), attach the unit using the attachment screw (3) and the small central screw thread located on the underside of the pedal set.
- Page 28 The “CONICAL RUBBER BRAKE” mod is now installed! Adjusting the brake pedal’s RANGE of travel and STRENGTH of resistance By slightly unscrewing the nut (5), you can further strengthen the resistance of the brake pedal by moving the conical stop (2) closer to the back of the pedal’s arm (if necessary, use a 14 mm wrench or pliers to re-tighten the nut and maintain the selected position).
- Page 29 Thrustmaster product (if no such action exists in the corresponding country, then the warranty period shall be one (1) year from the original date of purchase of the Thrustmaster product).
- Page 30 During the warranty period, Guillemot shall not provide, in principle, any spare parts, as Technical Support is the only party authorized to open and/or recondition any Thrustmaster product (with the exception of any reconditioning procedures which Technical Support may request that the consumer carry out, by way of written instructions –...
-
Page 31: Technical Support
TECHNICAL SUPPORT support.thrustmaster . com COPYRIGHT © 2017 Guillemot Corporation S.A. All rights reserved. Thrustmaster® is a registered trademark of Guillemot Corporation S.A. All other trademarks are the property of their respective owners. Illustrations not binding. Contents, designs and specifications are subject to change without notice and may vary from one country to another.