Advertisement
Table of Contents
- 1 Introduction
- 2 G Track Features
- 3 G Track Layout
- 4 Installing the G Track
- 5 Installing the G Track
- 6 Getting Started with MAC os X
- 7 G Track Quick Start
- 8 Operating the G Track
- 9 Operating the G Track
- 10 Application Notes
- 11 Using the Optional SP04 Shock-Mount
- 12 G Track Specifications
- Download this manual
See also:
Owner's Manual
Advertisement
Table of Contents

Related Manuals for Samson G Track


Summary of Contents for Samson G Track
- Page 2 G Track Specifications ........
-
Page 3: Introduction
Whether you’re recording your latest song idea, a podcast, or your band’s next big hit, the G Track is the simplest and most comprehensive solution for high quality recording on a Mac or PC. Just plug it in and start creating! In these pages, you’ll find a detailed description of the features of the G Track USB Studio... -
Page 4: G Track Features
G Track Features G Track Features • Large Diaphragm, 19mm, Studio Condenser with built-in audio interface and USB Digital Output. • Compatible with most any Mac and PC based Digital Audio Workstation. • The microphone's 19mm capsule with 3-micron diaphragm is extremely detailed and the super-cardioid pick-up pattern makes it ideal for recording vocals, acoustic instruments and just about any other sound source. -
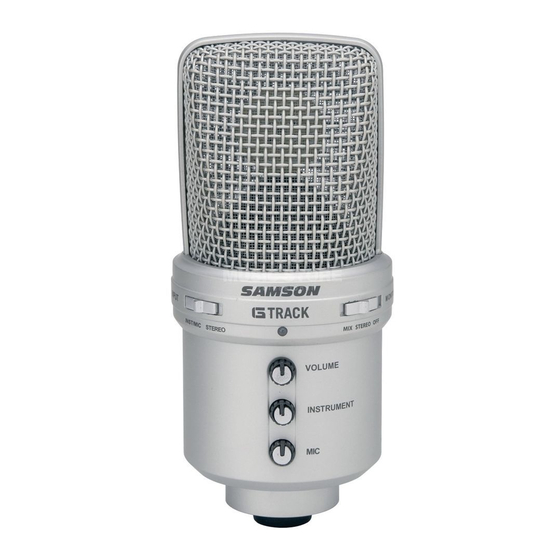
Page 5: G Track Layout
G Track Layout 1. Capsule – Large diaphragm, 19mm capsule with 3-micron diaphragm. 2. Input – Selector switch to configure the input configuration for either mono instrument and microphone, or stereo line in. 3. LED – The dual color Power/Clip LED... -
Page 6: Installing The G Track
OS and Windows in the following sections of this manual. Getting Started with Windows Figure 2 1. The first time you plug the G Track into a USB port, Windows will install the universal drivers for that port. A balloon tip will pop up, telling you it has found the USB Audio codec (figure 1). -
Page 7: Installing The G Track
Control Panel and opening Sounds and Audio Devices (figure 5). 5. To use the G Track as your default input/output device (for system sounds and programs like Sound Recorder), ensure that it is set for... -
Page 8: Getting Started With Mac Os X
Getting Started with MAC OS X The following example is for setting up the G Track in MAC OS X . 1. Plug in microphone. The LED will light to indicate it is receiving USB power. The MAC will recognize the USB audio device and automatically install a universal driver. -
Page 9: G Track Quick Start
Just follow the simple steps below to start recording. 1. Set the G Track up on the included desk stand or any standard mic stand and ensure it is secure and stable. Since the microphone is unidirectional, be sure to face the front side, with the G Track logo, towards the vocalist. - Page 10 11. Now, plug the USB cable into the G Track and into an available USB port on your computer. Note: Be sure to check the installation guide for Windows XP and Mac OS to confirm your computer will recognize the G Track.
-
Page 11: Operating The G Track
Operating the G Track Selecting the Inputs The G Track has two input modes; INST/MIC and STEREO, allowing you to connect and record a variety of different input signals and configurations. INST/MIC The INST/MIC mode lets you record the microphone along with a mono line input, like an electric guitar, bass or mono keyboard. - Page 12 Operating the G Track Using the Direct Monitor The G Track has a simple, yet sophisticated direct monitor system, which provides zero latency monitoring. What’s Latency, and what’s Zero Latency, and why do I need it? Latency is the delay time between record and playback that all computer DAW’s, including yours, have...
- Page 13 Operating the G Track Using the Direct Monitor - continued MONO Mode When the MONO mode is selected, you hear the two mono inputs signals, for example guitar and mic, directly from the mic’s input circuitry with the input signals in mixed mono. This...
- Page 14 Operating the G Track Connecting Studio Monitors You can connect the G Track to studio monitors like the Samson Resolv or Rubicon models using the PHONES output. Use the included 1/8-inch to dual RCA, or an 1/8-inch to dual quarter inch...
- Page 15 PEAK indicator to show when the input signal is clipping. To set a good level on the mic, set the G Track up in front of the desired sound source and slowly raise the input trim control until you see the CLIP or Peak indicator light up. Then, turn the input trim control down until the indicator does not light any more.
-
Page 16: Operating The G Track
Microphone Placement In order to maximize the sound quality, you must pay careful attention to the placement of your G Track and how it is positioned for the instrument or vocalist that you are miking. All microphones, especially unidirectional or cardioid microphones, exhibit a phenomenon known as “proximity effect. -
Page 17: Application Notes
Acoustic Guitar There are a variety of ways that the G Track can be used to mic an acoustic guitar. The microphone placement will depend on the type of instrument and what kind of sound you’re looking to capture, for example the tonal quality you want to focus on, and how much finger slide or pick noise you may or may not want. -
Page 18: Using The Optional Sp04 Shock-Mount
• Remove the G Track swivel mount by rotating the threaded collar counterclockwise as shown in fig- ure 1. • Install the G Track into the SP04 by fitting the microphone into the center of the web, positioning the G Track onto the bottom mounting plate. -
Page 19: G Track Specifications
G Track Specifications G Track Specifications Frequency Response 20~16000 HZ Polar pattern Super- cardioid Element type Back condenser type Diaphragm thickness 3 microns Sensitivity -40 +/- 3dB/Pa 132 dB Weight 1.38 lbs. (0.626 kg) Dimensions Height: 6.32-inches (160.5mm) Width (Diameter): 2.87-inches (73 mm) - Page 20 -- Consult the dealer or an experienced radio/TV technician for help. changes or modifications not expressly approved by the party responsible for compliance could void the user's authority to operate the equipment. Samson Technologies Corp. 45 Gilpin Avenue Hauppauge, New York 11788-8816 Phone: 1-800-3-SAMSON (1-800-372-6766) Fax: 631-784-2201...