Advertisement
Table of Contents
- 1 Table of Contents
- 2 Important Precautions
- 3 Before You Begin
- 4 Assembly
- 5 How to Plug in Power Cord
- 6 Operation and Adjustment
- 7 How to Fold and Move the Treadmill
- 8 Maintenance and Trouble-Shooting
- 9 Conditioning Guidelines
- 10 Notes
- 11 Ordering Replacement Parts
- 12 Limited Warranty
- Download this manual
Model No. 831.297890
Serial No.
Serial
Number
Decal
QUESTIONS?
As a manufacturer, we are com-
mitted to providing complete
customer satisfaction. If you
have questions, or if there are
missing or damaged parts, we
will guarantee complete satis-
faction through direct assistance
from our factory.
TO AVOID UNNECESSARY DE-
LAYS, PLEASE CALL DIRECT TO
OUR TOLL-FREE CUSTOMER
HOT LINE. The trained techni-
cians on our Customer Hot Line
will provide immediate assis-
tance, free of charge to you.
CUSTOMER HOT LINE:
1-877-897-7493
Mon.ÐFri., 6 a.m.Ð6 p.m. MST
VISIT OUR WEBSITE:
www.proformfitness.com
CAUTION
Read all precautions and instruc-
tions in this manual before using
this equipment. Save this manual
for future reference.
USER'S MANUAL
SEARS, ROEBUCK AND CO., HOFFMAN ESTATES, IL 60179
Advertisement
Table of Contents

Related Manuals for ProForm EKG 831.297890


Summary of Contents for ProForm EKG 831.297890
- Page 1 Model No. 831.297890 Serial No. Serial Number Decal QUESTIONS? As a manufacturer, we are com- mitted to providing complete customer satisfaction. If you have questions, or if there are missing or damaged parts, we will guarantee complete satis- faction through direct assistance from our factory.
-
Page 2: Table Of Contents
HOW TO FOLD AND MOVE THE TREADMILL ........ - Page 3 13. Never move the walking belt while the power is turned off. Do not operate the treadmill if the power cord or plug is damaged, or if the treadmill is not working properly. (See BEFORE YOU BEGIN on page 4 if the tread- mill is not working properly.)
-
Page 4: Before You Begin
BEFORE YOU BEGIN Congratulations for purchasing the new PROFORM EKG treadmill. The PROFORM EKG treadmill com- bines advanced technology with innovative design to let you enjoy an excellent form of cardiovascular exer- cise in the convenience and privacy of your home. And when youÕre not exercising, the unique PROFORM... -
Page 5: Assembly
ASSEMBLY Assembly requires two people. Set the treadmill in a cleared area and remove all packing materials. Do not dispose of the packing materials until assembly is completed. Refer to the drawings below to identify the small parts used in assembly. Assembly requires the included allen wrench... - Page 6 3. With the help of a second person, hold the Console Base (6) and the Right Handrail (32) near the right Upright (14) as shown. Route the Console Wire Harness (92) through the bracket on the Right Handrail. Refer to the inset drawing. Slide the Strain Relief Clip (88) onto the Console Wire Harness (92).
- Page 7 Adhesive Clip onto the base of the Uprights (14) in the indicated location. Press the Allen Wrench (73) into the Adhesive Clip. 10. Make sure that all parts are tightened before you use the treadmill. To protect the floor or carpet, place a mat under the treadmill.
-
Page 8: Operation And Adjustment
OPERATION AND ADJUSTMENT THE PERFORMANT LUBE WALKING BELT Your treadmill features a walking belt coated with PERFORMANT LUBE , a high-performance lubricant. IMPORTANT: Never apply silicone spray or other substances to the walking belt or the walking plat- form. Such substances will deteriorate the walking belt and cause excessive wear. - Page 9 Step onto the foot rails of the treadmill. Find the clip attached to the key (see the drawing above), and slide the clip onto the waistband of your clothing. Follow the steps below to operate the console.
- Page 10 Note: Pressing the MODE button will also stop the program, reset the displays, and select a different mode. button repeatedly to Change the incline of the treadmill, if desired. To change the in- cline, hold down one of the incline buttons until the desired in- cline is reached.
- Page 11 Follow your progress with the four displays. DISTANCE dis- playÑThis display shows the total distance that you have walked or run. TIME/PULSE displayÑWhen the manual mode is selected, this display shows the elapsed time. When one of the preset programs is selected, the display will show the time remaining in the program.
-
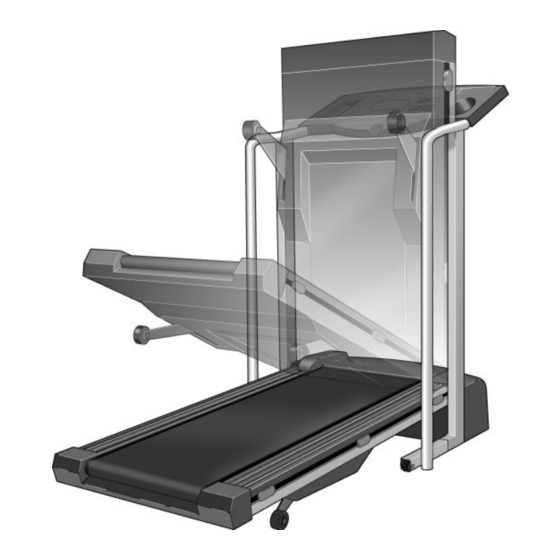
Page 12: How To Fold And Move The Treadmill
1. Hold the handrails and place one foot on the base as shown. 2. Tilt the treadmill back until it rolls freely on the front wheels. Carefully move the treadmill to the desired location. Never move the treadmill without tipping it back, or the base pads may come off. - Page 13 HOW TO LOWER THE TREADMILL FOR USE 1. Hold the upper end of the treadmill with your right hand as shown. Using your left thumb, press the storage latch and hold it. Pivot the treadmill until the frame and foot rail are past the storage latch.
-
Page 14: Maintenance And Trouble-Shooting
PROBLEM: The power turns off during use SOLUTION: a. Check the circuit breaker located on the treadmill frame near the power cord (see 1. c. above). If the circuit breaker has tripped, wait for five minutes and then press the switch back in. - Page 15 3 to 4 inches off the walking platform. Be careful to keep the walking belt centered. Plug in the power cord, insert the key and run the treadmill for a few minutes. Repeat until the walking belt is properly tightened.
-
Page 16: Conditioning Guidelines
CONDITIONING GUIDELINES WARNING: Before beginning this or any exercise program, consult your physician. This is especially important for in- dividuals over the age of 35 or individuals with pre-existing health problems. The following guidelines will help you to plan your ex- ercise program. - Page 17 Cool-down Finish each workout with 5 to 10 minutes of stretching to cool down. This will increase the flexibility of your muscles and will help to prevent post-exercise problems. Exercise Frequency To maintain or improve your condition, complete three workouts each week, with at least one day of rest be- SUGGESTED STRETCHES The correct form for several basic stretches is shown at the right.
-
Page 18: Notes
PART LISTÑModel No. 831.297890 Key No. Qty. Description Key/Clip Left Handrail Cage Nut Power Supply Rear Isolator Screw Console Base 8Ó Wire Harness Spider Nut Battery Cover Incline Motor Console Assembly Storage Latch 1/2Ó Screw Upright/Base Handrail Bolt Handrail Washer Motor Belt Motor Swivel Nut Motor/Pulley/Flywheel/Fan... -
Page 20: Ordering Replacement Parts
¥ The KEY NUMBER AND DESCRIPTION OF THE PART(S) (see the EXPLODED DRAWING and PART LIST attached in the center of this manual). If possible, place the treadmill near your telephone for easy reference when calling. ICON Health & Fitness, Inc. (ICON), warrants this product to be free from defects in workmanship and material, under normal use and service conditions, for a period of ninety (90) days from the date of pur- chase.