
Related Manuals for Singer 14T957DC


Summary of Contents for Singer 14T957DC
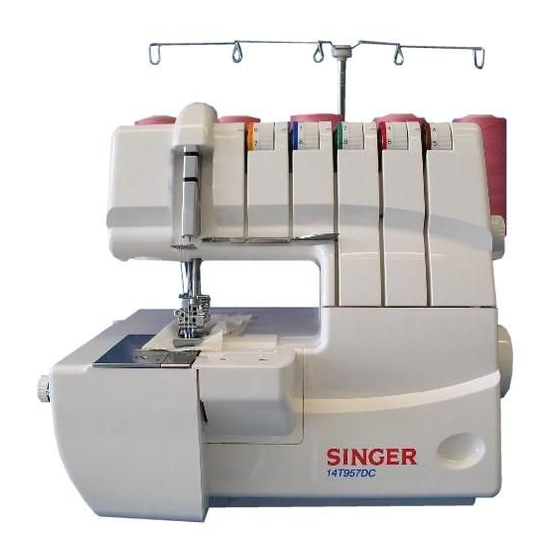
- Page 1 14T957DC 14T967DC 14T968DC - Professional 5 Service Manual 104 73 06-26 16 March 2010...
- Page 2 Please note that on disposal, this product must be safely recycled in accordance with relevant National legislation relating to electrical/electronic products. If in doubt please contact your retailer for guidance. Bitte beachten Sie, dass hinsichtlich der Entsor- gung dieses Produkts, vorschriftsmäßig entspre- chend der gültigen nationalen Gesetzgebung für elektrische/elektronische Produkte, recycelt werden muss.
- Page 3 Contence 1. Presser bar height ........................4 2. Needle bar height and parallelism ....................5 3. Needle timing ..........................6 4. Height of the lower looper ......................7 5. Clearance between lower looper the "A" needle................8 6. Looper to needle clearance ......................9 7.
-
Page 4: Presser Bar Height
1. Presser bar height Check With the presser bar lever raised, there must be a 4.4 mm (A) gap between the needle plate and the bottom of the presser foot. Setting: 1. Remove the face cover. 2. Remove the fastening screws (D) and lift out the light bulb socket completely. 3. -
Page 5: Needle Bar Height And Parallelism
2. Needle bar height and parallelism Check 1. Insert a new needle ELx705 # 90 into the left back needle holder "B". The needle must be inserted into the needle holder as far as it can go. 2. Turn the handwheel in the normal direction until the needle bar is at its upper turning point. 3. -
Page 6: Needle Timing
3. Needle timing Check Note: The timing of the needle eccentric is set by turning the handwheel back and forth. This method guarantees a 100 % setting. A new needle system ELx705 Nm 90 must be used for the following steps. 1. -
Page 7: Height Of The Lower Looper
4. Height of the lower looper Check The distance between the looper point and top of hole for the looper drive shaft (B) should be approximately 61.3 to 62.0 mm. Note: The looper drive shaft must not have any axial play. Setting: 1. -
Page 8: Clearance Between Lower Looper The "A" Needle
5. Clearance between lower looper the "A" needle. Note: A new needle system ELx705 Nm 90 must be used for the following steps. Check When the lower looper is at its most left point, the gap between tip of lower looper and the “A” needle must be 2.6 mm (B) Setting: 1. -
Page 9: Looper To Needle Clearance
6. Looper to needle clearance Note: A new needle system ELx705 Nm 90 must be used for the following steps. Check 1. Turn the handwheel in the sewing direction until the looper point, as it is moving to the right, is positioned exactly in the scarf of the needle “A”. -
Page 10: Timing Of The Lower Looper
7. Timing of the lower looper Note: The timing of the lower looper is set by turning the handwheel back and forth. This method guarantees a 100 % setting. This is very important for machines with double eccentric for the loopers and chainstitch loo- pers. -
Page 11: Clearance Between Lower Looper Needle Guard And "A", "B" Needles
8 . Clearance between lower looper needle guard and "A", "B" needles Note: A new needle system ELx705 Nm 90 must be used for the following steps. Check: 1. Remove needle plate. 2. Insert 2 new needles (Nm 90) in needle "A" and "B" posi- tions. -
Page 12: Upper Looper Position To The Left Needle
9. Upper looper position to the left needle Check: 1. Turn the handwheel in the normal direction until the upper looper is at its most left position. 2. The distance between upper looper point to the left needle "A" must now be 4.6 mm (B). Setting: 1. -
Page 13: Timing Of The Upper Looper
10. Timing of the upper looper Check: 1. Turn the handwheel in the normal direction until the upper looper, in its upward movement, and behind the lower looper. 2.When the two loopers overlap, the clearance between the point of the upper looper and the head of the lower looper must be between 0.8 and 1.0 mm (A). -
Page 14: Clearance Between The Upper And Lower Loopers
11. Clearance between the upper and lower loopers Check: 1. Turn the handwheel in the normal direction until the upper looper , in its upward movement, is behind the lower looper. 2. When the two loopers overlap, check the clearance between the point of the upper looper and the back of the lower looper is between 0.05 and 0.2 mm. -
Page 15: Height Of The Chain Stitch Looper
12. Height of the chain stitch looper Check The distance between the chain stitch looper point and the upper side of chain stitch looper drive shaft location must be approximately 58.7 to 60.2 mm (B). Note: The chain stich looper drive shaft must not have any axial play. Setting: 1. -
Page 16: Clearance Between Chain Stitch Looper The Left Needle "C
13. Clearance between chain stitch looper the Left needle “C” Note: A new needle system ELx705 Nm 90 must be used for the following steps. Check: When the Chain stitch looper is at its most left point, the gap between tip of Chain stitch loo- per and the “C”... -
Page 17: Chain Stitch Looper To Needle Clearance
14. Chain stitch looper to needle clearance Check: 1. Turn the handwheel in the normal direction until the looper point of the chainstitch looper is exactly in the scarf of the needle “C” while moving to the right. 2. The looper-to-needle clearance must be 0- 0.03 . Setting: 1. -
Page 18: Ellipsoidal Movement Of Chain Stitch
15. Ellipsoidal movement of chain stitch. Note: This adjustment must only be carried out if a compelling reason exists. Check: 1.Turn the handwheel in the normal direction until the lower looper is behind the "B" needle. 2.The Chain stitch looper ellipsoidal shaft (D) should now be at its most back position. Setting: 1. -
Page 19: Chain Stitch Needle Guard To Needle Clearance
16. Chain stitch needle guard to needle clearance Check: 1. Remove needle plate. 2. Insert 2 new needles (Nm 90) in needle "C" and "E" positions. 3. Turn the handwheel in the normal direction until the chain stitch looper point, when moving to the left, is precisely behind needle "C" . 4.It should be a clearance of 0 - 0.08 mm between to the chain stitch front needle guard and the needle. -
Page 20: Feed Timing
17. Feed Timing Check: 1. Set the stitch length adjustment knob to “4”. 2. Set the regulator wheel for the differential feed to “2”. 3. Turn the handwheel in the normal direction and set the Front feed dog (D) so it comes to its front top position and just before its starts to go to the back (A). -
Page 21: Feed Dog Height
18. Feed dog height Check: 1. Set the stitch length adjustment knob to “4”. 2. Set the regulator wheel for the differential feed to “2”. 3. Turn the handwheel in the normal direction until the rear feed dog (D) and the front feed dog, in its upward movement, in there highest position. -
Page 22: Lower Knife
19. Lower Knife Check: 1. The lower knife cutting edge (B) should be aligned with the surface of the needle plate (A). Setting: Loosen screw (C). Adjust so the lower knife cutting edge is aligned with the surface of the needle plate. 1047306-26... -
Page 23: Upper Knife
20. Upper Knife Check: 1. Turn the handwheel in the normal direction until the upper blade (d) is at its lowest position. 2. The upper and lower blades must overlap by 1.0 - 0.5 mm Setting: 1.Turn the handwheel in the normal direction until the upper blade (d) is at its lowest position. 2. -
Page 24: Set The Lower Looper Lower Thread Guide
21. Set the Lower Looper lower thread guide Check The lower looper brackets left side should be fl ush with the lower looper right side (A). Setting 1. Open up the set screw (B) 2. Move the thread guide until the correct measurement is achieved. 3. -
Page 25: Set The Upper Looper Lower Thread Guide
22. Set the Upper Looper lower thread guide Check 1. Check so the Lower Loopers lower thread guide is set correct 2. Set the upper looper to its left position. 3. The distance between the Lower looper thread guide and the upper looper lower thread guide should be 1 mm and the top of the thread guides should be line up. -
Page 26: Set The Upper Looper Upper Thread Guide
23. Set the Upper Looper upper thread guide Check 1. Check so the settings of the Lower Looper lower thread guide and Upper Looper lower thread guide is correct. 2. The distance between the upper loopers upper thread guide and the upper loopers lower thread guide should be 1.5 mm when the upper loopers upper thread guide set screw is in the centre of the thread guides hole. -
Page 27: Set The Chain Stitch Loopers Thread Take Up
24. Set the Chain stitch loopers thread take up. Check The Left chain stitch loopers thread take up should be 1.5 mm from the right chain stitch looper Setting 1. Loosen up the set screw (B) 2. Move the thread take up so it it is 1.5 mm clearance. 3.