Table of Contents
Advertisement
Advertisement
Table of Contents

Related Manuals for Radio Shack PRO-528


Summary of Contents for Radio Shack PRO-528
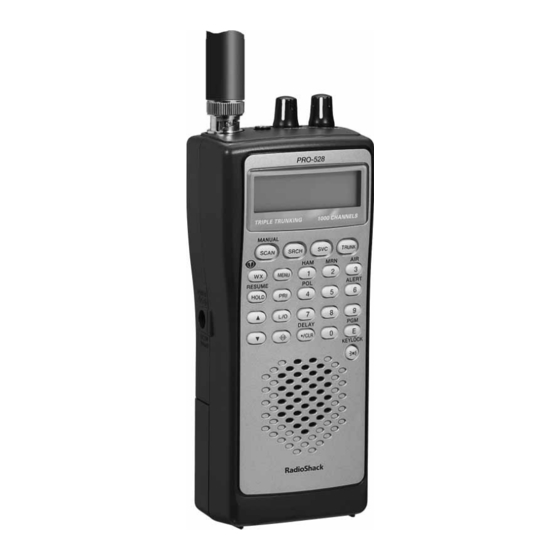
- Page 1 PRELIMINARY DRAFT Owner’s Manual PRO-528 1000-Channel Handheld Trucking Scanner...
- Page 2 Contents Features ..............xx FCC Notice ............xx Scanning Legally ..........xx Preparation .............. xx Using Internal Batteries ........xx Using Non-Rechargeable Batteries .... xx Using Rechargeable Batteries ....xx Using AC Power ..........xx Using Vehicle Battery Power ......xx Connecting the Antenna ........
- Page 3 Testing Digital Weather Alert Tone ....xx Testing NWR-SAME Code Detection ..xx Programming FIPS Code......xx Skywarn .............. xx Signal Stalker............xx Setting the signal stalker options ....xx Trunking Operation ..........xx Types of Trunking Systems ........ xx Setting the Scanner to the Trunking Mode ..
- Page 4 Care and Maintenance ........... xx Specifications ............xx Features Your RadioShack 1000-Channel Handheld Trunking Scanner is one of a new generation of scanners designed to track Motorola Type I, Type II, hybrid analog systems, (such as Smartnet and Privacy Plus ) plus ®...
- Page 5 Priority Channels — lets you program one channel in each bank (10 in all) and then have the scanner check that channel every 2 seconds while it scans the bank, so you do not miss transmissions on those channels. Four Service Banks — frequencies are preset in separate police (fire/emergency), aircraft, ham, marine to make it easy to locate specific types of calls.
-
Page 6: Fcc Notice
Weather Alert Indicator — your scanner also functions as a severe weather alert monitor. Your scanner can receive these bands: Frequency Step Range (MHz) (kHz) Transmission 29–29.7 10-m Amateur Band 29.7–50 VHF Lo Band 50–54 6-m Amateur Band 108–136.9875 12.5 Aircraft Band 137–144 Military Land Mobile... -
Page 7: Scanning Legally
SCANNING LEGALLY Your scanner covers frequencies used by many different groups including police and fire departments, ambulance services, government agencies, private companies, amateur radio services, military operations, pager services, and wireline (telephone and telegraph) service providers. It is legal to listen to almost every transmission your scanner can receive. -
Page 8: Using Rechargeable Batteries
as a ballpoint pen to set inside the compartment to ALKALINE JACK Ni-MH ALKALINE Warning: Set for use only with or nickel metal hydride ALKALINE JACK Ni-MH NI-MH (Ni-MH) rechargeable batteries. Never attempt to recharge non-rechargeable batteries. Non-rechargeable batteries can get hot or explode if you try to recharge them. 4. -
Page 9: Using Ac Power
Ni-Cd battery’s useful life, it must be recycled or disposed of properly. Contact your local, county, or state hazardous waste management authorities for information on recycling or disposal programs in your area or call 1-800-822-8837. Some options that might be available are: municipal curbside collection, drop-off boxes at retailers such as your local RadioShack store, recycling collection centers, and mailback programs... -
Page 10: Connecting The Antenna
store. Cautions: You must use a power source that supplies 9V DC and delivers at least 300 mA. Its center tip must be set to negative and its plug must fit the scanner’s DC 9V 300 mA jack. Using an adapter that does not meet these specifications could damage the scanner or the adapter. -
Page 11: Connecting An Extension Speaker
For private listening, you can plug an optional earphone or mono headphones into the jack on top of your scanner. This automatically disconnects the internal speaker. Listening Safely To protect your hearing, follow these guidelines when you use an earphone or headphones. •... -
Page 12: A Look At The Keypad
A frequency, expressed in kHz or MHz, is the tuning location of a station. To find active frequencies, you use the search function or refer to a frequency reference such as the included Trunking Frequency Guide. Besides searching within a selected frequency range, you can also search your scanner’s service banks. Service banks are preset groups of frequencies categorized by the type of services that use those frequencies. -
Page 13: A Look At The Display
Searches and scans down through a selected frequency range; selects options during programming; changes the ID location number while trunking. Searches and scans up through a selected frequency range; selects options during programming; changes the ID location number while trunking. Number Each key has a single-digit label and a range Keys... -
Page 14: Understanding Banks
— appears when Signal Stalker is active. SCAN — appears when you scan channels. LIST — appears with numbers ( – ) during trunking. Numbers with a bar under them show which ID scan list banks are turned on for scanning. SRCH —... -
Page 15: Turning On The Scanner And Setting Squelch
Service Banks The scanner is preprogrammed with all the frequencies allocated to the ham, marine, aircraft, and police (fire/emergency) services. This helps you quickly find active frequencies instead of doing a chain search (see “Service Bank Search” on Page XX). Channel Storage Banks To make it easier to identify and select the channels you want to listen to, all the channels are divided into 10 banks of 100 channels. -
Page 16: Searching For And Temporarily Storing Active Frequencies
Error • If you entered an invalid frequency in Step 4, appears and the scanner beeps error tone. Enter a valid frequency. •If you entered the frequency which already exist on other channel in step 4, the scanner beeps error tone and displays that channel. - Page 17 2. If you want to add or delete the bank to be searched, press corresponding the bank. 0 – 9 Note: At least one bank needs to be entered. If you disabled all the banks, the error tone beeps. 3. Press to search down or to search up.
-
Page 18: Scanning The Stored Channels
• to store the displayed frequency into the memory. To release the hold and continue searching, press HOLD/RESUME Note: Because there are many different frequencies allocated to fire and police departments, it can take several minutes to search all the service frequencies. Weather Search You can search also for weather transmissions. -
Page 19: Manually Selecting A Channel
activated banks. (See “Locking Out Channels” on Page XX and “Turning Channel-Storage Banks On and Off” on Page XX). When the scanner finds a transmission, it stops on it. When the transmission ends, the scanner resumes scanning. Notes: • If you have not stored frequencies into any channels, the scanner does not scan. •... -
Page 20: Locking Out Channels
You can turn each channel-storage bank on and off. When you turn off a bank, the scanner does not scan any of the 100 channels in that bank. While scanning, press the number key that corresponds to the bank you want to turn on or off. Numbers appear at the top of the display, showing the currently selected banks. -
Page 21: Using The Keylock
CLONING YOUR SCANNER You can clone all the frequencies, trunking talk groups, and fleet maps programmed in your PRO-528 to another PRO-528 or PRO-433 using an optional interface cable and software (available at your local RadioShack or www.radioshack.com). -
Page 22: Using The Display Backlight
FirSt unit. 5. On the scanner that is the First Unit needs to be set as 6. Press The First Unit checks whether the E/PGM. CLONE unit is connected to correctly. When a First Unit receives the response from the CLONE unit, the data transfer starts. During data transfer, SND and REC flashes. -
Page 23: Skipping Data Signals
TURNING THE BATTERY SAVE FUNCTION OFF/ON When the scanner is set to receive (monitor) a manually selected channel, and it is not actively scanning, using the battery save feature conserves energy. To turn the battery save function off or back on: 1. - Page 24 1. Press and start weather search. See “Weather Search” on Page XX. ALERT 2. Press appears. This mutes the audio until the scanner receives a SAME-coded 6/ALERT signal. ALERT When the scanner receives a SAME-coded signal, flashes and an associated “L” code (which indicates the severity of the alert) and SAME-coded signal appears alternately.
- Page 25 If the scanner is set to alert only the area you have programmed, appears. press to change the displayed FIPS code from If a FIPS code is not programmed, ------- appears. Use the keypad to enter the FIPS code. Press ・/CLR /DELAY to cancel an inputted FIPS code.
-
Page 26: Signal Stalker
minutes before they can be relayed for broadcast by NOAA and as much as 5 or 10 minutes sooner than you will hear them on local TV or radio! Those few minutes can be worth a lot when it comes to deciding if your family needs to take cover. -
Page 27: Trunking Operation
S-S.LOG : Lets you select the signal stalker logging settings. When this option is on, scanner checks log channel along with user programmed channels. Repeatedly press to select the option you want, then press E/PGM [S-S.bnd] S-S.bnd If you selected , one of the following band names appears: 29-54 : VHF Low Band... -
Page 28: Setting The Scanner To The Trunking Mode
SETTING THE SCANNER TO THE TRUNKING MODE Simultaneous Trunking The scanner allows you to track up to 10 systems at a time. You can trunk scan or search and scan conventional frequencies at the same time. You can also program conventional frequencies in the same bank as trunking systems. -
Page 29: Searching A Trunked Bank
depending upon the trunk system selected. Notes: • If you enter an invalid frequency (outside the selected range), the scanner beeps, the channel number Error ・/CLR /DELAY flashes and appears. If this happens, press to clear the frequency, then repeat the entry. - Page 30 You can scan conventional frequencies programmed in the same bank by holding down about 1 second. If there is no conventional frequency, the scanner scans the next bank. Turning the Status Bit Ignore (S-Bit) On or Off You can set how your scanner works with status bits (also called S-Bits), letting you control how the scanner interprets and displays talk group IDs.
- Page 31 You can use this feature to translate decimal talk group lists to the much more powerful AFS format. It is very easy to use. Be sure to become familiar with AFS partial entry, and your scanning will become far more fl exible and efficient.
-
Page 32: Using Talk Group Id Lists
Hold down while searching until you hear two short beeps. The scanner beeps twice. Press to resume the search. SRCH Using Trunk Scanning Scan Delay Sometimes a user might pause before replying to a transmission. You can set the scanner to hold on an ID for 2 seconds to wait for a reply. - Page 33 Motorola talk groups To enter a Type 2 Talk Group ID: 1. Enter the ID you want to store by using the keypad. 2. Press E/PGM To enter a Type 1 ID: For a Type I ID, enter the block number, fl eet number and subfleet number to form the talk group ID number. For more information, see User Defined Fleet Maps.
- Page 34 you can select either 128, 8, or 1 talk group. For example, you might program every talk group in a police department by pressing just four keys. Note: You cannot use partial talk groups in decimal mode. (See “Selecting the EDACS Talk Group ID Format” on Page XX.) You can program a specific talk group such as 01-011 into the scan list memory.
-
Page 35: Scanning Type I And Hybrid Trunked Systems
Error Note: If one or more of the IDs you stored are incorrect, flashes twice and the scanner beeps several times, then the scan list numbers appear at the top of the display. To correct the entry, delete at least one of the incorrect IDs (see “Deleting a Stored Talk Group ID List”). - Page 36 E1P1 E1P2 E1P3 Block Size Block Size Block Size Code Code Code (S12) E1P4 E1P5 E1P6 Size Size Size Block Code Block Code Block Code (S12) (S12) (S12) (S12) E1P7 E1P8 E1P9 Size Size Size Block Code Block Code Block Code E1P10 E1P11...
- Page 37 (S12) (S12) E1P16 Size Block Code (S12) Selecting a Preset Fleet Map 1. Set the scanner for conventional scanning and press to select the trunking programming mode and the bank you want to change. TRUNK 2 Repeatedly press to select TYPE 1 SYSTEM ( , then press E/PGM FLEEt,...
- Page 38 5. Repeatedly press to select the size code for the first block, then press . The next E/PGM available block appears. 6. Repeat Step 5 until you have selected a size code for each desired block. 7. Press . The scanner exits the trunking programming mode, tunes the data channel, SRCH then searches using the map you programmed.
-
Page 39: Programming A Hybrid System
・/CLR /DELAY 11. Press . The scanner returns to previous screen. Repeat the step 5 to 10 if you want to program other configuration. Programming a Hybrid System A hybrid system is simply a Type I system with some of its blocks designated as Type II blocks. To program a hybrid system, follow the steps listed in “Programming a Fleet Map”... - Page 40 Recharge the rechargeable batteries replace non-rechargeable batteries. Be sure the adapter’s barrel The AC adapter or DC adapter is plug is fully plugged into the 9V not connected. 300 mA jack. Batteries are not correctly Make sure the batteries are installed The scanner’s display dims or installed.
-
Page 41: Resetting The Scanner
The transmission might be a private or telephone interconnect Channel activity bars are flashing Scan for another transmission. call. The scanner does not but no sound is heard. scan these types of transmissions. Wait for the ID to become active, or The ID shown is not active. - Page 42 IF Rejection (at 162.4 MHz) ..........80 dB Channels ................1000 Operating Temperature Normal –4° to 140°F (–20° to 60°C) Signal Stalker 14° to 140°F (–10° to 60°C) Scan Speed ..........90 Channels/Second Search Speed: Normal ............90 Steps/Second Hypersearch ..........270 Steps/Second Priority Sampling ............