Advertisement
Model No. PFEX17932
Serial No.
Number
QUESTIONS?
If you have questions, or if there
are missing parts, we will guar-
antee complete satisfaction
through direct assistance from
our factory.
TO AVOID DELAYS, PLEASE
CALL DIRECT TO OUR TOLL-
FREE CUSTOMER HOT LINE. The
trained technicians on our cus-
tomer hot line will provide imme-
diate assistance, free of charge to
you.
CUSTOMER HOT LINE:
1-888-533-1333
Mon.–Fri., 6 a.m.–6 p.m. MST
CAUTION
Read all precautions and instruc-
tions in this manual before using
this equipment. Keep this manual
for future reference.
Serial
Decal
USER'S MANUAL
Patent Pending
Visit our website at
www.proform.com
new products, prizes,
fitness tips, and much more!
Advertisement
Table of Contents

Related Manuals for ProForm PFEX17932


Summary of Contents for ProForm PFEX17932
- Page 1 Model No. PFEX17932 Serial No. Serial Number Decal QUESTIONS? If you have questions, or if there are missing parts, we will guar- antee complete satisfaction through direct assistance from our factory. TO AVOID DELAYS, PLEASE CALL DIRECT TO OUR TOLL- FREE CUSTOMER HOT LINE.
-
Page 2: Table Of Contents
LIMITED WARRANTY ............. .Back Cover PROFORM is a registered trademark of ICON IP, Inc. -
Page 3: Important Precautions
IMPORTANT PRECAUTIONS WARNING: To reduce the risk of serious injury, read the following important precau- tions before using the exercise cycle. 1. Read all instructions in this manual before using the exercise cycle. 2. Use the exercise cycle only as described in this manual. -
Page 4: Before You Begin
Time (excluding holidays). To help us assist you, please note the product model number and serial number before calling. The model number is PFEX17932. The serial number can be found on a decal attached to the exercise cycle (see the front cover of this manual). -
Page 5: Assembly
ASSEMBLY Assembly requires two persons. Place all parts of the exercise cycle in a cleared area and remove the packing materials. Do not dispose of the packing materials until assembly is completed. Assembly requires the included tools and your own adjustable wrench and Phillips screw- driver Use the part drawings below to identify the small parts used in assembly. - Page 6 1. Identify the Front Stabilizer (2). While another person lifts the front of the Frame (1), attach the Front Stabilizer to the Frame with two M10 x 112mm Carriage Bolts (65) and two M10 Black Nylon Locknuts (63). Make sure that the Front Stabilizer is turned so the Wheels (30) are not touching the floor.
- Page 7 4. Slide the two Handlebar Collars (7) onto the Left Handlebar (50). Insert the Right Handlebar (51) into the Left Handlebar. Connect the Handlebar Collars, the Left Handlebar, and the Right Handlebar with two M4 x 16mm Screws (66). Attach the Handlebar Bracket (15) to the Left and Right Handlebars (50, 51) with four M8 x 22mm Button Screws (74).
- Page 8 8. Attach the Seat (12) to the Seat Bracket (6) with four M8 Nylon Locknuts (10) and four M8 Split Washers (70). Note: The Nylon Locknuts and the Split Washers may be pre-attached to the underside of the Seat. Turn the indicated Adjustment Knob (28) counterclock- wise two or three turns to loosen it.
-
Page 9: How To Operate The Exercise Cycle
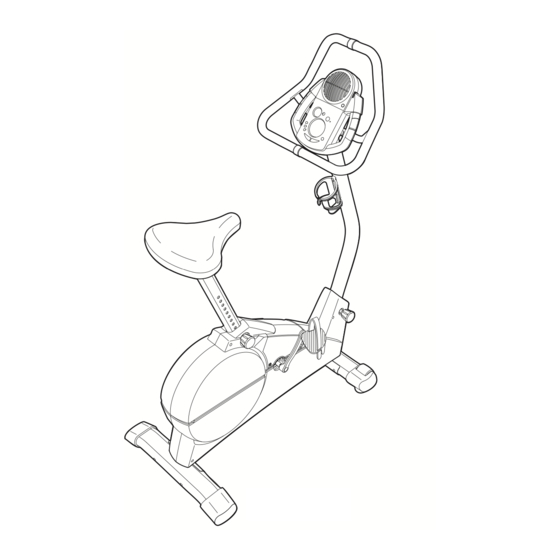
HOW TO OPERATE THE EXERCISE CYCLE HOW TO ADJUST THE SEAT POST For effective exer- cise, the seat should be at the proper height. As you pedal, there should be a slight Seat bend in your knees Post when the pedals are in the lowest position. - Page 10 Display Buttons FEATURES OF THE CONSOLE The advanced console offers a selection of features designed to make your workouts more enjoyable and effective. When the manual mode of the console is selected, the resistance of the pedals can be changed with the touch of a button.
- Page 11 HOW TO USE THE MANUAL MODE Turn on the console. Note: The console requires four 1.5V “D” batteries (see assembly step 6 on page 7). To turn on the console, press the On/Reset button or begin pedaling. (See the drawing on page 10 to identify the On/Reset button.) Select the manual mode.
- Page 12 To reset the displays, press the On/Reset button. Note: The con- sole can show speed and dis- tance in either miles or kilo- meters. The let- ters MPH or KM/H will appear in the lower section of the large display to show which system of mea- surement is selected.
- Page 13 HOW TO USE A SMART PROGRAM Each Smart program will automatically change the resistance of the pedals and prompt you to increase or decrease your pace as it guides you through an effec- tive workout. Programs 3 and 4 are weight loss pro- grams, program 5 is an aerobic program, and program 6 is a high-performance interval-training program.
- Page 14 HOW TO USE A HEART RATE PROGRAM Heart Rate program 1 is designed to keep your heart rate between 65% and 85% of your maximum heart rate during your workout. (Your maximum heart rate is estimated by subtracting your age from 220. For example, if you are 25 years old, your maximum heart rate is 195 beats per minute.) Heart Rate program 2 is designed to keep your heart rate near a target heart...
- Page 15 Note: If you stop pedaling for a few seconds, the program will end. To use the program again, rese- lect it and start it at the beginning. Follow your progress with the large display. See step 4 on page 11. Turn on the fan if desired.
- Page 16 HOW TO CONNECT YOUR PORTABLE STEREO Note: If your stereo has an RCA-type AUDIO OUT jack, see instruction A below. If your stereo has a 1/8” LINE OUT jack, see instruction B. If your stereo has only a PHONES jack, see instruction C. A.
- Page 17 HOW TO CONNECT YOUR COMPUTER Note: If your computer has a 1/8” LINE OUT jack, see instruction A. If your computer has only a PHONES jack, see instruction B. A. Plug one end of a 1/8” to 1/8” stereo audio cable (available at electronics stores) into the jack beneath the console.
- Page 18 HOW TO USE IFIT.COM CD AND VIDEO PROGRAMS To use iFIT.com CDs or videocassettes, the exercise cycle must be connected to your portable CD player, portable stereo, home stereo, computer with CD play- er, or VCR. See HOW TO CONNECT YOUR CD PLAYER, VCR, OR COMPUTER on page 15.
- Page 19 HOW TO USE PROGRAMS DIRECTLY FROM OUR WEB SITE Our Web site at www.iFIT.com allows you to play iFIT.com programs directly from the internet. To use programs from our Web site, the exercise cycle must be connected to your computer. See HOW TO CON- NECT YOUR COMPUTER on page 17.
-
Page 20: Maintenance And Troubleshooting
MAINTENANCE AND TROUBLESHOOTING Inspect and tighten all parts of the exercise cycle reg- ularly. Replace any worn parts immediately. To clean the exercise cycle, use a damp cloth and a small amount of mild soap. Important: To avoid damage to the console, keep liquids away from the console and keep the console out of direct sunlight. -
Page 21: Conditioning Guidelines
CONDITIONING GUIDELINES The following guidelines will help you to plan your exercise program. Remember that proper nutrition and adequate rest are essential for successful results. WARNING: Before beginning this or any exercise program, consult your physician. This is especially important for persons over the age of 35 or persons with pre-existing health problems. -
Page 22: Part List
EXPLODED DRAWING—Model No. PFEX17932 Key No. Qty. Description Frame Front Stabilizer Rear Stabilizer Rear Endcap Seat Post Seat Bracket Handlebar Collar Foam Grip Water Bottle Holder M8 Nylon Locknut M6 x 38mm Screw Seat Upright Upright Bushing Handlebar Bracket Console... -
Page 23: Exploded Drawing
EXPLODED DRAWING—Model No. PFEX17932 R0604A... -
Page 24: How To Order Replacement Parts
Friday, 6 a.m. until 6 p.m. Mountain Time (excluding holidays). To help us assist you, please be prepared to give the following information: • The MODEL NUMBER of the product (PFEX17932) • The NAME of the product (PROFORM • The SERIAL NUMBER of the product (see the front cover of this manual) •...