Table of Contents
Advertisement
Panasonic Appliances Microwave Oven (Shanghai) Co., Ltd.
888, 898 Long Dong Road, Pu Dong, Shanghai, 201203, China
Web Site: http://www.panasonic.com
F0003BW60HP_Cov.indd 1
F0003BW60HP_Cov.indd 1
F0003BW60HP
PA0717-0
Printed in China
Operating Instructions and Cookbook
使用說明書,精選食譜
Panduan dan Buku Resipi
Microwave/Grill Oven
Ketuhar Gelombang Mikro/Gril
Household Use Only
Kegunaan Rumah Sahaja
Model No.:
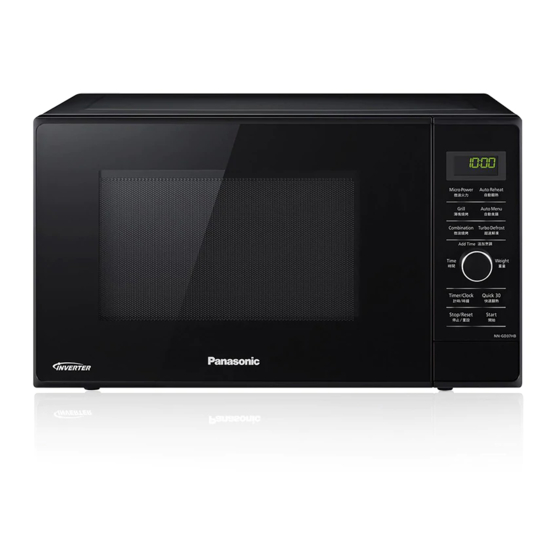
NN-GD37HB
型號:
Important safety instructions
Read carefully and keep for future reference
重要安全措施
仔細閱讀並妥善保存
Panduan keselamatan penting
Baca dengan teliti dan simpan untuk rujukan masa depan
微波/烤爐
僅家庭用
2017/7/3 11:03:46
2017/7/3 11:03:46
Advertisement
Table of Contents

Related Manuals for Panasonic NN-GD37HB


Summary of Contents for Panasonic NN-GD37HB
- Page 1 Household Use Only 僅家庭用 Kegunaan Rumah Sahaja Model No.: NN-GD37HB 型號: Panasonic Appliances Microwave Oven (Shanghai) Co., Ltd. 888, 898 Long Dong Road, Pu Dong, Shanghai, 201203, China Web Site: http://www.panasonic.com Important safety instructions Read carefully and keep for future reference 重要安全措施...
-
Page 2: Table Of Contents
Care of your Microwave Oven ......................23 Technical Specifications ........................23 Microwaves and How They Work ......................24 Food Characteristics..........................24 Cooking Techniques ........................25-27 Defrosting Chart ..........................28 Reheating Chart ..........................29 Cooking Chart............................30 Recipes............................31-33 © Panasonic Appliances Microwave Oven (Shanghai) Co., Ltd. 2017 - Eng-1 - F0003BW60HP.indd 1 2017/7/3 13:35:36... -
Page 3: Quick Guide
Quick Guide After plugging in, “ ” will appears in the display window, then you can start to operate. Feature How to Operate To Set Clock page 11) Press twice. Set Time of day. Press once. To Set: To Cancel: To Set / Cancel Child Safety Lock page 11) - Page 4 Quick Guide (continued) Feature How to Operate To Cook using Quick 30 Button Press to set the Press. page 16) desired cooking time. To Use the Add Time Function page 16) After cooking, turn Press. dial to select Add Time function. To Cook using Auto Cook Buttons page 17)
-
Page 5: Important Safety Instructions
Important Safety Instructions READ CAREFULLY AND KEEP FOR FUTURE REFERENCE Precautions to be taken when Earthing Instructions This microwave oven must be earthed. In the event using Microwave Ovens for of an electrical short circuit, earthing reduces the risk Heating Foodstuffs of electric shock by providing an escape wire for the electric current. -
Page 6: Installation And General Instructions
Important Safety Instructions (continued) Practical Hints: 5. Exterior oven surfaces, including air vents on the cabinet and the oven door will get hot during 1. For initial use of GRILL and COMBINATION, if GRILL and COMBINATION. Use care when you see white smoke arise, it is not malfunction. opening or closing door and when inserting or 2. - Page 7 Installation and General Instructions (continued) 11. DO NOT use this oven to heat chemicals or other 3. Eggs in their shell and whole hard-boiled eggs non-food products. DO NOT clean this oven with should not be heated in microwave ovens since any product that is labeled as containing corrosive they may explode, even after microwave heating chemicals.
-
Page 8: Feature Diagram
Feature Diagram Oven Window Oven Air Vent Door Safety Lock System Waveguide Cover (do not remove) ... -
Page 9: Control Panel
Control Panel 1 Display Window 2 Micro Power button (page 12) 3 Grill button (page 14) 4 Combination button (page 15) 5 Turbo Defrost button (page 13) 6 Auto Menu button (page 17) 7 Auto Reheat button (page 17) 8 Dial ... -
Page 10: Cooking Modes
Cooking Modes The diagrams shown below are examples of the accessories. It may vary depending on the recipe/dish used. Accessories Cooking modes Uses Containers to use • Defrosting. • Reheating. Microwave • Melting: butter, chocolate, Microwaveable (e.g. cheese. Pyrex® dishes, plates •... -
Page 11: Cookware And Utensil Chart
Cookware and Utensil Chart Microwave Grill Combination Wire rack (oven accessories) Aluminium foil for shielding for shielding Ceramic Plate Browning Dish Brown paper bags Dinnerware oven/microwave safe non-oven/microwave safe Disposable yes* yes* yes* paperboard containers Glassware oven glassware & ceramic non-heat resistant Metal cookware Metal twist-ties... -
Page 12: Clock Setting
Clock Setting You can use the oven without setting the clock. 1. Press twice. 2. Set the time by turning the 3. Press once. Colon will blink in the dial. Colon stops blinking; display window. Time appears in the display time of day is entered window;... -
Page 13: Micro Power Setting
Micro Power Setting 1. Press to select 2. Set cooking time. 3. Press Start. micro power level. Select cooking time by turning the dial. The time in the (see chart below) (1000 W: up to 30 minutes display window will Other Powers: up to 1 hour and 30 minutes) count down. -
Page 14: Turbo Defrost Setting
Turbo Defrost Setting This feature allows you to defrost meat, poultry and seafood automatically by setting the weight. The serving/weight is 0.1 kg to 2.0 kg. Food Maximum Weight Minced meat, Chicken Pieces, Chops 2 kg Beef roast, lamb, whole chickens 2 kg Whole fish, scallops, prawns, fish fillets 1 kg... -
Page 15: Grill Setting
Grill Setting There are two power levels for grill. When grilling, heat is radiated from the two heater. The oven door must be kept closed to prevent cooking odours from spreading in the kitchen and so as not to waste energy. The grill is especially suitable for thin slices of meat and seafood as well as bread and meals. -
Page 16: Combination Setting
Combination Setting There are three power levels for this feature. It’s a good way for roasting foods by combining microwave and grill effectively. It’s suitable for roasting poultry, meat and seafood. This function can ensure the foods even cooking and keep the crispness of certain foods. -
Page 17: To Cook Using The Quick 30 Function
To Cook Using the Quick 30 Function This function allows you to quickly set cooking time in 30 second increments. 1. Press Quick 30 to set the desired 2. Press Start. cooking time (up to 5 minutes). The cooking will start and the time Each press is 30 seconds. -
Page 18: Auto Cook Setting
Auto Cook Setting 1. Select desired menu number. 2. Select the Weight of food 3. Press Start. Press to select the desired by turning the Dial. The cooking time button until the desired menu (see chart below) appears in the display number appears in the display window and begins to window. - Page 19 Auto Cook Setting (continued) 1. Reheat Meal 7. Vegetables It is suitable for cooking all types of leaf, green and Pre-cooked foods are reheated automatically by soft varieties, including broccoli, squash, cauliflower, setting the food’s weight. You need not select power cabbage, asparagus, beans, celery, zucchini, spinach, level or reheating time.
-
Page 20: Auto Cook Setting
Auto Cook Setting (continued) 9. Casserole Rice 11. Steam Chicken It is suitable for cooking white rice including short, long It is suitable for cooking chicken pieces, such as grain, jasmine and basmati. Place rice in a suitable wings, drumsticks, thighs, half breasts etc. Chicken size microwave safe casserole. -
Page 21: Timer Setting (Kitchen Timer/Standing Time/Delay Start)
Timer Setting (Kitchen Timer/Standing Time/Delay Start) To Use as a Kitchen Timer Press once. Select desired time by turning Press Start. dial. Time will count down (up to 1 hour and 30 minutes) without oven operating. To Set Standing Time Press once. -
Page 22: 3-Stage Setting
3-Stage Setting Example: Continually set [600 W] 2 minutes, [Combination 1] 3 minutes and [Grill 2] 2 minutes. 1. Press 3 times. 2. Set as 2 minutes 3. Press once. 4. Set as 3 minutes (See page 12 for by using dial. (See page 15 by using dial. -
Page 23: Before Requesting Service
Before Requesting Service ALL THESE THINGS ARE NORMAL: The oven causes interference with Some radio, TV, Wi-Fi, cordless telephone, baby monitor, blue tooth my TV. or other wireless equipment interference might occur when you cook with the microwave oven. This interference is similar to the interference caused by small appliances such as mixers, vacuums, hair dryers, etc. -
Page 24: Care Of Your Microwave Oven
When removing the roller ring from cavity floor for cleaning, be sure to replace in the proper position. Technical Specifications Model name: NN-GD37HB Power Supply: 230 - 240 V 50 Hz 220 V 50 Hz Power Consumption: Microwave 4.9 A 1150 W... -
Page 25: Microwaves And How They Work
Microwaves and How They Work Transmission Microwaves are a form of high frequency electromagnetic waves (app. 12 cm wave length) Microwaves pass through some similar to those used by a radio. Electricity is materials such as paper, glass converted into microwave energy by the magnetron and plastic much like sunlight tube. -
Page 26: Cooking Techniques
Cooking Techniques Timing Whole Clams and Oyster: A range in heating time is given in each recipe. Pierce several times with a toothpick. The time range compensates for the uncontrollable Whole Potatoes and Vegetables: Pierce with a fork. differences in food shapes, starting temperature Frankfurters and Sausages: Score smoked polish and regional preferences. -
Page 27: Standing Time
Cooking Techniques (continued) Turning and Rearranging Cover with glass lid and cook at 1000 W to bring liquid to a boil and cook at 100 W until tender. Stir It is not possible to stir some foods to redistribute the occasionally. - Page 28 Cooking Techniques (continued) DEFROST DEFROST Preparing Foods for Freezing To use, select 300 W and program the defrosting The finished quality of the prepared food will depend time. Follow defrosting times and directions given in on the original quality before freezing, the care the this section and page 28.
-
Page 29: Defrosting Chart
Defrosting Chart The times given below are a guideline only. Always check the progress of the food by opening the oven door and then re-starting. For larger quantities adjust times accordingly. Food should not be covered during defrosting. Food Weight/Quantity Time &... -
Page 30: Reheating Chart
Reheating Chart The times given in the charts below are a guideline only, and will vary depending on starting temperature, dish size etc. Food Weight/Quantity Time & Mode Method Drinks-Coffee-Milk Coffee 1 mug 235 ml 1000 W 1 min 30 secs 1000 W 2 mins 30 secs- Coffee 2 mugs 470 ml... -
Page 31: Cooking Chart
Cooking Chart Food Weight/Quantity Time & Mode Method Beans & Pulses-should be pre-soaked (except lentils) 1000 W 8 mins then Chick peas 225 g 440 W 35-40 mins Use 600 ml (1 pt) boiling Lentils 225 g 440 W 15-20 mins water in a large bowl. -
Page 32: Recipes
Recipes NOTES: The cooking power and time in the recipes are only for your reference. Please adjust the power and time according to the different voltage, output power or your favor. CHICKEN WITH PINEAPPLE Ingredients: Method: 600 g chicken pieces 1. - Page 33 Recipes (continued) STEAM PRAWNS Ingredients: Method: 300 g big prawns with shell 1. Trim prawn whiskers and 100 g tomato (sliced) skewer prawns from tail to head A: ⅓ cup water with cocktail stick. ¼ tsp. salt 2. Arrange sliced tomato and ¼...
- Page 34 Recipes (continued) FRIED RICE Ingredients: Method: 400 g cooked rice 1. Combine ingredients A and 150 g mix vegetables leave aside. 2 tbsp. thin soya sauce 2. Fry combined ingredients B in 2 tbsp. sesame oil 22 cm casserole on power A: 150 g small prawns 1000 W, uncovered for 1 minute...