
Related Manuals for Samsung RZ32M


Summary of Contents for Samsung RZ32M
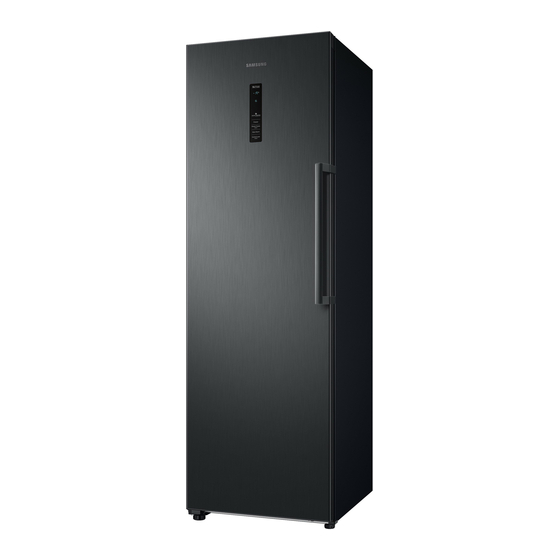
- Page 1 Refrigerator User manual (freezer only) RZ32M* Free Standing Appliance Untitled-51 1 2017-03-09 5:07:41...
-
Page 2: Table Of Contents
This appliance is intended to be used in household and similar applications such as Instructions about the WEEE Installation Refrigerator at a glance Step-by-step installation Operations Feature panel Samsung Smart Home Special features Maintenance Door reversal (applicable models only) Handle and care Cleaning Replacement... -
Page 3: Safety Information
Safety information • Before using your new Samsung Refrigerator, please read this manual thoroughly to ensure that you know how to operate the features and functions that your new appliance offers safely and efficiently. • This appliance is not intended for use by persons... - Page 4 If you have any questions or concerns, contact your nearest service center or find help and information online at www.samsung.com. • In order to avoid the creation of a flammable gas-air mixture if a leak in the refrigerating circuit occurs, the size of the room in which the appliance may be sited depends on the amount of refrigerant used.
-
Page 5: Important Safety Symbols And Precautions
Important safety symbols and precautions: Please follow all safety instructions in this manual. This manual uses the following safety symbols. WARNING Hazards or unsafe practices that may result in severe personal injury, property damage, and/or death. CAUTION Hazards or unsafe practices that may result in severe personal injury and/or property damage. -
Page 6: Severe Warning Signs For Transportation And Site
Safety information Severe warning signs for transportation and site WARNING • When transporting and installing the appliance, care should be taken to ensure that no parts of the refrigerating circuit are damaged. - Refrigerant leaking from the pipe work could ignite or cause an eye injury. - Page 7 • Do not plug several appliances into the same multiple power strip. The refrigerator should always be plugged into its own individual electrical outlet which has a voltage rating that matches the voltage listed on the refrigerator’s rating plate. - This provides the best performance and also prevents overloading of house wiring circuits, which could cause a fire hazard from overheated wires.
- Page 8 - Deteriorated insulation of electrical parts may cause an electric shock or fire. • If any dust or water is in the refrigerator, pull out power plug and contact your Samsung Electronics service center. - Otherwise there is a risk of fire. English...
- Page 9 • Do not stand on top of the appliance or place objects (such as laundry, lighted candles, lighted cigarettes, dishes, chemicals, metal objects, etc.) on the appliance. - This may result in an electric shock, fire, problems with the product, or injury. •...
-
Page 10: Installation Cautions
Safety information Installation cautions CAUTION • Allow sufficient space around the refrigerator and install it on a flat surface. - Keep the ventilation space in the appliance enclosure or mounting structure clear of obstructions. • Allow the appliance to stand for 2 hours before loading foods after installation and turning on. - Page 11 - Any sharp edges may cause a personal injury. • Do not touch the inside walls of the freezer or products stored in the freezer with wet hands. - This may cause frostbite. • Do not put a container filled with water on the refrigerator. - If spilled, there is a risk of fire or electric shock.
- Page 12 • If you smell pharmaceutical or smoke, pull out power plug immediately and contact your Samsung Electronics service center. • If any dust or water is in Refrigerator, pull out power plug and contact your Samsung Electronics service center.
- Page 13 • Do not use a hair dryer to dry the inside of the refrigerator. Do not place a lighted candle in the refrigerator for removing bad odours. - This may result in an electric shock or fire. • Do not stand on top of the appliance or place objects (such as laundry, lighted candles, lighted cigarettes, dishes, chemicals, metal objects, etc.) on the appliance.
- Page 14 • If the interior or exterior LED lamp has gone out, contact your nearest service center. • If the refrigerator emits a burning smell or smoke, unplug the refrigerator immediately and contact your Samsung Electronics service center. - Failing to do so may result in an electric or fire hazards.
-
Page 15: Usage Warning
• If the product is equipped with LED lamps, do not disassemble the Lamp Covers and LED lamps yourself. - Contact a Samsung service center. • Plug the power plug into the wall socket firmly. • Do not use a damaged power plug, damaged power cord or loose wall socket. -
Page 16: Usage Cautions
Safety information Usage cautions CAUTION • Do not re-freeze frozen foods that have thawed completely. Do not place carbonated or fizzy drinks in the freezer compartment. Do not put bottles or glass containers in the freezer. - When the contents freeze, the glass may break and cause personal injury. - Page 17 • When the refrigerator got wet by water, pull out the power plug and contact your Samsung Electronics service center. • Do not strike or apply excessive force to any glass surface. - Broken glass may result in a personal injury and/or property damage.
-
Page 18: Cleaning Cautions
Safety information Cleaning cautions CAUTION • Do not spray water directly on the inside or outside the refrigerator. - There is a risk of fire or electric shock. • Do not use a hair dryer to dry the inside of the refrigerator. -
Page 19: Critical Disposal Warnings
Critical disposal warnings WARNING • Please dispose of the packaging material from this product in an environmentally friendly manner. • Ensure that none of the pipes on the back of the refrigerator are damaged prior to disposal. • R-600a or R-134a is used as a refrigerant. Check the compressor label on the rear of the appliance or the rating label inside the freezer to see which refrigerant is used for your refrigerator. -
Page 20: Additional Tips For Proper Usage
Safety information Additional tips for proper usage • In the event of a power failure, call the local office of your electric company and ask how long the failure is going to last. - Most power failures that are corrected in an hour or two will not affect your refrigerator temperatures. -
Page 21: Saving Energy Tips
Saving Energy Tips • Install the appliance in a cool, dry room with adequate ventilation. Ensure that it is not exposed to direct sunlight and never put it near a direct source of heat (a radiator, for example). • Not to block any vents and grilles is recommended for energy efficiency. -
Page 22: This Appliance Is Intended To Be Used In Household And Similar Applications Such As
Safety information This appliance is intended to be used in household and similar applications such as • staff kitchen areas in shops, offices and other working environments; • farm houses and by clients in hotels, motels and other residential type environments; •... -
Page 23: Instructions About The Weee
Business users should contact their supplier and check the terms and conditions of the purchase contract. This product and its electronic accessories should not be mixed with other commercial wastes for disposal. For information on Samsung’s environmental commitments and product specific regulatory obligations e.g. REACH visit: samsung.com/uk/aboutsamsung/samsungelectronics/ corporatecitizenship/data_corner.html... -
Page 24: Installation
Installation Follow these instructions carefully to ensure a proper installation of this refrigerator and to prevent accidents before using it. WARNING • Use the refrigerator only for its intended purpose as described in this manual. • Any servicing must be performed by a qualified technician. •... -
Page 25: Step-By-Step Installation
Step-by-step installation STEP 1 Select a site Site requirements: • Solid, level surface without carpeting or flooring that may obstruct ventilation • Away from direct sunlight • Adequate room for opening and closing the door • Away from a heat source •... - Page 26 Installation Clearance See the pictures and table below for space requirements for installation. Depth “A” Width “B” Overall Height “C” 1853 (unit : mm) English Untitled-51 26 2017-03-09 5:07:42...
- Page 27 at least 50 mm 130° 1194 (unit : mm) NOTE The measurements in the above table may differ, depending on the measuring method. STEP 2 Spacing (applicable models only) 1. Open the door and locate the provided spacers (x2). 2. Unpack both spacers and attach them to the rear of the refrigerator as shown.
- Page 28 Dongle, visit www.samsung.com and follow the product information about the dongle. CAUTION • The Samsung Smart Home Dongle comes in two types: one that is dedicated to Samsung smart TVs, and the other one that is dedicated to Samsung home appliances.
- Page 29 3. Push down to close the dongle cover. STEP 4 Flooring • The surface to install the refrigerator must support a fully loaded refrigerator. • To protect the floor, put a large piece of cardboard on each foot of the refrigerator.
- Page 30 Installation STEP 5 Adjust the levelling legs CAUTION • The refrigerator must be levelled on a flat, solid floor. Failing to do so can cause damage to the refrigerator or physical injury. • Levelling must be performed with an empty refrigerator. Make sure no food items remain inside the refrigerator.
- Page 31 STEP 6 Initial settings By completing the following steps, the refrigerator should be fully functioning. 1. Remove the PE foam sheet on each shelf corner, which is attached to protect the refrigerator during transportation. 2. Plug the power cord into the wall socket to turn the refrigerator on . 3.
-
Page 32: Operations
Operations Feature panel TYPE A TYPE B English Untitled-51 32 2017-03-09 5:07:44... - Page 33 01 Freezer 02 Power Freeze 03 Door Alarm 04 Control Lock 05 Network connection 01 Freezer The Freezer button can be used to set the freezer temperature. Freezer Available temperatures are between -15 °C and -23 °C (default: -19 °C). 02 Power Freeze (3 sec) Power Freeze speeds up the freezing process at maximum fan speed.
- Page 34 • If your Internet service provider has registered the MAC address of your PC or modem for identification, your Samsung Smart Refrigerator may fail to connect to the Internet. If this happens, contact your Internet service provider for technical assistance.
-
Page 35: Samsung Smart Home
Electronics to your smart device. NOTE • The Samsung Smart Home app is designed for Android 4.0 (ICS) or higher, or iOS 8.0 or higher, and is optimized for Samsung smartphones (Galaxy S and Galaxy Note series). On other smartphone models, some functions may operate differently. - Page 36 Operations Category Item Description Displays the current temperature setting of Freezer temperature the freezer. Monitoring Diagnosis Detects abnormal operations of the freezer. Checks the accumulated power consumption Energy monitoring of the freezer for the last 180 days. You can turn Power Freeze on or off, and Functions Power Freeze check the current settings.
-
Page 37: Special Features
Special features The actual image and special functions of your refrigerator may differ depending on the model and the country. Slim Ice Maker (applicable models only) 01 Water bin 02 Ice maker lever 03 Ice bucket 04 Ice template 05 Ice template cover NOTE If you do not intend to make ice, remove the Slim Ice Maker to secure more room for storage. - Page 38 Operations To dispense ice manually 1. Pull up the handle of the water bin (01) to open, and then fill the bin with water up to the max line. Gently close the bin so that water does not drop or leak. CAUTION •...
- Page 39 3. To dispense ice, slightly lift up the ice bucket and tilt to the front. CAUTION • Do not tilt without lifting the ice bucket. The ice bucket may break. • Do not pour water directly into the ice bucket for ice making. The ice bucket may break. •...
- Page 40 Operations To open the top shelf cover (applicable models only) 1. Fully pull up the front end of the top shelf cover. 2. Then, push the cover inwards to the end. NOTE • To remove or put an item from the freezer, you must fold up the top shelf cover first. •...
- Page 41 To secure more storage space (applicable models only) If you need more storage space, remove the top shelf cover and all 4 drawers and insert the provided shelf (see the figure) in the inner bottom of the main unit. Then, remove the Slim Ice Maker.
-
Page 42: Maintenance
Maintenance Door reversal (applicable models only) Reversing the door must be performed by Samsung-approved servicing personnel at your own expense because this kind of servicing is not covered by the Warranty. WARNING • Reversing failure or property damage that may occur by unapproved agencies will not be covered by the Warranty. - Page 43 Step-by-step instructions STEP 1 Remove the handle 1. Unlock the handle cap and put it aside. 2. Remove each screw on the upper and lower side of the handle. 3. Use a flat-head screwdriver to remove the handle screw caps (x2). Then, insert the handle screw caps in the opposite side.
- Page 44 Maintenance STEP 2 Remove the freezer door 1. Open the dongle cover, and remove the space cover. 2. While holding down the lower areas (marked in the figure) of the wire cover with both hands, lift up the wire cover. 3.
- Page 45 Display Type A 1. Remove the top frame cover from the right side first. Then, pull out to the front. 2. Pull out the left side of the hinge cover to remove, and then slightly lift up the bottom to pull out. CAUTION When removing the hinge cover, use caution not to damage the connectors and...
- Page 46 Maintenance 4. When the top hinge is removed, lift up to remove the freezer door. Keep the door in a safe place. CAUTION The door is heavy. To prevent damage or injury, use caution while removing the door. Display Type B 1.
- Page 47 3. Disconnect the connectors on or around the freezer door. Loosen the screws from the top hinge to remove. CAUTION To prevent the freezer door from falling, make sure to hold the freezer door tight while removing the top hinge. 4.
- Page 48 Maintenance STEP 3 Reverse the auto closer 1. From the freezer door, remove the auto closer lever by loosening the screws on the lever and the screws in the opposite side. 2. Insert the auto closer lever in the opposite side, and tighten the screws. English Untitled-51 48 2017-03-09...
- Page 49 STEP 4 Reverse the bottom hinge 1. Lay down the refrigerator with care. Then, remove the screws from the bottom hinge on the right side and the levelling leg on the left side, respectively. 2. Use an 8 mm socket wrench to remove the rear bolt next to the shaft.
- Page 50 Maintenance STEP 5 Reattach the freezer door Display Type A 1. Remove the screw and pull out the control cover. 2. Move the connectors and wires to the opposite side. Insert the control cover, and then tighten the screws on the opposite side.
- Page 51 3. Remove the shaft from the top hinge. Then, reassemble the shaft as shown. 4. Insert the bottom of the door first into the main unit. 5. Insert the top hinge and tighten it with screws. • Move the wires to the opposite side and fix them on the inner hook of the opposite side.
- Page 52 Maintenance 6. Reinsert the dongle cover in the original position. 7. Connect the connectors from the freezer door and the main unit. Then, fix the wires on the inner hook of the optional hinge cover (L). 8. Insert the hinge cover in the top hinge with the right side first.
- Page 53 9. Insert the top frame cover with the part (b) fitting in the part (a) diagonally. 10. Insert the wire cover through the opened dongle cover. Turn the cover by 90 degrees to the front, and then push down to fit in. 11.
- Page 54 Maintenance 2. Move the connectors and wires to the opposite side. Insert the control cover, and then tighten the screws on the opposite side. 3. Remove the shaft from the top hinge. Then, reassemble the shaft as shown. English Untitled-51 54 2017-03-09 5:07:50...
- Page 55 4. Insert the bottom of the door first into the main unit. 5. Insert the top hinge and tighten it with screws. • Move the wires to the opposite side and fix them on the inner hook of the opposite side. 6.
- Page 56 Maintenance 8. Insert the hinge cover in the top hinge with the right side first. Then, press the bottom of the cover to fit. CAUTION Make sure all of the wires and connectors are not stuck in the middle. 9. Insert the top frame cover with the part (b) fitting in the part (a) diagonally.
- Page 57 • For models that have the display panel on the top of the freezer, push in the left end of the top frame cover then the right side by locking the lower and upper areas in this sequence. 10. Insert the wire cover through the opened dongle cover.
- Page 58 Maintenance STEP 6 Reattach the handle 1. Insert the handle in the opposite side, and then tighten the screw. 2. Close the handle cover as shown. NOTE You might want to return the doors to the initial position (before reversing the door). In that case, refer to the instructions above but switch the doors, hinges, and covers back to the initial position.
-
Page 59: Handle And Care
Handle and care Shelves Slightly lift up the rear side of the shelf to pull out. Door guards Slightly lift up and pull out the door guard. CAUTION To prevent accidents, empty the door guards before removing. Top shelf cover (applicable models only) 1. - Page 60 Maintenance Slim Ice Maker (applicable models only) NOTE • When cleaning the component parts of the Slim Ice Maker such as the water bin, ice bucket, and ice template, make sure they are completely dry after cleaning. • When cleaning the Slim Ice Maker unit, make sure to completely dry the inner and outer parts of the unit after cleaning.
- Page 61 Slim Ice Maker 1. Remove the multipurpose bin first, which is immediately above the Slim Ice Maker. 2. While holding the marked area on either side of the Slim Ice Maker unit with both hands, lift up the unit and pull out to the front.
-
Page 62: Cleaning
4. Plug in the power cord. Replacement LED Lamps To replace the lamps of the refrigerator, contact a local Samsung service centre. WARNING • The lamps are not user-serviceable. Do not attempt to replace a lamp yourself. This can cause electric shock. -
Page 63: Troubleshooting
Troubleshooting Before calling for service, review the checkpoints below. Any service calls regarding normal situations (No Defect Cases) will be charged to users. General Temperature Symptom Possible causes Solution • Power cord is not plugged in • Properly plug in the power properly. - Page 64 Troubleshooting Odors Symptom Possible causes Solution • Clean the refrigerator and • Spoiled food. remove any spoiled food. Refrigerator has odors. • Make sure strong smelling • Food with strong odors. food is wrapped airtight. Frost Symptom Possible causes Solution Frost around the •...
-
Page 65: Do You Hear Abnormal Sounds From The Refrigerator
Do you hear abnormal sounds from the refrigerator? Before calling for service, review the checkpoints below. Any service calls related to normal sounds will be charged to the user. These sounds are normal. • When starting or ending an operation, the refrigerator may make sounds similar to a car engine igniting. - Page 66 Troubleshooting • As the refrigerator cools or freezes, refrigerant gas moves through sealed pipes, causing bubbling sounds. Bubbling! • As the refrigerator temperature increases or decreases, plastic parts contract and expand, creating knocking noises. These noises occur during the defrosting cycle or when electronic parts are working.
-
Page 67: Samsung Smart Home
• The old Samsung Smart Refrigerator app cannot connect with operate. Samsung Smart Home models. The Samsung • You must log into your Samsung account to use the app. Smart Home app is • Make sure that your router is operating normally. installed but is not •... - Page 68 Contact SAMSUNG WORLD WIDE If you have any questions or comments relating to Samsung products, please contact the SAMSUNG customer care center. Country Contact Center Web Site SINGAPORE 1800-SAMSUNG(726-7864) www.samsung.com/sg/support 0330 SAMSUNG (7267864) www.samsung.com/uk/support SOUTH AFRICA 0860 SAMSUNG (726 7864) www.samsung.com/support...