
Related Manuals for MD SPORTS 1554200


Summary of Contents for MD SPORTS 1554200
- Page 1 MODEL: 1554200 VM Innovations ASSEMBLY INSTRUCTIONS Please contact us before returning the product to the store. themdsports.com Register Now on and Earn a One-Year Warranty for Free!
- Page 2 Give Us Your Opinion and Receive A FREE FULL YEAR EXTENTED WARRANTY! Write a review for a recently purchased item on TheMDSports.com and receive an extended full year limited warranty, valued at $150.00. See TheMDSports.com for additional details.
- Page 3 2 - Please review the replacement parts list and make sure that you have all of your parts before beginning assembly. For questions that may arise or for missing/damaged parts, please contact us. (Continued on the next page.) www.themdsports.com 1554200...
-
Page 4: Tools Required
3 years. Strong adults needed No children in Keep away from pets Do not use or keep product outdoors. For indoor use only. assembly area No wet/humid conditions. (Continued on the next page.) www.themdsports.com 1554200... - Page 5 1554200 PARTS LIST Tube - 2 Tube - 3 Tube - 4 Tube - 1 Φ25.4x514mm Φ25.4x584mm Φ25.4x610x160mm Φ25.4x698mm Tube - 5 Tube - 6 Tube - 7 Tube - 8 Φ25.4x464mm Φ25.4x206mm Φ25.4x89mm Φ25.4x349mm Tube - 9 Tube - 10...
- Page 6 FIG. 1 FIG.1 3. Attach tubes (#1, #2) with connectors (#15, #17) as shown in FIG 1. FIG. 2 FIG.2 4. Attach tubes (#3, #5) with connectors (#15) as shown in FIG 2. (Continued on the next page.) www.themdsports.com 1554200...
- Page 7 FIG. 3 FIG.3 5. Attach tubes (#8) with T connectors (#16), as shown in FIG 3. FIG. 4 FIG.4 6. Attach tube (#10) with connectors (#17) as shown in FIG 4. (Continued on the next page.) www.themdsports.com 1554200...
- Page 8 FIG. 5 FIG.5 7. Attach tubes (#1,# 6, #7) with connectors (#16, #17) as shown in FIG 5. (Continued on the next page.) www.themdsports.com 1554200...
- Page 9 FIG. 6 FIG.6 8. Attach tubes (#4, #9) with connectors (#15) as shown in FIG 6. (Continued on the next page.) www.themdsports.com 1554200...
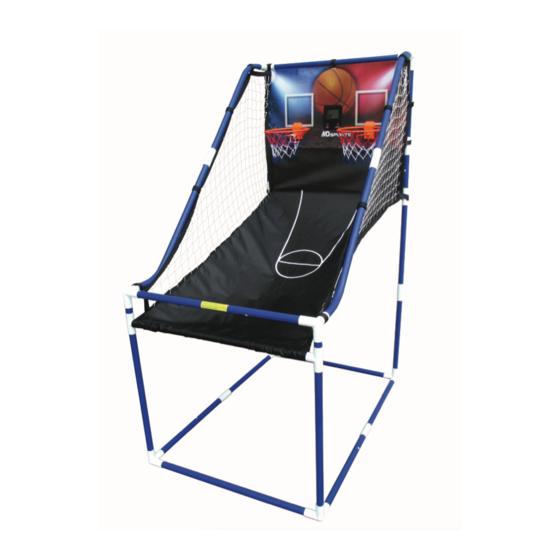
- Page 10 FIG. 7 FIG. 7A FIG.7 9. Attach the Backboard (#11) to the Tubes using three Velcros (#18) as shown in FIG. 7 and 7A. (Continued on the next page.) www.themdsports.com 1554200...
- Page 11 10. Slide velcro strap of Ball Return Net (#12) to the mainframe (pre-installed). See FIG. 8 and 8A. 11. Slide the Tube (#1) in front of the Ball Return Net (#12). See FIG. 8 and 8B. (Continued on the next page.) www.themdsports.com 1554200...
- Page 12 FIG. 9 FIG. 9A FIG.9 12. Attach the Ball Return Net (#12) to the Tubes using four Velcros (#18) as shown in FIG. 9 and 9A. (Continued on the next page.) www.themdsports.com 1554200...
- Page 13 . The player that scores first on their own hoop during each 5 second game receives 2 points. . The winner is the player with the most points at the end of the 12 game match. (Continued on the next page.) www.themdsports.com 1554200...
- Page 14 -- Connect the equipment into an outlet on a circuit different from that to which the receiver is connected. -- Consult the dealer or an experienced radio/TV technician for help. YOU ARE NOW READY TO PLAY! (The last page) www.themdsports.com 1554200...