
Related Manuals for MD SPORTS Meijer


Summary of Contents for MD SPORTS Meijer
-
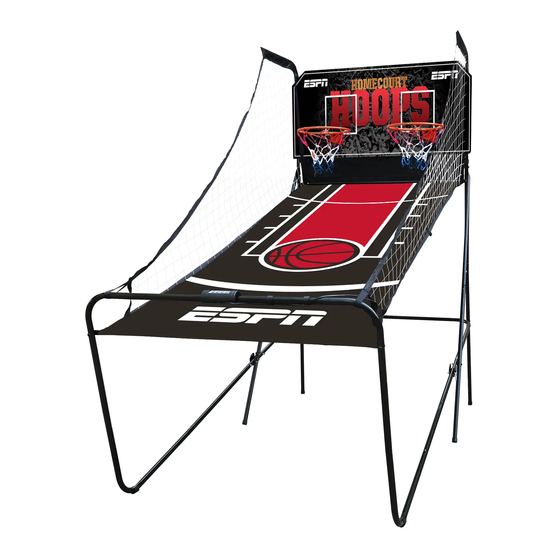
Page 1: Assembly Instructions
MODEL: 1558123 Meijer ASSEMBLY INSTRUCTIONS Please contact us before returning the product to the store. themdsports.com Register Now on and Earn a One-Year Warranty for Free! - Page 2 Give Us Your Opinion and Receive A FREE FULL YEAR EXTENDED WARRANTY! Write a review for a recently purchased item on TheMDSports.com and receive an extended full year limited warranty, valued at $150.00. TheMDSports.com See for additional details.
- Page 3 LIMITED 90 DAYS WARRANTY This product is covered by a limited warranty that is effective for 90 days from the date of purchase. If, during the limited warranty period, a part is found to be defective or broken, we will offer replacement parts at no cost to you, the customer.
- Page 4 Power Tools TOOLS REQUIRED: - Set Low Torque Phillips Screwdriver - Not Included Standard (Flat Head Screwdriver) - Not Included Wrench - Included Allen Key - Included High Torque over tightened Electric Screwdrivers may be helpful during assembly; however, please set a low torque and use extreme caution.
- Page 5 1558123 PARTS LIST Tube - 2 Tube - 3 Tube - 4 Tube - 1 Φ22x685mm Φ22x890mm Φ22x890mm Φ22x580x440mm Tube - 7 Tube - 8 Tube - 5 Tube - 6 Φ22x830mm Φ22x835mm Φ22x755x580mm Φ22x755x580mm Tube - 9 Tube - 11 Tube - 12 Tube - 10 Φ22x740mm...
- Page 6 1558123 PARTS LIST Allen Key Self-Stick Strap Ball Return Net Rim Net 1558123 PRE-INSTALLED PARTS Plastic Pole Spring Lock Locking Pin Insert ASSEMBLY INSTRUCTIONS: 1. Find a clean, level place to begin the assembly of your Basketball Game. We recommend that two adults work together to assemble this basketball game.
- Page 7 FIG. 2 FIG. 1 Spring Lock Spring Lock Punched hole Spring Lock FIG.1 & 2 3. Attach the Tubes - 2 (#2) to the Tube - 3 and Tube - 4 (#3 & #4) using the spring lock mechanism (pre-installed) as shown in FIG.1.
- Page 8 X 12 FIG. 4 FIG. 4C FIG. 4A FIG. 4B FIG.4 6. Attach the Tube - 5 and Tube - 6 (#5 & #6) to the Tube - 3 and Tube - 4 (#3 & #4) using Bolts (#26), Washers (#22) and Nuts (#28), and then attach the Tube - 5 and Tube - 6 (#5 &...
- Page 9 FIG. 5 FIG. 5A 28 22 FIG. 5B FIG.5 8. Attach the Tube - 12 (#12) to the Tubes - 2 (#2) using Bolts (#24), Washers (#22) and Nuts (#28) as shown in FIG. 5A. And then insert the Tubes - 1 (#1) to the Tubes - 2 (#2) as shown in FIG. 5. 9.
- Page 10 FIG. 6 Spring Lock Short Long Spring Lock FIG.6 10. Attach the Tubes - 10 (#10) to the Tubes - 9 (#9) using the spring lock mechanism (pre-installed), and then attach the Tube - 11 (#11) to the Tubes - 10 (#10) using the spring lock mechanism (pre-installed) as shown in FIG. 6. 1558123 www.themdsports.com (Continued on the next page.)
- Page 11 FIG. 7 X 32 X 16 X 16 FIG.7 11. Attach the Rims (#17) and Rim Support (#18) to the Backboard (#21) using the Bolts (#23), Washers (#22) and Nuts (#28). Then attach the Paddle Sensors (#15) to the Backboard (#21) using the Bolts (#23), Washers (#22) and Nuts (#28).
- Page 12 FIG. 9 FIG.9A FIG.9D See FIG. 10A FIG.9B FIG.9C FIG.9 14. Attach the Ball Return Net (#35) to the top Tubes - 1 (#1) by sliding the sleeve of the ball return net over the top Tube - 1 (#1), as shown in FIG. 9A. 15.
- Page 13 FIG. 10 FIG. 10A FIG. 10B Ramp FIG. 10C Locking Pin FIG.10 18. With the help of another adult, attach the Backboard (#21) to the Top Tubes - 1 (#1) using Bolts (#25), Washers (#22), Nuts (#28) and End Caps (#20) as shown in FIG.10A. At each bottom hole of the backboard, attach the ramp tabs of Ball Return Net (#35) using Bolts (#25), Washers (#22) and Nuts (#28) as shown in FIG.
- Page 14 FIG.11 FIG.11A Control Wire FIG.11 20. Attach the Control Box (#16) to the middle of the Tube - 11 (#11) using two Bolts (#30) as shown in FIG. 11A. 21. Run the rest of the Control Wire through the loops on the Ball Return Net (#35). Place the Control Wire on Tube - 11 (#11) using the Self-Stick Straps (#34) as shown in FIG.
- Page 15 FIG. 13 Locking Pin IMPORTANT! Make sure to use the Locking Pin (#P3) when folded. FIG.13 23. When not in use, fold the basketball game and insert the Locking Pin (#P3) as shown in FIG. 13 Note: The locking pin (#P3) needs to be removed from its original position when the game is being used before insertion to the new position when folded.
-
Page 16: Battery Installation
ELECTRONIC SCORER OPERATION Battery Installation Battery Box: Unscrew the bolt using a screwdriver and open the battery box. Insert 3 “AA” batteries ( not included) in the order of polarity as shown on the inside cover. Then close the cover using a screwdriver. Turn the power ON using the ON/OFF switch. Reminding: a. - Page 17 CHOOSE FROM 8 DIFFERENT GAME OPTIONS 1. Beat the time Clock Press "PLAY" to enter game 1. Press "UP/Down" to select single/multiple players (P1/P2/P3/P4). Press "PLAY" after the number of player is selected. Press "UP/Down" to select playing time, 30/45/60 seconds. Press "PLAY"...
- Page 18 CHOOSE FROM 8 DIFFERENT GAME OPTIONS 6. Around the World Use tape to mark the shooting lines. Press "PLAY" to enter game 6. Press "UP/Down" to select single/multiple players (P1/P2/P3/P4). Press "PLAY" after the number of player is selected. Scoreboard "HOME" display shows Player 1/2/3/4; "VISITOR" display shows the points scored. Once 10 points have been scored OR 99 seconds have elapsed, the game ends for that player and a 5 second countdown to the next player's game begins.