Table of Contents
Advertisement
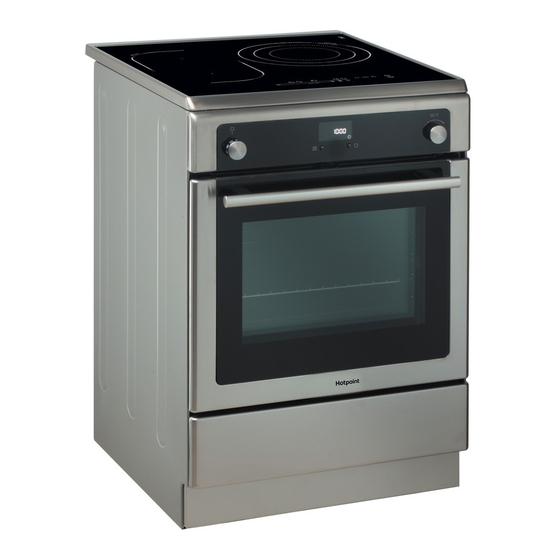
DUI611PX
English
GB
Operating Instructions
COOKER AND OVEN
Contents
Operating Instructions,1
Warnings,2
Description of the appliance-Control Panel,4
Advertisement
Table of Contents

Related Manuals for Hotpoint DUI611PX


Summary of Contents for Hotpoint DUI611PX
-
Page 1: Table Of Contents
DUI611PX English Operating Instructions COOKER AND OVEN Contents Operating Instructions,1 Warnings,2 Description of the appliance-Overall view,3 Description of the appliance-Control Panel,4 Installation,5 Start-up and use,7 Cooking modes,8 Precautions and tips,16 Care and maintenance,18 Guarantee ,22... -
Page 2: Warnings
Warnings WARNING: The appliance and its accessible parts become hot during use. Care should be taken to avoid touching heating elements. Children less than 8 years of age shall be kept away unless continuously supervised. This appliance can be used by children aged from 8 years and above and persons with reduced physical, sensory or mental capabilities or lack of experience... - Page 3 Description of the appliance DISPLAY 1. LOW TEMPERATURE MODE icon 2. AUTOMATIC COOKING MODE icons 3. Indicator Preheating 4. indicator DOOR LOCK 5. icon STOP 6. icon DURATION 7. icon END OF COOKING 8. icon TIMER 9. icon CLOCK 10.digits TIME and TEMPERATURE Description of the appliance Overall view 1.Glass ceramic hob...
-
Page 4: Description Of The Appliance
Description of the appliance Control panel 1. SELECTOR knob 2. DISPLAY 3. THERMOSTAT/TIMER knob 4. PYROLITIC CYCLE button 5. SET TIMER button 11 12 1920 13 TIMER* indicator light shows that the timer has been activated 14 MAX BUTTON - switches the cooking zone on at its maximum power level 16 (see Start-up and use). -
Page 5: Installation
Installation Electrical connection ! Please keep this instruction booklet in a safe place for future reference.. Make sure the booklet remains with the appliance if it is sold, given away or moved. Electric cookers come without a power supply cable. The cooker is designed to operate on an electricity ! Please read this manual carefully: it contains supply which conforms to the electrical data shown on... - Page 6 Connecting the supply cable to the mains TABLE OF CHARACTERISTICS Oven dimensions 34,0x42,4x42,4cm WARNINGS: THIS APPLIANCE MUST BE EARTHED. (HxWxD) ! The cooker must be connected to the mains by a 58 l Volume switched (double pole) cooker outlet correctly fused Useful width 42 cm measurements...
-
Page 7: Start-Up And Use
Start-up and use Setting the clock The temperature may be changed by turning the THERMOSTAT knob ! The clock may be set when the oven is switched 3. When the preheating indicator switches off off or when it is switched on, provided that the end and a buzzer sounds the preheating process is time of a cooking cycle has not been programmed complete: you may now place the food in the oven. -
Page 8: Cooking Modes
Manual cooking modes Automatic cooking modes ! The temperature temperature and cooking duration are pre-set temperature pre-set pre-set ! All cooking modes have a default cooking temperature which values, guaranteeing a perfect result every time - automatically. may be adjusted manually to a value between 40°C and 250°C as These values are set using the C.O.P.®... -
Page 9: Oven Cooking Advice Table
Recipe for BREAD: WARNING! The oven is 1 Dripping pan weighing 1000 g max placed on a low shelf level provided with a stop sys- tem to extract the racks Recipe for 1000 g of dough: 600 g flour, 360 g water, 11g salt, and prevent them from 25 g fresh yeast (or 2 sachets of powder yeast) coming out of the oven.(1) - Page 10 DISHES EXAMPLES COOKING MODE TEMPERATURE SUPPORTS Roast poultry chicken, duck, cockerel, capon. Roasting 200 °C poultry on the grid Poultry on the spit chicken, cockerel Turnspit 250 °C turnspit support roast pork, veal, turkey, beef, leg of lamb, haunch of Roasts Roasting 200 °C...
-
Page 11: Booster Function
Start-up and use The glue applied on the gaskets leaves traces of grease power level, or towards the left to decrease the on the glass. Before using the appliance, we recommend power level. you remove these with a special non-abrasive cleaning The min/med/max buttons can also be pressed product. - Page 12 3. Press the programming button. The indicator light Control panel lock corresponding to the selected zone will start flashing. - - - - - + + + + + When the hob is switched on, it is possible to lock the 4.
-
Page 13: Safety Devices
Practical advice on using the appliance Safety switch The appliance has a safety switch which automatically ! Use cookware made from materials which are compatible switches the cooking zones off after they have been in with the induction principle (ferromagnetic material). We operation for a certain amount of time at a particular power especially recommend pans made from: cast iron, coated level. -
Page 14: Technical Description
! Accessories To exit this mode, follow the procedure described above. For optimal EXTENSO TECHNOLOGY performance, The display will show the text DE and OF and the hob will we recommend the use of pans with an elliptical or be switched off. When it is next switched on, the hob will elongated base and a major diameter of at least 250 function normally. -
Page 15: Practical Cooking Advice
Practical cooking advice Frying Pressure cooking Pressure cooker Grilling Boiling Crêpes Cooking on a high flame and browning (roasts, steaks, escalopes, fish fillets, fried eggs) Fast thickening (liquid juices) Boiling water (pasta, rice, vegetables) Milk Slow thickening (dense juices) Bain-marie cooking Pressure cooking after whistle Low-flame cooking (stews) Reheating dishes... -
Page 16: Precautions And Tips
Precautions and tips ! This appliance has been designed and • Always make sure the knobs are in the o position manufactured in compliance with international when the appliance is not in use. safety standards. The following warnings are • When unplugging the appliance, always pull the provided for safety reasons and must be read plug from the mains socket;... - Page 17 • Do not let children play with the appliance. • If the cooker is installed on a pedestal, take all • Always keep the oven door closed when using the necessary precautions to ensure that the appliance SPIT ROAST and ROASTING modes. this will does not slide off this pedestal.
-
Page 18: Care And Maintenance
Care and maintenance Switching the appliance off 1. Remove the glass cover using a screwdriver. 2. Unscrew the light bulb and replace it with a Disconnect your appliance from the electricity supply similar one: Wattage 15 W, cap G9. before carrying out any work on it. Replace the glass cover, making sure the seal is positioned correctly... - Page 19 Automatic cleaning using the Safety devices PYROLYTIC cycle • The icon on the display, when lit, indicates During the PYROLYTIC cycle, the internal that the oven door was automatically locked as temperature of the oven reaches 500°C. The soon as the temperature reached a high value. pyrolytic cycle is activated and burns away food and grime residues.
-
Page 20: Guarantee ,22
12 Months Parts and Labour Guarantee As part of Hotpoint’s continued commitment to helping the environment, Hotpoint reserves the right to use quality, recycled components to keep down Your appliance has benefit of our manufacturer’s guarantee, which covers customer costs and minimise material wastage.