Table of Contents
Advertisement
Advertisement
Table of Contents

Related Manuals for Pioneer VSX-D41


Summary of Contents for Pioneer VSX-D41
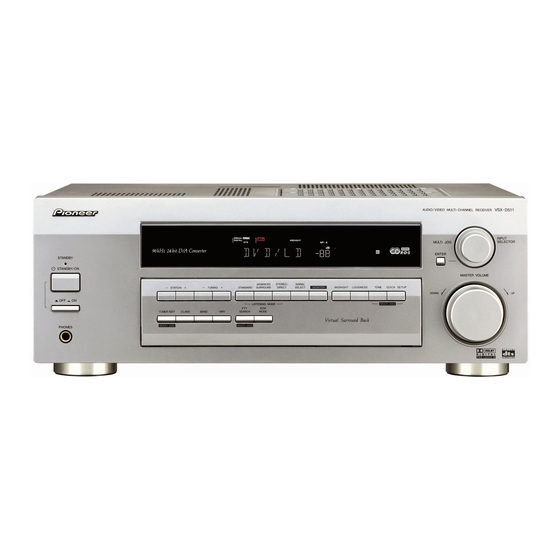
- Page 1 AUDIO/VIDEO MULTI-CHANNEL RECEIVER VSX-D411 VSX-D511 Operating Instructions...
- Page 2 Thank you for buying this Pioneer product. Please read through these operating instructions so you will know how to operate your model properly. After you have finished reading the instructions, put them away in a safe place for future reference.
- Page 3 Manufactured under license from Dolby Laboratories. “Dolby”, “Pro Logic II” and the double D symbol 2 are trademarks of Dolby Laboratorories. "DTS", “ES” and "DTS Digital Surround" are trademarks of Digital Theater Systems, Inc.
-
Page 4: Table Of Contents
To improve AM reception ...15 Connecting the speakers ...16 Speaker terminals ... 16 Hints on speaker placement ...17 AC outlet ... 18 Operating other Pioneer components ... 18 4 Controls and displays Front Panel ...19 Display ... 20 Remote Control ... 22 5 Playing sources Introduction to Sound Modes ... -
Page 5: Before You Start
Before you start Checking what’s in the box Please check that you've received the following supplied accessories: • AM loop antenna • FM wire antenna • Dry cell batteries (AA size IEC R6P) x 2 • Remote control • These operating instructions Installing the receiver Please note the following points: •... -
Page 6: 5 Minute Guide
5 minute guide Introduction to home theater You are probably used to using stereo equipment to listen to music, but may not be used to home theater systems that give you many more options (such as surround sound) when listening to soundtracks. -
Page 7: Listening To Surround Sound
5 minute guide Listening to Surround Sound This receiver was designed with the easiest possible setup in mind, so with the following quick setup guide, you should have your system hooked up for surround sound in no time at all. In most cases, you can simply leave the receiver in the default settings. - Page 8 5 minute guide Connect your speakers. A complete setup of six speakers (including the subwoofer) is shown here, but everyone’s home setup will vary. Simply connect the speakers you have in the manner shown below. The receiver will work with just two stereo speakers (the front speakers in the diagram) but using at least three speakers is recommended, and all six is best.
- Page 9 5 minute guide Plug in the receiver and switch it on, followed by your DVD player, your subwoofer and the TV. Make sure you’ve set the video input on your TV to this receiver. Check the manual that came with the TV if you don’t know how to do this.
-
Page 10: Using The Quick Setup
5 minute guide Using the Quick Setup You can use the Quick Setup to get your system up and running with just a few button presses. The receiver automatically makes the necessary settings after you have selected your speaker setup and room size. If you want to make more specific settings, refer to Choosing your receiver setup on pages 29 to 33. -
Page 11: Connecting Up
Connecting up Before making or changing the connections, switch off the power and disconnect the power cord from the AC outlet. Audio/Video cords Use audio/video cords (not supplied) to connect the audio/video components and a video cord to connect the monitor TV. Connect red plugs to R (right), white plugs to L (left), and the yellow plugs to VIDEO. -
Page 12: Connecting Digital Components
Connecting up Connecting digital components For proper decoding of Dolby Digital/DTS soundtracks, you need to make digital audio connections. You can do this by either coaxial or optical connections (you don’t need to do both). The quality of these two types of connections is the same, but since some digital components only have one type of digital terminal, it is a matter of matching like with like (for example, the coaxial output from the component to the coaxial input on the receiver). -
Page 13: Connecting Dvd 5.1 Channel Components
Connecting up Connecting DVD 5.1 channel components If you prefer to use a seperate component for decoding DVDs, you can connect a decoder or a DVD player with multi-channel analog outputs to the multi-channel inputs of this receiver. When connecting your equipment, always make sure the power is turned off and the power cord is disconnected from the wall outlet. -
Page 14: Connecting Antennas
Connecting up Connecting antennas Connect the AM loop antenna and the FM wire antenna as shown at right. To improve reception and sound quality, connect external antennas (see Using external antennas, next page). Always make sure that the receiver is switched off and unplugged from the wall outlet before making or changing any connections. -
Page 15: Am Loop Antenna
Connecting up AM loop antenna Assemble the antenna and connect to the receiver. Attach to a wall, etc. (if desired) and face in the direction that gives the best reception. Antenna snap connectors Twist the exposed wire strands together and insert into the hole, then snap the connector shut. -
Page 16: Connecting The Speakers
Connecting up Connecting the speakers A complete setup of six speakers (including the subwoofer) is shown here, but everyone’s home setup will vary. Simply connect the speakers you have in the manner shown below. The receiver will work with just two stereo speakers (the front speakers in the diagram) but using at least three speakers is recommended, and a complete setup is best for surround sound. -
Page 17: Hints On Speaker Placement
Connecting up Make sure that all the bare speaker wire is twisted together and inserted fully into the speaker terminal. If any of the bare speaker wire touches the rear panel it may cause the power to cut off as a safety measure. -
Page 18: Ac Outlet
A damaged power cord can cause a fire or give you an electrical shock. Check the power cord once in a while. When you find it damaged, ask your nearest Pioneer authorized service center or your dealer for a replacement. -
Page 19: Controls And Displays
Controls and displays Front Panel STANDBY STANDBY / ON STATION TUNER EDIT MULTI JOG PHONES STANDBY/ON Switches the receiver between on and standby. STANDBY indicator Lights when the receiver is in standby mode. STATION (+/–) buttons (pages 35–36) Selects station presets when using the tuner. TUNING (+/–) buttons (page 34) Selects the frequency when using the tuner. -
Page 20: Display
Controls and displays STEREO/DIRECT (pages 24–25) Switches direct playback on or off. Direct playback bypasses the tone controls and channel levels for the most accurate reproduction of a source. 16 SIGNAL SELECT (page 25, 28) Use to select between an analog or digital signal. - Page 21 Controls and displays 2 PRO LOGIC II When the Standard mode of the receiver is on, this lights to indicate Prologic II decoding. Lights when INPUT ATT is used to attenuate (reduce) the level of the input signal (can only be used with an analog signal).
-
Page 22: Remote Control
Controls and displays Remote Control DVD/LD TUNING BAND CLASS MENU TUNER SETUP EDIT ENTER CH SELECT AUDIO SUB TITLE DVD CONTROL AV RECEIVER RECEIVER Switches the receiver between on and standby. MIDNIGHT/LOUDNESS (page 26) Use to switch to Midnight or Loudness listening. - Page 23 Use to add or subtract the amount of effect in different sound modes or advanced listening modes. 15 DVD CONTROL buttons You can use these buttons to control a Pioneer DVD player connected to your system. Button What it does Turns DVD power on/off.
-
Page 24: Playing Sources
Playing sources Introduction to Sound Modes There are three basic sound options: Stereo/ Direct, Standard or Advanced Surround. Stereo/Direct When you select STEREO or DIRECT, you will hear the source through just the front left and right speakers (and possibly your subwoofer depending on your speaker settings). -
Page 25: Choosing The Input Signal
Playing sources Expanded This mode is especially designed to give sound depth to stereo sources. The overall effect builds a dynamic and broad sound space, allowing two-channel (stereo) signals to imitate a five speaker sound. Use with Dolby Pro Logic for a stereo surround effect. -
Page 26: Listening To Multi-Channel Playback
Playing sources Listening to multi-channel playback INPUT SELECTOR RECEIVER DVD/LD STANDARD Switch on the playback component. Switch on the receiver. Select the source you want to playback. Use the INPUT SELECTOR buttons on the remote (or the MULTI JOG/INPUT SELECTOR dial on the front panel). Press STANDARD. -
Page 27: Using The Tone Controls
Playing sources • Press MIDNIGHT/LOUDNESS. Each press cycles through the effects as follows: Midnight Loudness You can also press MIDNIGHT or LOUDNESS on the front panel. Each press switches the effect on or off. Using the tone controls Depending on what you are listening to, you may want to adjust the bass or treble using the front panel tone control. -
Page 28: Selecting The Multi-Channel Analog Inputs
Playing sources Selecting the multi-channel analog inputs Connect a DVD player with 5.1 channel output to listen to 5.1 channel playback. Select DVD/LD if it is not already selected. Use the INPUT SELECTOR buttons on the remote (or the MULTI JOG/INPUT SELECTOR dial on the front panel). -
Page 29: Choosing Your Receiver Setup
Refer to the following pages for details on each of the settings. If you are using the Pioneer S-FCRW220 speaker system, you’ll have to set the Crossover frequency to 200kHz. You can leave the Speaker setting and the Subwoofer setting in the default settings. -
Page 30: Speaker Setting
Setting up the receiver Use ’ or ‘ to adjust the setting. The setting is entered automatically. Repeat steps 3 and 4 to set other surround modes. When you’re done, press ENTER to exit. The setting display is automatically exited after 20 seconds of inactivity. -
Page 31: Lfe Attenuator Setting
Setting up the receiver 100Hz 150Hz 200Hz 100 Hz Sends bass frequencies below 100 Hz to the subwoofer (or L speakers). 150 Hz Sends bass frequencies below 150 Hz to the subwoofer (or L speakers). 200 Hz Sends bass frequencies below 200 Hz to the subwoofer (or L speakers). -
Page 32: Dynamic Range Control Setting
Setting up the receiver When S is selected in the speaker setting, the surround distance cannot be set. Dynamic range control setting • Default setting: OFF Dynamic range is the difference between the loudest and softest sounds in any given signal. With this setting, you can compress the dynamic range, so that low level sounds can be heard more easily (sounding relatively louder) -
Page 33: Setting The Relative Volume Level Of Each Channel
Setting up the receiver Setting the relative volume level of each channel • Default setting: 0 dB For best surround sound playback, you should set the relative channel levels from the main listening position. You can set seperate levels for each surround mode. Press STANDARD. -
Page 34: Using The Tuner
Using the tuner Listening to the radio The following steps show you how to tune to FM and AM radio broadcasts using the automatic (search) and manual (step) tuning functions. Once you are tuned to a station you can memorize the frequency for recall later—see Saving station presets on the next page for more on how to do this. -
Page 35: Saving Station Presets
Using the tuner Saving station presets If you often listen to a particular radio station, it's convenient to have the receiver store the frequency for easy recall whenever you want to listen to that station. This saves the effort of manually tuning in each time. -
Page 36: Naming Station Presets
Using the tuner Naming station presets For easier identification, you can name your station presets. Choose the station preset you want to name. See Listening to station presets (this page) for how to do this. If you’re using the remote control, press RECEIVER. -
Page 37: Making A Recording
Making Recordings Making an audio or a video recording You can make an audio or a video recording from the built-in tuner, or from an audio or video source connected to the receiver (such as a CD player or TV) through the analog jacks. You will need to connect a CD recorder, tape deck, MD, VCR, or DVR deck to the CD-R/TAPE/MD or VCR/DVR outputs on the receiver to do so (see... -
Page 38: Additional Information
Sometimes the trouble may lie in another component. Investigate the other components and electrical appliances being used. If the trouble cannot be rectified even after exercising the checks listed below, ask your nearest Pioneer authorized service center or your dealer to carry out repair work. - Page 39 Additional information Problem No sound from surround or center speakers. Noise during playback of a cassette deck. Sound is produced from other components, but not from LD or DVD player. No sound is output or a noise is output when software with DTS is played back.
-
Page 40: Specifications
Additional information Specifications Amplifier Section Continuous average power output of 100 watts* per channel, min., at 8 ohms, from 20 Hz to 20,000 Hz with no more than 0.2 %** total harmonic distortion (front). Continuous Power Output Front ... 100 W per channel Center ... - Page 41 Additional information Miscellaneous Power Requirements ... AC 120 V, 60 Hz Power Consumption ... 260 W In Standby ... 1 W AC Outlet ... 100 W MAX. (SWITCHED) Dimensions ... 420 (W) x 158 (H) x 393 (D) mm (16-9/16 (W) x 6-4/16 (H) x 15-8/16 (D) in.) Weight (without package) ...
- Page 42 Additional information...
- Page 43 Additional information...
- Page 44 Si ce produit doit être réparé au Canada, veuillez vous adresser à un distributeur autorisée Pioneer au Canada pour obtenir le nom de la Société de Service Autorisée Pioneer le plus près de chez vous. Ou encore, veuillez vous communiquer avec le Service de Clientèle de Pioneer: Pour obtenir des renseignements sur la garantie, veuillez vous reporter au feuillet sur la Garantie Limitée gui accompagne le produit.