Table of Contents

Related Manuals for Vivitar ViviCam S1527


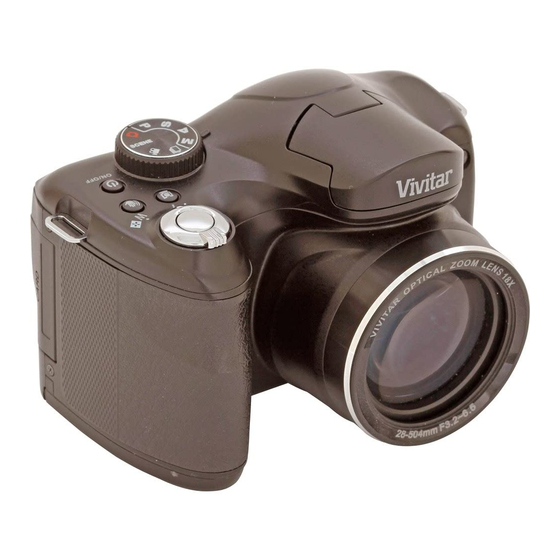
Summary of Contents for Vivitar ViviCam S1527
-
Page 1: Digital Camera
ViviCam S1527 Digital Camera User Manual © 2009-2012 Sakar International, Inc. All rights reserved. Windows and the Windows logo are registered trademarks of Microsoft Corporation. All other trademarks are the property of their respective companies. -
Page 2: Table Of Contents
TABLE OF CONTENTS Introduction ..........................2 What’s Included ..........................2 A Quick Look at Your Camera ...................... 3 Initial Camera Setup ........................5 Main Camera Modes ........................9 Camera Technical Specifications ....................10 Computer System Requirements ....................11 Powering the Camera On/Off ..................... 12 Changing Camera Mode ...................... -
Page 3: Introduction
This camera is a plug and play device. You can download the pictures and videos captured by your camera without the software by directly accessing the camera’s memory card from your computer. It is recommended however that you install the Vivitar Experience™ Image Manager Software to enjoy the full Vivitar Experience. -
Page 4: A Quick Look At Your Camera
A Quick Look at Your Camera PARTS OF THE CAMERA 1. Power ON/OFF Button 11. Self Timer/Left Button 21. Photo Shutter Button 2. ViviLink Button 12. LCD Screen 22. Flash Light 3. Playback Button 13. USB Port 23. Manual Flash Open Button 4. - Page 5 MULTI-FUNCTIONAL BUTTONS You can choose camera settings by pressing the 4-way control or OK. Left/Self –Timer Button: Scrolls left in menus. Toggles through the 4 self-timer options. Up/Flash Button: Scrolls up in menus. Toggle through the flash options. Right/Exposure Button: ...
-
Page 6: Initial Camera Setup
Initial Camera Setup QUICK INITIAL CAMERA SETUP INSTRUCTIONS Installing the Batteries Installing the Memory Card Insert 4 AA (1.5V) batteries. SD Memory card (up to 32GB) Alkaline batteries recommended. needed for normal use. Turning On the Camera Using the Camera... -
Page 7: Installing The Batteries
INSTALLING THE BATTERIES Use only the specified batteries for the camera. Use 4 x AA (1.5V) batteries. Alkaline batteries are recommended. Batteries not included. Note: When replacing batteries, always power off the camera before removing the batteries. Push the clip in the direction of the arrow and then slide the battery cover to the right to release and open it. - Page 8 INSTALLING THE SD MEMORY CARD Make sure an SD Memory Card has been properly inserted into your camera. SD card not included. To properly install the SD Memory Card: Open the SD Memory Card cover on the side of the camera to reveal the SD Memory Card slot.
-
Page 9: Attaching The Strap
Note: After the camera is powered on, an SD icon will appear on the LCD display. If you do not see the SD icon on the display, please check if the card was inserted properly. Make sure the SD card is not locked (check the lock switch on the side of the SD card). If the SD card is locked this will prevent the camera from saving captured photos to the SD card. -
Page 10: Main Camera Modes
Main Camera Modes Your digital camera has different modes for the various camera functions. Photo Capture Mode Use this mode to capture pictures with your digital camera. This is the default mode when the camera is powered on. To take a picture, aim your camera as desired and press the Shutter button halfway to focus, then press the Shutter button fully to capture the image. -
Page 11: Camera Technical Specifications
Camera Technical Specifications Image Sensor CMOS Sensor 4608x3456 (16M), 4300x3255 (14M), 4000x3000 (12M), 3648x2736 Image Resolution (10M), 3264x2448 (8M), 2560x1920 (6M), 2048x1536 (3M), 1920x1080 (2M-HD), 640x480 (VGA) Video Resolution HD 720P 1280x720 (30fps) Still Image: JPEG (EXIF 2.3 compatible); DCF compatible; Support File Format DPOF;... -
Page 12: Computer System Requirements
Computer System Requirements To be able to download photos and videos to your computer using the Vivitar Experience™ Image Manager Software, you will need the following minimum configuration: WINDOWS OS Microsoft® Windows XP with Service Pack 3, Windows Vista with Service Pack 1 or Windows 7 ... -
Page 13: Powering The Camera On/Off
Powering the Camera On/Off Make sure the batteries have been inserted properly into your digital camera. If your camera comes with a rechargeable lithium battery, make sure it is fully charged before the first use. Make sure an SD card has been inserted into your camera. (SD card up to 32GB - SD Card not included) Please see Initial Camera Setup for more information. -
Page 14: Changing Camera Mode
Changing Camera Mode The procedure below is a general guideline for basic operation. It is particularly useful if you are new to the camera. Your camera has three main modes: Photo Capture Mode - Use this mode to capture photos with your camera. Video Capture Mode - Use this mode to capture videos with your camera. - Page 15 VIDEO CAPTURE MODE When in Video Capture Mode, this icon displays on the top-left corner of the LCD display. T o switch to Video Capture Mode, press the HD button or turn the Mode Dial to Video. Press the Shutter button to start capturing your video. While recording, use the Zoom lever to zoom-in/zoom-out on the subject.
-
Page 16: Navigating The Menus
Navigating the Menus The Photo Capture Mode, Video Capture Mode and Playback Mode each have a set of menus specific to that mode. The General Camera Settings also has its own set of menus. To access the menus: Press the Menu button. Note: Depending on your selected mode and settings, the displayed option icons in the menu may vary. -
Page 17: Vivilink Feature
The ViviLink technology allows you to quickly and easily upload your camera’s photos and videos to the social networks of your choice with the accompanying Vivitar Experience™ Image Manager application. A ViviLink destination can be assigned to a photo or video in Capture mode prior to capturing your image or in Playback Mode. -
Page 18: Photo Capture Mode
Photo Capture Mode The Photo Capture mode allows you to capture pictures with your digital camera. LCD ICONS AND DESCRIPTION The following icons appear on the LCD display in Photo Capture Mode. Description Shooting Mode Flash Mode Focus Mode Image Size Image Quality Numbers of Shots Available Face Tracking... - Page 19 CAPTURING YOUR PHOTO While in Photo Capture mode, use the LCD display to direct the camera at the scene you would like to capture. Set the Mode Dial to the desired shooting mode. If you need to use the Flash for shooting, press the Flash button to open the Flash. Use the Zoom In/T and Zoom Out/W lever to better set the camera display if desired.
- Page 20 When the environment has more light than is needed, reduce the exposure setting (by using the negative - count) to reduce the amount of light allowed into the lens by your camera. If the environment has less light (darker) than is needed, increase the exposure setting (by using the positive + count) to increase the amount of light allowed into the lens by your camera.
- Page 21 FLASH MODE Opening the Flash You need to manually open the flash before switching to the flash mode. To open the flash: Push the button with the Flash icon next to the flash. The flash opens. To close the flash: ...
- Page 22 Important: When using Flash, stand between 8 to 10 feet away from the scene you would like to capture. The MACRO mode must be turned off when you want to use the Flash. Flash Mode Options Icon Mode Description The Flash does not fire. Forced Off (Default) ...
- Page 23 FOCUS MODE Icon Mode Description Auto focus Adjusts focus automatically. Macro Used when capturing images at a close distance. Used when capturing images at long distance. Infinity To select the Focus Mode: Set the Mode Dial to the desired shooting mode. Press the Down/Focus button repeatedly to toggle between the Focus Modes.
- Page 24 Manual Lets you set both aperture and shutter speed manually. Continuous Lets you capture a series of shots with a single press of the Shutter button. Shooting Video Use this mode to record videos with your camera. Scene Lets you select the desired scene mode that suits your Mode shooting environment.
- Page 25 Press the OK button. Adjust the settings. Press the Up/Down button to adjust the aperture value. Press Left/Right button to adjust the shutter speed. Press the OK button to confirm the setting. Using Continuous Shooting Mode In this mode, you can take consecutive shots. Icon Mode Description...
- Page 26 Setting the Scene Mode Select one of the following Scene Modes to fit your shooting condition. Mode Description Backlight Increases the exposure (by turning on the flash) when light illuminates from the subject from the behind. Scenery Catches the scenery with ease. Smile Capture Automatically takes a shot when a smile is detected.
- Page 27 PHOTO CAPTURE MODE MENUS Using the Menu Button Press the Menu button to access Photo Capture options while in Photo Capture Mode. Note: Depending on your settings, the displayed option icons in the Function menu may vary. To use the Menu Button: Press the Menu button.
- Page 28 Image Quality Menu The Image Quality menu allows you to select the desired quality level of the images taken by your camera. Keep in mind that images with a higher image quality level will also take up more memory on your camera. The Image Quality options include: Super Fine Fine (Default)
- Page 29 To select the Metering option: Press the Menu button. Press the Up/Down button to select ‘Metering’. Press the OK/Right button to enter the submenu. Press the Up/Down button to select an option. Press the OK button to confirm the setting. White Balance Menu White Balance compensates for color temperatures in different lighting conditions, so white and other colors can display properly when you capture images.
- Page 30 ISO Menu The ISO configures the camera’s sensitivity to light. The higher the ISO value, the brighter picture you can take in a low-light environment. Yet, you may see more noise in the picture as you increase the ISO value. The ISO options Include: Icon Description...
- Page 31 To select an Exposure option: Press the Menu button. Press the Up/Down button to select ‘Exposure’. Press the OK/Right button to enter the submenu. Press the Up/Down button to select an option. Press the OK button to confirm the setting. Image Sharpness Menu This setting allows you to adjust the sharpness of images, making edges more or less distinct.
- Page 32 This effect simulates an ultra wide-angle lens that produces strong Fish Eye visual distortion intended to create a wide panoramic or hemispherical image. Monochrome Adds an effect with monochromatic color tones. Adds an effect with dark reddish brown color tones, so the image or Sepia video looks as if it is old.
- Page 33 On selecting ‘Date & Time’: The date and time both appear on the captured photo. Press the OK button to confirm setting. Face Detect Menu The Face Detect feature when set to ‘On’ allows the camera to use a subject’s face as the basis for balancing the other colors and focus in the camera’s display.
-
Page 34: Video Capture Mode
Video Capture Mode The Video Capture Mode allows you to capture videos with your digital camera. To enter Video Capture Mode, follow one of the steps below: Turn the Mode Dial to Video. Press the HD button. LCD ICONS AND DESCRIPTION The following icons appear on the LCD display in Video Capture Mode. - Page 35 CAPTURING YOUR VIDEO Set the Mode Dial to Video Mode or press the HD button to open the Video Capture Mode. While in Video Capture mode, use the LCD display to direct the camera at the scene you would like to capture. Use the Zoom In/T and Zoom Out/W lever to better set the camera display if desired.
- Page 36 Image Size Menu The Image Size menu allows you to choose the desired size of the images taken by your camera. Keep in mind that images with a higher resolution will also take up more of your camera’s memory. The Image Size option includes: Icon Description 720P - 1280 X720 (30fps) (Default)
-
Page 37: Camera Settings
To select the White Balance option: Press the Menu button. Press the Up/Down button to select ‘White Balance’. Press the OK/Right button to enter the submenu. Press the Up/Down button to select an option. Press the OK button to confirm the setting. Camera Settings The general settings of your camera can be easily changed by using the Camera Settings menu options. - Page 38 Periodical Capture 5s [5 sec.] 10s [10 sec.] 30s [30 sec.] 60s [60 sec.] [Off] Date & Time Sets the date and time. Language Select a language for display menus and other information. TV Mode You can review images on a television with an AV cable. [NTSC] America, Japan, T aiwan and others [PAL]...
-
Page 39: Playback Mode
Playback Mode The Playback Mode allows you to review and edit photos and videos that you’ve already taken with your camera. When you first turn on the camera, the camera will be in Capture mode by default. Press the Playback button to open the Playback Mode. - Page 40 SELECTING AND VIEWING PHOTOS AND VIDEOS When the camera is in Playback Mode, press the Left/Right button to preview the next/previous recorded files. You can also select any of the following options. Enlarging a Photo To magnify and enlarge a captured photo: Press the Playback button to enter Playback Mode.
- Page 41 Press the Up/Down/Left/Right button to scroll and select the image you wish to view. Press the OK button to enlarge the selected image full size. Once full size, photos can be enlarged and videos can be viewed. DELETING FILES While in the Playback Mode, you can delete captured photos and videos from your camera through the Delete menu.
- Page 42 press OK. The ‘Delete this file?’ menu appears. Select ‘Yes’ to delete the selected file, or ‘No’ to exit the menu without deleting. Press the OK button to confirm your selection. Note: If you chose ‘Yes’, the selected image is deleted. The next image then appears with the delete options.
- Page 43 Slide Show The Slide Show option sets the time interval for presenting a series of captured images and video files (first frame only). To play a Slide Show: Press the Playback button to enter Playback Mode. Press the Menu button and then press the Up/Down button to select ‘Slide Show’. Change the slideshow settings.
- Page 44 Copy to Card Captured images saved to your camera’s internal memory can be transferred to an SD Memory Card. Make sure you have installed the SD Memory card properly. To set up copy to card: Press the Playback button to enter Playback Mode. Press the Right/Left button to select a file.
- Page 45 Rotate Use this menu to rotate the pictures that you’ve taken with your camera. To rotate a photo: Press the Playback button to enter Playback Mode. Press the Right/Left button to select a file. Press the Menu button and then press the Up/Down button to select ‘Rotate’. Press the OK button and then press the Up/Down button to select ‘Rotate/Save/Back’.
- Page 46 Voice Memo The Voice Memo feature inserts a voice annotation to a selected image file. To record a Voice Memo: Press the Playback button to enter Playback Mode. Press the Right/Left button to select the image you want to add a voice memo. Press the Menu button and then press the Up/Down button to select ‘Voice Memo’.
- Page 47 Photo Frame The Photo Frame feature allows you to choose from a selection of frames and add the frame to your image. Press the Playback button to enter Playback Mode. Press the Right/Left button to select a file. Press the Menu button and then press the Up/Down button to select ‘Photo Frame’. Press the Up/Down button to scroll through the photo frame options.
-
Page 48: Connecting The Digital Camera To An Hdtv
Connecting the Digital Camera to an HDTV The digital camera has and HDMI port to use your larger HDTV screen in place of the camera’s LCD screen. On plugging the HDMI cable (purchased separately) to the digital camera’s HDMI slot and to the TV, the LCD screen turns blank. Use the digital camera normally to capture and playback photos and videos. -
Page 49: Installing The Software
Installing the Software You must be connected to the Internet to install and run the Vivitar Experience™ Image Manager Software. Insert the installation CD into your CD-ROM drive. The installation screen should automatically open. WINDOWS OS: The Vivitar Experience™ Image Manager Installer window appears. If the window does not appear, open the application’s CD/DVD drive and click on “Setup.exe”... -
Page 50: Connecting The Camera To The Computer
13) MAC OS: Click the “Quit” button when the installation is complete. Click the “Launch Vivitar Experience™ Image Manager” to open the application. 14) If you close the application you can run the Vivitar Experience™ Image Manager from the Programs (WINDOWS OS) or Applications (MAC OS) menu on your computer. -
Page 51: Getting Photos And Videos From The Camera To The Computer
Getting Photos and Videos from the Camera to the Computer An SD card needs to be installed. Do not disconnect the cable during transfer. Doing so will cancel the transfer of any files on their way to your computer. Select the “Get Images” button from the Main menu. The “Get media from device”... -
Page 52: Getting Started
Use automatic “Geotagging” with built in Google Maps For more details on how to use the Vivitar Experience™ Image Manager open the “Help” from the menu option or click the “Take a Tour” button on the application’s Home screen. - Page 53 TRANSFERRING PHOTOS AND VIDEOS: MACINTOSH OS Use the USB cable that came with your camera to connect your camera to your computer. MSDC appears on the LCD. The camera’s device icon appears on the desktop. Click on the device icon and open the DCIM folder and the folder inside to view the media files.
-
Page 54: Camera Maintenance
Camera Maintenance The digital camera is a delicate device. Please handle your camera with care to avoid damaging it. Do not expose your camera to heat sources. Do not use you camera in wet or moist conditions. Sakar Warranty Card This warranty covers for the original consumer purchaser only and is not transferable. -
Page 55: Technical Support
Technical Support For technical support issues please visit our website at www.vivitar.com. You can find manuals, software and FAQ’s at the website. Can’t find what you are looking for? E-mail us at support@vivitar.com and one of our technical support team members will answer your questions. - Page 56 If your camera cannot operate normally, see the additional frequently encountered technical problems and solutions listed below. If the problem persists, contact your nearest service center or technical support. Problem Cause Solution The camera There is no battery or the Insert the batteries correctly.
- Page 57 I cannot The free space on the hard disk of Ensure that the hard disk has enough download your computer is insufficient. space for running Windows and that the drive for loading image files has free images from the space equal to or greater than the camera to my computer.