Pioneer Super Tuner III D AVH-P6850DVD Operation Manual
Pioneer av receiver/6-disc changer operation manual
Hide thumbs
Also See for Super Tuner III D AVH-P6850DVD:
- Installation manual (44 pages) ,
- Service manual (201 pages)

Related Manuals for Pioneer Super Tuner III D AVH-P6850DVD


Summary of Contents for Pioneer Super Tuner III D AVH-P6850DVD
- Page 1 Black plate (1,1) Operation Manual AV Receiver/6-Disc Changer with 7 inch Wide Display AVH-P6850DVD English <CRB2163-B>1...
-
Page 2: Table Of Contents
Contents Thank you for buying this Pioneer product. Please read through these operating instructions so you will know how to operate your model properly. After you have finished reading the instructions, keep this man- ual in a safe place for future reference. - Page 3 Contents Introduction of advanced DVD video operation 32 Repeating play 32 Selecting audio output 33 Playing Video CDs Watching a Video CD 34 Stopping playback 35 Pausing Video CD playback 35 Frame-by-frame playback 35 Slow motion playback 35 Searching for a desired scene, starting playback from a specified time 36 PBC playback 36 Introduction of advanced Video CD...
- Page 4 Contents Disconnecting a Bluetooth audio player 59 Displaying BD (Bluetooth Device) address 59 Bluetooth Telephone Hands-free phoning with cellular phones featuring Bluetooth wireless technology 60 Setting up for hands-free phoning 61 Basic operation of hands-free phoning 61 Introduction of advanced hands-free phoning operation 62 Connecting a cellular phone 62 Disconnecting a cellular phone 63...
- Page 5 Selecting the background display 99 Adjusting the response positions of the touch panels (Touch Panel Calibration) 100 Displaying the AVG-VDP1 (Pioneer Vehicle Dynamics Processor) 100 Using the AUX source 101 Setting remote control code type 102 Using the preprogrammed function 102...
-
Page 6: Important Safeguards
Section Precautions IMPORTANT SAFEGUARDS Please read all of these instructions regarding your display and retain them for future refer- ence. 1 Read this manual fully and carefully be- fore operating your display. 2 Keep this manual handy as a reference for operating procedures and safety informa- tion. -
Page 7: To Avoid Battery Exhaustion
Black plate (7,1) Section Precautions When you attempt to watch a DVD, Video CD or TV while driving, the warning VIDEO VIEW- ING IS NOT AVAILABLE WHILE DRIVING will appear on the front display. To watch a DVD, Video CD or TV on the front display, park your vehicle in a safe place and apply the parking brake. -
Page 8: Playable Discs
! If the battery is disconnected or discharged, the preset memory will be erased and must be reprogrammed. ! If this unit does not operate properly, contact your dealer or nearest authorized Pioneer Ser- vice Station. Playable discs DVD, Video CD and CD discs that display the logos shown below can be played back on this player. -
Page 9: About This Manual
Before You Start About this manual This unit features a number of sophisticated functions ensuring superior reception and op- eration. All the functions have been designed for the easiest possible use, but many are not self-explanatory. This operation manual will help you benefit fully from this unit’s potential and to maximize your listening enjoyment. -
Page 10: About Wma
Bluetooth wireless technology. ® iPod compatibility When you use this unit with a Pioneer iPod adapter (CD-IB100B) (sold separately), you can control an iPod with Dock Connector. ! iPod is a trademark of Apple Computer, Inc., registered in the U.S. and other coun- tries. -
Page 11: When An Operation Is Prohibited
Before You Start For viewing LCD comfortably Due to its construction, the viewing angle of the LCD screen is limited. You can adjust it by changing either screen size or picture adjust- ment. Changing the wide screen size By changing the screen size from 4:3 to 16:9, you can adjust the screen so that the screen can fit to the video image you are playing. -
Page 12: About The Demo Mode
Section Before You Start Notes ! When using with AVG-VDP1, if you press RESET, be sure ACC OFF is selected. If ACC ON is selected, correct operation may not be possible even if you press RESET. ! After completing connections or when you want to erase all memorized settings or return the unit to its initial (factory) settings, switch your engine ON or set the ignition switch to... -
Page 13: Customising Your System
! “DTS” and “DTS Digital Surround” are regis- tered trademarks of Digital Theater Sys- tems, Inc. Using iPod When you use this unit with a Pioneer iPod adapter (CD-IB100B) (sold separately), you can control an iPod with Dock Connector. Black plate (13,1) For details concerning operation, refer to Play- ing songs on iPod on page 54. -
Page 14: Using Bluetooth Wireless Technology
Section Customising your system Using Bluetooth wireless technology Playing a Bluetooth audio player using with Bluetooth adapter (e.g. CD-BTB100) If you connect Bluetooth adapter (e.g. CD- BTB100) to this unit, you can control Blue- tooth audio player via Bluetooth wireless tech- nology. -
Page 15: What's What
What’s What Head unit 1 BAND/ESC button Press to select among three FM bands and one AM band and to cancel the control mode of functions. 2 RESET button Press to return to the factory settings (initial settings). 3 Signal receptor Receives signals from a remote control. -
Page 16: Remote Control
Section What’s What Remote control Button names AVH mode Remote control Switch to change the setting of the remote control. For details, refer to Setting remote con- selection trol code type on page 102. switch SOURCE button Press to cycle through all the available sources. Press and hold to turn the source off. Press to quickly lower the volume level, by about 90%. - Page 17 What’s What Button names AVH mode a/b button Press to select the next/previous disc. (DISC) Remote control Switch the operation mode between AVH, DVD and TV modes. Normally, set to AVH. For operation mode details, refer to Using the remote control operation mode switch on the next page. switch BOOKMARK Press to operate the preprogrammed functions...
- Page 18 ! When specifying title by using 1–12. (Refer to Specifying title on page 30.) TV mode operation TV operations available with a Pioneer TV tuner (e.g. GEX-P5750TV(P)) can be controled with AVH mode. TV mode is not used with this unit.
-
Page 19: Basic Operations
(refer to page 94). — When the AV (AV input) is not set to VIDEO (refer to page 87). ! External unit refers to a Pioneer product (such as one available in the future) that, although incompatible as a source, enables control of basic functions by this unit. -
Page 20: Loading/Ejecting Discs
Section Basic Operations Loading/Ejecting discs CAUTION Keep hands and fingers clear of the unit when opening, closing, or adjusting the LCD panel. Be especially cautious of children’s hands and fin- gers. Loading a disc Up to six discs can be stored into this unit. Each disc is stored in each disc holder allow- ing you to specify a holder for loading a disc. -
Page 21: Adjusting The Flap Angle
Basic Operations Ejecting a disc You can specify a holder that you eject a disc from. Press OPEN on the unit to display load- ing/ejecting menu. The LCD panel opens halfway, and the load- ing/ejecting menu is displayed on the screen. ! If the disc in the holder has already been played, the disc type is displayed on the holder icon (e.g. -
Page 22: Touch Panel Key Basic Operation
Section Basic Operations Touch panel key basic operation Activating the touch panel keys 1 Common touch panel keys For details, refer to Using the common touch panel keys on this page. 2 Information bar 3 Touch panel keys Touch to do various operations. 4 Clock display To turn the clock on or off, or to adjust the time, refer to Setting the clock on page 88. - Page 23 Basic Operations Operating the menu 1 FUNCTION key Touch to select functions for each source. 2 AUDIO key Touch to select various sound quality con- trols. 3 SETUP key Touch to select various setup functions. 4 BACK key Touch to return to the previous display. 5 ESC key Touch to cancel the control mode of func- tions.
-
Page 24: Tuner
Section Tuner Listening to the radio These are the basic steps necessary to operate the radio. More advanced tuner operation is explained starting on the next page. 1 Source name Shows the selected source name. 2 Source icon Shows which source has been selected. 3 Band indicator Shows which band the radio is tuned to, AM or FM. -
Page 25: Storing And Recalling Broadcast Frequencies
Tuner Storing and recalling broadcast frequencies If you touch any of the preset tuning keys P1—P6 you can easily store up to six broad- cast frequencies for later recall with the touch of a key. % When you find a frequency that you want to store in memory keep touching one of preset tuning keys P1—P6 until the preset number stops flashing. -
Page 26: Tuning In Strong Signals
Section Tuner % Touch BSM on the function menu to turn BSM on. BSM appears. While BSM is flashing the six strongest broadcast frequencies will be stored under preset tuning keys P1—P6 in order of their signal strength. When finished, BSM dis- appears. -
Page 27: Playing Dvd Video Discs
Playing DVD video discs Watching a DVD video These are the basic steps necessary to play a DVD video with your DVD player. More ad- vanced DVD video operation is explained start- ing on page 32. ! Switch the remote control operation mode to DVD to perform DVD operations. -
Page 28: Operating The Dvd Menu
Section Playing DVD video discs # You can also skip back or forward to another chapter by pressing o or p button on the re- mote control. To perform fast forward or reverse, keep touching o or p. If you keep touching o or p for five sec- onds, fast reverse/fast forward continues even if you release o or p. -
Page 29: Resume Playback (Bookmark)
Playing DVD video discs % Touch f during playback. PAUSE is displayed on the information bar and playback is paused, letting you view a still image. # To resume playback at the same point that you turned pause on, touch f again. Note Depending on the disc and the playback location on the disc, the icon... -
Page 30: Searching For A Desired Scene, Starting Playback From A Specified Time
Section Playing DVD video discs Searching for a desired scene, starting playback from a specified time You can use the search function to search for a desired scene by specifying a title or chapter, and the time search function to specify the time on a disc at which play starts. -
Page 31: Changing The Subtitle Language During Playback (Multi-Subtitle)
Playing DVD video discs Notes ! You can also switch between languages/audio systems using AUDIO on the remote control. ! The number in the mark on a DVD’s package indicates the number of recorded languages/audio systems. ! With some DVDs, switching between lan- guages/audio systems may only be possible using a menu display. -
Page 32: Return To The Specified Scene
Section Playing DVD video discs Return to the specified scene You can return to the specified scene where the DVD you are currently playing has been preprogrammed to return. % Touch RETURN to return to the speci- fied scene. Note If a specified scene has not been preprogrammed in DVD disc, this function is not possible. -
Page 33: Selecting Audio Output
Playing DVD video discs ! TITLE – Repeat just the current title Notes ! If you perform chapter search or fast forward/ reverse, the repeat play range changes to DISC. ! Depending on the disc and the playback loca- tion on the disc, the function may not be se- lectable, indicating that operating this function is not possible. -
Page 34: Playing Video Cds
Section Playing Video CDs Watching a Video CD These are the basic steps necessary to play a Video CD with your DVD player. More ad- vanced Video CD operation is explained start- ing on page 37. ! Switch the remote control operation mode to DVD to perform video CD operations. -
Page 35: Stopping Playback
Playing Video CDs To perform fast forward or reverse, keep touching o or p. If you keep touching o or p for five sec- onds, fast reverse/fast forward continues even if you release o or p. To resume playback at a desired point, touch f. # You can also perform fast reverse/fast forward by pressing and holding m or n button on the remote control. -
Page 36: Searching For A Desired Scene, Starting Playback From A Specified Time
Section Playing Video CDs Notes ! There is no sound during slow motion play- back. ! Depending on the disc and the playback loca- tion on the disc, the icon indicating that slow motion playback is not possible. ! With some discs, images may be unclear dur- ing slow motion playback. -
Page 37: Introduction Of Advanced Video Cd Operation
Playing Video CDs Introduction of advanced Video CD operation 1 Function display Shows the function names. Touch AUDIO MENU to display MENU. MENU appears on the display. Touch FUNCTION to display the func- tion names. The function names are displayed and oper- able ones are highlighted. -
Page 38: Playing Cds
Section Playing CDs Listening to a CD These are the basic steps necessary to play a CD with your DVD player. More advanced CD operation is explained starting on page 40. 1 CD/CD-TEXT indicator Shows when a CD is playing. 2 Source icon Shows which source has been selected. -
Page 39: Stopping Playback
Playing CDs Notes ! When playing discs with MP3/WMA files and audio data (CD-DA) such as CD-EXTRA and MIXED-MODE CDs, both types can be played only by switching mode between MP3/WMA and CD-DA by touching MEDIA or pressing BAND/ESC. This function can be operated only when the disc is playing. -
Page 40: Introduction Of Advanced Cd Operation
Section Playing CDs Introduction of advanced CD operation 1 Function display Shows the function names. Touch AUDIO MENU to display MENU. MENU appears on the display. # You can also display MENU by clicking the joystick on the remote control. Touch FUNCTION to display the func- tion names. -
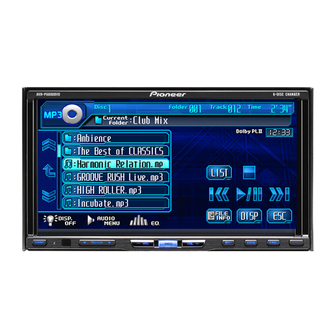
Page 41: Playing Mp3/Wma
Playing MP3/WMA Listening to MP3/WMA These are the basic steps necessary to play an MP3/WMA with your built-in DVD player. More advanced MP3/WMA operation is explained starting on page 44. 1 Media indicator MP3, WMA or MIX appears depending on the file format you are playing. -
Page 42: Stopping Playback
Section Playing MP3/WMA To select a folder, touch folder one level higher and touch a folder name on the list. # You can also select the next or previous folder by pressing a or b button (FOLDER) on the re- mote control. -
Page 43: Displaying Information On Mp3/Wma File
Playing MP3/WMA % Touch f during playback. PAUSE appears in the display. Play of the cur- rent track pauses. # To resume playback at the same point that you turned pause on, touch f again. Displaying information on MP3/WMA file Information recorded on an MP3/WMA disc can be displayed. -
Page 44: Introduction Of Advanced Built-In Dvd Player (Mp3/Wma) Operation
Section Playing MP3/WMA Introduction of advanced built-in DVD player (MP3/ WMA) operation 1 Function display Shows the function names. Touch AUDIO MENU to display MENU. MENU appears on the display. # You can also display MENU by clicking the joystick on the remote control. Touch FUNCTION to display the func- tion names. -
Page 45: Scanning Folders And Tracks
Playing MP3/WMA Scanning folders and tracks While you are using FOLDER, the beginning of each track in the selected folder plays for about 10 seconds. When you are using DISC, the beginning of the first track of each folder is played for about 10 seconds. Select the repeat range. -
Page 46: Multi-Cd Player
Section Multi-CD Player Listening to a CD You can use this unit to control a multi-CD player, which is sold separately. These are the basic steps necessary to play a CD with your multi-CD player. More advanced CD operation is explained starting on page 48. 1 Source name Shows the selected source name. -
Page 47: Pausing Cd Playback
Multi-CD Player ! If you do not use the touch panel keys within 30 seconds, they will be hidden auto- matically. Pausing CD playback Pause lets you temporarily stop disc playback. % Touch f during playback. PAUSE appears in the display. Play of the cur- rent track pauses. -
Page 48: Introduction Of Advanced Multi-Cd Player Operation
Section Multi-CD Player Introduction of advanced multi-CD player operation 1 Function display Shows the function names. Touch AUDIO MENU to display MENU. MENU appears on the display. # You can also display MENU by clicking the joystick on the remote control. Touch FUNCTION to display the func- tion names. -
Page 49: Scanning Cds And Tracks
Multi-CD Player Scanning CDs and tracks While you are using DISC, the beginning of each track on the selected disc plays for about 10 seconds. When you are using M-CD, the beginning of the first track of each disc is played for about 10 seconds. -
Page 50: Using Compression And Bass Emphasis
Section Multi-CD Player Erasing a track from your ITS playlist You can delete a track from your ITS playlist if ITS play is on. If ITS play is already on, skip to step 2. Play the CD with the track you want to delete from your ITS playlist, and turn ITS play on. -
Page 51: Tv Tuner
TV tuner Watching the television You can use this unit to control a TV tuner (e.g. GEX-P5750TV(P)), which is sold separately. For details concerning operation, refer to the TV tuner’s operation manual. This section pro- vides information on TV operations with this unit which differs from that described in the TV tuner’s operation manual. -
Page 52: Storing And Recalling Broadcast Stations
Section TV tuner Storing and recalling broadcast stations If you touch any of the preset tuning keys P01—P12 you can easily store up to 12 broad- cast stations for later recall with the touch of a key. % When you find a station that you want to store in memory, keep touching one of preset tuning keys P01—P12 until the pre- set number stops flashing. -
Page 53: Storing The Strongest Broadcast Stations Sequentially
TV tuner Storing the strongest broadcast stations sequentially % Touch BSSM on the function menu to turn BSSM on. BSSM begins to flash. While BSSM is flashing the 12 strongest broadcast stations will be stored in order from the lowest channel up. When finished, BSSM disappears. -
Page 54: Playing Songs On Ipod
Section Playing songs on iPod Listening to songs on your iPod 1 Source name Shows the selected source name. 2 Source icon Shows which source has been selected. 3 Song number indicator Shows the number of song played in the se- lected list. -
Page 55: Pausing A Song
Playing songs on iPod ! ARTISTS (artists) ! ALBUMS (albums) ! SONGS (songs) ! GENRES (genres) Touch a list title that you want to play. Repeat this operation until you find the de- sired song. # You can start a playback of all the songs in the selected list (GENRES, ARTISTS or ALBUMS). -
Page 56: Playing Songs In A Random Order (Shuffle)
Section Playing songs on iPod # When you do not set to repeat one song, this unit repeats all songs in the currently selected list (e.g. ARTISTS, ALBUMS). Playing songs in a random order (shuffle) For playback of the songs on the iPod, there are two random play methods: Song (play back songs in a random order) and Album (play back albums in a random order). -
Page 57: Bluetooth Audio
Bluetooth Audio Listening to songs on BT Audio (Bluetooth audio player) If you connect Bluetooth adapter (e.g. CD- BTB100) to this unit, you can control Bluetooth audio player via Bluetooth wireless technology. For details concerning operation, refer to the Bluetooth adapter’s operation manual. This section provides brief information on Blue- tooth audio player operations with this unit which slightly differes or is cut short from that... -
Page 58: Connecting A Bluetooth Audio Player
Section Bluetooth Audio Connecting a Bluetooth audio player 1 Function display Shows the function names. Touch AUDIO MENU to display MENU. MENU appears on the display. # You can also display MENU by clicking the joystick on the remote control. Touch FUNCTION to display the func- tion names. -
Page 59: Disconnecting A Bluetooth Audio Player
Bluetooth Audio Disconnecting a Bluetooth audio player Touch AUDIO MENU to display MENU. MENU appears on the display. # You can also display MENU by clicking the joystick on the remote control. Touch FUNCTION to display the func- tion names. The function names are displayed and oper- able ones are highlighted. -
Page 60: Featuring Bluetooth Wireless Technology
Section Bluetooth Telephone Hands-free phoning with cellular phones featuring Bluetooth wireless technology If you use Bluetooth adapter (e.g. CD-BTB100), you can connect a cellular phone featuring Bluetooth wireless technology to this unit for hands-free, wireless calls, even while driving. For details concerning operation, refer to the Bluetooth adapter’s operation manual. -
Page 61: Bluetooth Telephone
Bluetooth Telephone Note Equalizer curve for the phone source is fixed. When selecting the phone source, you cannot op- erate Using the equalizer on page 71. Setting up for hands-free phoning Before you can use the hands-free phoning function you will need to set up the unit for use with your cellular phone. -
Page 62: Introduction Of Advanced Hands-Free Phoning Operation
Section Bluetooth Telephone To end the call, touch The estimated call time appears in the display (this may differ slightly from the actual call time). Rejecting an incoming call % When a call comes in, touch The call is rejected. Answering a call waiting Touch to answer a call waiting. -
Page 63: Disconnecting A Cellular Phone
While connecting, Connect flashes. To com- plete the connection, please check the device name (Pioneer BT unit) and enter the link code on your cellular phone. If the connection is established, Connected is displayed. # The link code is set to 0000 as default. You can change this code in the initial setting. -
Page 64: Deleting A Registered Phone
Section Bluetooth Telephone Deleting a registered phone Touch PHONE REGISTER on the function menu. Touch DELETE next to the device name you want to delete. A confirmation display appears. Touch YES to delete the phone. # To cancel, touch NO. Connecting to a registered cellular phone Connecting to a registered... -
Page 65: Changing The Phone Book Display Order
Bluetooth Telephone Changing the Phone Book display order % Touch PHONE BOOK NAME VIEW on the function menu to turn Phone Book Name View function on. Display order for the Phone Book is changed. # To change to the other display order, touch PHONE BOOK NAME VIEW again. -
Page 66: Using The Call History
Section Bluetooth Telephone ! Each time you touch ABC, the alphabet type changes among upper case, lower case and symbol. Touch a or b to select an alphabet let- ter or number/symbol. Touch d to move the cursor to the next character position and edit the name. -
Page 67: Using Preset Numbers
Bluetooth Telephone On the normal display, touch LOG to display the Call History. Touching LOG repeatedly switches between the following call histories: MISSED CALL LIST — DIALED CALL LIST — RECEIVED CALL LIST # Touching DISP here switches between the phone number and the caller’s name (if it is in the Phone Book). -
Page 68: Making A Call By Entering Phone Number
Section Bluetooth Telephone Making a call by entering phone number Important You are required to park your vehicle and set the parking brake in order to perform this operation. On the normal display, touch DIRECT to display the direct dial display. Touch 0—9 to input numbers. -
Page 69: Echo Canceling And Noise Reduction
Bluetooth Telephone Echo canceling and noise reduction % Touch ECHO CANCEL on the function menu to turn Echo Cancel function on. ON appears in the display. # To turn echo canceling off, touch ECHO CANCEL again. Displaying BD (Bluetooth Device) address % Touch Device info on the function menu to display the BD address. -
Page 70: Audio Adjustments
Section Audio Adjustments Introduction of audio adjustments 1 Audio display Shows the audio function names. Important If the multi-channel processor (DEQ-P7650/DEQ- P6600) is connected to this unit, the audio func- tion will be changed to the multi-channel proces- sor’s audio menu. For details, refer to Introduction of DSP adjustments on page 75. -
Page 71: Using The Equalizer
Audio Adjustments Using the equalizer The equalizer lets you adjust the equalization to match car interior acoustic characteristics as desired. Recalling equalizer curves There are six stored equalizer curves which you can easily recall at any time. Here is a list of the equalizer curves: Display Equalizer curve... -
Page 72: Adjusting Loudness
Section Audio Adjustments Note If you make adjustments, Custom curve is up- dated. Adjusting loudness Loudness compensates for deficiencies in the low- and high-sound ranges at low volume. Touch LOUDNESS on the audio function menu. Touch c on the LOUDNESS setting to turn loudness on. -
Page 73: Using The High Pass Filter
Audio Adjustments Using the high pass filter When you do not want low sounds from the subwoofer output frequency range to play from the front or rear speakers, turn on the HPF (high pass filter). Only frequencies higher than those in the selected range are outputted from the front or rear speakers. -
Page 74: Selecting The Listening Position
Section Audio Adjustments Selecting the listening position One way to assure a more natural sound is to accurately position the stereo image, putting you right in the center of the sound field. Se- lecting the listening position lets you automa- tically adjust the speaker output levels and inserts a delay time to match the number and position of occupied seats. -
Page 75: Digital Signal Processor
Digital Signal Processor Introduction of DSP adjustments You can use this unit to control multi-channel processor (e.g. DEQ-P7650/DEQ-P6600), which is sold separately. ! Some functions may differ depending on the multi-channel processor connected to this unit. By carrying out the following settings/adjust- ments in the order shown, you can create a fi- nely-tuned sound field effortlessly. -
Page 76: Using Balance Adjustment
Section Digital Signal Processor Touch POSITION on the DSP function menu. Touch c/d/a/b to select a listening po- sition. Touch one of these, c/d/a/b, to select a lis- tening position as listed in the table. Display Position FRONT-L Front seat left FRONT-R Front seat right FRONT... -
Page 77: Using The Dynamic Range Control
Digital Signal Processor ! Video CD, CD and MP3/WMA are set to the same source level adjustment volume auto- matically. ! External unit 1 and external unit 2 are set to the same source level adjustment volume automatically. ! AUX (auxiliary input) and AV (AV input) are set to the same source level adjustment volume automatically. -
Page 78: Setting The Speaker Setting
Section Digital Signal Processor Touch any of the following touch panel keys to select the desired mode. ! MOVIE – The Movie mode suitable for movie playback ! MUSIC – The Music mode suitable for music playback ! MATRIX – The Matrix mode for when FM radio reception is weak ! OFF –... -
Page 79: Adjusting The Speaker Output Levels
Digital Signal Processor ! Set the front or rear speaker to LARGE if the speaker is capable of reproducing bass content, or if no subwoofer is installed. Touch SPEAKER SETTING on the DSP function menu. Touch c or d to select the speaker to be adjusted. -
Page 80: Selecting A Cross-Over Frequency
Section Digital Signal Processor FRONT-L (front speaker left)—CENTER (center speaker)—FRONT-R (front speaker right)— REAR-R (rear speaker right)—REAR-L (rear speaker left)—SUB WOOFER (subwoofer) # You cannot select speakers whose size is set to OFF at the SPEAKER SETTING menu. Touch c or d to adjust the speaker out- put level. -
Page 81: Using The Time Alignment
Digital Signal Processor Touch c or d to adjust the speaker out- put level. Each time you touch c or d increases or de- creases the speaker output level. +10 to –10 is displayed as the level is increased or de- creased. -
Page 82: Using The Equalizer
Section Digital Signal Processor Using the equalizer The equalizer lets you adjust the equalization to match car interior acoustic characteristics as desired. Recalling equalizer curves There are seven stored equalizer curves which you can easily recall at any time. Here is a list of the equalizer curves: Display Equalizer curve... - Page 83 Digital Signal Processor Adjusting 3-band parametric equalizer For Custom1 and Custom2 equalizer curves, you can adjust the front, rear and center equalizer curves separately by selecting a cen- ter frequency, an equalizer level and a Q factor for each band. ! A separate Custom1 curve can be created for each source.
-
Page 84: Using The Auto-Equalizer
Section Digital Signal Processor Level Touch c or d to select LEVEL. Each time you touch c or d selects the item in the following order: SP-SEL (speakers)—BAND (bands)— FREQUENCY (center frequency)—LEVEL (equalizer level)—Q. FACTOR (Q factor) Touch c or d to adjust the equalizer level. -
Page 85: Before Operating The Auto Ta And Eq Function
Digital Signal Processor Before operating the auto TA and EQ function ! Carry out auto TA and EQ in as quiet a place as possible, with the car engine and air conditioning switched off. Also cut power to car phones or portable telephones in the car, or remove them from the car be- fore carrying out auto TA and EQ. - Page 86 Section Digital Signal Processor # Press SOURCE to turn the source on if this unit is turned off. Select the position for the seat on which the microphone is placed. Refer to Using the position selector on page # If no position is selected before you start auto TA and EQ, FRONT-L is selected automatically.
-
Page 87: Setup
Setup Introduction of setup adjustments 1 Setup menu display Shows the setup function names. Touch AUDIO MENU to display MENU. MENU appears on the display. # You can also display MENU by clicking the joystick on the remote control. Touch SETUP to display the setup func- tion names. -
Page 88: Setting The Clock
When rear view camera is connected to AV input 2 CAUTION Pioneer recommends the use of a camera which outputs mirror reversed images, other- wise screen image may appear reversed. You can install a rear view camera onto the AV input 2 and display a rear view camera video. -
Page 89: Selecting Video On Rear Display
! You can operate this function only when a Pioneer Vehicle Dynamics Processor (AVG- VDP1) is connected to this unit. ! When selecting SOURCE and the selected source is an audio source, nothing is dis- played on the rear display. -
Page 90: Dvd Setup
Section DVD Setup Introduction of DVD setup adjustments You can use this menu to change audio, subti- tle, parental lock and other DVD settings. 1 DVD setup menu display Shows the DVD setup menu names. While playing a DVD disc, touch g. Playback of the disc is stopped. -
Page 91: Setting The Audio Language
DVD Setup Setting the audio language You can set the preferred audio language. Touch AUDIO LANGUAGE on the DVD language menu. Audio language menu is displayed and the currently selected language is highlighted. # To switch to the second language select menu, touch NEXT. -
Page 92: Setting The Aspect Ratio
Section DVD Setup Setting the aspect ratio There are two kinds of display. A wide screen display has a width-to-height ratio (TV aspect) of 16:9, while a regular display has a TV aspect of 4:3. Be sure to select the correct TV aspect for the display connected to VIDEO OUTPUT. -
Page 93: If You Forget Your Code Number
DVD Setup ! With some discs, the parental lock may be ac- tive only on the scenes with certain levels. The playback of those scenes will be skipped. For details, refer to the instruction manual that came with the discs. Changing the level You can change the set parental lock level. -
Page 94: Initial Setup
Section Initial Setup Adjusting initial settings Using the initial settings, you can customize various system settings to achieve optimal per- formance from this unit. 1 Source icon Shows which source has been selected. 2 Function display Shows the function names. Touch the source icon and then touch OFF to turn this unit off. -
Page 95: Setting The Fm Tuning Step
Initial Setup # When a subwoofer is connected to the rear output, set for subwoofer SUB. W. # When the rear output setting is SUB. W, you cannot change the subwoofer controller. Touch c or d on the PREOUT setting to switch the subwoofer output or non fading output. -
Page 96: Mixing Avg-Vdp1 Beep And Audio Sound
GUIDE to properly mix the beep sound and the audio sound. ! You can operate this function only when a Pioneer Vehicle Dynamics Processor (AVG- VDP1) is connected to this unit. ! When the multi-channel processor (e.g., DEQ-P7650/DEQ-P6600) is connected to this unit, you cannot use this function. -
Page 97: Resetting The Audio Functions
Initial Setup Note About your country TV signal, consult with your nearest Pioneer dealer. Resetting the audio functions You can reset all audio functions except vo- lume. ! Only when the multi-channel processor (e.g., DEQ-P7650/DEQ-P6600) is connected to this unit, you can operate this function. -
Page 98: Other Functions
Section Other Functions Adjusting the screen Changing the wide screen mode You can select a desired mode for enlarging a 4:3 picture to a 16:9 one. % Press WIDE to select the desired set- ting. Press WIDE repeatedly to switch between the following settings: FULL (full)—JUST (just)—CINEMA (cinema)—... -
Page 99: Selecting The Background Display
Other Functions ! BRIGHT – Adjust the black intensity ! CONTRAST – Adjust the contrast ! COLOR – Adjust the color saturation ! HUE – Adjust the tone of color (red is em- phasized or green is emphasized) ! BACK-CAMERA/SOURCE – Switch the pic- ture adjustment modes # You can adjust the picture adjustment for rear view camera only when B. -
Page 100: Adjusting The Response Positions Of The Touch Panels (Touch Panel Calibration)
V.ADJ. # To restart the 16-point adjustment, press BAND/ESC. Note If touch panel adjustment cannot be performed properly, consult your local Pioneer dealer. Displaying the AVG-VDP1 (Pioneer Vehicle Dynamics Processor) This unit can be used as the display unit for the AVG-VDP1 (sold separately) product. -
Page 101: Using The Aux Source
Other Functions Using the AUX source This unit can control an auxiliary equipment such as VCR or portable device (sold sepa- rately). When connected, auxiliary equipment is automatically read in as AUX source and as- signed to AUX. About AUX connection method You have two methods to connect auxiliary equipment to this unit. -
Page 102: Setting Remote Control Code Type
! If you select AVH mode, there is no need to take the following procedure. ! If you select A/B and if in case you need to operate other Pioneer units (may be avail- able in the future), take the following proce- dure and change the code type to the appropriate type. -
Page 103: Additional Information
Additional Information Troubleshooting Common Symptom Cause Power doesn’t turn on. Leads and connectors are incor- The unit doesn’t operate. rectly connected. The fuse is blown. Noise and other factors are causing the built-in microprocessor to oper- ate incorrectly. Playback is not possible. The disc is dirty. - Page 104 Appendix Additional Information Problems during DVD playback Symptom Cause Playback is not possible. The loaded disc has a different re- gion number from this unit. A parental lock message is dis- Parental lock is on. played and playback is not pos- sible.
-
Page 105: Error Messages
Additional Information Error messages When you contact your dealer or your nearest Pioneer Service Center, be sure to record the error message. Message Cause ERROR-02 Dirty disc Scratched disc The disc is loaded upside down ERROR-05 Electrical or mechanical ERROR-A0... - Page 106 Appendix Additional Information Message Cause Error check noise The surrounding noise level is too high. Black plate (106,1) Action ! Stop your car in a place that is as quiet as possible, and switch off the engine, air condi- tioner or heater. ! Set the microphone correctly.
-
Page 107: Dvd Player And Care
Additional Information DVD player and care ! Use only normal, round discs. If you insert irregular, non-round, shaped discs they may jam in the DVD player or not play prop- erly. ! Check all discs for cracks, scratches or warping before playing. Discs that have cracks, scratches or are warped may not play properly. -
Page 108: Dual Discs
Appendix Additional Information ! It may not be possible to play back CD-R/ CD-RW discs recorded on a music CD re- corder or a personal computer because of disc characteristics, scratches or dirt on the disc, or dirt, condensation, etc., on the lens of this unit. -
Page 109: Wma Additional Information
Additional Information ! In case of files recorded according to the Romeo file system, only the first 64 charac- ters can be displayed. ! When playing discs with MP3/WMA files and audio data (CD-DA) such as CD-EXTRA and MIXED-MODE CDs, both types can be played only by switching mode between MP3/WMA and CD-DA. -
Page 110: About Folders And Mp3/Wma Files
! If liquid or foreign matter should get inside this unit, turn off the power immediately and consult your dealer or the nearest authorized PIONEER Service Station. Do not use the unit in this condition because doing so may result in a fire, electric shock, or other failure. -
Page 111: Keeping The Display In Good Condition
— When the fluorescent tube reaches the end of its useful life, the screen will be dark and the image will no longer be projected. If this happens, consult your dealer or the nearest authorized PIONEER Service Station. <CRB2163-B>111 Appendix... -
Page 112: Language Code Chart For Dvd
Appendix Additional Information Language code chart for DVD Language (code), input code Japanese (ja), 1001 English (en), 0514 French (fr), 0618 Spanish (es), 0519 German (de), 0405 Italian (it), 0920 Chinese (zh), 2608 Dutch (nl), 1412 Portuguese (pt), 1620 Swedish (sv), 1922 Russian (ru), 1821 Korean (ko), 1115 Greek (el), 0512... -
Page 113: Terms
Additional Information Terms Aspect ratio This is the width-to-height ratio of a TV screen. A regular display has an aspect ratio of 4:3. Wide screen displays have an aspect ratio of 16:9, providing a bigger picture for exceptional presence and atmosphere. Bit rate This expresses data volume per second, or bps (bits per second) units. - Page 114 Appendix Additional Information Level 2: The file name can have up to 31 characters (in- cluding the separation mark “.” and a file ex- tension). Each folder contains less than 8 hierarchies. Extended formats Joliet: File names can have up to 64 characters. Romeo: File names can have up to 128 characters.
- Page 115 Black plate (115,1) Appendix Additional Information Playback control (PBC) This is a playback control signal recorded on Video CDs (Version 2.0). Using menu displays provided by Video CDs with PBC lets you enjoy playback of simple interactive software and software with search functions. You can also enjoy viewing high- and standard-resolution still images.
-
Page 116: Specifications
Appendix Additional Information Specifications General Rated power source ... 14.4 V DC (allowable voltage range: 12.0 V to 14.4 V DC) Grounding system ... Negative type Max. current consumption ... 10.0 A Dimensions (W × H × D): Chassis ... 178 × 100 × 166 mm Nose ... - Page 117 Additional Information WMA decoding format ... Ver. 7 & 8 FM tuner Frequency range ... 87.5 MHz to 108.0 MHz Usable sensitivity ... 8 dBf (0.7 µV/75 W, mono, S/N: 30 dB) 50 dB quieting sensitivity ... 10 dBf (0.9 µV/75 W, mono) Signal-to-noise ratio ...
-
Page 118: Index
Index Angle icon ...31,.91 Aspect ratio ...92,.113 Audio language ...30,.91 Bookmark ...29 Brightness ...98 Chapter ...113 Code number ...92 Color ...98 Contrast ...98 Direct search ...30 Dolby Digital ...113 DTS ...113 Hue ...98 Language code chart ...112 Linear PCM (LPCM) ...114 Menu language ...91 MPEG ...114 Multi-angle ...31,.114... - Page 119 Black plate (119,1) <CRB2163-B>119...
- Page 120 TEL: (03) 9586-6300 PIONEER ELECTRONICS OF CANADA, INC. 300 Allstate Parkway, Markham, Ontario L3R OP2, Canada TEL: 1-877-283-5901 PIONEER ELECTRONICS DE MEXICO, S.A. de C.V. Blvd.Manuel Avila Camacho 138 10 piso Col.Lomas de Chapultepec, Mexico, D.F. 11000 TEL: 55-9178-4270 先鋒股份有限公司...