
Related Manuals for 3Com III ISA


Summary of Contents for 3Com III ISA
-
Page 1: User Guide
Part No. 09-1310-000 Published January 1998 EtherLink Network Interface Card User Guide A member of the 3Com EtherLink III family of network interface cards III ISA ®... - Page 2 Corporation. IBM and OS/2 are trademarks of International Business Machines Corporation. Microsoft, Windows, and Windows NT are trademarks of Microsoft Corporation. Novell and NetWare are trademarks of Novell, Inc. PictureTel is a trademark of PictureTel Corporation. Other brand and product names may be registered trademarks or trademarks of their respective holders.
-
Page 3: Lifetime Limited Warranty
Lifetime Limited Warranty 3Com’s EtherLink ® , Fast EtherLink, TokenLink ® TokenLink Velocity ™ , ATMLink ™ PCI, and FDDILink ™ network interface cards have a Lifetime Limited Warranty. For further details, please see 3Com’s Limited Warranty statement in this guide. To ensure the very best 3Com service and support, take the time to complete the product registration card. - Page 4 Customers in the countries or regions shown below should send the completed registration card to the appropriate address. Customers in other non-U.S. locations should send the registration card to the U.S. address on the front of the card. Asia 3Com Asia Ltd., Marketing Department Room 2506-07, 25/F.
-
Page 5: Table Of Contents
ONTENTS BOUT UIDE How to Use This Guide Conventions ETWORK NTERFACE Network Interface Card Overview Before You Begin Installing the NIC Connecting to the Network Link LED ETUP FOR USTOM Selecting the Type of Installation Express Installation Custom Installation Multiple NIC Installations Windows 95 Setup Performing the Preinstallation Procedure Configuring the NIC in a Plug and Play PC... - Page 6 Configuring TCP/IP Under Windows 95 To Obtain an IP Address Automatically To Specify an IP Address Manually Configuring DNS To Obtain a DNS Address Automatically To Specify a DNS Address Manually Identifying Your PC on the Network Configuring DynamicAccess Software To Not Configure DynamicAccess Software To Configure DynamicAccess Software Repeating a Previous Installation...
- Page 7 Changing the I/O Base Address or the Interrupt Request Level Windows 95 Windows NT Installing Multiple NICs in a Windows NT PC Installing the First NIC Installing Subsequent NICs Windows 95 and Windows NT Troubleshooting Diagnostic Testing Under Windows 95 and Windows NT Starting the 3Com NIC Diagnostics Program Running Tests NIC Test...
- Page 8 DVANCED Additional Ranges Tab Advanced Options Tab FIFO Packet Threshold Concurrent UDP Streams Low-Priority Ratio Natural Packet Interval Disable Switch Packet Prioritization Disable Receive Packet Buffering ROSSOVER Troubleshooting Hubs with Crossover Cable ECHNICAL Online Technical Services World Wide Web Site 3Com Bulletin Board Service Access by Analog Modem Access by Digital Modem...
- Page 9 IGURES 3C509B Network Interface Cards Installing the 3C509B NIC Connecting to the RJ-45 Port on the 3C509B NIC Connecting to the BNC Port on the 3C509B-TPC NIC Connecting to the AUI Port on the 3C509B-COMBO NIC Windows 95 NIC Installation Overview Preinstallation Software Screen non–Plug and Play BIOS Detected Screen Update Device Driver Wizard Screen...
- Page 10 3-15 Save Installation Settings Screen 3-16 Installation Complete Screen 3-17 System Settings Change Dialog Box 3-18 Adapters Tab of the Network Screen 3-19 Microsoft TCP/IP Properties Screen Main Menu of the DOS Installation Program NIC Configuration Screen Assembling a Loopback Plug RJ-45 Connector Pin Assignments PACE Additional Ranges Tab PACE Advanced Options Tab...
- Page 11 ABLES Notice Icons Text Conventions Parameters for 3C509B NIC Models NIC LED Interpretation NetWare NLMs Network Driver Text File Names Option Settings 3Com NIC Diagnostics Program Tab Screens Diagnostic Programs AUI Connector Pin Assignments Supported Cable Types...
-
Page 13: About This Guide
Specifications, connector pin assignments, and cable specifications PACE advanced features Crossover cable tips Technical support UIDE ® ® EtherLink III ISA network interface card (called the Turn to... Chapter 1 Chapter 2 Chapter 3 Chapter 4 Chapter 5 Chapter 6... -
Page 14: Conventions
BOUT UIDE Conventions Table 1 this guide. Table 1 Notice Icons Icon Notice Type Information note Caution Warning Table 2 Text Conventions Convention Screen displays The words “enter” and “type” Keyboard key names Menu commands and buttons Words in italicized type Words in bold-face type Table 2 list conventions that are used throughout... -
Page 15: Interface Card
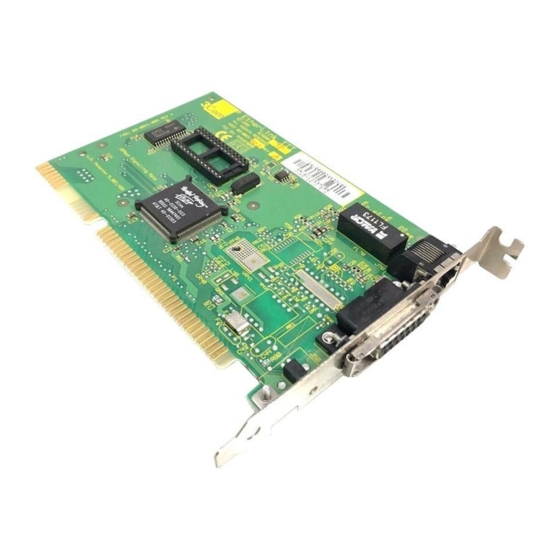
ETWORK NTERFACE NSTALLATION ® Figure 1-1. These NICs connect your ISA or EISA PC to an 3C509B-TPC “Link ® EtherLink III ISA 3C509B NICs are 3C509B-TP 3C509B-COMBO LED” later in this chapter for a RJ-45 port AUI port BNC port... -
Page 16: Before You Begin
If any of these items are damaged or missing, contact your shipper or network supplier. EtherLink III ISA NIC (3C509B) EtherLink III ISA Network Interface Card User Guide (this guide) EtherLink III ISA Network Interface Card Quick Guide 3Com 3C509B EtherDisk diskettes 1 and 2... -
Page 17: Installing The Nic
You also need to know the following about your network environment: The kind of network cabling that is used to connect to the network at your site. You must use the same kind of network cable, and the NIC that you install in your PC must have a port that matches the connector on the network cable that you use. -
Page 18: Installing The 3C509B Nic
Save the screw. Some PCs have both ISA and PCI slots. Make sure that you install the EtherLink III ISA NIC in either an ISA or an EISA slot. See Figure 1-2. PCI slots, the shortest of the three types of slots, are white. The longer ISA slots are black. -
Page 19: Connecting To The Network
Connecting to the Network This section describes how to connect the 3C509B NIC to an Ethernet network using an RJ-45, BNC, or AUI port. Each 3C509B NIC provides different network ports, as shown in When you first install the NIC and power on the PC, the LED on the NIC backplate lights, but the link is not active. -
Page 20: Connecting To The Bnc Port On The 3C509B-Tpc Nic
1: N HAPTER ETWORK Follow these steps to connect the BNC port on the 3C509B-TPC and COMBO NICs to the network: 1 Connect the BNC connector on the thin Ethernet coaxial cable to the BNC port on the NIC. See Figure 1-4 Connecting to the BNC Port on the 3C509B-TPC NIC 2 Connect the other end of the network cable to another PC or a 50-ohm terminator. -
Page 21: Link Led
2 Connect the thick Ethernet coaxial cable to the AUI port on the NIC. This connector will only attach one way. Orient the AUI connector to match the AUI port on the NIC. 3 Move the slide latch up to the closed position to lock the AUI connector in place. -
Page 23: Setup For Custom Installation
Preinstallation If you are running Windows 95 with a Plug and Play PC, you can also perform an Express installation. See the 3Com EtherLink III ISA Quick Guide for Express installation procedures. If your PC is not running Windows 95 or Windows NT, go to... -
Page 24: Custom Installation
2: S HAPTER ETUP FOR Custom Installation Custom installation is for knowledgeable network users who need to use different configuration settings or change test sequences for automated installations. This option is for network administrators, MIS departments, and value-added resellers (VARs) who need to automate the installation process. -
Page 25: Windows 95 Nic Installation Overview
Windows 95 Run preinstallation program Install the NIC in your PC Plug and Play BIOS installed? Windows 95 detects the NIC Install NIC software and configure the NIC 3Com Installation Wizard Select the type of installation Express installation Custom installation Figure 2-1 Windows 95 NIC Installation Overview Windows 95 Setup User guide... -
Page 26: Performing The Preinstallation Procedure
2: S HAPTER ETUP FOR Performing the Preinstallation Procedure Preinstallation is important for proper setup of your Windows 95 system environment. You must perform this procedure to ensure that the latest NIC driver and the 3Com NIC Diagnostics (a Windows-based program) can be successfully installed. Follow these steps to perform the preinstallation procedure: 1 Turn the power on and boot Windows 95. -
Page 27: Configuring The Nic In A Plug And Play Pc
Figure 2-3 non–Plug and Play BIOS Detected Screen To install the NIC using the 3Com Installation Wizard Express installation option, see the EtherLink III ISA Network Interface Card Quick Guide that shipped with the 3C509B NIC. To set up the NIC for installation using the 3Com Installation Wizard Custom installation option, go to the next section. -
Page 28: Updated Driver Found Screen
2: S HAPTER ETUP FOR 2 Insert EtherDisk diskette 1 in drive A. 3 Click Next. Windows 95 displays the Update Device Driver Wizard again, this time confirming that it has found the updated NIC driver. See Figure 2-5. Figure 2-5 Updated Driver Found Screen 4 Click Finish. -
Page 29: Disabling Plug And Play On The Nic
Disabling Plug and Play on the NIC If your Windows 95 PC does not support Plug and Play, you must disable Plug and Play on the NIC before you can install the NIC software. Follow these steps to disable Plug and Play on the NIC: 1 After installing the NIC in the PC, turn the power on and boot Windows 95. -
Page 30: Configuring The Nic
2: S HAPTER ETUP FOR Configuring the NIC This section describes the procedure to install NIC software and configure the NIC when Plug and Play has been disabled on the NIC. Follow these steps to install the NIC software and configure the NIC: 1 Double-click the My Computer icon, double-click the Control Panel icon, and then double-click the Add New... -
Page 31: Install From Disk Screen
7 Click OK. The Select Device screen shown in 3Com EtherLink III ISA (3C509/3C509b) in ISA mode selected. Figure 2-9 Select Device Screen 8 Click OK. Windows 95 copies the required files and updates the driver database. -
Page 32: Windows Nt Setup
2-10 2: S HAPTER ETUP FOR USTOM NSTALLATION Figure 2-10 I/O Range Assigned to the NIC Screen 9 Write down the I/O range setting displayed in the list box (or click Print, if you are connected to a printer), and then click Next. -
Page 33: Windows Nt Nic Installation Overview
Figure 2-11 provides a graphical overview of the steps required for installing and configuring the 3C509B NIC under Windows NT. Windows NT Install the NIC in your PC Is Microsoft Networking installed? Install NIC software and configure the NIC 3Com Installation Wizard Configure TCP/IP Figure 2-11 Windows NT NIC Installation Overview Windows NT Setup... - Page 34 2-12 2: S HAPTER ETUP FOR Follow these steps to install and configure the 3C509B NIC under Windows NT: 1 Install the NIC in your PC. See 2 Boot Windows NT. 3 Double-click the My Computer Icon, double-click the Control Panel icon, and then double-click the Network icon.
-
Page 35: Om Installation Wizard
3C509B NIC under Windows 95 or Windows NT using the 3Com Installation Wizard Custom installation option. To install the NIC using the Express installation option, see the EtherLink III ISA Network Interface Card Quick Guide. Custom Installation In the last step of the Windows 95 setup procedure in clicking Next starts the 3Com Installation Wizard. -
Page 36: Configuring The Nic
3: 3C HAPTER Configuring the NIC The NIC Configuration Settings screen appears, as shown in Figure 3-2. The list box displays recommended configuration settings for the NIC. You can either accept the recommended settings or change one or more to suit your operating environment. -
Page 37: To Modify Configuration Settings
To Modify Configuration Settings Follow these steps to change configuration settings in a Windows 95 non–Plug and Play PC: 1 Under Network Parameter, select I/O Base Address. 2 In the Set Value selection box, click the scroll arrow to select the I/O range setting that you wrote down in NIC”... -
Page 38: Network Connection Test Screen
3: 3C HAPTER Follow these steps to test the NIC: 1 Click Perform NIC Test. While the test is running, a progress bar indicates test progress. If a test fails, a message indicates the error type. Click the Help button in the error message screen to obtain more information. Chapter 5 provides additional troubleshooting help. -
Page 39: Installing Tcp/Ip Under Windows 95
Installing TCP/IP Under Windows 95 Installing and configuring TCP/IP is optional. If you want to access the Internet, you must install and configure TCP/IP. Figure 3-5 TCP/IP Inquiry Screen To Not Install TCP/IP Follow these steps if you do not want to install TCP/IP: 1 Select the No radio button. -
Page 40: Configuring Tcp/Ip Under Windows 95
3: 3C HAPTER Figure 3-6 TCP/IP Configuration Screen Configuring TCP/IP Under Windows 95 There are two ways to assign an IP address. You can obtain an IP address automatically or specify an IP address manually. Your network administrator will specify which method to use, and if required, provide an IP address for you to use. -
Page 41: To Specify An Ip Address Manually
To Specify an IP Address Manually Follow these steps to specify an IP address manually: 1 Select the Specify an IP address manually radio button. 2 Click Next. The Specify an IP Address screen appears, as shown in Figure 3-7 Specify an IP Address Screen 3 Enter the IP address. -
Page 42: Configuring Dns
3: 3C HAPTER Configuring DNS Dynamic Name Server (DNS) converts a World Wide Web URL to an actual IP address. You can configure DNS either automatically or manually depending on how your network is set up. When you click Next in the previous section, the DNS Configuration screen appears, as shown in Figure 3-8 DNS Configuration Screen To Obtain a DNS Address Automatically... -
Page 43: To Specify A Dns Address Manually
To Specify a DNS Address Manually Follow these steps to specify a DNS address manually: 1 Select the Specify DNS manually radio button if you are using a permanent DNS address. See Figure 3-9 Specifying a DNS Address Screen If DNS has been previously configured on your PC, the fields on this screen may already be filled in. -
Page 44: Identifying Your Pc On The Network
3-10 3: 3C HAPTER Identifying Your PC on the Network When you click Next in the previous section, the Network Identification screen appears, as shown in screen enables you to identify your PC on the network. Contact your network administrator if you do not have information to enter in these fields. -
Page 45: Configuring Dynamicaccess Software
Configuring DynamicAccess Software The DynamicAccess feature set optimizes network performance. DynamicAccess software includes PACE Interactive Access technology, dRMON (distributed RMON) support, Efficient Multicast Control, and PACE real-time and multimedia application support. PACE enhances both real-time, interactive applications and multimedia (data, voice, and video) applications by enhancing network bandwidth utilization, reducing latency, controlling jitter, and supporting multiple traffic priority levels. -
Page 46: To Configure Dynamicaccess Software
3-12 3: 3C HAPTER To Configure DynamicAccess Software Follow these steps if you want to configure DynamicAccess software: 1 Double-click the 3Com PACE Config icon shown in Figure 3-11. The PACE Support Setup screen appears, as shown in Figure 3-12 PACE Support Setup Screen 2 Select the Enable PACE Support radio button. -
Page 47: Repeating A Previous Installation
Repeating a Previous Installation You can save the configuration settings and test options that you selected during this installation for use in future installations. Saving settings is optional. When you click Next in the previous section, the Repeat Last Installation screen appears, as shown in Figure 3-13 Repeat Last Installation Screen To Not Save Installation Settings Follow these steps if you do not want to save these configuration... -
Page 48: To Save Installation Settings
3-14 3: 3C HAPTER To Save Installation Settings Follow these steps to save these configuration settings for future installations: 1 Select the Yes radio button, and then click Next. The Confirm Installation Settings screen appears, as shown in Figure 3-14. Figure 3-14 Confirm Installation Settings Screen 2 Select the check boxes for tests that you want to run in future installations, and then click Next. -
Page 49: Installation Complete Screen
3 Enter the path for the EtherDisk diskette that you are using. This installation diskette is first copied to a temporary directory, and then that file is copied to the drive that you indicate. If you are saving to a diskette, insert a blank, formatted diskette in drive A. -
Page 50: Completing The Installation And Configuration
3-16 3: 3C HAPTER Completing the Installation and Configuration Procedures for completing the installation and configuration differ for Windows 95 and Windows NT. Windows 95 This section describes how to complete the NIC installation and configuration under Windows 95 after you close the 3Com Installation Wizard. -
Page 51: Windows Nt
Completing the Installation and Configuration 3-17 Windows NT This section describes how to complete the NIC installation and configuration under Windows NT after you close the 3Com Installation Wizard. Clicking Finish on the Installation Complete screen closes the 3Com Installation Wizard. Windows NT then displays the Adapters tab of the Network screen, as shown in Figure 3-18. -
Page 52: Microsoft Tcp/Ip Properties Screen
3-18 3: 3C HAPTER Figure 3-19 Microsoft TCP/IP Properties Screen 2 Choose a method to configure TCP/IP. There are two ways to assign an IP address. You can obtain an IP address automatically or specify an IP address manually. Your network administrator will specify which method to use, and if required, provide an IP address for you to use. - Page 53 Completing the Installation and Configuration To specify an IP address manually—Follow these steps to install and configure TCP/IP manually: a Select the Specify an IP address radio button. b Enter the IP address, subnet mask address, and default gateway address in their respective entry fields. c Click OK.
-
Page 55: Software
This chapter describes how to install NIC software and configure the NIC under DOS, Windows 3.1, or Windows for Workgroups. If your PC is running Windows 95 or Windows NT, go to Chapter 2 Installing NetWare Drivers for DOS, Windows 3.1, and Windows for Workgroups This section describes how to use the AutoLink program to install client and driver software for DOS environments... -
Page 56: Main Menu Of The Dos Installation Program
4: S HAPTER OFTWARE EtherDisk for the EtherLink III Adapter Family v5.0 ESC=Cancel Installation Overview (ReadMe) ... Microsoft Windows Installation Auto Install and Config for NetWare (Autolink) Driver Installation and Update ... Configuration and Diagnostic Program Release Notes This option displays a directory of help on relevant topics (C) Copyright 1993, 3Com Corporation. -
Page 57: Obtaining Netware Loadable Modules
Obtaining NetWare Loadable Modules You can obtain current NetWare Loadable Modules (NLMs) for the NetWare servers listed in www.support.novell.com. Table 4-1 NetWare NLMs NetWare Server NetWare 3.12 NetWare 4.11, 4.1 The 3C509B NIC no longer supports NetWare 3.11 and 4.0x servers. Installing Other Supported Network Drivers Table 4-2 provides the text file names and driver names for other... -
Page 58: Removing Nic Software
4: S HAPTER OFTWARE Table 4-2 Network Driver Text File Names (continued) Network Operating System Windows 95 NDIS 2 16-bit network driver NetWare Client 32 NetWare 3.12 Server NetWare 4 Server NetWare OS/2 Packet driver NOSs Removing NIC Software EtherDisk diskette 2 includes an uninstallation program to remove the 3C509B NIC software. -
Page 59: Reconfiguring The Nic
Quit Install I/O Base Address Interrupt Request Level Boot PROM Transceiver Type Network Driver Optimization Maximum Modem Speed Plug and Play Compatibility Full Duplex Auto Configure [ENTER]=<Auto Configure> Automatically Configures the NIC [Alt]+<Highlighted Key>=Execute Function [TAB]=Next Field [SHIFT+TAB]=Previous Field [F1]=Help [ESC]=Cancel Figure 4-2 NIC Configuration Screen 7 Select Auto Configure and press Enter. -
Page 60: Changing Nic Configuration From Isa To Eisa
4: S HAPTER OFTWARE The following procedures are general. If you require more detail, see the configuration documentation that accompanied your PC. Changing NIC Configuration from ISA to EISA Follow these steps to configure the 3C509B ISA NIC for an EISA PC: 1 Run the installation program as described in the previous section. -
Page 61: Changing Nic Configuration From Eisa To Isa
If you are prompted for the wrong !TCM file: a Turn the power off and remove the NIC. b Clean the edge connectors on the NIC. c Reinsert the NIC in the slot. Make sure the NIC is fully seated in the slot. -
Page 62: Changing Configuration Settings
4: S HAPTER OFTWARE Changing Configuration Settings Figure 4-2, the NIC Configuration screen, shows the current configuration settings for the installed NIC. You can change the default settings to: Disable Plug and Play Use a boot PROM Optimize driver performance for a specific operating system Optimize driver performance for operation on a server Change the type of network connector Table 4-3... - Page 63 Follow these steps to change the configuration settings: 1 Run the installation program described in NIC” earlier in this chapter. 2 From the main menu (see and Diagnostic Program. 3 If multiple NICs are installed in the PC, use the arrow keys to select the NIC you want to configure.
-
Page 65: Windows 95 And Windows Nt Troubleshooting
This chapter explains how to isolate and solve problems that may occur when you install the 3C509B NIC in a PC running Windows 95 or Windows NT. Checklist If you experience problems installing the NIC, first check these items: Check the NIC LED, as described in Check the connectors. -
Page 66: Changing The I/O Base Address Or The Interrupt Request Level
Panel icon, and then double-click the System icon. The System Properties window is displayed. 2 Select the Device Manager tab, double-click Network adapters, and then double-click 3Com EtherLink III ISA Adapter. 3 Select the Resources tab. 4 Depending on the type of conflict that you have, select either Input/Output Range or Interrupt Request. -
Page 67: Windows Nt
Changing the I/O Base Address or the Interrupt Request Level Windows NT Follow these steps to change the IRQ level assignment or the I/O base address in a Windows NT PC: 1 Double-click the 3Com icon in the taskbar tray. The General tab of the 3Com NIC Diagnostics program appears. -
Page 68: Installing Multiple Nics In A Windows Nt Pc
5: W HAPTER INDOWS Installing Multiple NICs in a Windows NT PC If you are installing multiple 3C509B NICs in a Windows NT 4.0 PC, you cannot use the 3Com Installation Wizard to install the NICs. Use the following procedure to ensure that the NICs maintain separate resource assignments and are installed free of conflicts. -
Page 69: Installing Subsequent Nics
1 Perform steps 1 through 5 of the preceding procedure. The Windows setup program displays a message warning that a network card of this type is already installed. 2 Click OK. The 3Com EtherLink III (3c509) ISA Adapter Bus screen appears. -
Page 70: Windows 95 And Windows Nt Troubleshooting
5: W HAPTER INDOWS 8 From the Adapter box, select 3Com EtherLink III 3C509 ISA Adapter, select a method of assigning the TCP/IP address, and then click OK. Messages are displayed, and you are prompted to reboot. 9 Click No, and then double-click the 3Com icon in the taskbar tray to start the 3Com NIC Diagnostics program. -
Page 71: Com Nic Diagnostics Program Tab Screens
Diagnostic Testing Under Windows 95 and Windows NT Table 5-1 shows the various tab screens that are available within the 3Com NIC Diagnostics program. Table 5-1 3Com NIC Diagnostics Program Tab Screens Description General The General tab is the first screen to appear when you start the diagnostic program. -
Page 72: Running Tests
5: W HAPTER INDOWS Running Tests Two tests help you troubleshoot problems with the NIC: the NIC test and the network test. NIC Test Run the NIC test to determine that the NIC is working correctly. Be sure to run this test after you have verified that the network is functioning. -
Page 73: Reinstalling Nic Software
For Windows 95—On the Configuration tab, select the 3Com EtherLink III ISA NIC. For Windows NT—On the Configuration tab, select Network adapters, and then select the 3Com EtherLink III ISA NIC. 3 Click Remove. 4 Click OK. The System Settings Change screen appears, prompting you to restart your PC. -
Page 74: Performing Automated Installations
5-10 5: W HAPTER INDOWS Performing Automated Installations This section describes how to install and configure 3C509B NICs when you want to perform multiple installations automatically or when you must reinstall the NIC software because it has been lost or corrupted. This procedure uses configuration settings saved from a previous installation. -
Page 75: Windows
This chapter explains how to isolate and solve problems that may occur when you install the 3C509B NIC in a PC running DOS, Windows 3.1, or Windows for Workgroups. Checklist If you experience problems installing the NIC, first check these items: Check the NIC LED, as described in Check the connectors. -
Page 76: Starting The Dos Configuration And Diagnostic Program
6: W HAPTER INDOWS Diagnostic tests are divided into three groups: The Group 1 tests check the physical components, connectors, and circuitry on the NIC. The Group 2 Network Loopback Test (for the 3C509B-TPC and COMBO NICs only) checks to see if the NIC can transmit and receive data through the coaxial transceiver. -
Page 77: Running The Group 2 Test
Follow these steps to run the Group 1 tests: 1 From the Test menu, select Run Tests and press Enter. The Run Tests dialog box appears with the Start button already selected. 2 Press Enter to start the tests. Group 1 tests run 10 times (default setting) unless you specify otherwise. -
Page 78: Starting The Group 2 Test
6: W HAPTER INDOWS Starting the Group 2 Test Follow these steps to run the Group 2 test on either the 3C509B-TPC or 3C509B-COMBO NIC: 1 Connect the loopback plug to the round BNC connector on the NIC. 2 Start the Configuration and Diagnostic Program, as described in Diagnostic 3 From the Test menu, select Test Setup. -
Page 79: Starting The Group 3 Test
Diagnostic Testing Under Windows 3.x Table 6-1 Diagnostic Programs Diagnostic NIC Installed Program Name in the Echo Server 3C503.EXE EtherLink II 3C505.EXE EtherLink Plus 3C507.EXE EtherLink 16 or EtherLink 16 TP 3C508CFG.EXE 3Com Red 3C5X9CFG.EXE EtherLink III family 3C523.EXE EtherLink/MC 3C523TP.EXE EtherLink/MC TP 3C527.EXE... -
Page 80: Getting Help If A Test Fails
6: W HAPTER INDOWS Getting Help If a Test Fails If a diagnostic test fails, the NIC may not be defective. The problem may be incorrect configuration settings, settings that conflict with other NICs, or improper installation. For more information about a failed diagnostic test: Select the test that failed in the Run Tests dialog box and press Enter. -
Page 81: Specifications
This appendix lists specifications, pin assignments, and cable requirements for the 3C509B NIC. NIC Specifications Network Interface 3C509B-TP 3C509B-TPO 3C509B-COMBO 3C509B-TPC Physical Dimensions Length: Height: TPO height: TPC height: Environmental Operating Range Operating temperature: Humidity: Power Requirements Operating voltage: PECIFICATIONS Ethernet IEEE 802.3i 10BASE-T industry standard for a 10 Mbps baseband CSMA/CD local area... -
Page 82: Rj-45 Connector Pin Assignments
A: S PPENDIX PECIFICATIONS RJ-45 Connector Pin Assignments Figure A-1 Figure A-1 RJ-45 Connector Pin Assignments AUI Connector Pin Assignments Table A-1 interface) connector. Table A-1 AUI Connector Pin Assignments Function Collision shield Collision + Transmit + Receive shield Receive + Power return Not used Not used... -
Page 83: Cable Specifications
Cable Specifications In order to maintain compliance with the limits of a Class B digital device, 3Com requires that you use quality interface cables when connecting to this device. Changes or modifications not expressly approved by 3Com could void the user’s authority to operate this equipment. -
Page 85: Pace Additional Ranges Tab
This appendix describes PACE advanced features and how to use them. Additional Ranges Tab The Additional Ranges tab of the 3Com PACE Support Setup screen allows you to add information for PACE-supported applications that are not listed in the list box on the Supported Applications tab. Refer to the user guide that came with the PACE-supported application for specific range and protocol information. -
Page 86: Advanced Pace Features
B: A PPENDIX DVANCED Select the appropriate protocol for that application. Refer to the application’s user guide for the recommended protocol. Some applications support multiple protocols and use different port or socket ranges for each protocol. If the application in question uses multiple protocols, the range and protocol must match those on your PC. -
Page 87: Fifo Packet Threshold
The following advanced values can be modified to regulate PACE traffic on the network. FIFO Packet Threshold Controls the number of non-PACE packets that the network driver allows in the FIFO ahead of PACE packets. A smaller number decreases the time between PACE packets, but it can also decrease performance. -
Page 88: Disable Switch Packet Prioritization
B: A PPENDIX DVANCED Disable Switch Packet Prioritization This option disables modification of Ethernet packets used for prioritization of multimedia traffic within 3Com switch products. For example, disabling switch packet prioritization can sometimes alleviate the failure to make a multimedia connection between a PACE-enabled workstation and a non-PACE workstation. -
Page 89: Troubleshooting Hubs With Crossover Cable
When you work with 10BASE-T cabling, concentrators, and NICs from different vendors, it is possible to connect everything but still have no communication between file servers and workstations. When there are several unknown variables, it is difficult to determine which component is failing. Start with the following procedure to narrow the range of possible causes: Determine whether your equipment complies with the 10BASE-T standard. -
Page 90: Straight-Through And Crossover Cable Pinouts
C: C PPENDIX ROSSOVER To make a crossover cable, connect TD+ to RD+ and TD– to RD–. The cable performs the crossover that is usually performed by the hub. Figure C-1 Straight-through 10BASE-T cable Figure C-1 Straight-Through and Crossover Cable Pinouts If the file server and client PC function together as a small network, then either the existing cabling or the hub is failing. -
Page 91: Technical Support
3Com provides easy access to technical support information through a variety of services. This appendix describes these services. Information contained in this appendix is correct at time of publication. For the very latest, we recommend that you access 3Com Corporation’s World Wide Web site as described below. Online Technical Services 3Com offers worldwide product support 24 hours a day, 7 days a week, through the following online systems:... -
Page 92: Access By Analog Modem
D: T PPENDIX ECHNICAL Access by Analog Modem To reach the service by modem, set your modem to 8 data bits, no parity, and 1 stop bit. Call the telephone number nearest you: Country Australia Brazil France Germany Hong Kong Italy (fee required) Japan Mexico... -
Page 93: 3Comforum On Compuserve Online Service
Local access numbers are available within the following countries: Telephone Country Number Australia 1800 678 515 Belgium 0800 71279 Denmark 800 17319 Finland 98 001 4444 France 05 90 81 58 Germany 0130 81 80 63 Hong Kong 800 933 486 Italy 1678 99085 Malaysia... -
Page 94: Support From 3Com
D: T PPENDIX ECHNICAL Support from 3Com If you are unable to receive support from your network supplier, technical support contracts are available from 3Com. Contact your local 3Com sales office to find your authorized service provider using one of these numbers: Regional Sales Office 3Com Corporation P.O. - Page 95 Regional Sales Office 3Com GmbH Austria Czech Republic/Slovak Republic Germany (Central European HQ) Hungary Poland Switzerland 3Com Ireland 3Com Latin America U.S. Headquarters Northern Latin America Argentina Brazil Chile Colombia Mexico Peru Venezuela 3Com Mediterraneo Italy Spain 3Com Middle East 3Com Nordic AB Denmark Finland...
-
Page 96: Returning Products For Repair
D: T PPENDIX ECHNICAL Returning Products for Repair Before you send a product directly to 3Com for repair, you must first obtain a Return Materials Authorization (RMA) number. Products sent to 3Com without RMA numbers will be returned to the sender unopened, at the sender’s expense. To obtain an RMA number, call or fax: Country U.S.A. - Page 97 NDEX Numbers 3C509B NIC specifications 1-2 3Com Bulletin Board Service (3ComBBS) D-1 3Com Installation Wizard 3-1 Custom installation 2-1 Express installation 2-1 3Com sales offices D-4 3Com URL D-1 3ComFacts D-2 3ComForum D-3 attachment unit interface (AUI) A-2 AUI connector 1-2, 1-7, A-2 AUI port, slide latch 1-7 AutoLink program 4-1 AUTOLINK.LOG file 4-2...
- Page 98 NDEX drivers, installing supported Novell NetWare 4-1 Windows 3.1/DOS 4-1 Windows 95 2-5 Windows for Workgroups 4-1 Windows NT 2-10 DynamicAccess software 3-11 DynamicAccess tab 5-7 EISA, reconfiguring to ISA 4-7 Express installation 2-1 fax service. See 3ComFacts gateway server 3-7 entering the address 3-7 General tab 5-7 Group 1 tests 6-2...
- Page 99 saving installation settings 3-14 server address, entering the DNS 3-9 server, DHCP, testing 3-6 settings, changing configuration 4-8 slide latch, AUI port 1-7 software installing Windows 95 2-5 Windows NT 2-10 reinstalling 5-9 specifications 1-2, A-1 network interface A-1 operating voltage requirements A-1 static electricity 1-3 Statistics tab 5-7 subnet mask, entering the 3-7...
- Page 101 3Com Corporation L ARDWARE 3Com warrants its hardware products to be free from defects in workmanship and materials, under normal use and service, for the following lengths of time from the date of purchase from 3Com or its Authorized Reseller: Network interface cards Other hardware products (unless otherwise specified in the warranty statement above) Spare parts and spares kits...
- Page 102 3COM SHALL NOT BE LIABLE UNDER THIS WARRANTY IF ITS TESTING AND EXAMINATION DISCLOSE THAT THE ALLEGED DEFECT IN THE PRODUCT DOES NOT EXIST OR WAS CAUSED BY CUSTOMER’S OR ANY THIRD PERSON’S MISUSE, NEGLECT, IMPROPER INSTALLATION OR TESTING, UNAUTHORIZED ATTEMPTS TO REPAIR OR MODIFY, OR ANY OTHER CAUSE BEYOND THE RANGE OF THE INTENDED USE, OR BY ACCIDENT, FIRE, LIGHTNING, OR OTHER HAZARD.
- Page 103 DFARS 252.227-7014 (June 1995) or as a commercial item as defined in FAR 2.101(a) and as such is provided with only such rights as are provided in this License Agreement, which is 3Com’s ONFORMITY Description: EtherLink III ISA Network Interface Card OFTWARE ICENSE GREEMENT...
- Page 104 standard commercial license for the Software. Technical data is provided with limited rights only as provided in DFAR 252.227-7015 (Nov. 1995) or FAR 52.227-14 (June 1987), whichever is applicable. You agree not to remove or deface any portion of any legend provided on any licensed program or documentation delivered to you under this License Agreement.
- Page 105 NOTES...
- Page 106 NOTES...
- Page 107 NOTES...
- Page 108 NOTES...
- Page 109 NOTES...
- Page 110 NOTES...