
Related Manuals for 3Com 3C2000


Summary of Contents for 3Com 3C2000
-
Page 1: User Guide
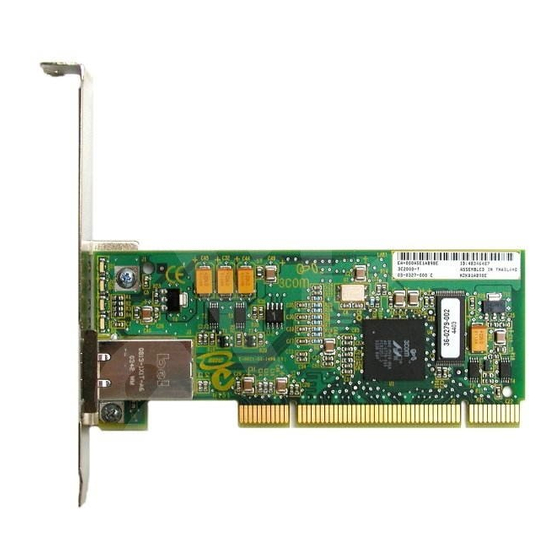
User Guide 3Com Gigabit Network Interface Card 3C2000 http://www.3com.com/ http://support.3com.com/registration/frontpg.pl Published April 2003 User guide version 1.0... - Page 2 • Copyright © 2003 3Com Corporation. All rights reserved. No part of this documentation may be reproduced in any form or by any means or used to make any derivative work (such as translation, transformation, or adaptation) without written permission from 3Com Corporation.
-
Page 3: Table Of Contents
Windows 2000 Driver Installation Windows Me Driver Installation Windows 98 SE Driver Installation Windows NT 4.0 Driver Installation Linux Driver Installation Novell NetWare Driver Installation Installing and Using the 3Com Connection Assistant Using the Virtual Cable Tester Troubleshooting Specifications Technical Support Warranty Information... - Page 4 Contents...
-
Page 5: Introduction
If the Windows autorun feature is enabled on your system, the 3Com Master Navigator launches automatically when you insert the 3Com Installation CD. See “Using the Master Navigator” on page 6 for more information. NOTE: Inform your network supplier of any missing or damaged items. If you need to return the NIC, you must use the original (or equivalent) packaging. - Page 6 Introduction...
-
Page 7: Installing And Connecting The Nic
Installing and Connecting the NIC Before installing the NIC, make sure your PC meets the requirements listed below. Hardware Requirements • Pentium-based PC that meets software requirements for the following operating systems: • Windows XP with latest service pack • Windows 2000 with latest service pack •... -
Page 8: Installing The Nic
“Hardware Requirements” in the previous section. 2 Verify that your system is using the latest BIOS. 3 Review the information in the readme.txt file on the 3Com Installation CD for important information not available at the time this user guide was created. -
Page 9: Connecting The Network Cable
3Com Master Navigator. NOTE: For driver installation and configuration instructions on non-Windows operating systems, or if you do not want to use the 3Com Master Navigator, refer to the software configuration chapter for that specific driver. 1 Insert the 3Com Installation CD. - Page 10 Installing and Connecting the NIC Using the Master Navigator When you allow the Windows autorun feature to launch the Welcome Screen of the 3Com Master Navigator, you can select from the options listed below. • User Guide View, print, or copy the user guide.
- Page 11 • Other Software Install other helpful utilities and programs. These programs include the 3Com Connection Assistant, the Virtual Cable Tester, and Adobe Acrobat Reader 5.1. For more information on these programs, see Chapter 10, “Installing and Using the 3Com Connection Assistant.” and Chapter 11, “Using the Virtual Cable Tester.”...
- Page 12 Installing and Connecting the NIC...
-
Page 13: Windows Xp Driver Installation
Windows XP Driver Installation If you do not want or cannot use the 3Com Master Navigator on your system, use the following procedure to install the drivers for Windows XP. Requirements Before you begin, make sure that: 1 All installation requirements are met. See “Hardware Requirements” on page 3. -
Page 14: Modifying Configuration Parameters
Windows XP Driver Installation Modifying Configuration Parameters Although the default values should be appropriate in most cases, you may change any of the available options to meet the requirements of your specific system: 1 Open the Windows Start menu, and then select Control Panel. 2 Double-click System. - Page 15 Media Type • 10 Mb, Full Duplex • 10 Mb, Half Duplex • 100 Mb, Full Duplex • 100 Mb, Half Duplex • 1000 Mb, Full Duplex • Auto • Value: Network Address • Not Present • 50 Number of Receive Buffers •...
-
Page 16: Removing The Driver Software
4 The Computer Management window appears. In the left window, click on the plus sign (+) next to System Tools, and then click on Device Manager. 5 Click Network adapters, and then right-click on the 3Com NIC that you want to remove. -
Page 17: Windows 2000 Driver Installation
Windows 2000 Driver Installation If you do not want or cannot use the 3Com Master Navigator on your system, use the following procedure to install the drivers for Windows 2000. Requirements Before you begin, make sure that: 1 All installation requirements are met. See “Hardware Requirements” on page 3. - Page 18 Windows 2000 Driver Installation Modifying Configuration Parameters Although the default values should be appropriate in most cases, you may change any of the available options to meet the requirements of your specific system: 1 On the Windows Desktop, right-click the My Computer icon and select Properties from the pop-up menu.
- Page 19 Maximum Frame Size • 1514 • 64 - 9014 (range) • 10 Mb, Full Duplex Media Type • 10 Mb, Half Duplex • 100 Mb, Full Duplex • 100 Mb, Half Duplex • 1000 Mb, Full Duplex • Auto • Value: Network Address •...
- Page 20 This option permanently uninstalls a device and its driver. The Installed Devices on Your Computer screen appears. 7 Click the NIC you want to uninstall (3Com Gigabit NIC), and then click Next. 8 In the Uninstalled Devices window, click Yes, I want to uninstall this device, and then click Next.
-
Page 21: Windows Me Driver Installation
(+) to the left of the icon to display the list of NICs currently configured. 4 Make sure that the 3Com Gigabit NIC is installed and that there is not a red X or a yellow exclamation point (!) next to the device. - Page 22 Windows Me Driver Installation Modifying Configuration Parameters Although the default values should be appropriate in most cases, you may change any of the available options to meet the requirements of your specific system: 1 On the Windows Desktop, right-click the My Network Place icon and select Properties.
- Page 23 (+) to the left of the icon to display the list of NICs currently configured. 5 Click the NIC you want to uninstall (3Com Gigabit NIC), and then click Remove. 6 Click OK to confirm the removal of the NIC.
- Page 24 Windows Me Driver Installation...
-
Page 25: Windows 98 Se Driver Installation
1 Turn on the power to the PC. 2 Insert the 3Com Installation CD in the CD-ROM drive. • If the 3Com Connection Assistant is not installed, you are prompted to install it. Click Yes to install the 3Com Connection Assistant. When finished, you are directed to the Master Navigator main menu. -
Page 26: Verifying Successful Installation
(+) to the left of the icon to display the list of NICs currently configured. 4 Make sure the 3Com Gigabit NIC is installed and that there is not a red X or a yellow exclamation point (!) next to the device. - Page 27 Log Status Messages • All Messages • Errors • None • Status Messages • Warnings • 5000 Max IRQ per Sec • 1000 - 30000 (range) • 1514 Maximum Frame Size • 64 - 9014 (range) • 10 Mb, Full Duplex Media Type •...
- Page 28 (+) to the left of the icon to display the list of NICs currently configured. 5 Click the NIC you want to uninstall (3Com Gigabit NIC), and then click Remove. 6 Click OK to confirm the removal of the NIC.
-
Page 29: Windows Nt 4.0 Driver Installation
Windows NT 4.0 Driver Installation If you do not want or cannot use the 3Com Master Navigator on your system, use the following procedure to install the updated drivers. Requirements Before you begin, make sure that: 1 All installation requirements are met. See “Hardware Requirements” on page 3. - Page 30 Although the default values should be appropriate in most cases, you may change any of the available options to meet the requirements of your specific system. 1 Launch the 3Com NIC Diagnostics program. 2 Change the parameters as desired. The following parameters are available (default values are listed in bold):...
- Page 31 Removing the Driver Software You must uninstall the driver before removing the NIC or moving it to another slot in the To remove the NIC driver and associated software: 1 Start Windows NT and log in. You must have Network Administrator privileges to remove the driver software. 2 Open the Windows Start menu, and then select Settings, Control Panel.
- Page 32 Windows NT 4.0 Driver Installation...
-
Page 33: Linux Driver Installation
To install the driver: 1 Make sure that the kernel source is installed in /usr/src/linux or /usr/src/linux-2.4. 2 Copy the file /Linux/3c2000.tar.gz from the 3Com Installation CD to your hard drive. a Create a directory to mount the CD-ROM into (if it does not exist):... -
Page 34: Removing The Driver
Linux Driver Installation Removing the Driver To unload the driver: 1 Type ifconfig eth0 down (substitute your actual interface for eth0). 2 Type rmmod 3c2000. Refer to the readme file for more information regarding the Linux driver configuration. -
Page 35: Novell Netware Driver Installation
Novell NetWare Driver Installation Requirements Before you begin, make sure that: • The NIC is installed in the server. • The latest support pack files are installed. The latest support packs can be found at: http://support.novell.com/misc/patlst.htm. NOTE: If you are installing NetWare 5.x or 6.x for the first time, you need to install the NIC driver during the operating system installation procedure. - Page 36 3 At the system console, type Load EL2000. This loads the driver. 4 At the system console, type config. 5 Look for the driver name 3Com Gigabit NIC. 6 Note the slot number used by the NIC. 7 Type Unload EL2000 at the system console.
- Page 37 # this server appears, you must delete it and then add the # new server name. Do this for all license objects. ServerID 1C8EE2C LOAD ODINEB.NLM LOAD TCPIP LOAD 3C2000 SLOT=2 FRAME=Ethernet_802.2 NAME=3C2000_1_E82 BIND IPX 3C2000_1_E82 NET=FAFD3D25 LOAD 3C2000 SLOT=2 FRAME=Ethernet_802.3 NAME=3C2000_1_E83 BIND IPX 3C2000_1_E83 NET=5A2D8D6D LOAD 3C2000 SLOT=2 FRAME=Ethernet_SNAP NAME=3C2000_1_ESP...
-
Page 38: Nic Driver Configuration Parameters For Novell Netware
Novell NetWare Driver Installation NIC Driver Configuration Parameters for Novell NetWare The following tables show the driver configuration parameters for Novell NetWare. The default values are listed in bold. Parameter Slot Number Node Address Set the Maximum Frame Size QUIET Advanced Options For Task Offload Advanced Option For Port A... - Page 39 # symbol at the beginning of each command line. Example: # LOAD 3C2000 SLOT=2 FRAME=Ethernet_802.2 NAME=3C2000_1_E82 # BIND IPX 3C2000_1_E82 NET=FAFD3D25 # LOAD 3C2000 SLOT=2 FRAME=Ethernet_802.3 NAME=3C2000_1_E83 # BIND IPX 3C2000_1_E83 NET=5A2D8D6D...
- Page 40 Novell NetWare Driver Installation...
-
Page 41: Installing And Using The 3Com Connection Assistant
• Resolve NIC installation problems. • Download the latest NIC drivers. • Access a list of frequently asked questions as well as the 3Com Knowledgebase. System Requirements To install and use the 3Com Connection Assistant requires: • Windows XP, Windows 2000, Windows Me, Windows 98 SE or Windows NT 4.0. - Page 42 Installing and Using the 3Com Connection Assistant...
-
Page 43: Using The Virtual Cable Tester
Using the Virtual Cable Tester The Virtual Cable Tester is an optional software package that can be installed from the 3Com Master Navigator on the 3Com Installation CD. About Marvell's Virtual Cable Tester (VCT) Technology Marvell's Virtual Cable Tester™ (VCT) technology feature utilizes Time Domain Reflectometry (TDR) technology to remotely and non-evasively diagnose the quality and characteristics of the attached cables. - Page 44 Using the Virtual Cable Tester Installing the Virtual Cable Tester To install VCT: 1 Insert the 3Com Installation CD in the CD-ROM drive. The Welcome screen appears. If it does not appear, run LAUNCH.EXE from the 3Com Installation CD. 2 Click Other Software.
-
Page 45: Troubleshooting
Troubleshooting This section describes how to troubleshoot the NIC by: • Accessing advanced diagnostics • Checking port LEDs • Reviewing a troubleshooting checklist • Checking network connectivity Accessing Advanced Diagnostics After the NIC is installed, you can access several NIC diagnostics programs from the NIC Properties page in Windows XP, Windows 2000, Windows Me, and Windows 98. - Page 46 Troubleshooting Click on the Diagnostics tab to display the 3Com diagnostic program options, as shown in the following figure. • NIC Diagnostics—tests the functionality of the NIC. You can run tests on the NIC, configure NIC settings, or register the NIC using this utility.
-
Page 47: Checking Port Leds
Checking Port LEDs The NIC has four LEDs. When the driver has been loaded and the cables are connected properly, the appropriate speed LED lights and the data transfer (ACT) LED lights (if data traffic is present). Before the speed LEDs can provide troubleshooting information, the NIC must be connected to the network (see “Connecting the Network Cable”... -
Page 48: Troubleshooting Checklist
NICs may be causing contention. Checking Network Connectivity Use the 3Com Connection Assistant included on the 3Com Installation CD to test for network connectivity. For installation instructions, see Chapter 10, “Installing and Using the 3Com Connection Assistant”. - Page 49 Specifications 10/100/1000BASE-T Cable Specifications Port Type 10BASE-T 100/BASE-T and 1000BASE-T NOTE: 1000BASE-T signaling requires four twisted pairs of Category 5 balanced cabling, as specified in ISO/IEC 11801:1995 and ANSI/EIA/TIA- 568-A (1995) and tested for additional performance using testing procedures defined in TIA/EIA TSB95. Performance Specifications Feature PCI clock...
-
Page 50: A Specifications
Specifications Environmental Specifications Condition Temperature Operating Specification Storage Specification 0°C to 70°C –30°C to +90°C... - Page 51 3Com Corporation World Wide Web site at: http://www.3com.com/ Online Technical Services 3Com offers worldwide product support 24 hours a day, 7 days a week, through the following online systems: World Wide Web Site To access the latest networking information on the 3Com Corporation World Wide Web site, enter this URL into your Internet browser: http://www.3com.com/...
-
Page 52: B Technical Support
Technical Support Support from 3Com If you are unable to obtain assistance from the 3Com online technical resources or from your network supplier, 3Com offers technical telephone technical support services. To find out more about your support options, call the 3Com technical telephone support phone number at the location nearest you. -
Page 53: Returning Products For Repair
Returning Products for Repair Before you send a product directly to 3Com for repair, you must first obtain an authorization number. Products sent to 3Com without authorization numbers will be returned to the sender unopened, at the sender’s expense. To obtain an authorization... - Page 54 Technical Support...
- Page 55 Warranty Information Warranty Hardware: Limited Lifetime Software: Media Replacement, Bug Fix: 90 Days Non-Warranty Services Included when you register your product Telephone Technical Support: 90 Days Online Knowledgebase Support: Limited Lifetime For further Warranty details, see booklet packaged with your product. Limited Lifetime: Lifetime for as long as the original customer owns the product, or for five years after product discontinuance, whichever occurs first.
-
Page 56: C Warranty Information
Warranty Information... - Page 57 This booklet is available from the U.S. Government Printing Office, Washington, D.C. 20402. Stock No. 004-000-00345-4. NOTE: In order to maintain compliance with the limits of a Class B digital device, 3Com requires that you use quality interface cables when connecting to this device. Changes or modifications not expressly approved by 3Com could void the user’s authority to...
-
Page 58: D Regulatory Information
• ANSI C63.4-1992 Methods of Measurement • Federal Communications Commission 47 CFR Part 15, subpart B 3Com Corporation: 5500 Great American Parkway, Santa Clara, CA 95052-8145 MIC Class B Compliance (Korea) Safety Compliance Statement CAUTION: This device has been tested and certified according to the following safety...