
Related Manuals for PRESONUS StudioLive 16.0.2 USB


Summary of Contents for PRESONUS StudioLive 16.0.2 USB
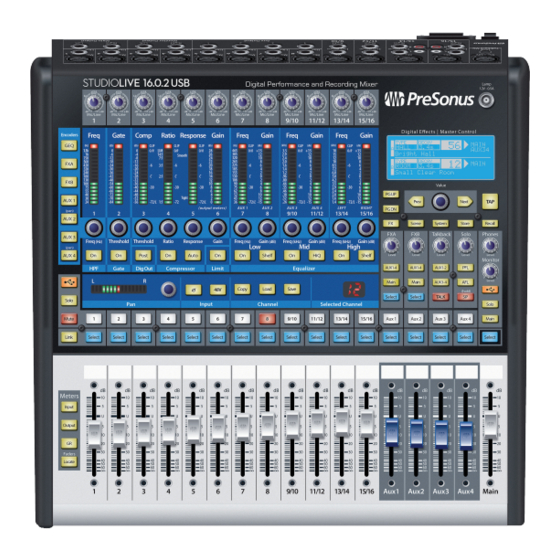
- Page 1 StudioLive 16.0.2 USB ™ Performance and Recording Digital Mixer Owner’s Manual ® English www.presonus.com...
-
Page 2: Table Of Contents
Internal FX Bus Controls — 28 5.2.2 What is in the Box — 3 Aux and FX Bus Channel Sends — 28 5.2.3 What is in Your My PreSonus account — 3 Creating Monitor Mixes — 29 5.2.4 5.2.5 Creating Internal FX Mixes — 30 Getting Started —... - Page 3 Resources — 62 Stereo Microphone Placement — 62 EQ Frequency Guides — 65 Technical Specifications — 67 StudioLive 16.0.2 Block Diagram — 69 StudioLive 16.0.2 Recall Sheet — 70 Troubleshooting and Warranty — 71 Troubleshooting — 71 PreSonus Limited Warranty — 72...
-
Page 5: Overview
Owner’s Manual Overview Introduction Thank you for purchasing the PreSonus StudioLive™ 16.0.2 USB Performance and Recording Digital Mixer. PreSonus Audio Electronics has designed the StudioLive utilizing high-grade components to ensure optimum performance that will last a lifetime. Loaded with 12 high-headroom, XMAX™ microphone preamplifiers; a built- in 18x16 USB 2.0 recording and playback engine;... -
Page 6: About This Manual
This will help you avoid problems during installation and setup. This manual covers hardware functions for the StudioLive 16.0.2 USB. A separate manual, covers the StudioLive 16.0.2 USB Software Library as well as connecting and using your StudioLive with a computer. -
Page 7: What Is In The Box
PreSonus Universal Control Power User Tip: All companion software and drivers for your PreSonus StudioLive 16.0.2 USB mixer are available for download from your My PreSonus user account. Please visit http://my.presonus.com and register your StudioLive 16.0.2 USB mixer to receive... -
Page 8: Getting Started
Getting Started StudioLive™ 16.0.2 USB Level Setting Procedure Owner’s Manual Getting Started Before you begin, here are a few general rules of thumb: Always turn down the Main fader and both the Monitor and Phones knobs in the Monitor section down before making connections. Before plugging or unplugging a microphone while other channels are active, mute the channel to which you are connecting. - Page 9 Getting Started StudioLive™ 16.0.2 USB Level Setting Procedure Owner’s Manual 3. Bring down all the faders on your StudioLive to the ∞ setting. 4. Make sure that the Mic/Line knob on Channel 1 is all the way counter-clockwise. 5. Plug your StudioLive into a power outlet and turn it on. 6.
- Page 10 Getting Started StudioLive™ 16.0.2 USB Level Setting Procedure Owner’s Manual 9. Speak or sing into your microphone at approximately the same volume you expect during the performance. 10. Turn the trim knob on Channel 1 clockwise while watching the first meter in the Fat Channel.
-
Page 11: Hookup
Owner’s Manual Hookup Rear-Panel Connections Microphone Inputs. Your StudioLive is equipped with 12 PreSonus XMAX microphone preamplifiers for use with all types of microphones. The XMAX preamplifier has a Class A input buffer, followed by a dual-servo gain stage. This arrangement results in ultra-low noise and wide gain control, allowing you to boost signals without increasing unwanted background noise. -
Page 12: Rear-Panel Connections
Hookup StudioLive™ 16.0.2 USB Rear-Panel Connections Owner’s Manual Talkback Mic Input and Trim. The StudioLive does not have an onboard talkback mic; an external mic must be used. Phantom power is always enabled on this microphone preamp, so you can use either a dynamic or a condenser microphone. This is the trim control adjusts the gain of the Talkback input. - Page 13 Hookup StudioLive™ 16.0.2 USB Rear-Panel Connections Owner’s Manual USB Port. This female USB-B jack provides connection to a computer for audio interfacing and control. 2 Amp Fuse. This is the StudioLive’s fuse housing. Your StudioLive uses a 5 mm x 20 mm, 250 VAC, fast-acting fuse.
-
Page 14: Typical Basic Band Hookup Diagram
Hookup StudioLive™ 16.0.2 USB Typical Basic Band Hookup Diagram Owner’s Manual Typical Basic Band Hookup Diagram Lead Vocal Mic Keyboard Rhythm Guitar and Amp Bass/DI Drum Set Monitors Front-of-House Speakers Laptop MIDI Pedal... -
Page 15: Business Conference Hookup Diagram
Hookup StudioLive™ 16.0.2 USB Business Conference Hookup Diagram Owner’s Manual Business Conference Hookup Diagram Wireless Microphones Microphones and Receivers Assisted-Listening Transmitter DVD player iPod Laptop Powered Speakers... -
Page 16: The Fat Channel
The Fat Channel StudioLive™ 16.0.2 USB The Select Button Owner’s Manual The Fat Channel The revolutionary Fat Channel is the heart of the StudioLive. The Fat Channel makes dynamics, routing, and panning for every input and output on the StudioLive available at the touch of a Select button. The 12 multipurpose knobs and meters located in the Fat Channel control nearly every adjustment you will need to make on your StudioLive. -
Page 17: Input Controls
The Fat Channel StudioLive™ 16.0.2 USB Input Controls Owner’s Manual Input Controls Trim Control. Adjusts the Input Gain Level. The analog Trim controls above the Fat Channel adjust the gain of the channel’s analog input. It is very important to properly adjust this control to minimize noise and avoid overload distortion. -
Page 18: Dynamics Processing And Eq
USB bus and can be recorded by your DAW with or without Stereo Link engaged. For more information on using your StudioLive as an audio interface, please consult the StudioLive 16.0.2 USB Software Library Reference Manual. Dynamics Processing and EQ The main function of the Fat Channel is to provide dynamics processing and filtering for every input and output on the StudioLive. -
Page 19: High Pass Filter
4.3.3 Gate Your StudioLive 16.0.2 USB is equipped with a downward expander that is available for every input channel, the four aux buses, and both internal FX buses. In contrast to compression, which decreases the level of a signal after it rises above the compression threshold, expansion decreases the level of a signal after the signal goes below the expansion threshold. -
Page 20: Compressor And Limiter
The Fat Channel StudioLive™ 16.0.2 USB Dynamics Processing and EQ Owner’s Manual Gate Threshold. Sets and Displays the Threshold of the Gate for the Selected Channel. This encoder sets, and the meter displays, the gate threshold for the selected channel. The threshold determines the level at which the gate will open. - Page 21 The Fat Channel StudioLive™ 16.0.2 USB Dynamics Processing and EQ Owner’s Manual Compressor Threshold. Sets and Displays the Threshold of the Compressor for the Selected Channel or Output Bus. This encoder sets, and the meter displays, the compressor threshold for the selected channel or output bus.
-
Page 22: Equalizer
The Fat Channel StudioLive™ 16.0.2 USB Dynamics Processing and EQ Owner’s Manual Equalizer 4.3.5 The Fat Channel EQ is available for every input and output bus. This 3-band semi-parametric EQ provides selectable per-band controls, making it extremely easy to sculpt the sound of your instruments as well as your overall mix. Low EQ On/Off Button. - Page 23 The Fat Channel StudioLive™ 16.0.2 USB Dynamics Processing and EQ Owner’s Manual This encoder sets, and the meter displays, the gain cut or boost at the center frequency for the Low band. The level of the center frequency can be set between -15 and +15 dB. Low Shelf EQ Button.
-
Page 24: Dig Out: Recording Eq And Dynamics
The Main bus automatically sends its signal post-Fat Channel dynamics and EQ. Note: All USB sends are pre-fader except for the Main outputs. For more information on using your StudioLive as an audio interface, please consult the StudioLive 16.0.2 USB Software Library Reference Manual. -
Page 25: Fat Channel Presets: Copy, Paste, Load
The Fat Channel StudioLive™ 16.0.2 USB Fat Channel Presets: Copy, Paste, Load Owner’s Manual Fat Channel Presets: Copy, Paste, Load In addition to being able to create and save custom Fat Channel presets, every setting in the Fat Channel can be copied from one channel or bus to any other channel or bus. -
Page 26: Loading Fat Channel Presets
4.4.2 The StudioLive comes with a suite of channel-strip presets created by professional users of PreSonus products. These presets provide a great jumping-off point to create a mix quickly and easily. The StudioLive also allows you to create your own library of presets. -
Page 27: Saving Fat Channel Presets
The Fat Channel StudioLive™ 16.0.2 USB Fat Channel Presets: Copy, Paste, Load Owner’s Manual Saving Fat Channel Presets 4.4.3 Fat Channel presets can be saved and customized as you find new and useful Fat Channel settings you would like to store and use in future mixes. 1. -
Page 28: Channel Presets Library
4.4.4 Your StudioLive comes with 50 Fat Channel presets custom designed by professional PreSonus users. These presets can be altered, renamed, and overwritten; however, there are 49 additional empty storage locations for you to build your own custom library of channel-strip settings. -
Page 29: Metering
The Fat Channel StudioLive™ 16.0.2 USB Metering Owner’s Manual Metering The StudioLive offers flexible metering at the touch of a button. The 12 meters in the Fat Channel section can monitor: The input signal for each channel, post-gain and pre-dynamics, pre-EQ, and pre-fader The gain reduction for each input channel The output level for each of the four Aux buses The output level of Main bus... -
Page 30: Basic Controls
This lets you incorporate digital audio tracks into the main mix and insert plug-in effects and software instruments from your audio program. See the StudioLive 16.0.2 USB Software Library Manual for more information. Input Channel Controls Input Channel Select Button. -
Page 31: Aux And Fx Buses
Note: USB returns are only available for the 16 channels of the Input bus. When USB Return mode is engaged, only the channel multimode buttons will function. More information about USB returns can be found in the StudioLive 16.0.2 USB Software Library Reference Manual. -
Page 32: Internal Fx Bus Controls
Basic Controls StudioLive™ 16.0.2 USB Aux and FX Buses Owner’s Manual Internal FX Bus Controls 5.2.2 Just to the right of the Fat Channel, you will find the master bus controls for the two internal effects buses, EFX A and EFX B: Internal Effects Bus Select Button. -
Page 33: Creating Monitor Mixes
Basic Controls StudioLive™ 16.0.2 USB Aux and FX Buses Owner’s Manual Creating Monitor Mixes 5.2.4 Creating custom monitor mixes is critical. If musicians can’t hear themselves or their bandmates, their performance will suffer. A monitor mix can be mono or stereo. Most often, an individual live monitor mix is mono and is sent to a floor-wedge or sidefill monitor. -
Page 34: Creating Internal Fx Mixes
Basic Controls StudioLive™ 16.0.2 USB Aux and FX Buses Owner’s Manual Creating Internal FX Mixes 5.2.5 There are at least two main advantages to creating an FX mix, rather than inserting an effect in a channel. First, several channels can be sent to a single processor. -
Page 35: Multimodes
For information on changing the effects preset, type or parameters, see Section 6.1. MultiModes Each channel and aux on the StudioLive 16.0.2 USB features a MultiMode button. These buttons allow you to solo or mute a channel or aux, as well as engage the channel USB returns. -
Page 36: Mute Button
Basic Controls StudioLive™ 16.0.2 USB Main Output Bus Owner’s Manual When a channel or bus is soloed, it will automatically be selected, and its Select button will illuminate. Power User Tip: When Solo In Place is engaged, Solo mode will display both the solos and subsequent mutes across the MultiMode buttons;... -
Page 37: Solo Bus
Basic Controls StudioLive™ 16.0.2 USB Solo Bus Owner’s Manual Solo Bus The StudioLive features an independent Solo bus. This feature is extremely useful in setting levels for monitor mixes, dialing in dynamics processing on each channel, and fixing issues during a live show without interrupting the main mix. Solo Bus Level Control. -
Page 38: Using The Solo Bus For Monitoring
Basic Controls StudioLive™ 16.0.2 USB Solo Bus Owner’s Manual Using the Solo Bus for Monitoring 5.6.1 When mixing live, or when recording multiple musicians at once, it is often necessary to quickly listen in on just one instrument or group. The Solo and Monitor buses can be used together for this purpose. -
Page 39: Using Solo In Place (Sip) To Set Up A Mix
Basic Controls StudioLive™ 16.0.2 USB Solo Bus Owner’s Manual 6. You can increase the overall volume of the Solo bus using the Level knob in the Solo section. Power User Tip: This feature can also be used to listen to a monitor mix that is being routed to an aux send. -
Page 40: Monitor Bus
(such as Studio One Artist) that is playing the audio. For more information about the main USB returns, please review the StudioLive 16.0.2 USB Software Library Reference Manual. Solo Button. Assigns the Solo Bus to the Monitor Outputs. - Page 41 Basic Controls StudioLive™ 16.0.2 USB Monitor Bus Owner’s Manual Main Button. Assigns the Main Mix to the Monitor Bus. The Main Mix Monitor button routes the same signal that is being sent from the main outputs to the monitor bus. This signal is always pre-fader. Power User Tip: Because the monitor bus is a summing amp, you can listen to the solo and main buses at the same time.
-
Page 42: Digital Effects | Master Control
Digital Effects | Master Control StudioLive™ 16.0.2 USB The Digital FX (Effects) Menu Owner’s Manual Digital Effects | Master Control From the Digital Effects | Master Control section, you can select and change the parameters of the two internal effects processors, and you can store and recall every setting on the StudioLive. -
Page 43: 6.1.1 Creating Fx Presets
FX type can be the foundation for myriad different presets. The StudioLive contains a library of 50 custom reverb and delay presets designed by PreSonus. In addition to these presets, there are 49 available locations for your custom effects library. The factory presets can be altered, renamed, and overwritten. -
Page 44: Reverb And Its Parameters
Digital Effects | Master Control StudioLive™ 16.0.2 USB 6.1.1 Creating FX Presets Owner’s Manual 4. Use the Next button and the Value encoder to dial in your FX Preset to taste. 5. Pages 4 and 5 allow you to store your changes for FX A and FX B, respectively, to the same location or to a new location, and to customize the name of your creation. -
Page 45: Delay And Its Parameters
Digital Effects | Master Control StudioLive™ 16.0.2 USB 6.1.1 Creating FX Presets Owner’s Manual the stage and shout “Hello world!” toward the center of the hall. There will be a brief pause before you hear the first noticeable reflections of your voice, because the sound waves can travel much further before encountering a surface and bouncing back. -
Page 46: Digital Effects Preset Library
Digital Effects | Master Control StudioLive™ 16.0.2 USB 6.1.1 Creating FX Presets Owner’s Manual Digital Effects Preset Library 6.1.4 POS. TYPE NAME POS. TYPE NAME AMBIENCE Natural LARGE HALL Gymnasium Lively Arena SMALL ROOM Closet PLATE PlateVerb Shimmer Studio A PlateVerb Thick Studio B PlateVerb Drums... -
Page 47: Digital Effects Types
Digital Effects | Master Control StudioLive™ 16.0.2 USB 6.1.1 Creating FX Presets Owner’s Manual Digital Effects Types 6.1.5 Your StudioLive contains 13 different effect types from which to create your own custom presets or to redesign the included library of presets. NAME PARAM (L1) PARAM (L2) -
Page 48: Scenes
Digital Effects | Master Control StudioLive™ 16.0.2 USB Scenes Owner’s Manual Scenes The StudioLive allows you to create and store a library of Scenes. A Scene is like a snapshot of your mix. It stores each Fat Channel parameter for every input and bus, as well as each fader’s position, the aux and effects mixes, channel mutes and solos, and the input source (analog input or USB playback stream). -
Page 49: Scene Recall
Digital Effects | Master Control StudioLive™ 16.0.2 USB Scenes Owner’s Manual You also can save custom mixes for each venue that a band plays repeatedly. 1. To save a Scene, press the Scene button and either page down to the second screen or press Store to automatically jump to this menu. - Page 50 Digital Effects | Master Control StudioLive™ 16.0.2 USB Scenes Owner’s Manual The StudioLive’s recallable parameters are grouped as follows: Mute: All mute states. This includes input channels, aux, and FXA, and FXB. FX: All parameters for the internal effects assigned to FXA and FXB. Assigns: All output and bus routing.
-
Page 51: Fader Locate
Scene menu, as described in the first part of this section. Graphic Equalizer The StudioLive 16.0.2 USB features a 31-band, 1/3-octave graphic EQ that can be inserted on the main output bus. A graphic EQ is a multiband equalizer that uses sliders to adjust the amplitude for each frequency band. - Page 52 In general, narrower bandwidth signifies a more precise EQ. But in traditional graphic EQ designs, the center frequency of each band is fixed. PreSonus took a different approach with the StudioLive. The StudioLive graphic EQ is a pool of shelving filters from which coefficients like cutoff frequency, bandwidth, and gain are extracted through a process of curve-fitting.
-
Page 53: The Graphic Eq Menu And Controls
Digital Effects | Master Control StudioLive™ 16.0.2 USB Graphic Equalizer Owner’s Manual you get. With a carefully drawn, smooth curve the StudioLive EQ will have almost no frequency ripple. The StudioLive EQ is also capable of very sharp notches. To widen a notch or a bump on a particular band, just bring the adjacent bands closer to that band‘s gain, and the bandwidth will change accordingly. -
Page 54: Saving And Loading Geq Presets
Digital Effects | Master Control StudioLive™ 16.0.2 USB Graphic Equalizer Owner’s Manual Saving and Loading GEQ Presets 6.3.2 Like all other parameters on the StudioLive, graphic EQ settings can be stored and recalled. 1. If you have created a graphic EQ setting that you would like to save to the GEQ Preset library, press the Save button in the Fat Channel while that graphic EQ is active. -
Page 55: System Menu
Digital Effects | Master Control StudioLive™ 16.0.2 USB System Menu Owner’s Manual 2. From the Fat Channel, press the Load button. 3. You will notice that LCD now displays the GEQ Load menu. Use the Value encoder to locate the preset you would like to use. 4. -
Page 56: Aux Send Position
6.4.3 MIDI Control Mode The StudioLive 16.0.2 USB can be remotely controlled with a DAW, a MIDI footswitch, a MIDI keyboard, and an assortment of other MIDI control devices. Pages 3 and 4 of the System menu allow you turn MIDI Control Mode on as well as select on which MIDI channels the StudioLive will be controlled, as well as which MIDI Control Change messages will be used. -
Page 57: Lockout Mode
To enable MIDI Control Mode, navigate to page 3 of the System menu and set MIDI Control Mode to “On” by turning the value encoder. This will enable your StudioLive 16.0.2 USB’s MIDI features so that the mixer can be controlled by any standard MIDI controller. -
Page 58: Understanding Midi
(one after the other). Program Change Messages. Program Change messages are sent to a device to request a “patch” change on a specified MIDI channel. The StudioLive 16.0.2 USB uses simple Program Change messages to recall Scenes and FX presets. -
Page 59: Controlling The Studiolive
Controlling the StudioLive 16.0.2 with a Behringer FCB1010 6.5.4 This tutorial will show you how to quickly configure your StudioLive 16.0.2 USB so that you can control it with a Behringer FCB1010. The setup configuration detailed here is just an example; you can customize your own setup using these simple steps. - Page 60 MIDI Control Mode to On and make sure the MIDI Source is set to the StudioLive’s MIDI Input. See the StudioLive 16.0.2 USB Software Reference Manual for information on controlling your StudioLive via USB using Studio One Artist.
- Page 61 Digital Effects | Master Control StudioLive™ 16.0.2 USB Using MIDI Control Mode to Remote-Control StudioLive Owner’s Manual You’re almost done! Now you need to set the global MIDI channel on which your FCB1010 will control FXA and FXB output levels, assign/ unassign FX to Mains, and control the Main output level.
-
Page 62: Controlling The Studiolive
FXA output level, while the other will control the Main output volume. This tutorial will show you how to quickly configure your StudioLive 16.0.2 USB so that you can control it with a Roland FC-300. The setup configuration detailed here is just an example;... - Page 63 Besides setting your MIDI channels and Control Change messages, you will also need to set MIDI Control Mode to On. Please review the StudioLive 16.0.2 USB Software Library Reference Manual for information on how to control your StudioLive via USB using Studio One Artist.
- Page 64 Digital Effects | Master Control StudioLive™ 16.0.2 USB Using MIDI Control Mode to Remote-Control StudioLive Owner’s Manual 12. Use the Value Up button to set the Program Change number to 002. 13. Press the Exit button twice and continue to FXA Preset Recall. FXA Preset Recall Next we will set CTL Pedal 1 to recall a preset on FXA.
- Page 65 Digital Effects | Master Control StudioLive™ 16.0.2 USB Using MIDI Control Mode to Remote-Control StudioLive Owner’s Manual Naming and Saving Your Patch 1. Press the right Parameter button until the LCD reads “Patch Name. ” 2. Use the Value Up and Down buttons and left/right Parameter buttons to enter a name (such as “My Preset”).
-
Page 66: Resources
Resources StudioLive™ 16.0.2 USB Stereo Microphone Placement Owner’s Manual Resources Stereo Microphone Placement The following are a few recording applications to help you get started with your StudioLive. These are by no means the only ways to record these instruments. Microphone selection and placement is an art. - Page 67 Resources StudioLive™ 16.0.2 USB Stereo Microphone Placement Owner’s Manual Acoustic Guitar Point a small-diaphragm condenser microphone at the 12th fret, approximately 8 inches away. Point a large-diaphragm condenser microphone at the bridge of the guitar, approximately 12 inches from the guitar. Experiment with distances and microphone placement.
- Page 68 Resources StudioLive™ 16.0.2 USB Stereo Microphone Placement Owner’s Manual Drum Overheads (XY example) Place two small-diaphragm condenser microphones on an XY stereo-microphone holder (bar). Position the microphones so that each one is at a 45-degree angle, pointed down at the drum kit, approximately 7 or 8 feet above the floor or drum riser.
-
Page 69: Eq Frequency Guides
Resources StudioLive™ 16.0.2 USB EQ Frequency Guides Owner’s Manual EQ Frequency Guides Table 1 Instrument What to Cut Why to Cut What to Boost Why to Boost Human Voice 7 kHz Sibilance 8 kHz Big sound 2 kHz Shrill 3 kHz and above Clarity 1 kHz Nasal... - Page 70 Resources StudioLive™ 16.0.2 USB EQ Frequency Guides Owner’s Manual Table 2 BOOST • harder bass to low • vocal presence frequency • kick & tom attack instruments (kick, • tom, bass) more finger sound • on bass • brighten vocals, guitar and snare •...
-
Page 71: Technical Specifications
Resources StudioLive™ 16.0.2 USB Technical Specifications Owner’s Manual Technical Specifications Microphone Preamp Type XLR Female, Balanced Frequency Response to Direct Output (at unity gain) 20 Hz-20 kHz, 0 / -0.5 dBu Frequency Response to Main Output (at unity gain) 20 Hz-20 kHz, ±0.5 dBu Input Impedance (Balanced) 1 kΩ... -
Page 72: Digital Audio
Resources StudioLive™ 16.0.2 USB Technical Specifications Owner’s Manual System Crosstalk Input to Output (Ref = +4 dBu, 20 Hz-20 kHz, unwtd) -90 dBu Adjacent Channels (Ref = +4 dBu, 20 Hz-20 kHz, unwtd) -87 dBu Noise Gate (Expander) Threshold Range -84 dB to 0 dB Attack Time Adaptive (0.2 - 2.5 ms) -
Page 73: Studiolive 16.0.2 Block Diagram
StudioLive™ 16.0.2 USB Resources Owner’s Manual StudioLive 16.0.2 Block Diagram StudioLive 16.0.2 Block Diagram Input Channel Meter Master Bus Dig Out USB Send 17/18 Input Channels 1-8 Gain Mic -6 + 65 dB USB Send Line -20 +20 dB Streams 1- 8 Output Phase Channel Meters... -
Page 74: Studiolive 16.0.2 Recall Sheet
Resources StudioLive™ 16.0.2 USB StudioLive 16.0.2 Recall Sheet Owner’s Manual StudioLive 16.0.2 Recall Sheet Artist Scene Date TRACK TRIM PRODUCTION NOTES TRACK TRIM PRODUCTION NOTES Instrument Instrument Mic used Mic used Notes Notes Instrument Instrument Mic used Mic used Notes Notes Instrument Instrument... -
Page 75: Troubleshooting And Warranty
Online technical support is available from within your My PreSonus user account. Please register your mixer at www.PreSonus.com. PreSonus telephone technical support is available to customers in the USA on Monday through Friday from 9 a.m. to 5 p.m. Central Time by calling 1-225- 216-7887. -
Page 76: Presonus Limited Warranty
PreSonus-branded products under normal use. This Limited Warranty applies only to hardware products manufactured by or for PreSonus that can be identified by the PreSonus trademark, trade name, or logo affixed to them. Exclusions and Limitations This warranty does not cover the following: 1. - Page 77 PreSonus will repair or replace, at our sole and absolute option, products covered by this warranty at no charge for labor or materials. If the product must be shipped to PreSonus for warranty service, the customer must pay the initial shipping charges. PreSonus will pay the return shipping charges.
- Page 78 Exclusion of Damages PRESONUS’S LIABILITY FOR ANY DEFECTIVE PRODUCT IS LIMITED TO THE REPAIR OR REPLACEMENT OF THE PRODUCT, AT PRESONUS’S SOLE OPTION. IF PRESONUS ELECTS TO REPLACE THE PRODUCT, THE REPLACEMENT MAY BE A RECONDITIONED UNIT. IN NO EVENT WILL PRESONUS BE LIABLE FOR DAMAGES...
- Page 79 Integration, and XMAX are trademarks or registered trademarks of PreSonus Audio Electronics, Inc. Capture, Impact, Mixverb Presence, RedLightDist, SampleOne, Studio One, and Tricomp are trademarks or registered trademarks of PreSonus Software Ltd. Mac and Mac OS are registered trademarks of Apple, Inc., in the U.S. and other countries. Windows is a registered trademark of Microsoft, Inc., in the U.S.
- Page 80 StudioLive 16.0.2 USB ™ Performance and Recording Digital Mixer Owner’s Manual 18011 Grand Bay Ct. • Baton Rouge, ® Louisiana 70809 USA• 1-225-216-7887 Part# XXX-XXXXXX-X www.presonus.com...